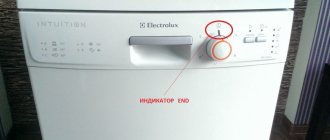
The popularity of machines for washing dirty dishes is growing every year, and more and more often consumers are wondering what to do when problems arise due to water leakage or loss of dishwashing equipment; take the required amount of liquid before starting the operating cycle. Modern models are equipped with warning systems that send special codes to the screen corresponding to certain failures. Today we will look at the reasons why error E4 appears in a Hansa dishwasher.
Possible reasons why this error occurs in a Hans dishwasher
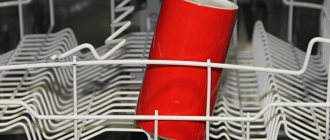
As follows from deciphering the problem, the error code is displayed as soon as one of the machine elements leaks. The trays in machines of these brands are no different in capacity, and sometimes about half a liter of liquid is enough to raise the Aqua-Stop float device, which activates a sensor that stops the operation of the dishwasher.
The list of probable causes can be made up to be impressive, but only opening the housing part will help determine the exact problem.
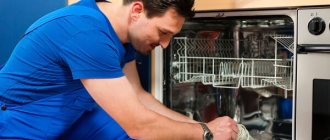
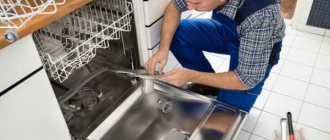
How to disassemble a dishwashing machine
Remember that there are two ways to troubleshoot a dishwasher - repair the faulty element or replace it with a new analogue.
In any case, the algorithm for disassembling a Hansa dishwasher is as follows:
- the unit is de-energized from the electrical network;
- the water supply is shut off, then the fastening clamps on the water intake hose are loosened;
- in case there is liquid left in the dishwasher, you should prepare a bucket and plenty of floor rags;
- All containers intended for loading dirty dishes are removed from the washing hopper;
- The dishwasher is neatly laid on its side;
- The screws holding the back panel and tray are unscrewed. By the way, the top cover should also be freed from its fastenings. Such measures make it possible to inspect not only the pump, but also the remaining internal elements of the dishwasher;
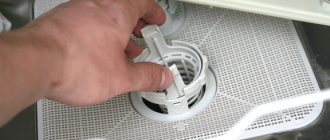
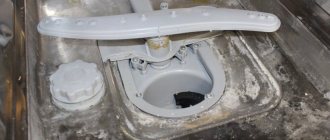
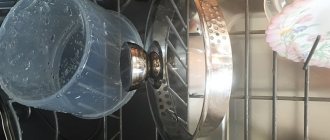
- All that remains is to remove Aqua-Stop from the dishwasher, which in most cases reliably protects against the occurrence of error E4.
We hasten to warn you that the protective system in older models quite often does not pay attention to small leaks. In such situations, the leak problem is identified in the old way - by visually searching for traces on the floor.
How to fix problems
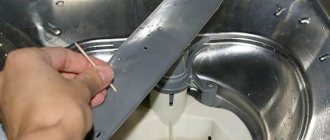
Having finished disassembling the Hansa dishwasher, you need to carefully wipe up the remaining puddles on the floor and begin inspection. If the hose leading from the pipe to the pump is torn off, it is necessary to loosen the clamps securing it, remove the hose and inspect it inside and out. It happens that the hose breaks from its normal place due to the excess pressure created.
The reason for this could be severe blockage inside the hose or at the place where it connects to one of the pipes. The role of blockage can be played by scale, remaining mineral salt, and other chemical elements that form sediment in the dishwasher. After some time, the salt particles harden, forming a strong barrier and threatening the entire drainage system with breakdowns.
Another common problem with error E4 is a leak in the drainage system. Water can seep in at joints or through damaged areas of the hull. The first option can be eliminated simply - tighten the clamps, change the gaskets made of rubber material. In the event of a leak through the housing, you will have to look for the failed element and replace it with a new spare part. Temporary measures are not used here - the situation can worsen at any moment, and error E4 will result in a significant breakdown.
Meanings of error codes and recommendations for troubleshooting Gorenje breakdowns
Below we list the designations of fault codes that the user may encounter when operating the Gorenye dishwasher. In the tables below, the causes are presented in rating form, starting from the problem with the greatest probability and ending with the least.
E1 – activation of the leakage sensor and detection of water in the tray
Appears if the float sensor of the “Leakage Protection” system is closed for more than 3 minutes, if water leaks into the pan. In this case, the pump will operate until the element contact opens.
| Cause | How to fix |
Water entered the pan due to a leak in the tank from the Aquastop system hose.
Internal components of the housing may also leak - pump, recirculation pump, etc.; connecting pipes.
Drain the tray so that the contact of the tank full sensor opens. This is followed by restarting the dishwasher to check and find the location of the leak.
The leakage is eliminated and the machine can be used.
A malfunction of the electronic board is obvious if none of the four failures listed above are confirmed.
How to reboot the machine to determine the module failure:
· select the washing mode;
· close the loading hatch;
· if after 3 minutes or less the PMM displays error code E1, it means that the problem is still in the unit and it needs to be replaced.
E2 - the level sensor of the Gorenye dishwasher has tripped
The system signals error E2 if the water level has crossed a certain mark and an overflow is detected. The Gorenye dishwasher stops the user-specified program, starts the pump to drain the water, and displays an error on the display (or the indicators flash).
Important! To immediately rule out a failure of the control board, you need to carry out the following check:
- Remove the side wall and check that the pan is not full (the float may have tripped).
- Drain the dishwasher by emptying the tank.
- Disconnect the PMM, disconnect the blue wire from the pressure switch connector.
- Turn on the machine.
- Enable program No. 1.
- After starting the program, the following situations may occur: 1. Draining will start. This will mean that the electronics correctly detected the signal and worked, which means the control unit is working. 6.2. The PMM will begin to pour water into the system. This means that the electronic system misinterpreted the signal, the control unit has failed and needs to be replaced.
| The fill sensor is stuck. | You need to open the sensor, returning it to its working position. |
| The overflow sensor is broken. | The sensor needs to be replaced and the dishwasher needs to be restarted. |
| Breaks in the wiring. | You need to check the wiring, connectors and contacts of the leakage sensor and system board. Damaged sections of wiring require maintenance. |
| Damage to the control unit. |
| Reasons for the error | How to fix the problem |
| Incorrect installation of the pressure hose to the level switch. | The rubber hose needs to be checked: there may be ruptures or breaks in it. If there are breaks in the hose, there will be a loss of pressure, which means the element will not be able to perform its functions. |
| Water has entered the pressure supply hose to the level switch. | In this case, you need to disconnect the hose from the sensor and inspect whether there is water in it. If there is, the part needs to be replaced with a new one. |
| The level relay has failed. |
After emptying the dishwasher tank, check the operation of the pressure switch using an ohmmeter.
If the relay needs to be replaced, install a new part.
Select a mode and turn it on. Make sure the pump delivers water evenly without creating bubbles.
If the water supply is intermittent, you need to inspect the pump hose that passes through the pan - it may be clogged.
If the problem is not solved, the part needs to be replaced.
The repair involves closing the water valve to regulate the pressure of the water flow. After this, reboot the device several times to make sure the problem is resolved.
If the E2 code comes back on, the intake valve will need to be replaced.
E3 – no heating
Warning lights or an error code appear on the user panel when the water heats up too slowly - less than one and a half degrees in 20 minutes.
| Broken or clogged wash pump. |
| The water intake rate at the inlet valve has been exceeded - the rarest cause of this error. |
| Causes | How to fix |
| Triggering of the heater thermal fuse (if one is provided in the design). |
Using a tester, measure the resistance of the fuse. If “0” lights up on the device screen, it means “closed”, there is no operation. If the measurements report: “open,” then the fuse has tripped to protect the heating element from overheating and burnout.
In the latter case, the thermal fuse trips due to one of two possible reasons:
1. The thermistor position is broken.
2. The washing pump is deformed.
What to do to fix the problem
Before you begin to repair or replace faulty elements, you need to exclude a system failure: when the board mistakenly displays a malfunction. Try resetting the code. For this:
- pull out the PMM plug from the socket;
- wait 10-15 minutes;
- start the equipment.
Look at the Hansa dishwasher screen. If the icons light up again, you need to look for and fix the problem. First of all, check the pressure switch (level sensor), since it is responsible for the amount of water in the hopper. When it gives incorrect readings, the water may overflow.
In some models, the PMM installs a flow sensor instead of a pressure switch.
Let us describe the general sequence of actions:
- Disconnect equipment from the network and communications.
- Remove the camera from the baskets.
- Turn the machine over onto its back wall.
- Remove the panel from below.
- A plastic box with tubes is attached to the circulation block.
- To check its functionality, attach the multimeter probes to the contacts and measure the resistance. If the value drops to zero, the part is working.
- If there is a malfunction, replace the sensor.
The inlet solenoid valve is equipped with a diaphragm. When turned off, the membrane blocks the passage, but as soon as the valve receives an impulse, the partition opens and water is poured in. The cause of the breakdown may be mechanical or electronic.
To diagnose the mechanical part, operating voltage is applied to the valve to check whether the membrane is working or not. Diagnostics of the electronics of the Hansa PMM is performed with a multimeter.
The valve is easy to replace. It is enough to disconnect the wiring chips and unscrew the fastening screw.
This is how you can fix the problem with your own hands when code E 4 appears. Read more about how to replace the pressure switch in a dishwasher in our separate article.
Source: cosmo-frost.ru
How are Leran fault codes deciphered?
Did the dishwasher stop the robot and display a fault code on the display? In this case, the equipment will not continue to work until the cause of the breakdown is eliminated. To find it, study the meaning of errors. This is what it means when it appears on the display:
Codes appear on the control panel
Important! If there is a leak, immediately turn off the water and disconnect the equipment from the network. Only then start troubleshooting.
We found out what this or that error code means. If this is the first time you have noticed the symbols on the panel, then a reboot will help. How to reset your dishwasher:
If there is a network failure, the codes will no longer appear on the screen. But if the problem recurs, then it is necessary to carry out repairs and fix the problem. Malfunctions are divided into two categories, which arise due to improper operation and wear of parts.
Thus, incorrect placement of dishes and cleaning of the filter lead to blockages and poor quality of washing. Of course, if your machine has already worked for 5–7 years, then it is fair to assume that the components have exhausted their service life. Remember that the duration of operation of the PMM is affected by the correct connection of the equipment.
Fixing error e4 in the dishwasher
Due to the growing demand for dishwashers in Russia and the CIS countries, an increasing number of users are wondering what to do in case of problems, such as water leakage or, conversely, the dishwasher does not fill with water. Modern devices are equipped with a warning system, and in the event of a certain type of malfunction, a digital code will be displayed on the display. Each model has its own system.
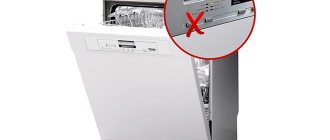
This code is typical primarily for Hansa brand dishwashers
Gorenje dishwashers - a little about the advantages
The modern Gorenje dishwasher is a high-tech and stylish kitchen assistant that has the following number of advantages:
- has enough space for washing kitchen utensils of any size;
- the ability to place baskets on one of several levels;
- the presence of very good capacity parameters;
- You can load up to 14 sets of dirty kitchen utensils into the dishwasher at a time;
- Ideal for washing long and short kitchen appliances;
- effectively washes kitchen utensils over the entire area, even in hard-to-reach corners;
- after finishing work, it issues perfectly clean and dry dishes;
- the door of models of the specified brand opens automatically, which makes it clear to the person that the wash is complete and the need to pick up cutlery;
- these models have the highest quality protection against leaks compared to options from other brands;
- the machines have a convenient external device that greatly facilitates the installation process;
- models of this brand are economical and operate in virtually silent mode;
- Gorenye machine filters are self-cleaning, which greatly simplifies the life of their owners;
- after washing, the dishes are completely hygienic, there is no visible dirt or harmful bacteria left on them;
- The devices can determine for themselves which mode is best for washing in a given case.
As it has already turned out, Gorenye dishwashers are spacious, high-tech and convenient, which is why they are popular. Many homes have such machines, and it’s worth getting more detailed information about their error codes, as well as troubleshooting options.
Decoding the code
Error code e4 in a dishwasher means “too much water.” This may mean that one of the pipes is leaking, or the plug on the inlet hose has become unusable, which is why liquid has accumulated in the tank with a volume exceeding the permissible norm. You can repair this fault with the help of a specialist or with your own hands. However, the services of a specialist are expensive - about 8 thousand rubles, so it will be easier to do the repairs yourself.
When error e4 occurs, the aquastop emergency system is activated. This means that the pan is full, and now it’s impossible to do without at least the initial draining of all the stagnant and non-flowing water. This is an initial measure and in order to understand how to fix error e4 in a dishwasher, you will first need to disassemble it and repair the broken parts. Next, we will look at the possible causes of leaks inside the machine and ways to eliminate them.
Possible causes of leaks inside the dishwasher
It is difficult to understand the reasons for the error without opening the housing and checking the sockets, pump and other elements of the drainage system. However, here it is necessary to mention the most common of them:
- Hose coming off the pump
- Leaking drainage system pipes
- Pump malfunctions
A slipped pipe as a possible cause of dishwasher flooding
How to disassemble a dishwasher
So, you can fix equipment problems either by repairing parts or replacing them with new ones. To do this, you should disassemble the dishwasher according to the following scheme:
- Disconnect the plug from the socket;
- Shut off the water supply to the water pipe to which the inlet hose is screwed, then unscrew the securing clamps;
- Prepare a floor bucket and rags in case there is water left inside the machine;
- Remove all containers for dishes from the machine hopper;
- Carefully place the machine on its side;
- Using a screwdriver and wrenches, unscrew the fixing screws holding the back wall, as well as the tray. Don't forget to also unscrew the top cover. Now you can not only inspect the pump, but also inspect all the other “insides” of the dishwasher;
- Now remove the aquastop from the machine. This device blocks the uncontrolled release of water in the event of a system failure. In many ways, it is thanks to the aquastop that it is possible to avoid serious leaks during error e4;
Diagram of a pump with aquastop
Important! The old generation Aquastop often ignores small leaks that form as a result of small tears in pipes and hoses, which is why the indicator that lights up when there is a leak will not light up. In this case, you will have to identify the error the old fashioned way - check whether there are any puddles left after the cycle, since leaks can be very insignificant at first.
Now that the sensor has been removed, you can proceed directly to the repair and installation work. The main advantage of the location of the pump is that you do not have to completely disassemble the machine and do not have to photograph the disassembly process itself, since the location of the walls, panels and ceilings is easy to remember.
What to do if each of their codes is detected
When detecting an error code on the display of a dishwasher, not every consumer can quickly and correctly navigate what to do in such a situation. So that the user does not face a feeling of confusion and is able to save his kitchen appliances, it is worth reading the action guide, which is written for each code separately. So, if the machine signals problems using the E1 code, then you need to act according to this principle:
- completely disconnect the dishwasher from the electrical power supply,
- stop the flow of liquid into the dishwasher,
- perform a detailed check of the condition of the pallet,
- look under the dishwasher body to find out if there is actually a leak,
- restart the mechanism again and see if the same code appears again,
- if the error does not disappear, you should remove the side panel from the device, pull out the pan and drain the water from it, track the source of the leak and fix it, if you need to change the gasket or pipe, complete the process, assemble the machine and start it up.
Only those who understand repairs can carry out such actions, and if a person does not have the necessary knowledge, then they should seek help from a qualified technician.
Knowing how to fix a breakdown with code E2, you can also begin to fix error E9, because they are essentially the same. So, when the presented dishwasher malfunction indicators appear on the screen, the consumer needs to act according to the following scheme:
- The dishwasher should be completely isolated from the power supply,
- The water supply to the dishwasher must be completely shut off,
- reboot the device several times in a row, seeing what happens during this time,
- unhook one of the walls of the housing to check the condition of the pallet,
- if you find a dry sump, find the blue wire and properly disconnect it,
- connect the machine and check whether it drains water (if it drains, then problems with the control module can be completely ruled out; if there are problems, most likely the control board has failed),
- Call a technician to repair or replace the part.
Most often, to eliminate this malfunction you need to call a specialist, since the repair is quite complex and requires special knowledge and appropriate tools.
The following instructions will tell the consumer what to do in the event of a breakdown with code E3:
- check the temperature of the water at which kitchen utensils are washed,
- unscrew one of the walls and the protective panel located under the door,
- check the operation of the temperature sensor and heating element,
- use a device called a multimeter to carry out detailed diagnostics,
- check the condition of the fuse, as well as the resistance level that the heating element currently has,
- check the thermistor and wires, if any of the parts require replacement, replace it,
- additionally test the condition of the control module.
Again, all diagnostic and repair processes must be performed by a qualified technician.
You can solve the error that is encrypted with E4 code by following the steps below:
- remove the panel and check the condition of the temperature sensor,
- inspect the wires that lead to the temperature sensor and evaluate their integrity coefficient,
- if necessary, replace the wires or install a new temperature sensor.
If everything is in order with the specified part and wires, then we can assume that there are specific problems with the electronics and they should be addressed by a professional technician.
The display of error E5 on the dishwasher screen indicates a lack or complete absence of water, so this problem will have to be solved in this way:
- check the inlet hose to find out if anything is pushing through the fluid supply system,
- check whether there is water in the house at all, whether its supply has been turned off,
- check the inlet duct to see if there are any blockages,
- check the resistance of the intake valve using a special device for this purpose,
- diagnose the wiring that supplies the valve.
If all options have been checked and no failures are observed in this area, then there are electronic failures that should only be addressed by a professional.
When a user approaches his Gorenje dishwasher and sees error E6 on its display, most likely the following actions need to be performed:
- check the level of contamination of the device's garbage filter,
- carefully inspect the siphon and drain hose of the dishwasher to identify the presence of squeezing or blockages,
- disconnect the dishwasher from the power supply and carefully remove one of the side panels,
- check the wiring, drain pump and pressure switch to identify damage and other problems,
- To properly diagnose the condition of the device, use a working multimeter,
- If malfunctions of one or another part are identified, it should be properly replaced.
The occurrence of one of the listed errors may indicate the presence of a minor malfunction or a serious problem, so it is better to ask a professional to carry out an accurate diagnosis to determine the exact cause of such an electronic reaction.
We are looking for the cause of the problems
After disassembling the machine, collect all leaked water with rags in a bucket and begin inspection. If you find that the hose connecting the pipes to the pump has fallen off, loosen the clamp securing it on the back side and inspect the hose from the inside.
Pumping system with aquastop
It often happens that the reason the hose comes off is a critical level of pressure. This may be caused by a blockage in the hose itself or at the place where it connects to the pipes. This can be caused by various types of blockages. For example, scale - residues of mineral salts and other chemical elements settling inside the machine. Over time, the salts harden and can form a solid barrier. This can lead to failure of the entire drainage system, so it is best to take preventive measures - add special salts to soften hard water when starting the dishwasher. Otherwise, this may lead to a major breakdown that cannot be fixed on your own, and you may have to purchase a new dishwasher.
The second possible cause of problems recognized by the system under code e4 is a leak in one of the pipes or hoses in the drainage system. It can leak at the junction of hoses and pipes, or from holes in the body. In the first case, you just need to re-tighten the clamps or change the rubber gaskets, which are commercially available in plumbing stores. If you find a leak on the body, then you will have to replace the spare parts. Do not tighten it with tape or tape - this can lead to more serious problems in the future.
How to remove error e4 in a dishwasher
Latest questions
Dishwashers Krona BDE 6007 EU
The Krona BDE 6007 EU dishwasher does not turn on - it gives error e4.
YAR Service 01/23/2017 20:31
you have an overflow, and you should check the circuits, devices, water fill-drain channels and Aquastop
Repair Laboratory on Elektrozavodskaya 01/23/2017 16:41
Good afternoon It is necessary to drain the pan completely, and it is also necessary to diagnose the overflow sensor itself.
High-quality repair of household appliances 01/23/2017 11:34
Error E4 in a KRONA dishwasher means there is overflow in the system. To fix it, clean the entire drain filter and drain the water from the pan. Dry thoroughly. If after this the error repeats, then the fault may already be in the drain pump.
Smart Service 01/22/2017 23:24
E4 water leakage into the pan. This error often occurs due to the detergent. First, you need to remove the water from the pan, then try washing without detergent, if the error does not appear, then change the detergent. If it appears, then you need to check the hydraulic system for water leaks. It is also necessary to thoroughly clean the drain filter.
IntelService 01/22/2017 21:52
Most likely water overflow. Need to watch.
ServiceMaster - repair of household appliances 01/22/2017 21:52
ERROR E4 in KRONA dishwashers - means the OVERFLOW SENSOR has tripped. This is precisely why water started leaking from your machine. It is necessary to drain the water from the tray and dry the dishwasher. To do this, it will need to be removed (dismantled) and tilted forward to drain the water. The cause of this malfunction is 90% related to the drainage system. Either the DRAIN FILTER is clogged or the DRAIN PUMP is faulty.
Source: www.servicebox.ru
Causes of breakdowns of the Leran dishwasher
The meaning of errors can tell you where to look for the breakdown location, but self-diagnosis does not work for every problem. Sometimes the signs of a problem are so obvious that they cannot be ignored. This is how the Leran dishwasher reports a breakdown:
Hopper filled with foam
How to fix the situation with your own hands? Sometimes it is enough to clean the parts to restore the operation of the equipment. But in other cases, a fault may need to be repaired. Below we will describe the sequence of disassembling and repairing the PMM at home.
The car does not turn on or start
What's happened? Having completed the usual actions, you are trying to select a program, but the equipment does not respond to pressing? The panel does not light up and the wash does not start? Check if the PMM is connected to the network. Perhaps last time you turned it off and forgot. Next, inspect the fuse or surge protector.
This is what a surge protector looks like
Why won't the equipment start? It is worth checking the flow of water into the tank. Press the cabinet door tightly and make sure that the closing is not obstructed by the dishes. When the door lock is locked, a click is heard. After this, water is drawn into the tank. If you don't hear a click, the lock may be broken and needs to be replaced. What to do? Buy a replacement part and get to work:
Important! Before starting work, unplug the machine.
Also check if water flows normally into the tank. Turn the shut-off valve and clean the filter. For this:
The filter can be located directly behind the hose
Intake valve problems
Continuous flow or, conversely, lack of water in the tank indicates problems with valve adjustment. In the closed position, the membrane inside the element prevents flow. To start working, the membrane opens and liquid begins to enter the tank. Valve coils are responsible for transmitting electronic pulses, which fail due to voltage surges in the network.
How to replace a part:
The part is located at the bottom of the case
After dismantling, you can install a working element. If you don't know how to choose the right part, take an old part and take it to the store.
No heating
Problems with water heating affect the quality of dishwashing. The most common cause of heating element failure is scale. These are deposits of potassium and magnesium salts, which, sticking to the heating element, interfere with heat transfer, causing the part to overheat and burn out. To prevent breakdowns, it is worth carrying out preventive maintenance with descaling agents or regular citric acid every few months.
If the flow-through heating element is no longer usable, then follow the instructions for replacing the element:
There is a temperature sensor located in the body of the heater. If necessary, it can be easily replaced by simply unplugging the connector. Watch the video for details:
There is water in the bunker
In time, the machine should complete the wash cycle and drain the used liquid. But in reality the chamber is full of water. First, clean the system of debris and food debris. Do this:
The user describes how to clean the filter in the video:
Also inspect the drain hose, siphon and drain for blockages. To avoid problems in the future, clean the filter after every wash or at least once a week.
Foam in the chamber and water on the floor
Excess foam can form in the following cases:
Increased foam formation
How to remove foam? Follow the instructions:
Foam can cause leaks by leaking through the door. A small amount of water near the body may indicate condensation accumulation, so do not rush to open the machine immediately after the end of the cycle.
If it's leaking from the back, inspect the hose connections. A leak from under the pan indicates that the cause is inside the PMM. There may be a damaged pipe or connections leaking; you need to drain the water from the pan and inspect the components.
The machine is noisy during operation, the devices are difficult to clean
Both of these problems are primarily related to improper loading of dishes. Because tightly spaced appliances hit each other and prevent water and detergent from entering. The operating instructions will help you correctly distribute the dishes in the baskets.
It is also important that large utensils do not block the operation of the sprinklers. In normal condition, the rocker arms rotate from the force of water pressure and spray water through the nozzles. The latter can become clogged with food and debris, so wash them with soap and water.
Here's how to unscrew the sprinkler
Select the correct washing program according to the degree of soiling. Following the rules and recommendations will help you avoid breakdowns:
You can deal with breakdowns yourself, but it is best to prevent their occurrence. We hope our recommendations will help you restore the operation of your equipment.
Decoding the code
Looking at the operating instructions for the Hansa dishwasher, we will see how clumsily the E4 error is deciphered by the manufacturer itself. Literally, the decoding is presented as follows: “overflow of water.” What kind of water overflow? Where could it have flown to? It seems that the operating instructions for such machines are compiled by employees of authorized service centers. Well, what if the user reads the instructions, doesn’t understand anything, and turns to the specialists who are happy to try to “rip off” a couple of large bills from the poor user.
Repairing a fault on a Hansa dishwasher associated with error E4 can cost $150-200, taking into account the cost of spare parts and the work of a technician.
Of course, on our part this is a joke, no one will deliberately squeeze money out of a user, but the problem has not gone away, it must be solved. What we have? Here is error E4, here is a certain overflow, which is mentioned in the instructions and there is no more information.
Error codes Bosch, Siemens, Neff:
- How to erase all errors from the board memory:
To do this, open the door and turn on the general power button.
Next, press program buttons 1+3 simultaneously (hold for 3 seconds). Close the door. After 1 minute, open the door. Turn off the dishwasher using the main power button.
Then turn it on again. Press the reset button (hold for 3 seconds). We close the door. And we wait for the end-of-wash signal from the dishwasher. After the signal, open the door. Turn off the car.
Your machine has cleared error codes and rebooted.
If something still doesn’t work, try testing it for damage.
- Run the service program to check:
1. Test program for Bosch models that are built into the kitchen:
With the door open, hold down any two keys and press the main switch. As long as the keys remain pressed, the LEDs (L2-L4) are lit and the current encoding is displayed.
After releasing two keys, LED L3 lights up, LED L4 blinks.
Press button S3 until LED L4 lights up. To activate the test program, press the S4 key.
We close the door and the start takes place. The transition to the next position of the program is made by pressing S3 (the only exception is when filling, the next step is after the level sensor F1 is triggered).
What does the technique do:
- pumping, pre-filling, filling - circulation, heating, tablet supply - conditioner supply, regeneration valve - filling with softened water, aqua sensor calibration - heat exchanger outflow valve.
In case of failures, an error code is displayed. We decipher it using the LEDs as shown in the figure:
Errors 1.2 - malfunction of water heating Errors 3.4 - incorrect water supply Error 5 - malfunction of the recirculation and drain pump Error 6.7 - aqua sensor (turbidity sensor, pump)
2.Running a service test for Bosch (not plug-in):
— set the rotary switch (S0) to position “5”. - press the power switch and hold for at least 3 seconds - after releasing the key, look at the picture
Errors E01, E02, E03, E04, E06, E07 are described in the previous example