Sewing machine repairs should be performed by an experienced and qualified technician, since not only knowledge is required, but also special tools. However, often the sewing machine stops working efficiently due to the inexperience of the seamstress or non-compliance with the manufacturer’s recommendations. It is enough, for example, to replace the needle or thread and skipping stitches will stop in the line. This article collects all the typical and simple malfunctions of a sewing machine and suggests ways to eliminate them.
Select one of the items that suits your “case” and read the simple recommendations. If these tips do not help eliminate the malfunction of the sewing machine, at the end of each section there are links to articles on our website with a more detailed description of the causes of this malfunction and how to repair the sewing machine.
The top thread breaks from time to time
1. The upper thread is not threaded correctly. The upper threading scheme is not complicated, however, mistakes do happen. The thread does not fit between the pressure plates, sometimes it does not get into all the fasteners along its route. But more often than not, it is inserted into the needle from the wrong side. This is especially true for older models of sewing machines such as Singer and PMZ.
Particular attention should be paid to threading when working with overlock machines. The hooks for fastening it are not always “in sight” and if you miss at least one of them, the overlocker will constantly break the thread.
2. The upper thread is tangled. This most often happens when using cone bobbins. The thread comes off the spool with a jerk, releasing a lot of excess thread. The rest of it sometimes gets tangled in the creel and the thread breaks. Sometimes the reason for this is that the thread is twisted too much. Tie the machine with an elastic band next to the spool and pass the thread under it. This simple technique will “extinguish” the twisting of the thread and it will be fed evenly into the tensioner.
3. The upper thread tension is too strong. This photo clearly shows how to thread the thread into the tensioner, correctly guiding it not only through the plates, but also through the compensation spring (bent wire). At maximum tension (in this example - 9), a thin and fragile thread will definitely break. With the foot lowered, the thread should be pulled out of the tensioner by hand almost freely, with only a little effort. If the machine sews poorly, for example, loops, at medium tension (4-5), then it needs to be adjusted by a specialist.
4. The spool is not installed correctly The most common reason why the machine breaks the thread is the use of conical bobbins and spools designed to work only with a creel. A creel is an additional stand for spools, in which the thread is removed not to the side, but upward.
5. The needle is dull or bent A bent needle point may not be immediately noticeable, but it can cause a fair amount of damage. It will not only break the thread, but also tear the fabric when punctured. A dull or bent needle can be easily identified by the dull sound of the sewing machine.
6. Wrong combination of thread, fabric and needle If you sew coarse fabrics with a thin thread and a thin needle, then any machine will tear not only the upper, but also the lower thread.
See also: Sewing stitch - thread breakage
Bottom thread breaks
1. The lower thread is tangled If the lower thread breaks, first disassemble the shuttle. Perhaps you will find a picture like this there.
2. The bobbin is not threaded correctly. Rarely does anyone pay attention to threading the thread from the bobbin into the bobbin case. The machine always sewed well, and suddenly, when sewing expensive and delicate fabric, it began to skip and break the thread. Check that you are threading it into the bobbin case correctly. It is advisable to focus on the instructions for refilling the instructions specifically for your machine.
3. Strong bobbin thread tension It is often not necessary to adjust the bobbin thread tension. To do this, it is better to loosen or increase the tension of the upper thread. But if you need to adjust the tension in the bobbin case, do it carefully. Half a turn of a screw is the maximum amount it can be tightened or loosened.
4. The lower thread is not threaded correctly. The lower thread should come not only under the plate, but also as in the right photo. Otherwise, it may jump out and get tangled in the shuttle.
See also: How to thread a sewing machine
The gap between the needle axis and the edge of the finger
If you have finally managed to establish these gaps, you can carefully, so as not to disturb the established gaps, tighten the shuttle mounting screws with a screwdriver. I want to warn you right away that you won’t be able to set the gaps exactly the first time, be patient.
Rotate the flywheel several times and check the clearances again using a magnifying glass. After this, you can finally tighten the three shuttle fastening screws using a long and powerful screwdriver. I would like to finish setting up your class 22 sewing machine here, but before you put the needle plate in place, look through a magnifying glass to a couple more parameters: the size between the axis of needle 1 and the edge of finger 3 should be in the range of 0.1 - 0.5 mm; the gap between pin 3 and bobbin holder 2 should be 0.5 - 0.6 mm. The position of the finger is adjusted by a screw securing it to the machine body. You will find it if you tip the car on its side. As a rule, these adjustments rarely go wrong on 1022 and 22 class sewing machines, so just check. But keep in mind that if the gap between pin 3 and bobbin holder 2 is less than 0.5 - 0.6 mm, the thread will get pinched in it and break. This is the worst case scenario; at best, the thread will loop.
Skipped stitches in a line
1. The needle is not installed correctly. Seamstresses often use industrial needles instead of household needles. This inevitably leads to stitching defects, including skipped stitches. Household needles have a cut on the bulb, while industrial sewing machines have round bulbs.
It is difficult to insert a needle with a cut incorrectly, but just in case, you should know that the thread is always started from the side of the long groove. The cut of the flask is located on the reverse side.
2. A low-quality needle is used. A bent, rusty, wrong size and brand needle always leads to skipped stitches.
3. Incorrect combination of needle, thread and fabric The thread experiences maximum tension as it passes through the fabric. And if the eye of the needle is smaller than required for a given thread thickness, and the fabric is very dense, then skipping a stitch is guaranteed, and sometimes even thread breakage.
4. Tows and thread scraps have accumulated under the needle plate. Tows, thread scraps, together with oil, compact the teeth of the conveyor rail so much that they do not allow the thread to pass freely and form a “good” loop for its capture by the nose of the shuttle. It is best to clean this assembly with a stiff glue brush.
5. Incorrect threading
See also: Reasons for skipping stitches on a sewing machine Skip stitches in modern machines
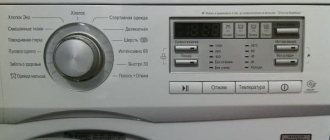
Where to get it repaired: average prices in workshops
When choosing a workshop where sewing machines are repaired, it is better to focus on service centers that service the purchased model. In such centers, most often all components are in stock, the client does not have to order them and wait a long time for the work to be completed.
The cost of repair depends on the model and complexity of the breakdown. On average, for a machine of the Veritas, Singer and Janome brands you will have to pay from 800 rubles to 1,500 rubles for a simple breakdown. Repair services for Brother and Jaguar models start at 1,200 rubles.
You might be interested in what interesting things can be made from old nylon tights
If we are talking about an industrial sewing machine, its repair can cost 2,000 or more. Repairing older sewing machines can be difficult due to the lack of spare parts. This may increase the waiting time.
Choosing a repair service
Looping thread in a stitch, wavy stitch
1. Thread tension is incorrectly adjusted This is the most “harmless” reason. Just try to correctly adjust the tension of both threads and check that they are threaded correctly. If the result remains the same, it means that some parameters of the sewing machine’s operation need to be adjusted by the master. And sometimes loops in a seam are a sign that the sewing machine requires complex repairs and adjustments. There is another simple reason for this defect. A piece of thread has fallen between the plates of the upper thread tensioner or a seal has formed due to dust and fringing. If the upper thread does not tighten well, disassemble the tensioner and clean it. This especially happens with overlockers. Over the years of operation, tensioners pass kilometers of thread and various types of seals accumulate in them, preventing the thread from being pressed by the plates.
See also: Seagull sewing machine Why the stitch loops Adjusting the shuttle operation of the Seagull sewing machine
Basic rules for operating a sewing machine
Let's look at the basic rules for operating sewing machines:
- Sewing equipment should not be located near radiators or heaters. But at the same time, it must be in a dry room, in which there are no signs of dampness;
- Before starting work, it is necessary to select the necessary materials and tools, needles and threads that will be needed during the work process;
- Before you start sewing, you need to make sure that the needle and thread guide are in the up position;
- Remember that the sewing machine needs to be assisted while sewing, pulling the fabric towards itself;
- After the sewing work is completed, you need to raise the presser foot and stretch the fabric. Next, cut the thread, having previously found a free end, the length of which will be a maximum of seven, but a minimum of five centimeters.
The fabric gathers when sewn
1. Too much thread tension In addition to this banal reason, there is another. The foot presses the fabric tightly against the teeth, and the fabric is very thin. Correctly adjust the pressure of the presser foot on the fabric, and at the same time the height of the raising of the teeth of the rack, and you will no longer need to “help” the machine with your hand.
2. The wrong needle is used
3. Incorrect threading
4. Wrong combination of needle, thread and fabric
See also: Setting up a sewing machine. Reika - fabric advancement
Looping and poor tension
As a rule, looping is noted at the bottom due to weak thread tension at the top or improper threading. To prevent this problem, you need to put the machine foot in the lower position, and only then thread the thread at all threading points. While lowering the presser foot, the tension adjustment plates are connected:
- The thread must be held with tension, which must be felt when it is pulled out, in order to insert the thread into the thread take-up.
- If the thread does not clamp in the adjusting plates, this indicates that there is a foreign object in the space (for example, a piece of thread) that needs to be removed. If cleaning does not help, then you need to disassemble the regulator. In older generation devices it is located outside, on the outer part of the unit. In modern models you need to unscrew the lining to repair it.
Weak movement of the fabric and regular breaks may occur due to mismatch between the movement of the movable rack element and needle strikes. Since the adjustment of the rack assembly is different for any model of sewing machine, it is impossible to recommend anything specifically. However, if you know the operating principle of this unit, you can adjust it on any machine.
Fabric moves unevenly
1. The stitch length regulator is set to the minimum value
2. Wrong combination of needle, thread and fabric
3. The wrong needle is used
4. The thread got tangled
5. The conveyor combs are lowered. On many machines, the lifting of the rack teeth is controlled by a switch, do not forget about it.
See also: Setting up a sewing machine. Reika - fabric advancement
Weak fabric movement
The needle moves simultaneously with the movable bar to the final lower position. The most important moment during adjustment is considered to be the moment when the tip of the needle meets the teeth of the movable bar, which must be located in a slightly lowered position relative to the needle plate, but not completely (peeking out slightly). In this case, the position of the needle must be such that its end does not reach the notches by 1.7–2.3 mm. This position of the two parts relative to each other is considered the main parameter when adjusting lockstitch machines.
This can be achieved taking into account the correctness of the remaining adjustments:
- The moment of raising the needle . Once the needle reaches the bottom position, it begins to rise, while the staff moves forward to perform a further cycle of advancing the fabric. At this moment, a stitch is formed (the thread is removed from the needle using a shuttle), and there should be no obstacles to the advancement of the thread. This is often done while the fabric is being advanced, resulting in excessive tension and thread breakage. Often the movement of the fabric provokes needle breakage.
- The thread is tightened in the tie . If the bar moves upward in the direction of the plate, the thread guide sharply pulls out the upper thread. This movement of the thread guide must occur if the formation of the tie has already been completed, and therefore an excessive amount of thread is pulled out. The quality of the stitch can be affected not only by the tension force of the thread, but also by the correct functioning of the compensation spring, the normal condition of the shuttle (without any defects), the tension force of the thread at the bottom and other factors. If the movable bar is adjusted incorrectly, the thread will begin to get tangled at the bottom, tear, and be difficult to pull out.
- Promotion of fabric . At the final stage, the bar moves the fabric along the plate. The length of the stitch, which is set by a special regulator, will depend on the step with which the bar moves. It is necessary to pay attention to the protrusion of the notches above the level of the plate. Their output must be no more than their size. For thin material, it is advisable to lower the teeth by half, along with reducing the pressure on the fabric of the foot. The best option is to replace the bar with another one with small notches (this option does not exist with all sewing devices).
The sewing machine is noisy and slow
1. Scraps of thread and tow have accumulated under the needle plate.
2. Insufficient lubrication of the machine
3. Drive belt is too tight When replacing the drive belt, you tightened it too much. Adjust it so that when you press with your finger, it bends firmly but slightly.
See also: How a sewing pedal works Lubrication of sewing machines How to disassemble a sewing machine and replace the electric drive
Setting the interaction between the hook tip and the needle
Adjusting the shuttle mechanism of sewing machines performing zigzag stitching Chaika, Podolsk, Veritas and others involves setting the position of the looper nose above the eye of the needle by 1...2(3) mm at the moment the looper nose approaches the needle. This parameter is checked when the sewing machine performs not only a straight stitch, but also on the left and right needle pricks (when performing a zigzag stitch). The nose of the shuttle must simultaneously pass almost closely to the needle blade - this is the second condition that allows you to form a stitch without gaps.
In this photo, the arrow indicates the fastening of the shuttle shaft. Loosen the screw with a 10mm socket wrench, and while holding the handwheel with your hand, you can turn the shaft (along with the shuttle stroke), adjusting the position of the hook nose in relation to the needle.
However, these are not all the parameters for adjusting the interaction between the hook nose and the needle. There is such a parameter as the timeliness of the approach of the shuttle nose to the needle, namely at the moment the needle begins to rise up. The needle drops to the lowest point, and when raised by 1.8-2.0 mm, it should meet the nose of the shuttle, the shuttle removes the loop from the needle and wraps it around itself.
But that's not all. For sewing machines that perform zigzag stitches, there is such a thing as right and left needle prick. When injecting the needle left and right, the nose of the shuttle should “confidently” remove the loop formed above the eye of the needle. It should pass just above the eye of the needle, but less than the distance of the eye of the needle itself, approximately 1 mm.
However, such adjustments are most often not required; it is enough to simply check with a magnifying glass how the hook interacts with the needle and make sure that repairs or adjustments to the sewing machine are not needed, and look for another reason. For example, replace the threads, thread them correctly, change the needle, clean the shuttle device from dust and fuzz, etc. To make it easier for you to repair your sewing machine, disassemble the shuttle stroke and study its structure. Observe how the stitch forms when the needle plate is removed. At the same time, check all the shuttle settings described above. See also How the sewing hook works.
The above settings can be used as a guide if you decide to repair your sewing machine yourself. As a rule, the machine will work normally with such gaps, but if you need to sew knitted fabrics, too thin (silk) or, on the contrary, thicker fabrics, more precise adjustment of these parameters is required, which only a master can set.