Share on social media networks:
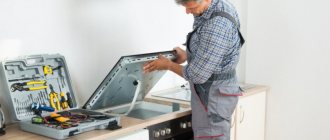
Household appliances powered by electricity are in great demand today, but, unfortunately, they often break down during operation. Every modern kitchen is equipped with an electric stove, and it is the heart of the room. Home craftsmen, if their favorite equipment breaks down, wonder: can they fix it themselves? Today we will tell you how to repair the Gorenje electric stove with your own hands, because models of this particular brand are in greatest demand. This material will also concern the repair of equally popular Electrolux gas stoves.
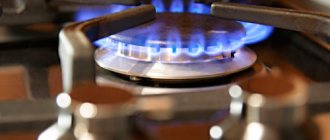
Do-it-yourself gas stove repair
It is impossible to imagine any kitchen without a hob, be it an electric or gas stove, since it is on these units that the cooking process takes place. But unfortunately, these devices fail over time for various reasons. A qualified gas service specialist must repair gas stoves, eliminate breakdowns of various kinds and carry out maintenance. But there are minor malfunctions in which you can repair a gas stove on your own. So, you can repair a gas stove with your own hands if the following malfunctions occur:
- One or all burners do not light;
- electric ignition does not ignite gas;
- after igniting the gas, the burner goes out;
- The oven lid is not closed.
Internal structure of the stove
Before you start repairing a Gorenje gas stove, it is important to understand the structure of the equipment in order to understand in which area you need to look for a breakdown. And also study the rules for the safe operation of gas appliances.
Despite the huge variety of equipment in different price categories, all gas stoves have the same structure, and differences can only be observed in the original parts of each model.
Almost all new models of Gorenje gas stoves are equipped with a piezo ignition system, which often causes frequent equipment breakdowns
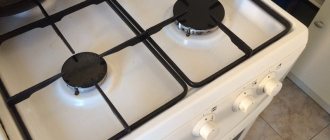
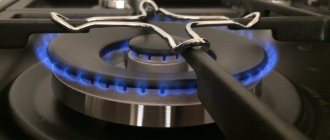
A classic gas stove is equipped with four burners, each of which is secured to the inner panel with bolts. The burner includes a lid, a divider and an injector, and a copper tube with a special “American” type fastening is connected to it. This is how gas is supplied to each burner.
If there is an electric ignition system, two candles are supplied to each burner: one is intended for ignition, and is powered by a piezoelectric element, while the second acts as a thermocouple that controls combustion.
The auto-ignition spark plug has a ceramic caftan, which prevents the spark from breaking below the set level, while the candle with a thermocouple is equipped with a bronze caftan, a powerful heat conductor.
The gas stove manifold, which is responsible for controlling the gas flow, is located under the top panel of the equipment. It is presented in the form of a thick tube, from which solenoid valves diverge to each burner - conductors responsible for controlling the gas flow. This way, even if one burner flame goes out, the other burners can still function safely.
Step-by-step troubleshooting instructions
Algorithm for identifying the most common equipment failures:
- Check the presence of voltage at the terminals of the supply cable using a voltmeter. After making sure that power is supplied to the control panel, press the “Sand” button. Sound and light indications are activated on the touch panel.
- At the input circuit breaker located in the power supply distribution board, the voltage at the upper contacts is checked. This process is carried out using a multimeter, a low voltage indicator (LV) and a single-pole indicator.
- The supply of voltage to the mechanical and electronic control mechanism is carried out using a special unit. To check the serviceability of the cooking zones, it is necessary to measure the electric current one by one with an ammeter.
- Tubular electric heaters, temperature measurement sensors, electrical switches, make and break contacts, and all kinds of regulators are checked for malfunctions and to detect the causes of device failure.
Diagram for finding common faults
The algorithm for troubleshooting electric stoves does not depend on the selected model and the type of burners with which they are equipped.
Follow these steps to find the problem:
- Use a voltmeter to check the voltage. Often the problem lies in the tripping of the circuit breaker. In addition, the wiring insulation may be damaged or the socket may be broken. If this is the reason, then you will have to disassemble the device.
- If the indicator on the control panel is on, but the stove still does not work, this means that there is no current supply to the burners, which means that it is necessary to disassemble the stove.
- Next, you should check how well the electronic or mechanical control unit works. The measurement is carried out by a device that shows whether current is flowing to the terminals of the burners.
- Then check the heating element on each burner to look for a burnt-out coil.
- Carefully inspect all sensors, regulators and relays.
Your main task is to find the problem and localize it. If you follow all the recommendations, you will be able to identify the problem, and we will tell you how to fix it later.
Symptoms of a problem
Are you trying to light a burner but the ignition is not working? This is a fairly common problem for owners of gas appliances. If you notice problems with the electric ignition, you should call a technician to your home. You can carry out preliminary diagnostics and try to determine the problem, but it is not always worth repairing the electric ignition of a gas stove yourself - this can only aggravate the problem.
Signs by which you can determine that the electric ignition has stopped working are:
- continuous clicking of the electric ignition;
- When you press the button, the electric ignition does not work;
- ignition continues after the button is released;
- constant appearance of sparks when the button is turned off;
- the burner in the gas stove does not work or works with varying degrees of success;
- knocking out the machine gun in the dashboard.
Expert advice
To avoid the need for professional cleaning of the nozzles to remove dirt and grease after a short period of use, wipe the surface of the gas stove every time after use. Other removable parts of the stove also require regular cleaning. Cleaning is carried out in a foam solution. The surface of the gas stove itself should be cleaned using products recommended by the manufacturer that do not contain abrasive elements.
If any problems occur, do not continue to operate a faulty gas stove. It is necessary to invite a specialist for diagnostics as soon as possible in order to understand the causes and eliminate them in the shortest possible time. If you smell gas, you need to turn off the household appliance, turn off the tap, ventilate the room and call: 8 (495) 228-31-78
. We will arrive on the day of your request.
| Item no. | Categories of work | Standard time (in minutes) |
| 1 | Diagnostics (determination of the declared malfunction) | 20 |
| 2 | Full product diagnostics (functionality check) | 40 |
| 3 | Technical consultation | 10 |
| 4 | Maintenance | 15 |
How to disassemble an electric stove?
The slabs may differ not only in appearance, but also in design and dimensions. There is no specific algorithm that would be suitable for disassembling absolutely all models. But all devices, without exception, have a thermal insulation layer, which should be handled very carefully.
The first step is to dismantle the hob, which is attached with screws to the body. Just unscrew them and it will come off easily. It is under it that the burners, wires, and mechanical temperature controllers located on the front panel are located. All these parts must be removed to get to the bottom of the appliance, where the oven heating elements are located.
It is easier to work with modern stoves - they are equipped with glass-ceramic cooking surfaces and to disassemble the body and get inside, you just need to remove the top panel.
Basic elements and design of electric stoves
Naturally, before repairing an electric stove with your own hands, you need to understand its design features and study what main components it consists of. Electric stoves look quite impressive, because they are complex household appliances. But their design is quite simple; all the main working elements are located in a special heat-resistant case made of stainless steel.
They work like other electrical household appliances: current passes through the heating element and heats up to the required temperature.
Important! The stove may have several burners on the hob, their number can vary from 2 to 4. The burners have a varied structure. In classic models they are located on the hob with a heating element inside. More modern appliances have solid ceramic surfaces with built-in heaters.
Burners can be of the following types:
- Domestic old versions are equipped with cast iron products, which heat up quite slowly and also cool down. Because of this, a steam effect is created in the kitchen, but at the same time they are resistant to high temperatures and moisture.
- Tubular spirals. They are made from a hollow tube; during the heating process, they give off heat and promote the circulation of heated air inside the case. Thanks to this, the efficiency of their work increases significantly.
Important! Such devices are quite difficult to repair.
- Ceramic burners. They have a simple design, but it is difficult to repair them yourself, since the nichrome spiral is located in a circle in special cells and is securely fastened there.
Important! Modern models are often equipped with solid glass-ceramic plates; they are easy to clean and more durable.
- Halogen models. These are burners with a similar emitter; they are installed in several places on the hob. Such devices heat up quickly, literally in a second, they consume a minimum of electricity, so they can safely be called economical. Only specialists can repair them.
All modern models use power wires of a special cross-section to transmit current directly to the burners. They are connected to thermostats and regulators that provide protection against overheating.
Important! The heating level in different models is regulated differently, for example, using a special timer and alarm, manually changing the cooking mode.
Causes
Gas is a source of extreme danger. When mixed with air, it becomes highly flammable and explosive, so there are only a number of steps you can take when repairing it yourself without calling a qualified technician. You can identify some possible reasons for what is happening. The main ones are as follows.
- Lack of oxygen. May cause fire problems. Try starting the device with the door open.
- The burners are clogged. Perhaps this part is simply contaminated with combustion products, then the heat is uneven or there is simply not enough of it. The gas control system can shut off the gas supply, believing that there is no flame; the fire will go out immediately after releasing the handle. The problem is easily solved. Remove the burner, clean it and reinstall it. When cleaning, use a liquid product; powdery substances damage the equipment.
- The burner has become misaligned. If the burner is incorrectly positioned or misaligned, it will result in uneven flames and heat and soot. Check the position of the part and adjust it if necessary.
- The fuel pressure in the gas pipeline has decreased. Check: perhaps there is no need to call a specialist, and the cause of the trouble lies in an almost empty cylinder or problems in the supply of gas to the gas pipeline. Weak flame intensity may prevent the system from starting.
- Doesn't hold the regulator. Do you turn the knob, but it doesn't turn on? To check, try lighting without it. Carefully dismantle the handle, keeping all small components that will be difficult to find later. Arm yourself with pliers, lightly press down and turn the valve stem. When gas comes out, try to light it.
- The auto-ignition function is broken. If gas flows, but the flame does not ignite, do not hold the knob for a long time and pollute the room. In the front center of the oven there is a hole for ignition with matches.
- The temperature sensor has moved away from the flame zone. Then it is necessary to return it to its previous position to resume operation.
When your baked goods are not baking well or the heat in the oven is low, it may be time to change the rubber door seal.
Despite the fact that ovens are “long-lived” among household appliances, and some of them work for more than 50 years, malfunctions still occur due to breakdowns of parts inside the device. Sometimes gas control components wear out. The contacts in the system may have oxidized and need to be cleaned. During operation, the thermocouple also constantly heats up, which leads to its destruction. Sometimes this part cannot be repaired. It is simply replaced with the same new one.
The temperature is maintained thanks to a mechanical thermostat. It is a container with liquid filler. The appliance is placed inside the oven. At high temperatures, the cylinder filler expands, pushing the valve, which closes the gas supply. If your oven is constantly not heating well, the thermostat may need to be replaced.
One of the reasons why the device cannot be turned on may be wear on the ignition unit or a faulty solenoid valve. The longer the service life, the greater the likelihood of such troubles occurring. The valve is usually simply replaced. The functioning of the unit can be checked. Turn off the lights in the room at night. Turn on the electric ignition. Look at the result:
- there is no spark at all - the wiring is damaged;
- the spark goes to the side - a crack in the spark plug;
- a yellow or red spark means the block has tripped.
The fire goes out after being ignited
There are times when a properly working gas stove suddenly begins to give surprises. Let's say that you turn on the gas supply, it ignites, and after releasing the handle, it immediately goes out. Such symptoms indicate a breakdown of the thermocouple - a sensor that turns on the supply of a combustible mixture.
A thermocouple works like this: when heated, it generates alternating current, which magnetizes the solenoid valve. The valve, on its part, opens and gas flows freely into the burner. If the heating of the thermocouple ends, the electrical pulse disappears and the valve closes the flow. Similarly, if after opening the tap to turn on the gas and ignite it with an electric candle, the combustion immediately ends, this means that the solenoid valve has tripped and cut off the supply of the combustible mixture.
Repairing a gas stove in the event of such a breakdown is very simple.
- First of all, you will need to remove all the handles and the top panel of the stove by unscrewing the bolts located on the sides of the lid and under the burners (stove designs are varied, based on this, and the locations of the fasteners may vary).
- After screwing in the fasteners, remove the top cover of the unit.
In the same way, you can repair the Hephaestus, Ardo, Brest and Hansa stoves if the thermocouple breaks down.
You also need to remember about safety precautions; before repairing a gas stove, you should turn it off from the electrical network.
Button failure
Sometimes the reason for a spark plug not working can be a faulty button. This breakdown during repairs of burning stoves or other brands can be determined by transferring the wires (after removing the top panel of the device in advance) to another button on the gas stove. If the ignition works when you open the burner tap, then you need to replace the broken button.
Broken “gas control” of the burner
If after cleaning the burner continues to go out, the fire burns, but does not register, the cause of the malfunction lies in the automation. It is possible to determine the state of the automation using a multimeter. A thermocouple measures the voltage when heated. The solenoid valve checks for winding breakage.
6 reasons why a gas stove burner does not work.
We repair automation. “Gas control” is a set of parts working in pairs (thermocouple and solenoid valve). When heated, the thermocouple produces electricity to magnetize the valve. Loss of contact, as well as mechanical wear, will lead to rupture and gas combustion will stop. The repair is simple: remove the table tray and securely fasten it in a vertical position. A thin copper-colored wire from the burner to the gas stove faucet is called a thermocouple. The connection point between the tap and the thermocouple is a contact. Separate the parts and clean the contacts with sandpaper, connect and tighten securely.
Tip: If the gas control stops working, replace the thermocouple or solenoid valve. Install original spare parts according to the stove model. Universal parts differ in the diameter of the seats. The fit and installation height of the thermocouple plays an important role.
Types of breakdowns
The most common failures in the electric ignition system occur with Gefest, Bosch, Hansa, Ariston, Mora and Hephaestus stoves. So what can break in this system?
- The charger does not work. The reason for its breakdown may be drops of fat, food particles or detergent that get into and stick to it. If you clean the part with fine sandpaper, rinse it carefully and dry it well, you can return it to functionality.
- The spark plug is faulty. It may stop working due to dirt and grease buildup. Cleaning will bring it back to normal. Another reason may be oxidation of the spark plug contacts, or the appearance of a crack in the ceramic body. When contacts become oxidized, they need to be cleaned and restored. And if the housing is cracked, then the spark plug needs to be replaced.
- The transformer unit that directly generates the spark has burned out. This case requires replacement of the part.
- The contacts of the ignition button are broken. This happens most often due to water getting in while washing the stove. This leads to contact oxidation, sticking or increased fragility. Cleaning and restoring the contacts returns the stove to operation.
- There is a spark, but the flame does not ignite. There may be several reasons for this malfunction. One of them is mechanical damage to the spark plug body. In this case, the spark strikes in a random direction, without hitting the gas stream. Another reason for the lack of ignition is the high pressure of the gas jet. Only a master can set up the gas supply correctly. Finally, clogged burner nozzles can also prevent the gas from igniting.
Instructions: how to turn off a gas stove during repairs
Very often it is necessary to turn off the stove to replace the flooring or carry out repairs. When you turn off the electric stove, there are absolutely no problems; you just need to unplug the cord from the outlet.
When turning off the gas stove, it is important to follow safety precautions and it is advisable to contact a gas service technician.
Regardless of the gas stove model, turning it off consists of the following steps:
:
- Blocking gas access;
- Removing the locknut;
- Removing the coupling on the descent to the plate;
- Installation of the plug.
Regardless of how long you need to turn off the gas stove, you must monitor the flow of gas into the burner, since an explosion may occur when fuel is mixed with air. If the stove needs to be turned off for a long time, then a plug must be installed on the pipe leading to the gas main.
Regardless of whether they are old gas stoves, in particular, such as Darina, Wrozamet, Brest 1457, Elekta, or new, modern models, the principle of their design and operation is identical. Models in which the surface of the hob is separate from the oven are considered very convenient and functional. In particular, we can highlight the following: Hephaestus, Ariston, Indesit, Ardo, Kaiser, Hansa. Multifunctional devices that are easy to maintain and repair are considered to be Hansa, Gorenje, Bosch, Zanussi.
Removing broken kitchen stoves
We have described the distinctive breakdowns for each brand of kitchen stove, as well as the “weak points” of one or another model in the appropriate sections. For more accurate information about problems with a specific brand of cooker, follow the links..
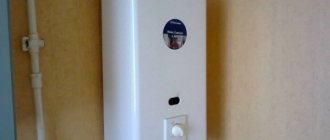
Before you try to repair a broken geyser, you will understand that access to gas and electrical communications is provided (the batteries are changed and all taps are open). We often meet with clients who complain: “I open the water tap, but the water heater does not light up,” they call a technician and pay money as if for a high-quality overhaul, because they do not follow and do not know the simple operating rules that are described in the manuals.
1. The stove's atmospheric burner does not light or turns off. A common breakdown of the kitchen stove and electric stove is poor activation or absolutely no inclusion of the atmospheric burner. This breakdown is caused by the usual clogging of the spray devices with food particles; crack or broken insulation on the spark plug; solenoid valve malfunction or burnt thermocouple. If your stove is equipped with automatic ignition, you need to check the presence of current in the electrical network by turning on another device.
2. The atmospheric burner of the stove goes out during the working period. If the atmospheric burner of the stove goes out during the working period, it is worth checking the combustion of gas. The flame from the burner should wash the thermocouple on each side. If the fire does not reach the thermocouple, you should clean the stove’s spray device: – otherwise, you will need to adjust the gas supply. If the above steps do not help, you will need the competent assistance of a specialist who will deliver and replace the burnt thermocouple.
3. Electric ignition does not work (does not click, no spark) This problem is not the death of the panel, many owners switch to matches. Cause of manifestation: lack of voltage in the network; the spark generation unit burned out (ignition unit); The contacts of the power buttons have oxidized. Troubleshooting begins with checking the outlet. Plug in a previously working home appliance. The contacts are visually inspected and, if necessary, cleaned with alcohol. If these actions do not help, change the ignition unit.
4. The gas burns poorly (the burner may not turn on). If the flame on an atmospheric burner burns sluggishly (has a small crown), the cause of the breakdown may be a clogged hole in the gas atomizing nozzle. The burner should be thoroughly cleaned. The height of the flame depends on the amount of fuel and air supplied to the burner. Adjusting the air damper and cleaning the spray devices can correct the problem, but this work must be performed by a special specialist.
5. The stove burners do not burn well (smoke). If the flame on an atmospheric burner burns sluggishly (has a small crown), the cause of the breakdown may be a clogged hole in the gas atomizing nozzle. The burner should be thoroughly cleaned. The height of the flame depends on the amount of fuel and air supplied to the burner. Adjusting the air damper and cleaning the spray devices can correct the problem, but this work must be performed by a special specialist.
6. The gas supply control valves are turned with great difficulty. To a large extent, it occurs due to the adhesion of fat on the rotary type mechanisms (adjustment knob and plastic rings). Remove everything and wash with a soap-based solution. To a small extent it occurs due to lack of lubrication in the middle of the valve. You should disassemble the broken faucet, clean the old graphite grease and apply new one. Do not overdo it with the amount of lubricant, otherwise after a certain time the tap holes will become clogged with excess.
7. The stove oven does not ignite or turn on. If the oven is equipped with an automatic 220 ignition system, the oven may not ignite due to a worn spark plug. An electric spark shoots away from the burner. Turn off the kitchen lights and press the ignition button. The oven of a kitchen stove is considered a technically difficult device, so we do not recommend cleaning up the breakdown on your own; the optimal solution would be to contact our warranty center and choose an oven repair service
8. Gas aroma. The smell of gas during cooking or at the end indicates that the gas panel requires maintenance. If you feel the presence of gas near the stove or in the room where the kitchen appliance is installed, immediately turn off the tap on the outlet to the stove, open the windows and ventilate the room. Quite often, when carrying out repairs, we notice that a gas leak occurs from a poor-quality connection. In the future, trust installation to trusted organizations. Such a breakdown of the kitchen stove is difficult to remove with your own hands; contact the gas service for help.
9. The burner turns off after releasing the handle. Modern foreign-made gas stoves regularly “suffer” due to unscrupulous operation of the gas control system. Thermal solenoid valve breaks easily. We advise you not to try to repair it and especially to turn it off; a rational solution would be to replace the worn valve with a new one. Gas control is, first of all, your safety and the safety of your property.
When should you replace an injector?
Modern gas stoves, for the most part, are designed for a centralized gas supply. Methane is used in central networks; the pressure in the system differs from the pressure in the cylinder, so a hole in the nozzle of a slightly larger diameter is required. When using bottled gas, propane is used to provide household needs, so a nozzle with a smaller hole is required.
The basic configuration always uses injectors designed to supply fuel through centralized lines. Modern models may include a spare nozzle designed for bottled gas. Also, to use cylinders, the gas reducer will additionally need to be replaced.
When trying to get rid of the cause of soot on the burner of a household gas stove, it is important to purchase a jet that matches the brand of the household appliance. Otherwise, replacing the part will not bring the expected result.
Correct selection of the jet and proper installation ensure uninterrupted operation of the gas stove. If there are installation errors, fuel will be supplied unevenly.
Older models of gas stoves do not have a nozzle. However, they are equipped with a mechanism that allows you to regulate the intensity of fuel supply. It needs to be configured correctly. Adjustment is carried out by turning the tap equipped with the gas cylinder. Without unscrewing the valve all the way, it is easy to reduce the gas pressure in the system and minimize the likelihood of soot appearing.
In some situations, soot appears when the oven is turned on. It is likely that the injector needs to be replaced here too. In most gas stoves, the nozzle is located behind the left wall of the oven chamber, into which the arc-curved burner is inserted. To replace the nozzle, you need to unscrew the screws, remove the burner, find and replace the part.
During prolonged use of a gas appliance, the jet could become stuck to the burner nozzle. In such a case, you need to lubricate it with a special compound and wait a few minutes.
When the nozzle is deformed, fuel flows unevenly to the burner, soot may appear and gas may accumulate in the device, which is dangerous. To replace the nozzle, you need to look at the brand of the gas stove and select the appropriate components.
It is important to remember that gas equipment is potentially dangerous, so in case of any breakdowns, it is advisable to invite specialists from the gas company with which you have a service agreement.
Do-it-yourself troubleshooting for popular problems
Replacing or repairing any parts on an electric stove will require the hands of a specialist. Below we provide a list of the most common breakdowns of electric stoves. Many of them can be eliminated on their own, while others require professional diagnosis. Repairing an electric stove with your own hands can be done in the simplest cases. Let's take a closer look at them.
The burner is out of order
Follow these steps to change the burners on your stove:
- Unscrew the nut and remove the grounding.
- Under it you will find a bracket or ring that presses the part to the body.
- The burners are secured with threaded connections or inserted into a special hole. In the first case, you need to pry the thread with a screwdriver and remove it, in the second, lubricate it with oil and try to carefully unscrew it from the body.
Important! If you have an old stove, then it is better to completely replace the burners with more economical and modern models that are suitable in size.
- If the burners are functioning, then the reason for their failure may lie in the control unit. It is enough to clean the contacts from carbon deposits with fine sandpaper.
Heat switch problems
Follow these instructions to repair or replace a failed switch:
- If there is no click when turning the knob, this indicates a malfunction. To check its condition, you need to set the regulator in the middle position, apply voltage to the stove, as a result of which the automatic protection should work and turn off after 30 seconds.
- Then remove the adjusting knobs from the outside, unscrew the front panel.
- You will find a bar underneath that needs to be removed to get to the faulty regulator and replace it.
Electronic control unit
If you do not hear a click when you turn on the relay, check for the presence of a signal. If it is absent, we can safely say that the problem lies in the output cascade or microprocessor.
To repair an electronic unit, you need to find a diagram and understand the complexities of radio technology. If you do not have such skills and knowledge, then contact a specialist.
Results of the work done
After gas supply and control washing, no gas leaks were detected! The faucet is sealed and works much more pleasantly, without jamming!
Alexander Birzhin, rmtn.ru
Details Published 12/20/2016 16:38
What should we do if we smell an unpleasant gas smell in the kitchen? There is a high probability that this is leaking from the gas valve, which is located directly in front of the device.
As soon as you hear the smell, you should call emergency services, because the gas is highly explosive.
But it’s also worth knowing how to deal with such situations yourself. If the valve is to blame for the leak, then it is better to replace it; for polypropylene pipes, a frialen 63 ball valve is suitable. But simply lubricating the faucet may be enough. To do this, we will study in detail the instructions on how to carefully lubricate the faucet.
Tools and materials that we will need in our work:
Flat blade screwdriver Rag Gag Graphite, grease or technical petroleum jelly Soap We proceed in order: 1
Examine the gas tap, paying attention to how the main part of the tap is made. It can be made in the form of a cone with a hole all the way through, or pressed with a twisting spring using a special plug
2. Shut off the gas supply to the house or apartment as soon as possible, this will minimize the possibility of an accident. If you can’t turn off the gas, you can work like this. You just need to take into account the important rules: Turn off all electrical appliances from the outlet; Ask all uninvolved people to leave the room, if possible, the premises. Make sure there is no open flame in the room and never smoke while working. 3. Next, unscrew and remove the valve from the faucet and gag it to reduce the gas flow. Carefully remove all old grease with a dry cloth and apply new grease without filling the holes. 4. After everything is done, you need to very quickly replace the gag in the gas tap with a bolt. Carefully twist the spring and clamp it with a plug. We resume the gas supply if you shut it off earlier. 5. Ventilate the room well. Then prepare a solution of soap and apply it to the tap. If there are no bubbles, then you have done the job. But still, when there are bubbles, try to assemble the faucet again and check for leaks in the same way. When the problem persists in this case, urgently call the gas service. Since even the smallest leak can lead to a destructive explosion.
Gas is the main assistant to the cook and fireman; with it you will not be cold and hungry. Knowing the safety rules and behavior patterns during emergency situations will protect you from harm and help strengthen your “friendship” with the gift sent to us by Mother Nature. Still don’t know what to do when the gas tap in the kitchen leaks and how to check if there is a leak? Well, let's get down to business then.
You are probably aware that natural gas comes to our kitchens directly from the bowels of the earth, naturally, bypassing kilometers of pipes. The main flammable component of gas is methane. It is this that poses a threat to human life if it comes out of the pipeline. A 5% concentration of this substance in the air is enough, and if you do nothing, fire or explosion is inevitable. “Why does everything have to end in fire?” - you ask. As a rule, due to ignorance of the rules of behavior in such situations, people do not stop using electrical devices (sometimes they even turn on the light to understand what kind of unpleasant smell is coming from the kitchen), and even when the gas tap in the kitchen sometimes goes bad, they bring a lit match to the stove to determine which burner is broken.
According to the rules for handling gas, the population is prohibited from dismantling or repairing pipes on their own. What should you do if the gas tap in the kitchen is leaking? First, open the doors and windows. Secondly, stop using electrical appliances. Third, call the appropriate service.
What to do if you suspect a gas leak, but you’re not sure about it; do you think it’s just your imagination? There is a way to check the correctness of this assumption. Make a soap solution and apply it to the faucet or areas where you think gas may be leaking. If there is indeed a breakdown, then bubbles should appear, and of substantial size. Do you have any doubts? Perform the operation again, because calling emergency services due to unfounded suspicions is also bad, isn’t it?
This is what one of the gas tap models looks like
Troubleshooting
Important
Although a ban has been introduced on unauthorized access to the operation of gas units, independent repairs are possible to prevent more serious problems.
Having taken precautions - opening the windows, getting rid of open sources of fire, preparing a flashlight instead of electric light sources - they begin to troubleshoot.
Read more about how to repair electric stoves of different models with your own hands here.
Electric ignition
Electric ignition modules are installed in almost all modern models of gas stoves. This is a high-voltage voltage generator supplied to ceramic electrodes attached to the burners, usually located under the top cover. A malfunction occurs on one or periodically occurs on several burners.
- Most often, the essence of the repair is to eliminate the short circuit that has arisen between the stove body and the high-voltage cable.
Behind the front panel there is a technological space used to accommodate wires and gas pipes. Over time, water and food residues formed after cooking accumulate in the cavity. This is a liquid substance with an acidic reaction that conducts electricity and causes ignition failure if it gets between the housing and the cable. The wires are cleaned, dried, placed in polyvinyl chloride tubes, secured on plastic stands, making sure that there is no contact with the metal case. - The next reason for malfunctioning ignition is dirty spark plugs. To repair, remove the contact connector from the element, remove the leaf spring with a screwdriver and pliers, and pull out the spark plug. The part is thoroughly washed in soapy water, dried, and put back in place.
- Another reason for repairing electric ignition is that the system operates even when the burner control handle is inactive or clicks after the handle is released. The reason for this is a short circuit between the control cable and the stove body, caused by severe contamination. For repairs, the device is disconnected from the network, the top cover is removed, the entire technological niche is cleaned and dried.
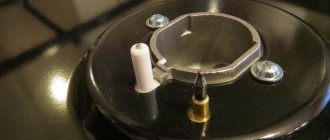
Thermocouple
Attention
Thermocouple is a sensor responsible for the gas supply. This is a small pointed metal pin near the burner. The malfunction of the element is manifested by the fact that immediately after ignition the fire goes out.
To resolve the problem, perform the following steps:
- Using sandpaper, clean the element from grease, dust, and chemical residues.
- If cleaning does not bring results, then the thermocouple requires replacement. To do this, remove the top panel by first removing the handles and unscrewing the bolts.
- The thermocouple is located near the spark plug. Disconnect from the burner and free from the wire.
- The attachment point is cleaned and a new element is installed.
- Return the cover to its place.
Cranes
If the gas stove taps do not turn or turn with difficulty, the reason is sticking of fat and excess lubricant or a breakdown of the turning mechanism.
- It is necessary to remove the handles and clean them from residual grease and lubricant. This is done in a soapy solution, then the taps are dried and a thin layer of new lubricant is applied.
- If the problem has not been resolved, after removing the handles, inspect the seat of the taps.
- If the metal plate located at the inlet of the valve stem is damaged, it is replaced with a new one. You can make it yourself by cutting it out of a canning lid or a tin can.
Oven doors
The oven door does not close for two reasons:
- the rubber seal is worn out;
- The brackets holding the door came loose.
Advice
To fix a loose door, unscrew the screws holding it to the oven, but not completely. Then move the door in different directions until it returns to its hinges, and tighten the screws until they stop. If the problem is not solved, most likely the brackets have become deformed.
To fix it, do the following:
- the hinges, supplemented with clamps, located on both sides of the oven, are bent;
- then carefully close the door until it rests against the latches;
- by pulling it towards you and up, disconnect the door from the body;
- Next, remove the side walls of the case to gain access to the brackets responsible for the clamping;
- parts requiring repair are disconnected from the oven, and the deformed elements are leveled with pliers and a hammer;
- if the bracket is broken, it is replaced with a new one;
- Assemble the body, install the door in place in the reverse order.
The sealing gasket is removed by first unscrewing the door. The groove intended for installing the gasket is washed with detergent, a new rubber band is installed and the door is put in place.
Read about how to repair the oven doors on the stove yourself in a separate article.
Hob
If the hob of a gas stove does not work, perform the following steps:
- Investigate electric ignition. The problem is the accumulation of fat and food residues on the element. To eliminate the defect, just wash the part well, dry it and put it back in place. The functionality of the electrical network is also checked.
- Make sure that gas is entering the burner. If the valve is not closed, gas enters the system, proceed to inspecting the nozzles.
- Clean the jets, which are also susceptible to clogging with food debris. After washing, you need to thoroughly dry the parts so that the ignition system works correctly.
Lattices
Over time, they burn out and fail. Enameled steel lasts a long time, but due to the characteristics of the material, the appearance quickly deteriorates. Cast iron does not last as long, as it becomes brittle due to exposure to high temperatures.
Replacing the grille, regardless of the material, is done independently. Purchase the part in a specialized store to ensure the correct choice of model.
Important
Modern gas stoves are equipped with sensors that determine the cause of the breakdown and display information in the form of numbers on the display. It is enough to take the operating instructions, which contain a decoding of error codes, find out the cause of the problem and fix it.
Frequent problems and methods for eliminating them
Before starting to repair equipment, you should study its design in detail, as well as diagnose the device in order to identify the cause of the malfunction.
Frequent malfunctions and ways to eliminate them.
Poor oven heating. This problem often occurs due to a broken switch. To fix the problem, it is enough to install a working element.
Remember, if replacing the switch does not bring the desired effect, you need to check the heating coil.
To do this, you should first dismantle the rear panel of the stove body, loosening the clamping brackets of the device
If damage to the spiral is detected, it is important to replace it. In this case, the new mechanism should be installed exclusively in prepared grooves. Uneven flame length in the burner or lack of fire in the burner
As a rule, this problem occurs due to clogging of the gas channels of the stove. To restore the functional properties of the unit, you should clean the nozzle passage holes using a thin needle.
Uneven flame length in the burner or lack of fire in the burner. As a rule, this problem occurs due to clogging of the gas channels of the stove. To restore the functional properties of the unit, you should clean the nozzle passage holes using a thin needle.
However, if this procedure does not resolve the problem, you will need to check the spark plug insulation for leaks and the solenoid valve's structural integrity. If any malfunctions are detected, the worn element should be replaced.
- The appearance of extraneous sounds during gas combustion. This problem often occurs when the balance of the air-gas mixture is disturbed. When using old kitchen stoves, adjusting the air damper of the device will help eliminate the problem. To eliminate noise, when operating devices of a new type, all flame dividers are replaced.
- Spontaneous extinguishing of the gas burner. When the stove is operating properly, the flame from the burner “washes” the thermocouple. However, if the fire does not reach the element, the burner may spontaneously go out. To eliminate the malfunction, you should clean the stove nozzle from dirt or adjust the gas supply.
- The flame goes out in the oven. Modern gas stoves are often equipped with a gas control system. Thanks to the presence of this function, when the flame in the oven goes out, the fuel supply is automatically blocked. In this case, the sensor, when cooled, transmits a signal to the valve of the device, which shuts off the passage channels of the furnace. However, if there is a malfunction in the gas control design, the flame in the oven burns only when the ignition button is pressed. As a rule, after stopping the impact on the key, the burner spontaneously extinguishes.
This problem often occurs when the thermocouple is not cooled quickly enough. As a rule, in the process of heating this element, an electric current is generated. In this case, the flow, holding the magnetic valve in the pressed position, does not allow the resource to close the passage hole of the nozzle.
To restore full operation of the unit, the thermocouple should be cleaned of dirt. This procedure is performed using sandpaper.
If cleaning the thermocouple from dirt does not bring the desired result, it is necessary to replace the faulty mechanism.
Poor supply of gas burner flame. This problem often occurs when the holes in the jets that spray fuel become clogged.
Regular cleaning of the injector clearances will help prevent excessive dirt accumulation.
The second reason for poor flame pressure is the incorrect ratio of the air-gas mixture that flows to the burner. If it is necessary to increase the burning intensity of the fire, the air damper of the stove should be adjusted.
Remember, improperly repaired kitchen appliances can lead to gas leaks and explosions.
Typical failures of Gorenje slabs
Gorenje gas stoves can break down for various reasons, but the most common malfunctions of such equipment include breakdowns of electric ignition and gas control.
Due to constant voltage drops in the network, the first to fail is the piezoelectric element responsible for the automatic ignition of the burner, which will need to be replaced in the future.
The electric ignition system may stop working due to liquid or grease getting inside, so it is important to keep the stove clean and clean the hob with care
The first sign of a gas control malfunction is the inability to turn on the burner the first time, and you often have to hold the knob for about a minute before a flame appears. If the burner goes out immediately after lowering the handle, then in this case the problem may be a malfunction of the solenoid valve or thermocouple.
Gorenje gas stoves have special “weak points” that should be considered in more detail. So, you can independently repair your gas stove, having first studied its structure, as well as methods for eliminating specific faults.
Gas goes out after lowering the handle
For the safe use of gas equipment, equipment manufacturers use a protection system - gas control. If, when you try to turn on the Gorenje gas oven, the flame goes out immediately after you release the handle or gas supply button, then the problem is a malfunction of the gas control.
The system consists of a thermocouple and electromagnetic valves connected to the burner taps. On average, the burner control mechanism is activated within 1-2 seconds, while it will take at least 15 seconds to ignite the oven burner.
Even if the burner lights up, it is important to continue holding the knob or gas button for at least 10 seconds to fully warm up the sensor.
To quickly heat up the burner, the tip of the thermocouple must be located directly inside the flame. If it is set too low or high, the sensor will not heat up to the required level, and the gas supply safety valve simply will not open.
To restore gas control operation, you should try:
- clean the sensor probe. During operation, grease or liquid could get inside the part, which is why the gas control system does not work;
- ensure a tight fit of the handle. If, after pressing the button, the burner goes out, then you should remove the handle, press the tap rod with your finger, and then try to turn on the burner (if it works, put something in the handle);
- adjust the position of the thermocouple. Its tip should touch the tongue as little as possible, so in case of deviation, the part can be adjusted with a simple screw.
If the handle does not fit well enough, then when you try to light the burner, the solenoid valve does not work, which is why the gas supply is cut off. Quite often, the burner of a Gorenje gas stove does not ignite due to a simple burnout of the thermocouple tip, so the only correct solution to the problem in this case is to replace the faulty part.
The burners don't light up
Often, the electric ignition is the first to stop working, which is not always related to the length of operation of the Gorenje gas stove. There are only two problems with automatic ignition: a complete lack of spark or non-stop sparking of the electrodes.
The lack of a spark can be caused by contamination of the electric ignition buttons, so before you begin diagnosing the system, you should first clean the stove components from grease
The cause of electric ignition failure may be that the spark plug is contaminated with food or grease. You can fix the problem by cleaning the surface of the candle with a stiff brush and detergent. If the steel rod of the part becomes oxidized, it will be enough to clean it using fine-grained sandpaper.
During operation, a noticeable crack may form on the ceramic surface of the spark plug, due to which the part can no longer perform its main function. The only way out is to replace the spark plug, and thereby restore the operation of the piezo ignition. To be on the safe side, it is better to immediately check all burners for microcracks in order to replace all broken parts if necessary.
The next reason for the failure of the electric ignition is the burnout of the ignition transformer (spark generation unit). You can try to repair a broken ignition unit, but such an operation will take you too much time and money, so the easiest way is to buy a new transformer and replace it yourself.
If a crack appears on the spark plug, the spark will be completely absent, and the piezo ignition function will not work only on those burners on which the breakdown occurred
Temporary interruption of auto-ignition may occur due to oxidation of the power button contacts. During the process of washing the hob, water penetrates into the system, and as a result, the contacts oxidize, become rough and even break.
To prevent this from happening, it is recommended to clean and dry the button contacts from time to time.
The flame comes off the burner
During operation of a gas stove, separation of the burner flame may occur, which occurs due to the high pressure of the gas-air mixture, which exceeds the speed of flame propagation. Thus, the flame, breaking away from the burner, goes out partially or completely, provoking an emergency situation.
You can adjust the burner flame using special adjustment screws. When setting to natural gas, it is necessary to unscrew the low flow adjustment screw until the minimum power is reached (no more than 1.5 turns).
If the gas stove is connected to a cylinder, then the adjusting screw should be tightened to the very end.
Before disassembling Gorenje equipment, you must disconnect it from the network and turn off the tap located directly above the gas stove
If the burner burns with a weak flame, then the problem most likely lies in a clogged nozzle or burner divider. In some cases, the Gorenje gas stove burner may not light at all, so the only option is to clean the nozzle and divider using a thin knitting needle or needle. In the absence of a needle of the required size, you can use thin wire.
If the burner burns weakly
Well, now let's figure it out. The most common malfunction of gas stoves is that the burner flame disappears completely or partially due to clogged nozzles or gas burner dividers. This happens due to inaccurate cooking - small holes are filled with boiled soup, milk, etc., clogged with crumbs, as well as during the process of cleaning the gas appliance with powders. Therefore, I recommend not bringing the burners to the point where “blue fuel” stops flowing to the burner, and cleaning the stove with cleaning gels. If the gas still stops flowing, or the flame has noticeably decreased in size, you should simply remove the burner and clean the nozzle or divider with a thin knitting needle or needle.
Many gas stoves have plastic faucet handles and are attached to the stem using a metal plate, which is inserted into a special groove. As you use it, the handles become loose, and this metal plate tends to fly out and get lost. Don’t rush to grieve ahead of time, everything is much simpler. Take an ordinary metal can lid or canning lid, cut out exactly the same plate with scissors and insert it into the groove on the handle. Problem solved!
The most popular malfunctions of gas stoves and how to fix them
The gas stove market today is quite large, with many conscientious manufacturers operating there. But, despite the reliability, quality and functionality, such household appliances still break. Therefore, many home craftsmen repair the Electrolux gas stove with their own hands.
Most often, problems are associated with the following phenomena:
- Insufficient burner flame.
- Problems with the oven door.
- Malfunction of electrical ignition.
- Poor quality thermocouple operation.
Important! Remember that gas is highly explosive. When it mixes with air and reaches a certain ratio, it can lead to an explosion. Therefore, if you decide to repair the gas stove yourself, the first step is to cut off the gas supply to the apartment. It’s better to play it safe and open the window or entrance doors. Experts recommend turning off the electric ignition.
Now we will describe the most popular problems with gas appliances and methods for eliminating them.
Burner repair
More often than not, problems arise with the burners. The flame gradually begins to weaken, then disappears altogether. The main problem is due to clogging of the dividers or burners. This happens due to inaccurate cooking - spilled sauce, boiled-over broth lead to the fact that small holes quickly become clogged.
Solving this problem is not difficult, you need to remove the burner, then disassemble it, clean the divider or nozzle. You can use a thin knitting needle or needle for this.
Oven door repair
Problems with oven doors also occur frequently. Some time after the start of operation, the door begins to jam and does not close tightly. As a result, the housewife cannot fully operate the oven.
To repair this element, you need to unscrew the screws connecting it to the stove, then rock it slightly in different directions so that it sits back on its hinges.
Electric ignition repair
With this device you can start a fire without matches or lighters. But to use it, you need to provide it with access to the network. It rarely breaks; if this happens, it is due to careless handling or contamination with food particles and dirt.
To replace it, you should turn off the stove and disassemble the partition located under it.
The burner burns weakly or goes out
The burner of the table or oven burns weakly when the tap is open fully and the oven is cold. If there are problems with only one burner (the rest are working fine), then the reason is that the nozzle of the corresponding burner is clogged. The repair is simple. It is necessary to clean the nozzle (nozzle, injector). This is done with a thin wire or needle. First, you can try cleaning the nozzle without removing it. The nozzles of the table burners are installed under the burners (Fig. 1. A). The oven burner nozzle is installed on the side of the stove (Fig. 2. A). Getting to the oven nozzle is not always easy. Then you need to remove the bottom wall of the oven, unscrew and remove the burner (it is secured there with one or two screws). The nozzle will be accessible from the oven.
If you cannot clean the nozzle without removing it, you can easily unscrew it with a suitable key.
If all the burners burn weakly, then the reason is low gas pressure. The burner of an oven with a thermostat should be checked when the oven is cold. Otherwise, the thermostat may reduce the gas supply when a certain temperature is reached. This is, in fact, its standard function.
Cleaning and prevention
It is better to prevent any malfunction than to eliminate it. By observing the operating conditions of the gas stove, you will extend its service life, avoiding unforeseen repairs. Preventative care and cleaning:
- Clean the surface of the stove from food debris after each cooking, waiting until the panel has cooled down.
- Do not leave the stove turned on unattended, as boiling liquid from the containers floods the flame of the burners, which leads to premature wear of the auto-ignition and gas control systems.
- Do not forget to lubricate the rubbing surfaces of the adjustment knobs.
- Cleaning of burners, jets, connections of regulators and switches is done with a needle or thin wire; metal brushes and brushes are also suitable.
- Maintenance is carried out periodically. To do this, the protective panel is dismantled, the studs are removed, the rods are pulled out, the parts are cleaned and inspected for mechanical damage and signs of wear. Contacting and mating elements are lubricated with graphite lubricant.
The hob is becoming increasingly common in modern kitchens due to its convenience, expanded functionality and improved appearance. We talked about the signs, causes of malfunction and self-repair of hobs in our materials. You may find the advice of our experts useful on how to repair induction cookers, timers, oven doors, electrical appliances with ceramic and glass-ceramic surfaces, and electric stove ovens.
Repairing a gas stove seems like a difficult task. Armed with the necessary tools and troubleshooting instructions, you can repair your home appliances yourself and save a significant amount.