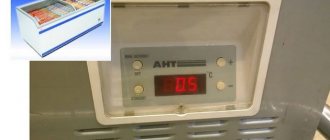
Quite often, the size of a stationary freezer does not make it possible to accommodate all the necessary products that require low temperatures for storage. To solve this problem, the easiest way is to buy a ready-made freezer, but you need to remember that the price of such a product will be quite high.
The best way out of this situation would be to make your own freezer. All you need is an old refrigerator, effort and a little time.
What does the equipment consist of?
To understand how to make a cooling chamber yourself, it is important to first understand what such equipment consists of. This will make it possible to meaningfully approach the solution of the task, not waste your time and avoid making mistakes. Also, understanding the structure of such an installation will make it possible to further improve it.
The cooling chamber includes the following elements:
- Capacitor.
- A tube.
- Directly the refrigerator itself.
- Evaporator.
- A compressor that moves refrigerant through the pipes.
- Thermostat. It maintains the required temperature level inside the equipment. It is also the thermoregulatory system that periodically turns the compressor off and on.
Moreover, new refrigerators may be equipped with filters, dehumidifiers and devices for automatic temperature control and regulation. This allows you to maintain stable operation of the device and avoid problems.
Worth knowing! You can store a ready-made homemade freezer in different rooms, but it is best to place it in a dry basement with electricity.
Prefabricated chambers from panels
To create a freezer, you will need to purchase sandwich panels that are connected using grooves. The kit, along with the panels, includes a door that has a lock and handle. To exit the cell when the door is locked, the manufacturers have provided an emergency button.
Installation diagram
To assemble a freezer from panels, you will have to follow the following steps:
- The floor is being assembled. Floor panels are made of galvanized iron.
- The seams are treated with sealant, and the panels are tightly connected to each other.
- The walls are being assembled. You can start from any corner. First, a right angle is made from two panels and a corner element, which is also included in the kit.
- After the corner is ready, the walls are assembled. The movement occurs in a circle, and eventually the walls close.
- Ceiling installation. The most difficult stage. It is necessary that the wall grooves coincide with the ceiling grooves. In this case, you will have to call an assistant.
- Door installation.
This is a rather expensive way to create a freezer, but the device is durable and reliable.
This is what a freezer made from sandwich panels looks like
There are also non-removable freezer units made of sandwich panels. Their installation is much more complicated and requires special skills and experience working with these structures. The advantage is that the refrigeration room can have an individual configuration depending on the characteristics of the building.
How the design works
All of the above-described elements of the freezer are connected to each other by tubes and form a kind of closed system. It is through this that a substance circulates during operation of the device, which freezes at sub-zero temperatures.
A fairly large role in such a process is played by the refrigerant pressure inside the cavity of the tubes. Thus, the lower the pressure, the lower the “boiling” temperature will be.
When the freezer is constantly running, steam from the evaporator enters the condenser. There it is cooled by air and converted back into liquid. Large freezers also use fans that greatly reduce the overall temperature of the device's radiator.
Today, modern automation systems make it possible to carry out the process of freezing and defrosting products without human intervention. It is quite easy to achieve this level even with a homemade unit. To do this, you just need to strictly follow the instructions presented below.
Remember! When purchasing new refrigerator parts, it is better to make a list in advance. If a person does not know much about what exactly he needs to purchase, it is better to additionally consult with a specialist so as not to buy too much.
The principle of frost generation by a refrigerator
Before making a refrigerator yourself, review existing designs. Below we offer a short thematic excursion. We apologize for the lack of adsorption models, they also work on freon. There are hardly anyone capable of obtaining the necessary materials and substances to facilitate the implementation of the concept.
First, know: 99% of household refrigerators use freon. Devices based on Peltier elements can be found as car freezers. Electric current flows through the junction of two dissimilar semiconductors, resulting in cooling of one material. The other, on the contrary, heats up. The external radiator of a refrigerator based on Peltier elements requires intensive cooling. This is achieved by choosing a large-sized cut aluminum part, or by introducing a fan, forced airflow. We see the idea inside modern system units of personal computers.
Anyone who wants to make a refrigerator on their own can start here. Find a Peltier element for cooling the processor, preferably two or three. Actually, the detail is very interesting.
Let’s make a reservation right away: ice cream power (cooling capacity) and consumed from the outlet are two different things. Refrigerators have an efficiency of up to 200 percent. Applies to most types of climate control equipment:
- air conditioners;
- heat pumps.
The abilities of Peltier elements are not known for certain. Cooling capacity is not given. Peltier elements are designed for fixed power, the manufacturer offers to trust. There is only one problem: the rate at which the processor temperature drops cannot be used to judge the parameter; there are too many unknowns. Found on the website https://forum.sirius.dn.ua/ a figure showing the dependence of the cooling capacity of the Frost-72 Peltier element. The graph is linear and makes it possible to calculate the necessary parameters for creating a refrigerator with your own hands.
Dependence of the cooling capacity of the Peltier element
As the supply voltage increases to 16 V (maximum permissible), the cooling capacity increases in parallel. You can improve the result a little. Let's think about the performance of the Stinol 102 refrigerator:
- The cooling capacity of the refrigerator compartment is 75-100 W.
- The cooling capacity of the freezer is 100-120 W.
What displacement?
- Refrigerator compartment – 200 liters.
- Freezer compartment – 120 liters.
We see how many Peltier elements are needed.
We will better remove heat from the hot side, and the Peltier element will work more efficiently. Be too lazy to take measures, the temperature difference will reach 68 degrees Celsius (12 volt power supply), cooling will stop. Consequently, we are powerless to predict in advance. Suppose the room temperature is 22 degrees Celsius, the refrigerator compartment is plus 5 degrees Celsius, with ideal cooling the power is 38 W. It’s easy to see: for Stinol 102 you will need at least two or three Frost 72.
As for the freezer, the power cannot be realized with any conceivable losses. An article on this site explains: the peak efficiency of the device is 62% (ideal case), creating a homemade refrigerator from the point of view of energy saving cannot be called a good idea. There is no need to refill freon, the system is silent. We will provide a brief calculation for those wishing to build a freezer. The temperature difference will be 22 - (-18) = 40 degrees, the power is 20 W. Buy 6 Frost 72 elements. Let's look at it in monetary terms.
Peltier elements Frost 72
According to the website https://www.chipdip.ru/, one Frost 72 Peltier element costs 1,500 rubles. Whether you need a freezer for 9,000 rubles (subtracting the cost of the box material), decide for yourself. You will need a thermostat. Plus of the device: it can work for heating. Just change the power polarity. A homemade refrigerator will become an air conditioner; you can heat food inside. Ideal for defrosting mode. By the way, the fact needs clarification. The Peltier effect is reversible. By passing current in the opposite direction, we achieve heating. The operating principle of the refrigerator is limited by the effect of lowering the temperature of one side of the Peltier element; the effect is reversible.
What can a freezing unit be made from?
Experts identify the following simplest and at the same time effective ways to create a freezer yourself:
- from the basement or cellar;
- from premises, empty containers;
- from an unwanted old refrigerator.
To implement such projects, you will certainly need different materials and tools. According to reviews, it is easiest and most profitable to convert an old refrigerator into a freezer, since other product options will require the additional purchase of new cooling systems.
The duration of such work will largely depend on how well the person understands the structure of refrigerators. Thus, some may need two weeks or more to make a camera, while others will be able to cope with this task in just a couple of days.
The performance of the finished device will depend on the following factors:
- strict adherence to instructions (step-by-step execution of tasks);
- the original condition of the old refrigerator and its cooling system;
- the quality of new built-in elements and their correct installation (following the required algorithm of actions, features of the new cooling system).
Creating a freezer from an empty room
To turn a room into a freezing unit, you will have to perform the following steps in the order in which they are indicated:
- Create a lattice from wooden blocks, it should affect the entire room.
- Place reflective film.
- Fill the cells between the bars with insulation.
- Place foil on the joints and secure with tape.
- Then sheathe the room with galvanized sheets.
- Seal all seams with sealant.
- Install shelving.
- Installation of a finished monoblock and sensors that are responsible for adjusting the automation.
- A door covered with insulating material is installed. It shouldn't leave any gaps.
- Functionality check.
Creating a freezer from an empty room
For cellars, the system is even simpler: you just need to seal the cracks and seal the door. You will also need to install a special split system.
How to disassemble a refrigerator
The first thing you need to take care of when disassembling an old refrigerator is safety. For this reason, before starting work, you should disconnect the device from the electrical supply and only then get down to business.
The general scheme for remodeling the camera includes the following steps:
- Dismantling an old refrigerator. No details need to be thrown away just yet, even if at first glance they seem unnecessary. Most likely, these are the elements you will need when assembling a new camera.
- Removing the evaporator.
- Fixing the evaporator.
- Installing a new temperature sensor.
- Functionality check.
Remember! You need to check how well the converted camera works gradually.
It would be unwise to immediately load the device to the top with products, because it may not work properly, as a result of which everything that was frozen will spoil. In such a case, it is recommended to place only a couple of foods or just bottled water in the chamber. By the level of its freezing, you can determine how well the freezer is working.
You should also know that all refrigerator models are disassembled differently. This is due to the structural features of the devices, as well as the types of installed cooling systems.
If the equipment being converted is inoperable, then when working with it you should handle the tubes very carefully, avoiding their kinks. It is better to release the refrigerant altogether and refill it after reinstalling the system. Of course, this will complicate the process somewhat, but getting a new camera to work is often the only way to do it.
In some cases, a non-working camera requires a preliminary search for the cause of the malfunction. It may also happen that repairing and further reworking the device will simply be pointless.
Important! It should be understood that homemade designs that were made from old refrigerators will require more energy than their new store-bought counterparts. This is justified by the fact that they have lower efficiency.
Is it possible to make a new freezer from a refrigerator?
Many owners of household appliances want to update them, sometimes simply because of a more modern design. The presence of a working refrigerator on the farm that has served its useful life will allow it to be used in a new useful capacity.
The main working element of the device is a refrigeration unit, consisting of a compressor, evaporator, heat exchange system and conductive tubes. Controls and automation are also important. This constitutes the active part of the future product.
Passive parts include parts of the body, working or freezer chamber and door. Depending on how voluminous the freezer should be, several methods of making it are used:
- from the body of the same refrigerator from which the active part is taken;
- from a shipping container, cabinet or other container;
- from an entire utility room, such as a pantry, closet, cellar, etc.
The difference between the simplest and more complex option is very significant, so it is important to calculate everything first. If the farm has enough components of the future design that are ready for use, there will be no problems with purchasing the missing ones.
The principle of the golden mean works here. The main and most expensive part is considered to be the refrigeration unit, removed from an old household refrigerator. It will be good if it turns out to be functional.
Checking the functionality of an old refrigerator
If the refrigerator has been in a horizontal position for a long time, it should be returned to the vertical position. So it should stand for at least a day. Some even recommend turning it upside down for this time.
After making sure during inspection that all the main working components and controls are present, a test switch is performed.
Attention! It is important to listen to the sound of a running compressor and pay attention to the characteristic odors of overheated electrical equipment. If alarming signs occur, the refrigerator is immediately disconnected from the network, followed by diagnosing the cause and nature of the malfunction.
If the device is working properly, wait at least 5 minutes and check the evaporator walls by touch for noticeable cooling or the appearance of frost. After a longer period of time, it is not necessary to touch the evaporator with your hand.
Possible faults
The absence of signs of operation suggests a step-by-step identification of the problem node. The sequence of actions is as follows:
- checking the integrity of the power cord;
- determining the operability of the compressor motor starting relay;
- identifying faults in the electric motor itself;
- searching for the causes and locations of leaks from the refrigerant system (freon gas);
- diagnostics of automation and control units, including relay regulator, thermostat and temperature sensor.
To establish the functionality of the connection cable, it is enough to disconnect the terminal block of the starting relay, power a lamp “probe” or any low-power electrical appliance from the phase and neutral contacts of the power cord. This is done using an adapter consisting of a socket and a piece of cable.
Important! All work related to elements of electrical equipment and their open contacts is performed with the device completely de-energized. Plug the plug into the socket only after ensuring reliable insulation of even temporary contacts.
If the cable is in good condition, proceed to diagnosing the start relay. A proven test method is to supply electricity directly to the terminals of the operating winding of the electric motor. If the fact of rotor rotation is established, the starting relay will have to be replaced.
The absence of “signs of life” from the compressor itself or its electric motor indicates more serious breakdowns: burnout of the stator windings (primary and working), breakdown of the housing. Since this element is superior in importance and price to the rest in the refrigeration unit, they choose between the cost of repairs and replacing the compressor with a new one or an old one, but it works.
On the compressor casing there is a fitting, or sealed tap, for installing a pressure gauge. Using this device, the refrigerant pressure in the system is determined. A decrease in compression occurs as a result of long-term (more than 10 years) operation or mechanical damage to conductive tubes, the evaporator, and other parts in the gas circulation system.
The location of the damage is found in various ways: visually, by ear, by applying a soap solution, etc. After eliminating the damage or replacing the part, refrigerant is pumped into the system. To do this, use the same fitting on the compressor housing.
The easiest way to check the functionality of the thermostat is in the same way - by connecting directly. To do this, close all 3 contacts on the terminal block of the regulator and plug it into the network. If the compressor is working properly, the refrigerator will turn on immediately, but will work non-stop.
Minor malfunctions of the control system are eliminated independently. In other cases, the main element (regulator relay and thermostat) is replaced with a new one.
Instructions: how to make a freezer from an old refrigerator
Let's assume there is a completely working single-compartment refrigerator. The task is to convert the entire internal volume into one large freezer.
The standard location of the freezer is at the top of the common workspace. Therefore, it is enough to remove the plastic partition between the freezing and cooling chambers. Next, very carefully uncouple the joint of the aluminum evaporator housing and straighten the lower ends along the walls of the chamber.
A U-shaped evaporation module is formed. It is more convenient and safer to carry out such work with the evaporator removed, but to achieve a quick effect and eliminate the need to pump in new freon, this convenience is neglected. As a result, the refrigerator is turned into a freezer with your own hands.
Reference. Many people are confused by the fact that the lowest temperature is concentrated in the upper part of the common chamber. This is due to the faulty analogy of an oven, where the burners are located at the bottom. However, with cold air the opposite happens.
To improve circulation inside the chamber, it is recommended to use a fan. Depending on the design features and the location of the working elements in the cavity of the thermal insulation layer, a seat for inserting the fan is selected.
Power (220 V) is connected in parallel to any of the nearest contact groups, for example, to the compressor terminal block. The fan is turned off when the refrigerator door is opened using a light limit switch. The contacts are used in the opposite way: for the lighting lamp they are closed, and for the phase line of the fan they are opened.
When trying to create a common version of a horizontal freezer, many people make a serious mistake. The fact is that the cooling system provides for the injection of refrigerant into the upper point of the evaporator chamber, after which it flows freely through the heat exchanger or radiator grille. The horizontal position of the refrigerator disrupts this process and can lead to serious damage.
Such a rework will require a fundamental change in the design of the unit in order to place all the elements in technological compliance. Additional space will be needed. As a result, the goal will not justify the money spent.
Enclosure from a closet or an entire room
An excellent DIY freezer can be made not only from an old refrigerator, especially if its body is pretty rusty. An equally popular option is a homemade freezer or even a block. In this case, only parts of the refrigeration unit and controls will be needed.
The main problem is the selection of the camera. They use dishes and even a wardrobe, the capacity of a transport container and entire rooms, such as a closet, cellar, pantry. The compressors of old refrigerators are powerful enough to provide low temperatures in volumes of up to 6 m³.
In this option, the main criteria will be high-quality thermal insulation of the entire chamber, including the door, and the isolated location of the parts of the refrigeration unit, which emits a lot of heat. All elements, except the evaporator, are placed in a separate casing or box outside the room, preferably outside. An analogy with a split system is appropriate here, the details of which are also successfully applicable.
To insulate the chamber itself, the principle of a thermos is used. By means of additional planes, a layer up to 10 cm thick is created inside. It is advisable to line the internal surfaces with sheet aluminum. To fill the space use:
- polyurethane foam;
- polyurethane (foam) panels;
- all types of fiberglass, for example Isover;
- holofiber, dornite and other synthetic non-woven materials;
- bulk materials, such as vinyl chloride chips, fine expanded clay, etc.;
- sandwich panels.
When making such a freezer with your own hands, it is important to know that the use of a fan has a dual purpose: to circulate cooled air inside the working chamber and to cool it outside the compressor. The power unit will have to work under increased load, and ventilation becomes mandatory.
The question of whether it is possible to convert a freezer into a refrigerator is extremely relevant for such designs. The household freezer is built into one of the walls so that the heat dissipation grilles are on the outside. All that remains is to modify the freezer lid or door. Holes of different configurations and sizes are made in it, allowing part of the cold air to flow from the freezer into the refrigeration unit room.
The final stage is to configure the automation and control elements. It is important to experimentally establish the most advantageous location of the temperature sensor inside the refrigeration chamber. The control panel with a power button and a knob for setting cooling modes is placed outside, for example, next to the door, at eye level.
For large rooms, a separately purchased thermostat with temperature sensors is used as a control element. It will ensure reliable operation of the entire structure and exact compliance with temperature indicators inside the working chamber.
Step-by-step instruction
If you have an old refrigerator at home that leaks all the time, then this is not a reason to throw it away. It would make a great freezer. To do this, do the following (analysis of the chamber using the example of the Nord refrigerator):
- Remove the device cover.
- Remove the thermostat.
- Release the refrigerant (if it is still there) through the tube.
- Using a grinder, cut the freezer 5 cm higher from the refrigerator compartment. If the evaporator of the device is in working condition, then it can be safely used. To do this, one side should be mounted with a capillary tube under a pressure of 15 atm. Connect the other side to a copper tube with a length of 1.5 m and a diameter of 6 mm.
- Make two holes in the freezer. The first with a diameter of 8 mm for the suction tube. The second is for a thermostat tube with a diameter of 3 mm.
- Install the evaporator into the chamber and thread the suction tube into the hole.
- Mount the thermostat behind the device and insert its tube into the hole. Secure to the evaporator from below using two clamps.
- Secure the evaporator itself with stainless steel screws. In this case, you need to be careful not to get the screw into the tube, otherwise it will be damaged.
- Bend the suction tube down towards the compressor and put insulation on it with a diameter of 10 mm.
- Fill the finished holes with silicone.
- Attach a capacitor behind the device.
- Install the entire refrigeration system and charge it with refrigerant.
- Install the electrical wiring (one wire for powering the network on the start-up protection field, and the second on the start-up protection relay).
- Place the cover on the camera.
- Insert standard shelves.
In the finished device, the temperature should normally be minus 18–25 degrees.
Another popular refrigerator for its transformation into a freezer is the Snige. It has a simple design, so it does not cause problems for craftsmen. The scheme for converting it into a chamber is the same as that of the Nord refrigerator.
Interesting! Many people ask what else can be made from an old refrigerator. In fact, you can use it to build a mini-cellar for storing fruit, a smokehouse, or a cabinet for storing small items. That is why, before throwing away your old refrigerator, you should think about whether it will be useful for any other purposes. The flight of imagination is unlimited.
Large refrigerator room
The role of a room can be any non-residential premises, for example, a small outbuilding made of brick. In this case, proceed as follows:
- they make a wooden sheathing on which a thick film (oilcloth) is attached;
- the empty space is filled with foam plastic, the joints are sealed with aluminum tape;
- they make a wooden floor if the extension is earthen;
- all surfaces are sheathed with galvanized sheets, all seams are treated with sealant;
- They install shelving and a door, which is pre-insulated and equipped with airtight seals.
To build a cooling system, it is better to take two old refrigerators at once. Having removed the refrigeration systems from the equipment, they are attached to the outer wall of the future refrigeration chamber. Fans are installed underneath them. Freezers installed indoors are connected to the systems using tubes led inside. Both refrigerators are “forced” to work in shifts; this mode of operation protects them from overheating.
A simpler (but also expensive) way is to purchase a ready-made monoblock with sensors that automatically regulate the temperature. If you are installing a refrigeration chamber in the cellar, then the work is greatly simplified: it consists of sealing the cracks and sealing the door, but in this case it is necessary to install a split system.
Recommendations for using and setting up the camera
In order for a homemade freezer to work smoothly and not cause trouble, it is important to adhere to the following recommendations from specialists for using this device:
- Set the modes correctly. According to the standard, the chambers have a freezing mode and a storage mode. The first should be used for quick freezing of fresh vegetables, meat, fish, various semi-finished products and vegetables. The second mode must be installed after a day.
- Regulate the temperature. This can be done using a special regulator (usually they have a scale from 1 to 7). After setting the regulator in the desired position, the temperature in the chamber will be maintained automatically.
- Select the temperature regime based on the required storage conditions of the products. The temperature of the camera is also affected by the location where it is installed and the general temperature in the room.
- Properly arrange food in the freezer. Thus, the upper compartments are intended for primary freezing of products, and the lower ones are for storing already frozen products.
- Do not open the chamber door too often, as this may disrupt the temperature of the device.
- Regularly defrost the freezer and clean out the cabinets. This will keep it clean and prevent unpleasant odors.
- Do not place products in the chamber whose quality or expiration date you are not sure of. It is also important to label the name and date of freezing for each product, especially if it is meat or fish.
- Properly remove odor. Some cameras that are used for a long time may develop a bad odor. To eliminate it, it is best to wash the inside of the camera with a regular baking soda solution. The refrigerator itself must be disconnected from the network.
- Install an audible alarm. It will operate if the door is open for 30 seconds. This will allow you to maintain optimal temperature conditions for storing food.
- The camera should be turned on at least 24 hours before placing food. It should reach the desired temperature. Otherwise, the freezing may be of poor quality, which will negatively affect the shelf life of semi-finished products.
Moreover, it is important to check the power supply in advance. If there are problems with this (insufficient electricity, frequent power outages), then this can cause the camera to be “knocked out” of power and the wires to burn out.
Door installation
The installation of the front wall completes the manufacture of the refrigeration chamber. To load and unload bottles, we recommend making a door of sufficient volume. It is convenient to perform the process of thermal insulation of the front wall before attaching it to the base. Carefully measure the internal dimensions of the chamber, cut out the appropriate piece of thermal insulation and glue it to the sheathing blank.
The door can be insulated after the housing part has been attached.
After completing the assembly of the camera, you can finish the exterior of the body using various dyes. This will protect the material of the product and give it completeness.
Then you can test the performance of the device and possible temperature conditions. Due to the significant increase in the volume of cooled air, it is difficult for a small refrigerator to cope with a load for which it was not originally designed, so the cooling process of the chamber, especially at high ambient temperatures, is quite slow. If you need to obtain lower temperatures, we recommend that you use a more powerful refrigerator as a source of cold, increasing its useful volume with the help of such a chamber.
In this case, a homemade device can be used for temporary storage of a wider range of different products, including meat, fish, and game.
Dear readers, comment on the article, ask questions, subscribe to new publications - we are interested in your opinion
