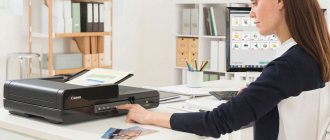
If you are using an inkjet or laser printer, you may need to clean the cartridge. At home, devices are often used irregularly, but despite this, they require proper care. Timely cleaning helps to obtain high-quality printouts and extends the life of the equipment. Do-it-yourself cleaning can be done using hot and cold methods. In order to carry it out on time, you should know the first signs of problems associated with cartridges.
Signs that cleaning is needed
The fact that there is a need to inspect inkjet printer cartridges is evidenced by a number of printing defects, the main ones of which are the following:
- the templates on the test printouts contain uneven or unclear lines;
- During operation of the device, ink blots appear on the sheets;
- one or more colors are missing when printing the test pattern;
- When photographs and other color images are taken, horizontal streaks appear on the paper.
Poor print quality
The defects discussed are typical for different device models, for example, Epson, HP, Samsung, Canon. When rebooting does not help get rid of the unpleasant phenomenon, then you will need to clean the device cartridges. There are several reasons why you need to do this regularly:
- during downtime, it may happen that the paint in the nozzles has dried and will need to be removed to remove blockages;
- dust from the air settles inside the printer, especially on ink-coated components - the print head, cartridges.
For laser devices, cleaning is carried out when replacing the toner. At the same time, old ink and other contaminants are removed from the cartridge.
The work is carried out using napkins, cloth or a lint-free brush. It is important that the electrical contacts remain clean. The work is carried out according to certain algorithms and does not require special skills.
How to remove the print head
To remove the print head, you need to lift the top cover and turn on the printer. Next, observe the movement of the cartridges. When they are in the middle, they are carefully removed one after another. It is important to remember their original location in the device.
The print head is located under the locking lever. Sometimes they don’t lift him, but pull him towards himself. The head is removed and cleaning begins.
Software cleaning
Many inkjet machines are equipped with built-in automatic cleaning programs. To carry it out, proceed as follows:
- open the control panel;
- go to the printing equipment settings;
- there select the required section - “Remedies and cartridge cleaning”;
- make a test print of a blank sheet.
The operation can be repeated several times. Built-in tools allow you to get rid of minor dirt.
If the function is missing, you can download the program from disk or the Internet and install it. Then in the print settings, select the “Printer Maintenance” section, then you will need to open the print settings and start cleaning. In this case, you must follow the instructions of the program. Most often, the procedure must be performed repeatedly.
When the software method does not help, then you can get rid of the problem in several other ways. For different models of inkjet technology, the algorithms are the same, only the method of accessing the cartridges differs . To do this, you may need a set of screwdrivers with different bits.
The operation scheme, regardless of the chosen cleaning method, is as follows:
- removing the cartridge;
- soaking;
- washing;
- drying;
- gas station;
- installation in the printer;
- control printout.
You must work carefully so as not to smear surrounding objects or clothes with ink.
Features of devices from different companies
The operating principle of a printing device from any company is not significantly different from each other. Minor differences may only be in the form of spare parts and some printer components. Therefore, the instructions described in this article are applicable to any model of all well-known printer manufacturers: Canon, HP, Epson, Samsung, Xerox, Brother, Kyocera and many others.
Cleaning agents can be used without harm, but software cleaning will require a special utility for your printer model. In some cases, different versions of programs may be used for different series or devices released in different years by the same manufacturer. We recommend installing such software from the disk that comes with the device.
Cleaning with detergent
To implement the cold method, you will need to stock up on the following available tools and materials:
- rubber gloves (medical);
- syringe;
- napkins (cloth) made of paper or cotton;
- clean water;
- pipette;
- a special glass cleaner containing isopropyl alcohol or ethylene glycol.
Examples of suitable detergents are “Mr. Muscle”, “Mr. Glitter”.
The whole process takes place in the following sequence:
- remove the cartridge from the printer;
- place it with the nozzles up (on a specially laid fabric);
- a few drops of cleaning liquid are applied to them using a pipette;
- wait approximately 10 minutes;
- then blot the nozzles with a napkin and wipe them dry with a cotton cloth.
A screwdriver may be required to remove it, depending on the model of device you are using.
The manipulations discussed above are not always sufficient. If the nozzles remain clogged, then continue the operation:
- take a small container;
- fill it with cleaning liquid, pouring approximately a layer of 3 mm;
- immersed in the nozzle composition;
- keep them in liquid for 3 hours;
- take it out and wipe it dry.
After wiping the cartridge nozzles, located in the working position, with a cloth, there should be an ink mark on it, which is a characteristic result of complete cleaning. An ordinary plastic jar lid is suitable as a container for the cleaning composition.
There are special liquids available for sale to remove dried ink. They are even divided by type of cartridge, but the way they work is the same.
Method 2. Boiling or 'the principle of boiling pasta'
- small iron bowl or ladle
- pliers and pliers
- napkin or toilet paper
Instructions
- With the printer turned on, open the lid and wait. and the cartridges themselves move to the replacement position. It is enough to lightly press its box down and it will come out easily. We take out the cartridge
- Now you need to heat a small amount of water on the stove in an iron bowl or ladle so that the water boils and steam comes out. We take the cartridge and hold the print heads over the fumes, you can rinse for 2-3 minutes by lowering the print cartridge into boiling water. Be careful because... The cartridge will heat up, so it is better to hold it with pliers. Just do not squeeze it under any circumstances to avoid damage.
- The dried paint in the head should become wet and begin to drip; wipe off all excess with napkins until all the colors come through. This can take quite a long period of time, depending on the degree of neglect of the printing nozzles.
- If the inkjet cartridge has not been used for a long time, you will have to wash it from the inside. Be careful when opening the lid. Older models have a special metal device for this. Don't be afraid of a little crunch, you can't do without it. On new printers, the cover is sealed with adhesive tape; first you need to get rid of it, and then carefully open it with a screwdriver. The main thing is to prevent cracking of the walls, this can render the container unusable. We take out the absorbent inserts and rinse them with warm water, be sure to remember where each of them was located.
Manual ink pressing
In order for the ink from the cartridge to get onto the paper, a set of certain mechanisms is used inside. The design is such that it is possible to manually push out a certain amount of ink, which will allow you to clean the nozzles. There are 2 ways in total.
Method 1 (difficult)
For this method you will need a regular syringe.
- You need to find a small hole on the back of the cartridge. It acts as an air intake. It is necessary to insert a needle placed on an empty syringe. You need to insert so much that it rests. The part of the needle that remains outside needs to be measured.
- From the end of the needle, cut off the amount that does not fit. Next, you need to take a small piece of rubber material and put it on the base of the needle. It will serve as a gasket and will prevent unnecessary physical impact on the plastic, which can lead to breakage.
- Place the cartridge with the nozzles down on the paper. It will absorb any paint that should run during cleaning. We reinsert the syringe, but this time with air, and slowly squeeze it out until drops appear on the nozzles.
Now all that remains is to remove the released ink, and you can start printing.
Method 2 (easy)
To clean the cartridge using this method, you will need a rubber pad, which may be supplied with it (not available on all models). If it is provided by the manufacturer, then the sequence of actions is as follows.
- There is a hole in the cover. You need to insert a syringe into it without a needle.
- Now it is placed on the cartridge with the syringe installed.
- Holding the paint hopper on the table and pressing the pad (it creates a kind of vacuum), you need to pull the syringe plunger towards you, pulling the ink through the hole.
This completes the cleaning process. All that remains is to make sure that the ink does not leak. If there are any residues on the nozzles, they are simply removed.
Method 2. Boiling or 'the principle of boiling pasta'
- small iron bowl or ladle
- pliers and pliers
- napkin or toilet paper
Instructions
- With the printer turned on, open the lid and wait. and the cartridges themselves move to the replacement position. It is enough to lightly press its box down and it will come out easily. We take out the cartridge
- Now you need to heat a small amount of water on the stove in an iron bowl or ladle so that the water boils and steam comes out. We take the cartridge and hold the print heads over the fumes, you can rinse for 2-3 minutes by lowering the print cartridge into boiling water. Be careful because... The cartridge will heat up, so it is better to hold it with pliers. Just do not squeeze it under any circumstances to avoid damage.
- The dried paint in the head should become wet and begin to drip; wipe off all excess with napkins until all the colors come through. This can take quite a long period of time, depending on the degree of neglect of the printing nozzles.
- If the inkjet cartridge has not been used for a long time, you will have to wash it from the inside. Be careful when opening the lid. Older models have a special metal device for this. Don't be afraid of a little crunch, you can't do without it. On new printers, the cover is sealed with adhesive tape; first you need to get rid of it, and then carefully open it with a screwdriver. The main thing is to prevent cracking of the walls, this can render the container unusable. We take out the absorbent inserts and rinse them with warm water, be sure to remember where each of them was located.
Fault prevention
Any equipment requires proper care and operation. This helps to avoid many problems. In order for the printer to serve for a long time and without failures, it is enough to follow the following recommendations.
- The room in which the printing equipment is located should be kept clean. Wet weekly cleaning is necessary, since dust is the worst enemy of a printer or MFP.
- You should carefully clean the printer with a vacuum cleaner once a month. This will collect dust particles and ink (for laser printers). Areas wet from paint should be removed with a rag.
- Every printer has a software method for cleaning the printer head. How to start it can be found in the instructions for the device. This cleaning should be done regularly.
- If the printer is color, and most often only black text is printed, then it is worth doing a color test print once a week. Otherwise, the paint may dry out and clog the nozzles.
- When refilling laser printers, experts recommend cleaning the waste ink bin regardless of its filling level.
When cleaning the cartridge, you do not need to do any complex manipulations, but the procedure itself is quite labor-intensive. The easiest option when working independently is to use special built-in programs. If none of the methods considered will lead to the desired result, then it is necessary to remove contaminants from the equipment involved in printing . When this does not help, you should contact the service center specialists. They will accurately determine the cause of the problem and advise options for eliminating it.
When is it time to clean
The printer requires periodic cleaning. This process will significantly extend the life of the device. Determining the need for cleaning is not so difficult, but this may not always help. Therefore, experts do not advise waiting for signs, but carrying out activities regularly for the purpose of prevention. Precursors to cleaning the printing device may be:
- Extraneous sounds during operation.
- Poor print quality. For example, streaks when printing.
- There are ink or toner stains on the printed pages.
- Frequent paper jams.
- Any deviation from the usual form of work.
Soaking in washing liquid
If the cartridge begins to streak or stops printing altogether, it can be cleaned with a special cartridge wash prepared according to one of three recipes:
- acidic (HP color cartridges): 10% acetic acid essence, 10% alcohol, 80% distilled water;
- neutral (suitable for any printer): 10% glycerin from a pharmacy, 10% ethyl alcohol, 80% distilled water;
- alkaline (Epson, Canon): 10% ammonia/ammonia solution, 10% ethyl alcohol, 10% glycerin, 70% distilled water.
Before you revive a dried cartridge using this composition, it must be thoroughly filtered by any available method.
If one type of acidification does not give results, try another.
An excellent result is achieved by using green “Mr. Muscle” as a washing liquid for cleaning glass (the one with ammonia).
Mister Muscle is diluted with dist. water in a 1:1 ratio and use as a rinse.
How else can you clean the printer head at home? Instead of Mister Musk, you can use a cheaper glass and mirror cleaner “Every Day”:
Recovery technique
Printer cartridges from different manufacturers need to be washed differently. We will discuss below how to wash the head of an Epson inkjet printer. For now, let's start with the most common ones - Hewlets, Lexmarks, Canons and the like.
How to clean a Canon, HP, Lexmark (and similar) printer cartridge?
So, your HP cartridge is dry, what should you do?
Pour the cleaning solution generously onto the napkin and place the cartridge with the nozzles directly on it.
Make sure that the napkin is always moistened thoroughly! Add liquid as it dries.
If the cartridge is empty and very dry, then you can put it directly into the solution entirely (not for foam cartridges!) and pour it inside and let it sit for 1-3 days.
How to clean the Epson printer head?
Epsons are restored differently : move the head to the side, make a sponge out of a napkin or a thin piece of fabric of a suitable size and place it in the place where the head is parked. Soak generously in acidifying agent and park the head. Leave for 10 or more hours.
As a last resort, you can completely dismantle the head and immerse it with nozzles in the composition by 1 cm. Then select cleaning heads in the menu (a couple of times). After this, if the cartridge is working properly, it should start printing.
You will find interesting discussions about the composition of the washing liquid and how to soak a Canon and HP cartridge at home in this video:
Well, the simplest rinsing for any cartridge is clean distilled water. The next two methods will be just using it.
Method 5. Cleaning the cartridge in an ultrasonic bath
'Fari' and water are used. Color water-based ink cartridges recover after 10 years in the cabinet.
We also recommend reading:
Published: September 17, 2007 Last modified: August 18, 2013
What to do if the cartridge is dry? Our restoration technique will be useful to all owners of inkjet printers without exception.
But first, let's find out how to understand that the cartridge has dried out and not run out?
Firstly, if he was typing before your eyes and suddenly suddenly - bam! - and stopped, which means it simply ran out of ink.
Secondly, if you try to refill a dried out cartridge, it will not work. He never published, and never will.
Thirdly, if you apply the “Shake Off” method to a cartridge that has run out, you can squeeze out a little more ink from it and even make it print a couple more pages.
You can try one of the methods below or a combination of them in any combination and sequence.
So, let's go in order.