You can see a printer in almost every home. This device has become an integral part of our lives. Every day a person needs to print out a task, photocopy documents on a printer, etc.
Today, there are many new generation devices on the market called multifunctional devices (MFPs). They not only speed up work, but also save space and money. How to scan a photo to a computer?
Previously, before the advent of these devices, people had to purchase several devices in order to separately perform the functions of copier, scan and print. This took a lot of time. Now we can freely and in a short period of time, from one device, photocopy or photocopy a document.
Preparatory stage
Before proceeding directly to the scanning procedure, preparatory measures should be carried out. This approach will prevent further difficulties and technical errors.
- You need to make sure that the device has the appropriate option. The modern office equipment market has a lot of multifunctional devices. However, you can often find models that do not allow you to take a scan. You need to read the instructions for use of the device, which should be present in its passport.
- Next, you should make sure that the device is connected correctly. Modern technology provides users with a lot of possibilities, so by “connecting” with a computer, you can perform any manipulation. Despite this, not all PCs and MFPs are capable of supporting this format. As a rule, when purchasing a scanner or printer, the box already contains a USB cable, which you need to use to activate interaction with a PC.
- After this, you need to make sure that the device is connected correctly by pressing the device button. If the indicators do not manifest themselves in any way, it is worth rechecking the correct functioning of the equipment. Some devices require driver installation, so it is quite possible that you will have to deal with this issue as well.
- From the moment the paper is in the scanner, you need to close the lid tightly and press the button to start the process.
Important! You should pay attention to the individual characteristics of the scanner. There should be a symbol near the glass surface that will indicate how the document is placed.
MFP
How to scan personal documents with a printer
Official documents must be of high quality so that all elements are clearly visible and readable. This applies to important information: birth certificates, passports, IDs and similar documentation. Most often, ABBY FineReader is used for these purposes, but any other software with similar functionality may be suitable. Instructions on how to scan a document to a computer from a printer using a passport as an example:
- Be sure to remove the cover, it will interfere during the procedure.
- In the settings, set the following parameters: “grayscale”, resolution – 300 dpi (or dpi).
- Unfold the passport on the first page and place it facing the glass. It is better to place it closer to the edge, leaving a small gap.
- Close the lid of the device tightly; for more detailed copying, you can press it a little with your hand.
- Click “Preview” and make sure that the color and detail of the letters are correct.
- At the bottom, click “Scan” and wait until the device finishes recognizing the file. After that, check the picture and click “Save”.
- Using a frame, select the area with the image (the passport itself); the empty fields should be outside it.
- To store official data, you should select tif or bmp format.
- How to treat urethritis in men
- How to cook funchose at home
- How to count your menstrual cycle
Windows Standard Tools
This method is the most convenient and proven. Using the capabilities of this system, you can solve the problem, spending a minimum of time on it. The procedure is as follows.
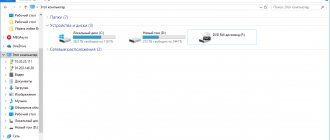
- Visit the Start menu and search for Devices and Printers.
- Search for the name of a specific printer that is currently connected to a computer device.
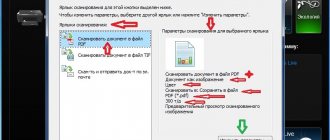
- Click on the icon and then click on the “Start Scan” button.
- Specifying data such as profile, color format, feed, file type, resolution, contrast and brightness settings.
- Using the Preview option for pre-checking purposes.
- Clicking “Scan”, waiting for the process itself and the subsequent appearance of the window for importing images and videos.
- Importing with preliminary opening of parameters.
- Sending the finished file to the folder in which it will be placed.
How to scan photos to a printer
Nowadays, more often than not, people print digital photos from a computer, but sometimes a situation arises when they need to be scanned. It is important to configure the MFP correctly to ensure high-quality images. The procedure for scanning a document to a computer from a printer is as follows:
- Connect the MFP to your computer and turn it on. To digitize photographs, you need to check that they are free of stains, lint and other dirt.
- The photo must be placed face down on the scanner glass.
- It is better to scan photos using a program on your computer. This option will provide the opportunity to make adjustments during preview.
- In the application, specify the scanning type (black and white, color) and set the format to “Photo”.
- Set the resolution to the maximum value. This way you can scan the photo in better quality.
- If you want to copy the file well, then you should not make changes to the settings during the process or lift the lid.
- After the procedure, save the file in any location convenient for you on your computer.
- Use a graphic editor to adjust the image. It will give you more options than a scanner program.
Paint program
This program is standard and easy to understand. To use it, you need to follow a number of simple steps:
- launch the application using the special “Start” button;
- click on the “File” tab;
- select the scanning method - in this case - from a camera, but there is also an option - from a scanner;
- wait for the scan preparation process to start;
- select file type;
- adjust the resolution, as well as determine the optimal image brightness setting.
After starting scanning, the user will see the picture he needs or a scan of a document on the screen. All that remains to be done later is to save the document in the required graphic format. The main advantage of this program is that there is no need to download and install additional products. That is, to get started, it will be enough to activate the “native” option and perform the simplest actions.
Scanner
Adding a scanner manually
If you could not find your scanner among the connected devices, we will register it in the system manually:
- Click on “Start” and select “Settings” from the rising menu;
- In “Settings” select “Devices”;
- In the window on the left we need to select “Printers and scanners”;
- After this, we need to click on the big “+” in the right window at the top of the window;
- We start “Searching for our device”;
- If the system did not find it, then click on the link “Required... in the list”;
- Next, we need to select “My printer is quite old” (or select it by name).
ABBYY FineReader
This program is designed to recognize text from scanned PDF images. There are versions in different languages, including Russian, and in just a few clicks you can recognize and compare files. The latest version includes an automation tool called "Hot Folder". With its help, it will not be difficult to assign a folder for document processing.
The ABBY Fine Reader program has many advantages over competing products:
- high degree of recognition accuracy equal to 99%, which is associated with the work of advanced OCR technology;
- decent speed of work – one sheet takes about 15 seconds;
- an impressive number of input file formats and documents for saving;
- simplicity of the Russian-language interface;
- the possibility of machine learning, which leads to improved recognition quality;
- digitization of documentation in just one click;
- ability to process papers according to schedule.
FineReader (Android and iOS)
A premium subscription to this application costs RUB 399. per month, but the first five documents can be processed free of charge. To do this, open the app and tap on the camera icon in the bottom right corner of the screen. Then point your phone at the document and wait a bit: the application will take the photo automatically. If you are satisfied with the result, click “Use” - “Done”.
Be careful: this reactive program takes the photo before you can even properly aim the lens at the document. If you're not willing to pay for a subscription, it would be a shame to lose one of the free attempts.
FineReader does not do a good enough job of removing creases from a document: where they were, black dots remain after processing. Only some of them were removed manually directly in the program
VueScan program
This is a universal software that is compatible with many types of equipment and provides the ability to fine-tune and process images. He also does an excellent job with documents. The application is constantly updated, so it is easy for it to support numerous scanner models. Setting up basic scanning parameters will not take much time.
Thanks to its extensive functionality, this program will provide flexible preparation for all processes and get excellent results. The application is universal and will be an excellent alternative to software. The principle of its operation is quite simple. You just need to download and install the utility, and then start scanning and wait for the result. He will appear in just a few minutes.
Paper for printer
Installing the scanner
It connects to the PC via a USB cable, after which the firewood is installed. The OS copies them automatically. But, if the scanner is old, then the system may call your device “Unidentified”. Therefore, we download firewood from the resource of the device’s creators. For this:
- Connect the device to the PC;
- An automatic installation should occur;
- Did you install the drivers successfully? So you can scan. Not successful? Then we do the following:
- Load the driver;
- We reboot the OS.
Scanner Wizard
After the scanning device is connected to the computer, you need to install drivers. To do this, perform the following steps:
- the use of “Plug and Play” technology; if the desired option is present, the monitor will indicate “New equipment found”;
- you need to click on this item and read the information;
- click on the search engine icon “Yes, just now”;
- Click “Next” until the system finds the tool and begins installing it.
Faxes and scanning Windows 10, 8.1, 7
- First, you need to connect the printer to your computer, and don’t forget to turn it on. Then, enter the word “Manager” into “Search” and go to “Device Manager”;
- In the manager, your device will most likely be in the “Printers” section. There should not be an exclamation mark next to your printer;
- Next, enter the word “Faxes and Scanning” into “Start” and go to the element that appears;
- A new window will open where we can see which faxes we have previously sent or received. You can also see scanned files in the window. In this window we are interested in the “New Scan” tab. Click on it to start scanning;
- Now we can configure our scanning parameters. For example, we will show the “File type” (pdf, docx or other image), resolution (what quality the image should be in. For example, from 200 to 1100 DPI), brightness level. This setting will make it possible to obtain a higher quality picture. You need to look at the printer model, which is shown at the top left of the window. If your device can scan 2 sides of sheets at once, note this in the “Feed” command;
- After you have created the necessary parameters, it is advisable to preview the future result. Did you like him? In this case, we begin scanning;
- It is possible to save the settings that you have made in a separate profile (in this case, you will not have to configure them again);
- Now the time scan will take place depending on what settings you have chosen. For example, 20-30 seconds. The result will be saved in the “Factory settings” folder. Mostly in the “My Documents” directory.
Special software
Any printer or MFP comes with a disk on which drivers and software are installed. When using this method, the following actions are performed:
- opening a list of programs;
- application search;
- launch;
- pressing the scan button;
- selection of type, format, brightness and resolution;
- specifying the destination folder storage location;
- correct shortcomings, if any.
Photo printer paper
How to save scanned documents
Some “native” applications for MFPs do not save scanned files, but simply open them in an application for viewing images. With this option, you simply press the key combination “Ctrl+S” and select the folder where the document should be placed. It is better to install software that has been tested by other users and can save photocopies automatically. Adobe Reader or DjvuReaser are popular among people. Simply set the image format and storage location.
The device may scan your file with black margins, and before saving them to your computer, be sure to trim them off in the editor. The standard resolution is 150 dpi, for official references it is 300. The size of the final file is affected by the format in which you saved the electronic document, for example, jpg has the smallest value, and tif and bmp are much larger.
Possible problems
Many problems can arise during the scanning process, their list is as follows:
- all kinds of errors (the reason is the wrong choice of driver);
- the appearance of vertical lines in the image (this occurs due to the accumulation of dust on the surface of the glass slats);
- lack of a finished image (the settings are not suitable, they need to be set again);
- image skew (no corresponding width adjustment);
- slow speed (lack of consistency in resolution);
- the finished image does not feed (the paper is not inserted correctly into the printer);
- poor image quality (there can be many reasons, the most common of which is incorrectly inserted paper, clogged device, lack of correct settings).
List of preparatory work before scanning
An important point in working with any office equipment is proper preparation for the immediate process. Scanning photos is no exception. To ensure that the device is working properly, you should perform several simple steps to check and make preliminary equipment settings.
- If you have not previously used your printer to obtain scans of documents, then it is worth finding out for sure whether it can perform such tasks. A regular device doesn't do this. What you need is an MFP (multifunctional device) that is equipped with a flatbed scanner.
- Check the quality and availability of connection with your computer or laptop. Problems often arise if the connection is made via WiFi or local network. A more reliable connection between a PC and a scanner works via a USB cable. If you can choose the type of connection, use the latter method.
- Sometimes the user even simply forgets to turn on the equipment to the network. In addition to connecting to an electrical outlet, you need to “activate” the device by pressing the corresponding button or switch on the scanner body. Note that after “booting up” the device, the indicators should stop blinking, and only one remains lit. In 99% of cases it is a green LED.
- When you plan to use an MFP for scanning that previously only printed, you may also need to install software for the scanner. Alas, without this program it simply will not work. You can download drivers on the equipment manufacturer’s website, indicating the exact model name from the label on the case.
Features of working with specific MFP models using the example of Canon and HP
How to scan to computer using a Canon printer
To scan documents using technology from this well-known brand and recognized leader in the production of printing devices, the first step is to install the correct drivers. They are on the disk included in the kit. The official website also contains a comprehensive archive of installation files for installing software for all models.
To obtain a copy using a Canon scanner you need:
- Open the lid.
- Place the document or photo face down.
- Press the “Scan” or “Start” button on the device itself.
- Remove the copy from the output tray.
Scanning via a PC is carried out by using the “Scan Wizard” of the operating system or using Canon’s proprietary MF Toolbox utility, which offers a wide range of useful functions for copying, scanning and even image editing.
Canon is one of the leaders in the production of printing equipment
How to scan to a computer using an HP printer
A company that competes with Canon in the printing device market. To work with a copier or scanner, you need to install the appropriate driver, which can be supplied as a disk or downloaded from the official website. Also, for ease of use, the user can install the proprietary HP Scanner Utility. This feature is built into all drivers that were released after 2011. It contains a large number of scanner settings. The scanning process itself starts in the application, which opens after selecting the “Scan a document or photo” item.
HP offers users a convenient tool - a solution center that will help with scanning and setting up MFPs
Also, for device models that were released after 2010, the HP Solution Center application is available, which allows you to launch scanning jobs online, change settings, and save received scans in various formats.
Using HP Solution Center, you can automatically attach scanned documents to an email. This feature is available by default for Microsoft Outlook, Live Mail and Mozilla Thunderbird. If you use other email clients, you need to set up a local account.
CamScanner (Android and iOS)
This application is also not free. A weekly subscription to it costs 299 rubles, a month – 799 rubles. Even after activating a paid trial subscription, the application constantly shows bright, annoying pop-ups.
To make a scan through this program, click on the blue circle with the camera sign at the bottom of the screen, point the camera at the document and take a photo. Please note: above the shutter button there is also a horizontal menu where you can select the type of your document.
“Single mode” – for scanning 1 page. “Batch mode” – for scanning a multi-page document. “Book” – for scanning a spread and automatically dividing it into pages.
Of all the paid programs, CamScanner showed the worst results