Low ambient temperature significantly reduces labor productivity and living comfort. Therefore, heating domestic and industrial premises performs an important function that requires significant financial costs for the purchase of special equipment. To save money on heating appliances, you can assemble a heater yourself. Which is especially important for those rooms and locations where there is no need to care about its aesthetic appearance and design.
Homemade heater from a cast iron battery
How to heat a living space if there is no central heating or gas?
The same change house, dacha or small country house? We will consider the option of a homemade safe heater made from a cast iron radiator; it can be used as an auxiliary or main source of heating in a room.
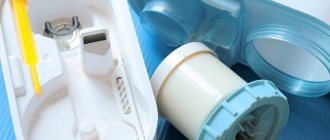
To make a homemade heater you will need:
- The battery is cast iron (aluminum or metal will not work).
- Closed heating element with a power of 0.3 to 0.8 kW (depending on the number of battery sections).
- Air thermostat.
- Silicone seal.
- Futorka.
- Plugs for cast iron radiator – 2 pcs.
- Valve for bleeding air from heating radiators STD 7073V (Maevsky valve).
Homemade heater made from a cast iron battery and heating element.
Construction stores sell stainless steel heating elements with a brass threaded plug specifically for a cast iron battery.
You need to select a heating element based on power depending on the number of battery sections.
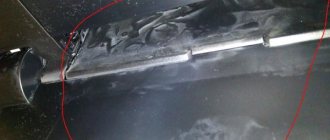
An electric heating element is screwed into the cast iron battery into the lower threaded connection through a gasket.
The opposite bottom hole and one top hole of the battery are screwed in with a plug.
In the opposite part of the battery from the heating element, a cast iron fitting is screwed into the upper threaded hole. We screw a faucet with a handle for releasing air into the futorka (Maevsky faucet).
The installed battery is filled with water; to do this, you need to unscrew the top tap, insert a hose with a watering can into the hole in the fitting and fill with water. The battery is filled until water begins to flow out of the battery opening. You can use ordinary water, but it is better to use distilled water so that there is less scale on the heating element. The capacity of one section of a cast iron radiator is approximately 1.45 liters.
Why is it not recommended to use steel and aluminum radiators? The volume of water in an aluminum heating radiator (1 section) is about 0.3 l. This amount of water does not ensure proper circulation throughout the entire battery.
An electric heating element can be immediately connected via a cord and plug to the electrical network, but it would be correct to connect an air thermostat and set the temperature value.
A homemade heater made from a cast iron radiator reaches a temperature of 80°C in 1.5 hours and then maintains the set temperature.
Do-it-yourself vapor-drip heater
This type of heater is assembled similarly to an oil heater. Except for a few differences:
- The heating element must be low-power;
- the body must be stainless, otherwise the homemade vapor-drip heater will not last long;
- Instead of transformer oil, you need to add a small amount of water.
The body can be welded independently in the form of a tubular radiator using stainless steel pipes.
To avoid steam rupture of the housing, install a safety valve on it.
Technical characteristics of homemade heaters
In most cases, home-made heat generators are a copy of those devices that are commercially produced by official companies. They may be inferior in quality to the original in terms of technical characteristics, but for a number of reasons, apartment owners still want to assemble such a unit on their own.
The fact is that when making it yourself, the equipment is several times cheaper, since improvised means are used during assembly. It will also be possible to assemble the unit of the required size and dimensions, and independently select a housing with the desired strength. This means that the master chooses all the technical characteristics himself, based on the size of the room that needs to be heated. For example, if heating elements are used to assemble the apparatus, then only two samples will be suitable for heating one room. More than 4 heating elements per room are usually not used.
A DIY battery heater may violate operating conditions
But it should immediately be noted that a self-made heater may violate the operating conditions drawn up by official manufacturers. A homemade product is not as safe as a purchased unit. The heating device will be unpredictable and may result in unpleasant consequences for others. This is due to many factors:
- Homemade heating devices often cause fires.
- There are also no legitimate manufacturer warranties.
- The technical characteristics of a homemade device are uncertain, and if assembled inappropriately, the result will be an unaesthetic design.
But if all these shortcomings do not frighten the master, and there is no desire to purchase a heating device in a store, then you can proceed to assembling the heater yourself.
Requirements for a homemade device
Most of those who want to try their hand at making a heater themselves are unlikely to strive for too difficult a job.
And the purchase of a large number of different technical elements and components, whose cost is quite comparable to the price of the finished product, is hardly economically justified. Thus, the future device should be:
- easy to install;
- productive;
- economical in energy consumption;
- safe;
- profitable, that is, the costs of its production should be minimal;
- convenient;
- compact.
Considering existing heaters produced by industry, we can conclude that all these requirements are met by devices operating on the principle of infrared radiation. More precisely, the so-called thermal films. The material generates thermal energy that is transferred to objects, which, in turn, heat the environment. This heating method is considered the most effective, since the generated heat is not wasted. Accordingly, the efficiency of such a device is very high.
Criteria for selecting the required materials
Since a homemade device is assembled from units that have already been used, first of all it is necessary to assess the condition of the pipes. Particular attention will need to be paid to their walls. Their thickness should be several millimeters. If corrosion occurs, it is undesirable to use such pipes or be sure to eliminate all defects before use. All rust will need to be thoroughly removed from the metal with a brush, and then covered with an anti-corrosion compound so that the problem does not arise in the future during operation.
For production, pipes with a diameter of approximately 12 cm are usually used. Sheet metal of the appropriate size is used to plug the ends.
To make bypass channels and fittings, you will need to use pipes of a smaller diameter, which can eventually be connected to the heating system. The threads on the fittings are pre-cut, for this reason the appropriate equipment is required - a tool (for creating external threads) and a tap (for cutting internal threads).
A DIY oil radiator can be made portable. In this case, small pipes will be used, and oil will be used as the coolant. Heating elements are used instead of heating elements. The choice of this component depends on the area of the room that needs to be heated. Home craftsmen often install an additional thermostat on such a device, which periodically turns the heating element on and off.
For good fastening to the wall, you will also need strong hooks that can support the weight of the resulting unit. To create a more aesthetic appearance, they can be purchased in the store. But if you don’t want to spend additional money, then strong reinforcement bars that need to be fixed in the wall are also suitable. It is advisable to first paint the hooks in the same color that was used to paint the heating device - this way the fittings will become invisible.
Installation of heating elements
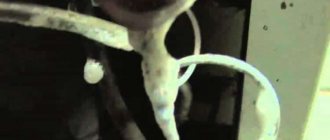
The electrical part of a homemade heater is quite simple in design. A heater, a connecting wire with a plug - that’s all you need to install it. To begin with, a grinder is used to cut out a metal plate to which the heating element will be attached. A hole is drilled or cut out by electric welding in it according to the seat and fasteners of the heater. When this part of the work is completed, the plate is welded to the end of the lower pipe left for these purposes. After processing the welding seams, the heating element is installed in its place.
The gasket between the heater and the heater body is made of thermo-oil-resistant material (special rubber). The electrical connecting wire is quite suitable from an old electric iron. At this point, the assembly of the waste oil heater with your own hands can be considered complete. All that remains is to fill in the coolant and plug in the device.
Oil is poured into the heater in an amount of 85% of the internal volume of the heater.
Types of homemade heaters
The most popular are two types of homemade heaters. This is a heater made from a heating element battery, as well as an oil unit made from a battery. In most cases, it is these that home craftsmen try to recreate with their own hands. To carry out the procedure correctly, you must familiarize yourself with all the information about the design before starting work.
Heater made of battery and heating element
Electricity and liquid/solid fuel for space heating are quite expensive options. That is why residents of apartments or private houses are interested in the question of how to make a heater from a cast iron battery so that it costs as little as possible and consumes little energy. For this purpose, heating elements are installed, the benefits of which consumers have long known about.
The main merit of a heater made of a cast iron battery is that if it is connected correctly, the device is able to effectively heat small rooms without additional heat sources. For example, such equipment is often used to heat workshops and greenhouses.
Heater made of battery and heating element
A battery with a heating element is an effective autonomous device for heating small rooms or an additional source of heat in apartments or private houses. The heating element is a small metal cylinder with a spiral attached inside. The housing does not touch the spiral due to the insulating filler.
Such a device has a number of advantages:
- High-quality and reliable construction, absolutely safe for human habitation.
- Great efficiency.
- Ease of manufacture and durability.
- Heating elements are unnoticeable because they are installed directly into the heating system, which means they do not spoil the appearance of the room.
- Equipped with a thermostat that helps save energy resources.
- Current consumption is much lower than factory electric heaters and modern floor heating systems.
- To manufacture a unit using heating elements, you do not need to purchase special permits. You just need to place the unit in the pipe.
It is noteworthy that even a person who has never done electrical work can assemble the equipment. You just need to screw the heating element into the radiator socket and connect the equipment to the network. After this, the homemade heating device from the battery is ready.
It is important to note that the heating element must be located exclusively in a horizontal position. The heating device is connected to the electrical network only if there is a coolant in the system. To control safety, the heating element is equipped with special protection against overheating.
The heating element should only be located in a horizontal position
The modern device is equipped with several operating modes, so it can be used as the main source of heating and periodic or emergency. In the second case, it is very beneficial to use such technologies if it is necessary to heat a dacha where a person does not live permanently.
For the manufacture of heaters, heating elements are selected with the required power - depending on the area of the room that needs to be heated.
Oil heater from battery
Typically, oil heaters are used not as the main type of heating, but as an auxiliary one. In the event that central heating cannot fully heat the room, then this option comes in handy. Often this type of heater is installed in small rooms where factory heating is not provided.
Depending on the heating power, from 1 to 4 heating elements are used to manufacture the structure. Usually one or two is enough.
To work you need to purchase the following materials:
- Cast iron pipe grade MS-140.
- Heating element of the required power.
- Technical oil. Experience suggests that the best option is curling oil in a transformer. It can withstand high temperatures and is safest for humans. But there is also a drawback - high cost.
Oil heater from battery
To assemble, you need to follow the instructions:
- The heating element is placed in the end part of the lower collector of the battery.
- The back wall of the equipment is grounded.
- The oil drain hose must be moved to the lowest point of the battery. This is very important to do, because if the unit is large, then to drain the oil it will need to be tilted, which is inconvenient to do due to its weight.
- A plug is installed in the upper end.
- The hole above the tap is plugged with a Mayevsky tap.
The homemade heater is ready. Making a heater is not difficult if you follow the instructions.
It is important to know that the oil will expand very strongly when heat is applied to it, and therefore it will require space inside the cast iron radiator. This means that the container must not be filled completely - 80% is enough.
DIY gas heater
This device will heat the room both by convection and by infrared radiation.
Here's what you'll need to make it:
- gas burner and valve;
- hemispherical household sieve;
- galvanized steel sheet;
- steel mesh.
The device is made according to the following scheme:
- From a sheet of galvanized steel, using metal scissors, you need to cut out two blanks that look like a circle (the diameter should correspond to the diameter of the household sieve) with “ears”.
- You need to bolt a gas burner to one of the blanks on one side. Next, you need to bend the “ears” of this workpiece in the direction opposite to the burner and screw a hemispherical sieve to them so that the burner is inside it. The sieve plays the same role as a heat trap in a candle heater.
- Now you need to take a metal mesh and attach it in the form of a cylinder to the same “ears”, so that the sieve with the burner is inside. Rivets should be used as fasteners. Now the mesh with a round piece attached to it resembles a pan in which the burner and the hemispherical sieve covering it are placed.
- Cover the “pan” with the second piece, bending its “ears” upward. We rivet the upper part of the mesh cylinder to these “ears”.
The heater is ready. All that remains is to connect the hose from the gas supply line to the burner.
Periodically there are interruptions in heating, but there is no heater? You can quickly make a candle heater with your own hands, and without significant costs.
You will learn in this topic what nuances you need to consider when choosing a ceramic heater.
Heater made of battery and heating element
When it comes to deciding how to heat a room: electricity or solid/liquid fuel, consumers are confused by both options because of their high cost. Therefore, many are interested in the question of how to make a heater from a cast iron battery so that it is cheap and does not require special care.
Craftsmen have long been using the advantages provided by installing a heating element. Its main merit is that, with proper connection, it can easily heat small rooms, for example, a greenhouse, garage, workshop or chicken coop, without additional heat sources.
A cast iron battery with a heating element is, in fact, an effective way to autonomously heat a small room or use it as an additional heat source in an apartment in a city heating network.
A heating element is a metal cylinder with a spiral installed inside. The walls of the tube do not come into contact with the spiral due to insulation with a special filler. Installed in a heating device, such a homemade heater made of a cast iron battery has the following advantages:
- This is a reliable design, completely safe for human life.
- This device has high efficiency.
- They are simple and durable to use.
- Heating elements are almost invisible, as they are installed directly into the heating system.
- Since they are equipped with a thermostat, they help save energy resources.
- The amount of electricity it consumes is significantly lower than that of conventional electric heaters, boilers or underfloor heating systems.
- To make such a heater from a cast iron battery with your own hands, you do not need any permits. The heating element is simply mounted into the heating network pipe.
Even a person far from electrical work can install and connect the heating element. As a rule, they are sold complete with parts for installation and protection, control devices and elements for connecting to the electrical network. The heating element is simply screwed into the radiator socket and plugged into the outlet.
It should be remembered that the heating element must be installed in a horizontal position. You can turn on the device for heating the room when there is coolant in the system.
To control safety, the heating elements are equipped with double overheating protection. Control sensors are located both inside the device and outside.
Modern heating elements for connecting to cast iron radiators are equipped with two operating modes, which allows them to be used as the main source of heating, and then they are turned on at full power, or as an emergency or periodic one. In the latter case, it is beneficial to use such technology, for example, in dachas where people do not live permanently, but care must be taken to ensure that pipes and radiators do not freeze.
To make efficient heating from cast iron radiators with your own hands, you need to choose a heating element of suitable power. To do this, a calculation is made taking into account the required heating of the coolant and its quantity in the battery.
Mini garage heater
Sometimes a very compact heater is required for certain purposes. In such situations, a mini fan heater made from an ordinary tin can can help out.
To make it, take the following steps:
- Prepare a large tin can of coffee or other products, a computer fan, a 12 W transformer, nichrome wire with a cross section of 1 mm, and a diode rectifier.
- A frame is cut out of PCB according to the diameter of the can and two small holes are made in it to tension the incandescent coil.
- Insert the ends of the nichrome spiral into the holes and solder them to the stripped electrical wiring. For variability of modes and reliability, several spirals are connected in parallel and a power regulator is installed.
- Assemble the electrical equipment of the heater. All connections are well soldered and insulated.
- Mount the fan inside the can with bolts and a bracket.
- The electrical wires are secured well so that they do not overheat and do not fall into the cavities of the fan when the heater is moved.
- To allow air access, about 30 holes are drilled in the bottom of the jar.
- For safety, a metal grill or cover with holes is put on the front.
- For stability, a special stand is made from thick wire.
- Plug in and check the device.
Such a small electric heater will very quickly warm up the garage if you need to make urgent repairs. It will be needed in the winter at the dacha, when there is no time to light a fire in the main stove.
Oil radiator from MS-140 battery
As a rule, oil heaters are used as additional heat sources if central heating cannot cope fully. Sometimes they are used to heat small rooms where heating is not installed.
In this case, knowing how to make an oil radiator from a cast iron battery, you can save a lot on both the purchase of a new device and its operation.
Depending on the power required from the heater, its manufacture may require from 1 to 4 heating elements. As a rule, one or two heating elements are enough to use such an oil radiator in everyday life. To work you will need:
- Classic cast iron battery, for example, brand MS-140.
- Heating element of suitable power.
- Technical oil, but according to craftsmen, the best option would be to use electrical oil, which is poured into transformers. It is resistant to high temperatures and therefore safer. The only drawback of transformer oil is its high cost.
The modern market of thermal technologies offers heating elements specially adapted to work in the MS-140 cast iron radiator. It is better to look for and buy a ready-made device than to try to calculate on your own what power, shape and size of the device will be required.
It is very easy to make an oil cooler by following the steps in the right sequence:
- The heating element is installed in the lower manifold of the cast iron battery from the end part.
- The rear wall of the structure is grounded.
- Move the oil drain hose and ball valve downwards. This is important because if the media drains, the heavy battery case filled with oil may be difficult to tilt.
- A plug is placed on the upper end hole above the heating element, and the hole above the tap is closed with a plug with a Mayevsky tap.
When heated, oil expands greatly and will require space inside the cast iron radiator, so fill the container only 80-85%.
Using radiators
Selection by heat transfer
So that the radiators cope with their task, i.e. provided a comfortable microclimate, we need to purchase a sufficient number of such devices for one room.
And here you can’t do without calculations, instructions for which are given below:
The number of heating points must correspond to the volume of the room
- Power consumption depends on how much volume needs to be heated. Therefore, we need to multiply the area of the room by its height (in meters). So, for a room with an area of 25 m2 with 3 m ceilings, the required value will be 75 m3.
- Next, we multiply the volume by the standard value of 41 W/m3. This value determines the heat consumption per cubic meter of living space for central Russia. In our case, the total volume of heat will be equal to 75 * 41 = 3075 W.
For cast iron models, heat transfer is calculated per section
System installation
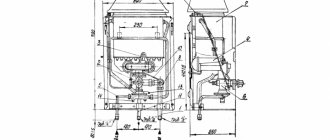
Installing heating radiators with your own hands is a rather complicated process, but this task is still feasible for most craftsmen.
We begin the description of the algorithms with instructions for installing electrical models:
Electric radiator under the window sill
As a rule, stationary electric heaters are mounted on the wall. In this case, for connection, either a socket located in the immediate vicinity of the device or hidden wiring for a permanent connection is used.
- In order for heat flows to be distributed evenly in the room, the battery must be positioned according to certain rules. It is extremely important to maintain the size of the gaps: from the floor - about 100 mm, from the window sill - 80 - 100 mm, from the wall to the back surface of the battery - 30 - 60 mm.
- If the radiator is completely covered by a window sill board, then it is advisable to make holes in it for the release of warm air, covered with plastic grilles. Otherwise, the bottom of the window glass will constantly accumulate condensation as the coldest area in the room.
- The installation of an electric radiator itself is not difficult. All we need to do is install the mounting brackets on the wall and hang the battery on them.
Water heating systems
With water heating it is much more difficult:
First you need to select a connection scheme. This determines how efficiently heat redistribution will take place. Possible schemes are presented in the images in our article, so during installation you must keep this information in mind.
Connection diagrams and heat losses during their implementation
- Secondly, we need to lay heating pipes. As a rule, steel or polymer products with good heat resistance are used for this purpose.
- After this, we install the radiator itself on wall or floor brackets. The heaviest batteries are made of cast iron, so the most powerful fasteners are used to secure them.
- Finally, you need to connect the radiator to the pipes. Most often, threaded connections are used here, which must be as reliable and tight as possible.
Connection fittings
After completing the installation work, it is worth testing the system
If you have not done this, then it is important to follow the announcements about the beginning of the heating season: only the first launch of a test portion of the coolant will finally demonstrate how high-quality the installation was
Heat exchanger for a boiler made of cast iron battery
Many craftsmen, in order to save money on heating in autonomous heating systems, install heat exchangers in furnaces or boilers. Their main task is the transfer of heat that is generated during the combustion of solid fuel.
For a design to be truly effective, it must have the following characteristics:
- The larger the heated surface area, the more heat it can transfer.
- The material from which the heat exchanger is made must have high heat transfer.
- The device must be resistant to temperature changes.
As practice shows, the best and cheapest option is to assemble a heat exchanger from a cast iron battery. It is suitable for the following reasons:
- From the radiator sections you can assemble a device with the required heating area. If you use old cast-iron batteries, you first need to disassemble and wash them, and then, knowing how to assemble a cast-iron battery, make a structure of the required length from it.
- Cast iron has sufficient thermal conductivity and is at the same time resistant to the aggressive environment that forms inside the furnace.
- Sufficiently wide channels of the cast iron battery are able to freely pass water from the heating circuit, which requires high movement speed to effectively heat the house. To ensure such circulation, it is necessary to create a significant temperature difference between the incoming and outgoing water. The larger it is, the faster the coolant flows through the network.
When assembling cast iron heating radiators with your own hands to mount a heat exchanger from them, you need to replace the gaskets with special asbestos threads, pre-impregnated with graphite lubricant.
Depending on the size of the stove, you can use several sections of cast iron radiators or even arrange them in two rows. Assembly is carried out in the same way as for connecting to the city heating network. For this, adapters, bends and corners are used, and after connecting all sections, the structure must be checked for leaks. To do this, water is supplied to it under pressure.
You cannot install a heat exchanger in a furnace without checking its reliability and tightness.
The best place for such a device would be a chimney. There the cast iron will be protected from open flames, which will ensure its safety. If you place a heat exchanger in a firebox, then the flame on one side and the cold water that enters it through a pipe on the other can cause strong temperature changes that it cannot withstand.
What to learn to make an oil heater
The container must be sealed, the oil does not boil, but burns. The flash point is close to 200 degrees Celsius. Unrefined varieties polymerize in air. A tank of any configuration is suitable, but the one sold in the store serves better (increases maintainability). A structure made up of sections is suitable. Required theory:
- First, the tank is filled with oil to 85%. The rest of the space is taken up by air. This is done so that the oil does not rupture the tank, otherwise the container will not withstand the thermal expansion of the liquid. But the air cushion absorbs thermal shock. Therefore, when you turn the oil radiator upside down and backwards, you hear a dull, menacing knock. There is nothing wrong, just air bubbles find a comfortable position and periodically float to the surface, bursting.
- Take clean, heat-resistant oil. The first requirement is fulfilled to prevent the formation of scale on the heating element, leading to an emergency. The second follows from operating temperatures. In an oil heater it often goes over 100 ºС.
- The heating element is selected according to power, but without a magnesium anode. There is a dilemma with this silver rod. In fact, the magnesium anode protects the spiral or tank walls from destruction, taking the blow of electrochemical corrosion. In this chain, aluminum is the victim, and copper is the aggressor. But a magnesium anode will not help. Oil is an insulator and quenches electrical corrosion. Secondly, shavings from the magnesium anode would quickly render the heating element unusable. This would settle to the bottom, quickly destroying the coil. Oil is not water; adhesion is not canceled.
Read also: Traffic signs with explanations and pictures
- It would not be recommended to combine metals in the design of an oil heater tank that form an incompatible electrochemical pair: aluminum and copper. In the case of a copper heating element, the use of steel is undesirable; stainless steel is allowed. The outside of the device can also get wet, which will cause corrosion with the ensuing consequences. There are at least two disadvantages: we didn’t bother to find out the internal pressure, but we believe that it is considerable, and when the oil leaks out, it can catch fire if air gets to the heating element. It's helpful to know what materials to use. If the heating element is steel, it is allowed to embed the element into a cast iron heating radiator; for a copper one, it is better to find bimetallic batteries and stainless steel pipes. This way you gain confidence that the structure will not tear over time.
- For proper design, know how the oil circulates. In factory radiators the process occurs naturally. The heated oil rises in the area of the heating element and falls on the opposite side. It is clear that in modern bimetallic radiators, where sometimes the vertical passages are extremely narrow, the number will not work. In this case, make a tank with a heating element and force oil through the channels. Please note that the radiator tubes are narrower than those of cast iron. This will not allow the heating element to be placed inside. It makes more sense to create a design based on a tank. For those who are determined to insert a heating element into an old cast-iron battery - and the idea is indeed tempting - it is useful to learn how to use the tool.
Circulation without expander
What role do air pockets play? As it warms up, the liquid inside the battery expands and the pressure increases.
Without air pockets there will simply be no compensation for thermal expansion. There is no expansion tank provided in the design.
These pockets do just that. Homemade expanders only spoil the appearance and help evaporate the liquid from the heater.
This is especially dangerous with anti-freeze agents and their mixtures (50% antifreeze or antifreeze + 50% dissolved).
Also, a closed system without an expander, due to the creation of pressure, helps reduce noise when the heater operates. Noise is a phenomenon of cavitation, when microbubbles of gas are separated when the heating element is heated, and their appearance directly depends on external pressure.
Even 1.5-2 bar will make the battery much quieter.
However, the air inside the sections also poses a hidden threat. If the battery overheats (the heating element does not turn off, the relay contacts are stuck), the pressure will increase more and more.
Having reached a critical point, the radiator will burst. A sharp piece may fly off from it, or you will simply be scalded by hot steam.
What happens if the battery is filled up to the neck, without any remaining air at all? In this case, the pressure will increase much faster, and one of the sections will crack at one “wonderful” moment.
As a rule, this is not accompanied by any explosion. But due to the lack of an expander, we need air pockets in any case.