Content:
- 1 Dead pixels: what are they, where do they come from and how to get rid of them
- 2 When is a dead pixel test necessary?
- 3 Warranty service
- 4 How to visually check the screen for dead pixels
- 5 How to check for dead pixels online
- 6 How to repair dead pixels yourself
One of the most annoying problems with monitors or LCD TV screens is the appearance of “dead” pixels. It is noteworthy that there is no escape from this problem - there will always be dead pixels, it is important that their number does not exceed the permissible limit. Only the premium segment of TVs is free from such shortcomings, but the price of such devices will be appropriate. 90% of buyers in any household appliances store pay attention to TVs of the second (II) and third (III) classes, which are considered optimal in terms of price-quality ratio. If you trust the seller and discover at home that the TV has a lot of dead pixels, it will be almost impossible to return it, because many manufacturers warn that this is not a warranty case. Therefore, it is important to check for dead pixels before purchasing, especially since it is not as difficult as it seems at first glance.
Dead pixels: what are they, where do they come from and how to get rid of them
Pixel is the smallest rectangular element with which an image is transmitted to the screen. With minor damage, malfunctions or assembly errors, the pixel may “die”.
The problem appears as dots whose color does not match the image. The reason for the violation lies in the malfunction of the matrix or its damage. You can detect dead pixels as follows:
- "Closed pixels" When you turn on your monitor or TV, some pixels on the screen remain dark. They are called "dead" and look like black dots.
- "Open pixels" Some pixels remain active after the device is turned off and continue to “burn” on a black screen.
- "Stuck Pixels" They are the most difficult to detect. They become visible only if their color clearly does not match the check table.
Checking for dead pixels is necessary if several defects are detected on the screen in one of the areas. In some cases, the defects are so noticeable that the size of the “broken” area is 10 points in length and 10 in width. Sometimes “dead” pixels line up horizontally or vertically and form noticeable stripes. Operating such a device will inevitably cause discomfort.
The matrix of a standard monitor contains about 6 million subpixels. In 4K displays, this figure can be thirty-seven million. A huge number of elements cannot work without failures, but the dead pixel test allows you to avoid buying a TV or monitor with large damaged areas.
Pixel, what is it?
Today, liquid crystal displays are not something unusual or extraordinary. On the contrary, in addition to televisions, they are present in many devices: computer monitors, phones, cameras, navigators and other similar equipment. The basis of LCD or LCD technology is liquid crystals. After light from lamps or LEDs passes through a layer of crystals, a corresponding picture appears on the screen.
The matrix of a color TV is a huge number of tiny indivisible rectangular or round cells called pixels. In turn, each such object consists of red, green and blue subpixels. It is these colors, or rather their combinations, that are considered the basis of color television. The simultaneous lighting of all pixels forms a complete image on the screen. Moreover, the more pixels, the clearer the picture. If you look closely at the display, you can easily see the three colored areas of these objects.
When is a dead pixel test necessary?
When purchasing a TV or monitor, you need to test for dead pixels. Checking helps to avoid red tape with warranty service of the product or with its replacement. To prove that the product can be returned, an examination will be necessary. And only after the matrix has been checked for dead pixels and the presence of defects has been confirmed, can we talk about a malfunction. But this is not a guarantee of exchanging the device for a new one, because the owner will still have to prove that it was not his actions that caused the breakdown.
ISO13406-2 standards state that each monitor may have a certain number of faulty points upon sale.
Different manufacturers have different standards for the presence of dead pixels, depending on:
- how they are located;
- what is the monitor resolution;
- or what is the diagonal size of the display.
For example, LG standards recognize the presence of 10 stuck and 3 “dead” pixels on a 20-inch screen. Samsung's standards call for 7 dead spots, while Dell's have 6 stuck spots and 13 dead spots, depending on which display the fault was found on. Therefore, even a pre-sale check of the Samsung screen for dead pixels revealed several dead pixels in acceptable quantities - there’s nothing wrong with that. But if there are several devices, the dead pixel test will allow you to choose the “healthiest” device.
Cases when you should refuse a purchase - if testing for dead pixels reveals a deviation from the standard:
- if the monitor or TV is classified as class 4 (it can have up to 50 burning points, 150 “dead”, 500 “stuck”),
- if the monitor matrix corresponds to class 3 (this implies the presence of 5 “hot” points, 15 “dead”, 50 “stuck”),
- the second class of monitor quality assumes only 2 burning or “dead” points and only 5 “stuck” points,
- if the monitor matrix belongs to the first class, there should be no inconsistencies or defects on such a product at all.
Most standard brands of monitors or screens comply with the second class. They also need to be checked for dead pixels. The check should reveal no more than 5 malfunctioning pixels.
The class of a product affects its price. For example, monitors from the same manufacturer, but having different classes, may differ in cost several times.
Warranty service
Why do manufacturers produce equipment that already has a number of faulty or defective points? The technology for creating monitors or televisions is complex. Not every electronics brand owner decides to start production of LCD displays. Writing off screens with minor defects will lead to a significant increase in the price of the product. Therefore, manufacturers and sellers have found a way out of this situation by offering the buyer monitors with minor defects at a reduced price. It allowed:
- leave the production of screens at the same levels and produce products in the same volumes without increasing prices,
- buyers will use equipment that has a certain percentage of dead pixels (these cases are not covered by warranty).
But buyers should know and exercise their rights and check the equipment before paying. Pixel testing must be carried out in-store.
Attention! Vendors in select stores often offer dead pixel testing for a fee. On average, the cost of such a service is 1000 rubles. According to the law, the buyer has the right to independently check the equipment he is interested in! Therefore, instead of paying sellers who want to earn extra money, it is enough to take a regular flash drive with you.
But today more and more electronics are bought in virtual stores - via the Internet. Therefore, the customer needs to be able to check for dead pixels at home. For this purpose, special tests or simple but effective programs were created. They are not needed only in cases where dead or burning spots can be detected with the naked eye.
It is important to check for “bitishis” before signing the document on acceptance of the TV!
How to visually check your screen for dead pixels
Installing a standard color grid on the screen is a test for dead pixels, or rather, stuck pixels. The test is a grid of squares, stripes or a specially designed pattern. Any test contains five primary colors that allow you to find stuck pixels. Working with a test program will help determine whether the dead pixels are dead or stuck. While “stuck” pixels can be restored, “dead” pixels cannot be restored.
You can download images to check TVs or monitors for dead pixels
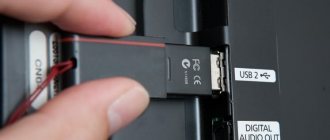
All you need to do is transfer them to a USB flash drive, install the flash drive into the TV in the store and launch the images.
If you test the TV using software, it must be connected to the computer processor. Smart TV can be connected to the Internet via Wi-Fi. There are special online services for this. But sellers are not interested in such checks. Therefore, it is better to take a laptop with you and download test utilities to your computer. You only need to connect to the TV via an HDMI cable and run the test. Software that offers colors to check for dead pixels includes:
- TFTTest.
- Dead Pixel Tester,
- IsMyLcdOk
Each program has several testing modes and allows you not only to test for dead pixels, but also helps eliminate the so-called “stuck” cells.
You can download the program
. The interface of TFTTest is extremely simple - you just need to start the test by pressing one button and the program itself will build a grid indicating dead pixels.
Before checking broken points, you need to run a non-pre-installed application. The Pettern section allows you to select the desired mode and check colors using the Color Selector option. Changing the test mode is done by selecting the Auto Color Cycle option. This program helps you quickly find stuck points. To test different areas of the screen, you can use the Exerciser option. Using a special dynamic area, you can carefully examine any area of the screen.
The second program helps diagnose the monitor matrix. It does not require pre-installation. The program has a special training option that appears on the screen after the program is downloaded.
The matrix is tested using the F2,3,4,5 keys. The program displays:
- painted areas,
- rectangles,
- vertical or horizontal sections.
All programs help flash pixels with several standard colors, so you can get rid of “stuck” pixels. But nothing can be done with the “dead”.
How to check the touchscreen on a smartphone
In addition to dead pixels, the phone may have a much more serious problem with the display. For example, lack of sensitivity in some areas of the screen. So let's figure out how you can check the touchscreen on Android.
Step 1: Developer Section
At this stage we need to obtain developer rights. For this:
- Go to settings.
- Go to the "About device" or "About phone" section.
- Click 7 times on “Build Number” or “Firmware Version”.
- Then the “For Developers” tab should appear in the settings. It is usually located in the "Advanced Settings" section. Enter it.
- Scroll through the list to the “Input” tab, where activate the checkbox next to the “Pointer location” item.
Now you can go directly to checking the touchscreen.
Step 2: Touch Test
Now we will tell you how to check the number of touches your smartphone supports.
It is important that it coincides with the manufacturer’s declared indicator. To do this, place the required number of fingers on the screen. In the “P” tab you will see the number of touches recorded by the phone
The finger locations will also be displayed on the screen.
Step 3: Screen touch test
Budget smartphones often have problems with touches in the corners of the display. To test this, swipe your finger across the corners of the screen. If stripes appear on the display, then everything is fine.
Thus, after reading this article there should be no questions left about how to check the sensor on Android. Follow the instructions and you will definitely succeed. Well, if you have any questions, feel free to ask them in the comments!
How to check for dead pixels online
If the download mode on your computer is limited, then you will not be able to download and run the program. Then you can use online monitor checking services. There are many websites that help you do testing. Among them are:
- Monteon,
- Vanity Monitor Test.
Using the first service, you can carry out seven types of checks. To run a test, you need to click a button and select one of the test types. The test is carried out using a looped video. It helps to detect stuck points and control their refresh rate on the monitor.
The second program helps to quickly detect picture defects. To use it, you must have a browser that supports Adobe Flash Player. The program allows you to select appropriate verification modes. This resource is good because it allows you to “catch” dead pixels not only on a computer monitor or TV screen, but also on a tablet, laptop or smartphone.
How to check yourself
The test runs quite quickly. Moreover, such an option is provided by law. If the seller refuses to carry it out or insists on a paid inspection, it is better to go to another store to make the purchase.
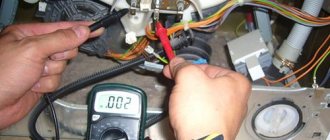
For the test you will need a regular flash drive, it will need white, black, green, etc. You need to start checking after the TV has been running for several minutes, since defects only appear on a heated matrix.
To begin checking for dead pixels on your TV upon purchase, ask the seller to insert a pre-prepared flash drive into the TV. After that, display the images on the screen. So, on a white screen, dark pixels will be clearly visible, and on a black screen, you can see white dots.
Special testing programs are also available. There are quite a few of them, but the most commonly used are:
- Free application for computer on Windows 7,8,10. The website also contains detailed verification instructions, which is very convenient.
- A site that has 9 color pictures that can be opened in full screen on both your TV/computer and your mobile phone.
- Another program with many settings and high-resolution images for tests.
- The easiest site to use. Everything is very simple, there are names of the pictures, you click on each of them and make it full screen.
In terms of application, the second application is simpler, and it was designed specifically for testing LCD screens. Illuminates any area of the display in the desired shade. As a result, all defects can be quickly detected.
If you don’t know how to check your TV using these programs, use the instructions on how to connect your laptop to your TV. By doing this, you will be able to transfer the image from your computer to your TV screen.
How to repair dead pixels yourself
It is important for online store customers to be able to repair broken or stuck pixels on their own. Choosing an option to fix the problem is possible only after testing for dead pixels has been carried out. The test will help you understand how the problem appeared. Among the causes of problems are the following:
- Damage to the control transistor. In this case, “broken” pixels are removed from the monitor screen only with the help of a laser.
- Subpixel freezing. This failure can be corrected using special software. Removing freezes is done using the Bad Crystal program.
- Pixel error. It can be eliminated using the UndeadPixel utility. Dealing with errors is done by using a special area that can be placed over the defect and constantly changes color. Running the program for several hours allows you to eliminate the problem. This program is not suitable for restoring dead pixels.
EIZO Test Monitor will help you fix pixel errors on any device. It includes 24 tests. This makes it possible to quickly identify faults in any area of the monitor. Restoration of violations is carried out according to eight scenarios. The pixel will not only be installed, but will also undergo contrast and brightness calibration. The program helps the user change settings.
There are a number of programs that allow you to remove defects from the screen:
- Bad Pixel is a professional paid service that helps save equipment owners from problems in 10 minutes.
- DeadPix is a universal program suitable for both Windows and Android. It makes it possible to detect and then correct stuck pixels using cyclic color changes.
- PixelHealer is a utility that works with Windows. It helps correct stuck pixels by quickly changing and flickering different colors.
- JScreenFix is an online service. It is suitable for working with a computer, tablet, phone and any other device. With its help you can only detect faulty points. This is done by moving the study area to the desired area of the monitor.
The Internet resource YouTube has also created its own program to restore normal operation of points. This is the PixelFixel service, which allows you to restore points in 12 hours. It is recommended to turn it on and leave it running all night. The high speed of image change is not suitable for a person with normal vision. Therefore, it is better to turn the monitor towards the wall while the program is running.
In addition to using special software, pixel restoration can be done manually. But this method is only suitable for stuck or hot pixels. You need to take a regular cotton swab and gently press the black dots of the screen with it. Then you need to wait 10-15 minutes. After which, the “hot” pixel can work normally, and the stuck one can enter into balance with the other points. But this method of recovery can lead to matrix failure. If you press the cotton swab too hard, the neighboring pixels will also die and the equipment cannot be exchanged or returned.
It is not recommended to carry out technical checks on your own or to physically impact the matrix, as this can only aggravate the problem and lead to more serious problems.
Found a mistake? Select it and press ctrl+enter
- 60
Types of defects and how many are allowed
The permissible number of dead pixels on a new TV is strictly regulated by the international standard ISO 13406-2. The document is quite voluminous; it describes in detail all aspects of the screen’s operation. Moreover, it distinguishes 3 categories of damaged points:
- Open ones - constantly glow white and cannot be restored.
- Closed - non-working pixels, always glow black, can be repaired, but in a service center.
- Colored - the failure lies in the control transistor, as a result the pixel glows in one of the following colors - blue, red, green.
Using special software, you can deal with the problem at home. The Samsung company, and many other well-known companies, divide the TV they produce into four classes. Most produced TVs belong to the second class. First class devices should have no defective points at all.