At the beginning of February, I wrote about how to choose a DSLR camera. Let's say the choice of model has already been made and you are going to the store. In this article I just want to describe the process of checking the camera directly in the store. Once again I would like to remind you that almost always buying a DSLR means buying a “body” and a lens. And testing is divided into four stages: first we inspect the camera, then the lens, then we put it on and test the already turned on camera, and only if everything is satisfactory we proceed to the “assembly” tests. We will leave the issues of checking the lens for another article, but here we will give basic recommendations for the carcass.
So, you came to the store, you immediately need to tune in to a leisurely, calm choice. The purchase is not cheap, if something does not work, then in 90% of cases you will have to go to a warranty workshop (the seller will not replace the product just like that), so it is better to inspect and check everything before paying.
Checking the appearance of the camera
The first thing you need to pay attention to is the appearance of the camera. It is advisable that you be the first to pick it up, i.e. There should be no fingerprints, no dust, and there should be protective stickers on the screens.
Quite often it may be that sellers have already shown the camera. This is not a reason to demand a new one, you just need to test it a little more carefully, perhaps it has some defects and someone refused to buy it, or perhaps they just wanted to hold it in their hands.
When inspecting, pay attention to possible scratches and chips; there should be none at all. All screw connections must be free of screwdriver marks on the heads. Moving parts (doors for memory card and battery compartments) should open and close tightly without problems, and the seals on their internal parts should be in place. Nothing should play or creak. It is worth carefully inspecting the rubber pads in the grip area so that they do not come off.
Enabling and checking the matrix
If everything looks normal, then you can install the lens and turn on the camera. Make sure in advance that the battery is new and there should be no scratches on its contact pads.
The first thing to do is check the camera matrix for “dead pixels”. To do this, in manual mode (M), with autofocus disabled, without removing the lens cap, take a picture with a shutter speed of a few seconds and ISO 400. We download the result to the computer; we most likely will not notice the problem on the camera screen, zoom in to 100% and carefully We inspect the entire field of the photo for “cold” or “hot” pixels. If they are present, then white or colored dots will be visible against a uniform black background. This type of camera needs to be replaced immediately.
Example of dead pixels
Almost all sellers will insist that such pixels are present on any matrix, on any camera. This is wrong. If there are dead pixels, they are hidden using the camera firmware. This procedure is done at the production stage and the matrix must be “clean” in the store. In principle, you can contact the service and they will also hide the defects, but why do extra work and waste your time. If “dead” pixels are located on the periphery of the frame, then you can put up with it, but think about whether you need such artifacts in all photographs without exception.
Checking the Camera Controls and Screens
If everything is in order with the matrix, then the next stage of testing will be to check absolutely all the buttons, wheels and levers on the camera. Feel free to ask the seller what a particular button is for. Pay special attention to the joystick; it should handle presses in all directions without any problems.
The next point is to check the main screen. Again, there should be no unlit or constantly glowing dots on it. Then we go to the upper auxiliary screen, if there is one, of course. The situation is similar, all characters should be displayed. And don't forget to check the backlight of this screen.
The last point is the viewfinder, there should be no visible dust, bubbles, scratches, etc., all focus point indicators should be displayed normally.
Checking the camera electronics
The last check point is to test the camera electronics. Most likely there won’t be any problems here, but it’s better to make sure the camera is fully operational once again.
Take several pictures in automatic mode. First of all, you need to check the operation of white balance, exposure metering and autofocus in different conditions, say, take a picture indoors and from a window. The white balance should not be too biased towards warm or cool tones. The exposure should be more or less even, there should be no strong overexposure or completely dead shadows. Autofocus is highly dependent on the lens, so here we are simply checking the operation of the system itself; there should be no obvious mistakes in both the telephoto and wide-angle positions. Checking electronics is a rather subjective action; if the overall quality of the photos suits you, then most likely the camera is working fine.
Be sure to open the photos you took on your computer to check the recording on the memory card; there should be no artifacts on them.
This completes the SLR camera test. It remains to check the lens and their joint work. How this is done can be found in one of the following articles.
Related Posts
Check your camera sensor
Go into your camera settings and lock the mirror up to inspect the sensor.
The sensor is the most sensitive part of the camera. If it appears damaged, scratched, stained, worn, etc., it is NOT WORTH . No matter how low its price!
Also check the sensor for broken or hot areas. The verification method is similar to checking an LCD monitor for dead and “hot” pixels.
How to check a digital SLR camera when purchasing (sensor, autofocus, shutter)
June 1, 2016
How to check a DSLR camera when purchasing
From time to time I get asked questions “how to check a DSLR?”, “what to check?”, “how to find out the mileage”, and now while I was writing an answer to a similar question I received the following message:
I think this reminder will be useful.
I'm one of those people who doesn't like to spend more money if I can save it. I only bought new DSLR cameras in a store twice (and this was because the price had already jumped, and in our city they had not yet updated the price tag). One way or another, I prefer to take a working camera from an adequate person for 20-40% cheaper than the cost of a new one. The question always arises: “how to check the camera?” There was a case when I bought a camera myself, and the matrix in it was damaged (it was burned out when shooting a video, thanks to lasers for that), by the way, it shot no worse, I just put a patch in LR and synchronized it frame by frame.
WHERE TO START?
For many, having all the receipts and documents is important (I’m not one of them, but it’s always a nice bonus), if this is important to you, then check that all the numbers on the pieces of paper match the numbers on the camera. Nikon (just write/call technical support) and Canon (here is the link) have online checks of cameras for their “dullness”.
APPEARANCE
First of all, you should inspect the camera. If there are abrasions, chips, or dents, you need to clarify how they were received, don’t be afraid of stupid questions.
On my camera with a mileage of 350,000 frames, the rubber bands came off (hello, Nikon! This is a standard problem for them), there were small scratches on the bottom (when you put the camera on the table, willy-nilly, small scratches remain), abrasions from the belt and unloading, and there were also a couple of stripes on the flash. Those. nothing special, it doesn’t affect the way she shoots, just aesthetics. You definitely need to check all the switches and displays, everything should work flawlessly.
BATTERY
Modern SLR cameras do not have problems with power supply; even a simple modern digital SLR camera can take 800-1000 frames. Even if the battery discharges quickly, there are now many good analogues that cost an order of magnitude cheaper than the original, so this is not the most important point. But the condition of the contacts inside the battery compartment should be inspected for rust (if you fill the camera with water, you won’t expect anything good).
CAMERA RUN/SHUTTER TEST
But now you need to find out the mileage of the cameras (the number of shutter times). The shutter itself is a very reliable thing, for example, on my Nikon d700 camera it lasted about 350-380 thousand operations, then I sold the camera, and it is still alive, another example - the Nikon D3s holds and does not assemble, but on its The account already has 800 thousand positives. In general, it’s worth looking at the statistics here - statistics on shutter releases for SLR cameras.
How to find out Nikon shutter mileage
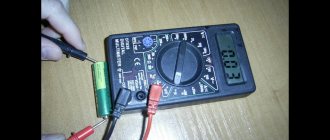
Nikon does not hide data on how many shutter releases have been made; in exif you can view this data using the ShowExif_06-16beta () program
We see that the mileage is only 209,539 frames, for Nikon D4 this is nothing.
For MAC OS users, there is a standard program “viewer.app” - open the image in it and press the command + I combination, go to the “Nikon” tab and look at the “number of releases” item.
How to find out Canon shutter mileage
It's not that simple with Canon. Only when connecting the camera to a running computer.
MAC OS : ShutterCount From DIRE Studio - download and watch
Windows OS: install the program and watch . At the beginning of 2021, only the native program and the method described below are relevant for new cameras; other methods, as far as I know, show anything but the actual mileage. This is often used by Indians/Pakistanis who sell used ones. cameras “like new” at VDNKh and in cheap online stores.
To check/find out the mileage of the camera (or rather the shutter) you need:
- Download and install the program - (here is the link https://amarkov.ru/www.eosmsg.com, and here is the direct link to the download https://amarkov.ru/www.eosmsg.com/eosmsg.exe).
- During installation, keep clicking “next”
- Launch the program (watch the video below)
- Connect the camera via USB to the computer
- We look at the value of “ShotCount”
Here you can see what it looks like (video)
In general, replacing the shutter in a camera does not cost a fortune ( relative to the cost of the camera itself and its service life).
For example, replacing the shutter in Nikon d700 costs ~ 13,000 rubles, and replacing the shutter in Nikon D3s will cost 14,832 rubles, with a guarantee of 150,000 operations (in reality... I don’t even know, see the statistics above).
CHECKING THE VALVE FOR OPERATION
We set the shutter speed to 1/4000, then at 1/8000 . If there are no vertical stripes, then the shutter is still alive; no one knows when it will break.
MATRIX
It is desirable that there is no dust on the matrix. Dust is bad, dust must be removed carefully.
The matrix needs to be checked for hot, cold, and dead pixels. First, a little theory :
What does a “dead/cold” pixel mean?
A dead/cold pixel is a light-sensitive element of the matrix that does not work at all. It is determined by the color and brightness of the pixel. If the photo was taken without light entering the camera, then a working pixel will be close in color and brightness to black. If the pixel is instead white and has increased brightness, then it is not working.
What does a “bad/hot” pixel mean?
A bad/hot pixel is determined by checking its brightness. If the brightness of a pixel is higher than the set threshold (threshold), it is considered faulty and is added to the report. Depending on the shutter speed and ISO value, the bad pixel may work completely fine and will not be added to the list of problem pixels. Such bad pixels are no different from ordinary electronic noise and can be easily removed by noise reduction.
To check the matrix of a SLR camera for broken and hot pixels, you need to:
- Disable noise reduction - Noise Reduction OFF
- It’s best to shoot in RAW without compression (or at least in tiff)
- Set the matrix sensitivity close to the minimum, for example, ISO 100 (or 200, if this is the hardware minimum of the camera under test)
- Set exposure mode to manual - M
- Disable auto focus -AF/MF in MF position
- To check the health of the camera matrix, take three frames without removing the lens cap at different shutter speeds: 1/3 sec, 1/60 sec, 3 sec.
After the test, carefully review the footage at high magnification. It is better to copy the files to your computer and view them on the monitor screen.
- If in a photo taken with a shutter speed of 1/3 sec. there are no gray, blue or red dots (hot and cold pixels), then the matrix has passed the first stage of testing.
- If several dots of gray, red or blue are visible, you should look at the frame taken with a shutter speed of 1/60 sec.
- If no colored dots are visible in this frame or there are significantly fewer of them (hot pixels appear at long shutter speeds), we consider that the camera has passed the first stage of testing.
- Now, look at the shot taken with a long shutter speed of 3 seconds. With a fully functioning matrix, up to 5-6 colored dots (those hot pixels) may appear at a long shutter speed. This is not considered a defect due to the peculiarities of the matrix manufacturing technology. In addition, a small number of colored dots at a long shutter speed will not affect the quality of photographs in any way, because at long exposures, noise reduction is usually automatically turned on and the colored dots will not be visible.
Very long shutter speeds are rarely used in regular photography. It is also possible that colored dots may appear at high sensitivity values - these are also hot pixels, but at high ISO values you also often have to turn on the noise reduction.
But if colored dots are visible at medium shutter speeds in combination with low ISO values, then the matrix has faulty pixels - most likely dead (broken). Theoretically, if there are less than 5 such pixels, then this is not a defect - this is a technology cost . If there are more than 5 dead pixels, then I recommend refusing to purchase.
There is an application called Dead Pixel Test() that simplifies the task of checking the matrix.
Dead Pixel Test – INSTRUCTIONS
The DPT utility is designed to search for dead pixels on the matrix of your camera. DPT also detects hot pixels that can appear at slow shutter speeds and high ISOs, but can be removed by noise reduction.
This program can be used free of charge for non-commercial purposes. Commercial use and distribution of this program without the prior written permission of StarZen Technologies, Inc. is prohibited.
Disclaimer of Warranties
The DPT program is provided “as is”, without any warranty, including compatibility, performance, data accuracy, etc. The user assumes responsibility for using the program and any possible damage caused. Any claims for damaged equipment or software products associated with the use of this program are not considered and claims will not be accepted, either by the author of the program, Michael Salzlechner, or by any supplier or distributor.
HOW TO WORK WITH THE PROGRAM
Keep light out of your camera. To do this, cover your camera lens with a light-proof cap or any light-proof material. When testing from a single-lens reflex camera, also cover the viewfinder eyepiece with a special plug/curtain or any light-proof material. For greater test accuracy, it is recommended to disable in-camera noise reduction for long exposures and high ISOs.
Make several shutter releases with different shutter speeds from 1/30 sec to 2 sec or more.
The best test results can be obtained when testing the sensor in RAW or TIFF mode, since in-camera image processing when saving in JPEG can lead to compression artifacts and false hot/cold pixels that actually do not exist.
Save the test images on your computer. If you are testing in RAW format, convert the test images to TIFF without processing and run the DeadPixelTest.EXE file
Click the 'Browse' button and select one of the test images. Now click the 'Test' button.
The snapshot will be downloaded and file analysis will begin, and you will be able to monitor the progress of the analysis in the lower left field of the program interface. After analyzing the file, the program will display the number of dead and hot pixels and show a histogram of the test image. To the right of the histogram, a report list will appear with the coordinates (X,Y) of problem pixels and their brightness (Luminance)
When you click on a pixel type in the report (Type), you can view it at high magnification in the Preview window.
The maximum number of problem pixels indicated in the report is limited to 100 for reasons of data processing speed and the low probability of having such a number of bad pixels.
PROBLEMS
The test showed too many problem pixels
Make sure the test is completed correctly.
- Use TIFF rather than JPG format.
- Check that the lens cap does not allow light to pass through and is installed correctly.
- Make sure there is no light coming through the optical viewfinder.
- Manually check for problem pixels in any photo editor - the coordinates are given in the report. If you do not find that many problem pixels, check the 'Treshold for hot pixels' and 'Treshold for dead pixels' fields - the optimal values are 60 and 250, respectively.
That's probably all there is to know. Brief summary:
- Documentation
- Set
- External condition (chips, scratches, screens, buttons)
- Battery
- Travel/Shutter
- Matrix
HOW TO CHECK AUTOFOCUS
So. The simplest option is to take a few frames (I always recommend 10) - if you are satisfied with everything and you think that the camera focused on the very object that you indicated, then everything is ok. If you want more details, then read below.
An adequate conclusion about the presence or absence of back and front focuses can be given by an authorized service center of the equipment manufacturer . But you can carry out preliminary a very simplified technique, it’s worth understanding that the photographer’s actions can themselves lead to back focus, for example, if you shoot a person in full view and focuses on the eyes at the central point, and then lowers/shifts camera to reframe the image, we get back focus. The camera's grip, style, focus point selection, and shutter button press all affect focus. Have your lenses and camera adjusted at a service center at least once a year. To ensure the purity of the test, you need to use a tested (adjusted) lens.
It's time to check that autofocus is working correctly, there are special targets for this, if there is no target, then you can use a regular ruler, templates can be downloaded here and
):
A little theory.
Digital SLR cameras primarily use phase detection autofocus . There is a sensor installed in the camera, and it is with its help that phase focusing occurs. This is a fairly complex system that should work in harmony, but sometimes deviations occur. The result of these deviations will be repeated autofocus errors, which are called back-focus and front-focus.
Back focus - the camera regularly focuses not on the subject, but behind it. Front focus , the camera regularly focuses in front of the subject.
It is worth noting that the presence of back and front focus means systematic errors with focusing; if one frame turns out to be sharp and the other is not, then the problem should be looked for elsewhere.
A clear problem with back and front focus is visible when working with high-aperture optics (especially portrait ones, for example, 50mm, 85mm, etc.) - the depth of field will be very small, in this case, disturbances in autofocus operation will be clearly noticeable. Errors in focusing can be compensated by a large depth of field (you can find out what depth of field is here), for example, if you set it to f/3.5, f/5.6, f/8, and so on.
By turning on the Live View mode in a SLR camera, you can use contrast type autofocus . With this type of focusing, there cannot be back and front focus, since its operation does not require separate sensors; focusing occurs directly on the matrix of the digital camera.
CHECKING FOCUS ACCURACY
An adequate conclusion about the presence or absence of back and front focuses can be given by an authorized service center of the equipment manufacturer . But you can do preliminary here’s a simple way to check :
- We take a ready-made camera and a proven lens , the quality is set to a quality that is convenient for you, light settings (ISO 100-200 (minimize noise), shutter speed to avoid blur, there must be enough light (window, lighting fixtures, flashes), I recommend testing on proven ones ( adjusted) fast lenses from 50mm (50mm f/1.4(1.8) or 85mm f/1.4(1.8)) or fast zoom (also start with 50mm)
- Set the maximum aperture - open the aperture to the maximum (minimum aperture number, for example, f/1.4)
- Turn on autofocus (if it is turned off) and select single-point focus mode
- We take a target for testing, like this
- Ideally, the camera should be mounted on a tripod
- The target must lie on a flat surface, the camera must be positioned at an angle of 45 degrees
- Minimum distance to target
- Select a point in the center.
- We focus on the center of the red rectangle with the inscription “focus here”
- The black line with the words “focus here” should be in the center of the frame and at right angles to the optical axis
- I recommend not using serial shooting (use single-frame) and take at least 10 frames, before taking the next frame you need to refocus
- Now we copy the received frames to the computer and examine
As mentioned above, if you see a repeating focusing error in all frames, then most likely you have back or front focus - this can be easily fixed in a service center, and some advanced cameras have fine-tuned autofocus (if there is no I’m too lazy to tell you about this someday, but I’ll tell you the secret right away - the whole procedure is described in the instructions).
If there are other problems with autofocus than those described above, I recommend studying the problem in more detail and thinking about buying a camera. The best thing to do is send the camera to a service center.
PS. There are targets for testing, for example, spyderlenscal (4500-6000 rubles).
If in doubt, ask competent people for help. Good luck!
Which is better Canon or Nikon? Introduction
Editor's Choice National Geographic Russia
Tags: amarkov, amarkovru, d700, EOSMSG video, EOSMSG how to use, , Ivanovo, , real photographer Ivanovo, how to check autofocus, How to check a SLR camera when buying, How to check the matrix of a SLR, How to check the matrix of a camera, How to check the matrix of a camera, How check the mileage of Canon, How to check the mileage of Nikon, How to check a digital SLR camera when buying, how to check a digital camera when buying second-hand, How to find out the mileage of a Nikon shutter, Alexander Markov, Camera MATRIX, CAMERA MILEAGE/SHUTTER TEST, Check the Canon shutter, Check the Shutter Nikon, CHECKING THE SHUTTER FOR OPERATION, reportage photographer Ivanovo, Wedding photographer Ivanovo, family photographer Ivanovo, photographer Ivanovo
When is it better to buy a used camera, and when is it worth buying a new camera?
It is best to buy used cameras after the New Year holidays and the release of a new camera model from a popular brand. After the holidays, the likelihood of catching a good camera on the secondary market is highest, since photographers who received a new camera as a gift get rid of old copies. Those who received an unwanted gift also sell their cameras.
You can buy a used camera in several cases:
- When you have a limited budget and buying a new camera is simply not possible.
- When you need a backup camera, which will be in your backpack for backup.
- When you are not sure that photography is for you, and you just want to try yourself in this matter.
In other cases, it is better to purchase a new camera.
Pros of buying a camera on the secondary market:
- Saving money and the opportunity to buy a better camera for the same money.
- Refund for subsequent resale of used photographic equipment.
Disadvantages of buying a camera second-hand:
- Unpredictability of the result: one camera can work for six months and break down, while the second can plow even beyond its working life.
- Impossibility of 100% verification: even at a photo service, specialists do not give a 100% guarantee that the camera is in working order and will serve you faithfully for a lifetime.
- Risk of buying stolen photographic equipment: if you buy a camera without a box and other components, you risk purchasing a stolen camera.
Weigh all the pros and cons for yourself and make an informed choice.
Lens check
Checking the lens is an important part of checking your photography equipment. The lens may be included in the package or purchased separately, and in this case the buyer should be especially careful. How to check a lens before purchasing so as not to regret the money spent later?
Important! In order not to make a mistake when choosing a lens, even if you have read many reviews and the choice has already been made, it is worth taking with you a camera for which you will purchase a lens and a tripod.
If possible, choose among several copies. Each of them is examined for scratches or abrasions. If this is not done, then there is a risk of purchasing a used lens under the guise of new optics.
It is equally important to make sure that there are no dust particles on the new optics or foreign inclusions, such as bubbles in the glass. To do this, examine the lenses through transmission. The presence of dust in a new lens is unacceptable.
Check the rotation of all lens rings, both the zoom ring and the manual focus ring. The latter is checked manually. When walking, the rings should move smoothly and without jerking.
The lens is put on the camera and several test shots are taken in automatic focusing mode. At this stage, it is important to make sure that there are no strange sounds from the autofocus drive. The sound should be the same with each click.
Check the lens for front focus and back focus. The verification method was described above, but the cause may be not only the camera, but also the lens. It is important to make sure that it is in good working order at the time of purchase, so as not to be bothered by trips to the service center later.
How and what to check
As soon as the buyer receives the camera in his hands, he begins checking the quality. The check begins with a visual inspection of the camera and its packaging. The box must be without damage, because the slightest scuff or dent may indicate that the camera, although in the box, may have been dropped. Such handling may affect the operation of the equipment itself.
The buyer must ensure that the box is complete and all the parts included in the list are present. All parts are in a separate package, and the equipment itself has no fingerprints.
The surface of the new camera should be perfectly clean, and the presence of traces will indicate that someone has already used the camera. This is especially noticeable on the camera screen: a new one is always matte, and even if it has already been touched, it will be impossible to clean it to its original state.
Here they check the documents for the camera and the warranty card - the numbers on the body of the device and on the box must match, and the warranty belongs strictly to the manufacturer, otherwise problems with warranty service may arise.
In order to make sure that the camera is intended for import into our country, just examine the box. The surface must be marked PCT. This means that this product has been tested and has certificates.
Checking a camera upon purchase also includes a visual check of the lens. An undamaged lens has scratch-free lenses and no specks of dust. When installed, the lens fits tightly, leaving no gaps.
After the buyer is convinced of the visual quality of the camera, he proceeds to check the operation of the camera. If the camera has not been used before, the program will ask you to enter the date and time, as well as set the language; by default it is English in most cameras. Check the serviceability of all switches and all buttons.
To get started, just take a few frames in auto mode and make sure the flash is working properly. To make sure your camera's shutter is working well, take a few burst shots while holding down the shutter button.