What to look for when choosing dishwashing equipment
The advantages of a built-in dishwasher over a free-standing one are that it significantly saves kitchen space and fits harmoniously into the finished design. All you have to do is decide what size machine you need and correlate the dimensions of the equipment with the location of its intended location.
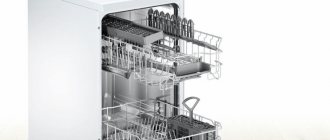
Types of Dishwashers
First of all, all dishwashers can be divided into household and industrial. The latter are used in public catering places and enterprises, so we will not touch on them.
Household dishwashers can be divided into the following types:
- fully built-in - the system is completely hidden behind the furniture facade. The control unit is located at the end of the front wall. Such models are often equipped with an indicator beam. It creates a light marker on the floor surface, which signals that the washing cycle is not completed;
- partially built-in - the front wall is completely open or partially hidden behind the furniture front. The control panel in this case is located above the facade and is accessible even when the machine is turned on;
- free-standing - an independent unit in its own housing; The following classification affects the dimensional characteristics of dishwashers. The machines are distinguished:
- full-size - with a width of 60 cm. An excellent option for a large family. This “helper” can handle a whole mountain of dishes. In one cycle it can wash from 10 to 17 sets. It is easy to place pots and baking trays in it. The height of such machines ranges from 82-87 cm, depth 55-60 cm. They are presented in all categories - built-in, partially built-in, separate;
- narrow - their width can be from 45-49 cm. They can accommodate a maximum of 10 sets of dishes. More suitable for small families of 3-5 people. If the family is large, you will have to run it several times;
- compact - small devices similar in size to a microwave oven. They have a width of 35-45 cm, so they are easy to place in any, even the smallest kitchen. They can wash 4-6 sets of dishes per cycle. Available in built-in and free-standing design options.
Choosing a size
Built-in dishwashers come in several sizes, and, accordingly, can accommodate different amounts of dishes.
Table 1. Dimensions of dishwashers
SizeDimensions in centimetersMaximum capacity (in the number of cookware sets)
| Mini | 50/50/55 | 5 |
| Narrow | 45/55/85 | 8 |
| Full size | 60/60/85 | 17 |
Please note: different equipment manufacturers may vary in size by up to 5 cm.
How to plan the installation of installations of various sizes, drawing
Mini dishwashers are convenient because they can be built into a small kitchen, even under a sink or in a pencil case, since it is similar in size to a microwave oven and its location at eye level is quite convenient. Narrow units should only be purchased if you do not have a large family. It is advisable to choose full-size ones if you have a lot of relatives and the house is full of guests. But, you need to understand that such a machine will take up more space in the kitchen.
There are different types of machines, the body dimensions of which may vary.
Energy efficiency classes and labeling
Electricity consumption and energy efficiency are also important points to pay attention to when purchasing. Manufacturers are required to indicate the energy efficiency class for each product.
As a rule, it is indicated on a sticker that is pasted on the device itself or placed in a package with documents for the equipment. Classes are marked with Latin letters: A+++, A++, A+, A, B, C, D (until 2010, the markings were indicated by the letters A, B, C, D, E, F, G), where, respectively, class A +++ – the most economical model in terms of electricity and water consumption.
How energy efficiency classes are marked for various types of dishwashers
But the price for such models will be significantly higher than for a product with a subsequent gradation of classes. The sticker should also indicate:
- product model and brand;
- water consumption in liters per cycle;
- electricity consumption per cycle (kWh);
- drying class (A - G);
- number of sets of dishes;
- class of noise produced in decibels.
Explanation of the symbols found on the sticker that is equipped with the dishwasher body
Preliminary work before installation of PMM
There are two options for installing a dishwasher: yourself and with the help of specialists. In the first case, you risk connecting the car incorrectly; in the second, you will have to part with part of the family budget.
Sometimes the skills of one craftsman are not enough; you have to call a team of specialists: a furniture assembler, a plumber and an electrician.
Installation services for built-in equipment are offered by companies that sell them. For a certain fee, a universal master comes at the appointed time, carries out all the connection work and checks the serviceability of the machine.
However, if you carefully study the installation instructions, think about connecting hoses, find or install an additional outlet, you can save money and acquire new skills by doing everything yourself.
Choosing a location based on size
An important step is choosing a location for installation. For the built-in model, furniture modules of the first level are suitable, that is, cabinets standing on the floor.
But if you like a compact mini-dishwasher, then its installation is a little easier - such equipment can be inserted at waist or chest level (for ease of maintenance).
There are several conditions for choosing a good location. If they are not followed, you may later encounter problems with water supply/discharge or PMM maintenance.
Image gallery
Photo from
The furniture module adjacent to the washing unit is the most suitable place, since the water supply and drainage units are located nearby, so it is easy to connect the hoses. The length of the hoses should not be long, otherwise the supply and drainage of fluid becomes difficult, which often leads to breakdowns
Prudent owners, even at the stage of interior planning or renovation, think about installing several grounded outlets for powerful household units. If there is no free power point, you will have to draw an additional line
The machine must be placed freely inside the furniture module, with a margin of 5 cm on each side - more precise information is provided in the instructions. The cabinet walls must be strong and able to withstand the fastening elements and the weight of the dishwasher. Rear wall not provided
You should not expect that the machine will be installed once and for all. Sooner or later you will need to replace parts, reconnect hoses or clean some elements. Therefore, the installation is carried out in such a way that possible dismantling is easy and access to communications is open.
Built-in dishwasher next to the sink
Separate grounded socket for dishwasher
Suitable cabinet for dishwasher dimensions
Dishwasher Maintenance
Many installation difficulties arise when a dishwasher is integrated into an already installed kitchen set. You have to adjust cabinets to fit, and sometimes dismantle and remodel some of the furniture.
We recommend that you take care of the installation location before purchasing furniture. This also applies to other household appliances that require integration. Usually, the models you like are first selected, and when drawing up a sketch of the headset, their location and exact dimensions are taken into account. We have provided recommendations for choosing a built-in dishwasher in this material.
Preparation of tools and materials
Manufacturers of built-in PMMs sometimes list in the instructions what tools may be useful during the installation process. However, they expect that preliminary work has already been done.
If measures are required to lay a power line or tap into a pipe, the list of necessary items will increase.
To be on the safe side and save time, you should stock up on the following tools:
- hammer drill or powerful drill;
- adjustable wrench;
- hammer;
- a set of screwdrivers, including flat and Phillips;
- chisel;
- pliers;
- laser level;
- tape measure, square, pencil;
- screwdriver
In addition to tools, you will need connection parts. It is not recommended to use used elements - this will reduce their service life.
To install a socket, you need to buy the electrical installation product itself, a socket box for it, a three-core copper cable, and an additional automatic protective device.
There are special requirements for the socket: it must be of a “European” type, with grounding, preferably protected from moisture, fully operational, without damage
To connect water, you will need a metal tee for inserting into the water supply system, fum tape, a tap for shutting off water, rubber gaskets, clamps or ties for fastenings.
If the siphon is not provided for connecting another drain hose, then it will also have to be changed.
If the voltage in the network often fails, we recommend purchasing a stabilizer. It can be installed on several devices at once.
Installing a built-in dishwasher
The dishwasher is placed in the kitchen cabinet. The main thing is to choose a place near sockets or sewers so that there are no connection problems in the future.
A small dishwasher is built into a niche intended for an oven or microwave. To make it look harmonious with other elements of the kitchen interior, the door is decorated in the same style as the facade. A wooden facade is also worth taking care of. For example, oil-wax for wood, information about which can be found here, has a wide range of applications: it gives wood water-repellent and bioprotective qualities. properties, prevents the effects of UV rays, gives any desired noble shade.
Choosing an installation location
In new residential buildings, the project already provides space for household appliances. But if this is a building from previous years, then more often the kitchen furniture was purchased earlier than the PMM, so you have to install a BOSCH dishwasher into a ready-made kitchen set. With this option, some problems may arise, in particular, some cabinets will have to be remodeled, and sometimes completely dismantled.
If the kitchen already has furniture, the best option is to install a Bosch dishwasher under the countertop. Among the models, choose not a free-standing PMM, the dimensions of which are quite large, but a model of a built-in dishwasher. These models have a width of no more than 45 cm. Most of them are equipped with wheeled legs that can be adjusted in height. At the same time, the car easily slides into the niche, which is convenient. Built-in models are equipped with special fasteners, so there are no difficulties with installing them in a niche.
If you are installing a dishwasher in your kitchen unit yourself, then in this case the first-level kitchen modules are most suitable for the built-in model - these are cabinets that stand on the floor. But you can choose a compact mini-model PMM Bosch for your kitchen and install it higher for more convenient use.
A separate issue is installing the front on a dishwasher. This is necessary in the case when the installation of PMM is carried out in a ready-made kitchen set.
Built-in models of BOSCH machines have ready-made templates, which allows you to attach the front to the dishwasher door without any complications. All you have to do is follow the instructions, and then you can easily install the unit.
But first of all, the machine must take its intended place. A handle is attached to the facade, through which the PMM will be opened. Then fastenings are installed to connect the unit to the façade. The screws with nuts for fastening need to be longer, then the connection will be more reliable. The finishing touch can be attaching decorative elements to the door.
Features of embedding PMM
If you want to maintain a single “picture” of the kitchen without separating the furniture to install appliances, then a built-in model is perfect. Such a dishwasher will hide behind the outer façade, without revealing itself in any way.
The choice of built-in PMMs today is especially large. Among them are the following brands: Bosch, Gorenie, Electrolux, Zanussi, Kandy, Veko and others. They differ not only in functionality, but also in size:
- full-size models are produced with a width of 60 cm, a height of 80 cm, and a depth of 45 cm;
- Compact PMMs measure 45 cm in both width and height.
It is better to integrate such dishwashers into a new kitchen unit, where there is space for them. Usually this is a larger box than the car, because it should not stand close to the walls. Be sure to leave space for ventilation - at least 5 cm. The back wall of the cabinet may be absent or have holes for hoses.
Installing built-in PMMs yourself is quite simple. The kit includes templates with markings for fastenings for hanging the decorative panel.
If you have to start from furniture that is already in the kitchen, choose a place near communications. The ideal option is to the right or left of the sink. Empty the suitable cabinet from the shelves and remove the door. Integration under the countertop is convenient if the machine is equipped with wheeled legs that are height-adjustable.
It is not advisable to place the dishwasher near stoves, ovens or heating appliances.
When purchasing equipment, a warranty is issued, which is void if connected incorrectly. For example, the use of tees or carries is prohibited. You cannot connect the PMM to a stove socket. The cord of the machine is quite short, so the socket should be located at a height of 45 cm from the floor, and also have a European standard, grounding, and connection through a difavtomat.
Preparation of tools and materials
No special tools are required to secure the façade trim.
The same items that are used to install the dishwasher as a whole will be useful:
- drill;
- screwdriver;
- awl;
- screwdriver;
- tape measure or ruler;
- pencil or marker.
If you don’t have a power tool, then one screwdriver is enough - you can screw in the screws by hand if the holes for them are pre-drilled.
The drill bit is selected according to the diameter of the screws: the holes should be a little tighter so that the fasteners are held firmly in the sockets
The work is simplified by the presence of a stencil for the façade overlay included in the delivery set. It is a large sheet of thin paper with marked attachment points.
The stencil is placed on the back side of the decorative panel and the places where the screws are screwed in are marked.
In addition to the tools, you will need double tape. Several “Velcro” pieces of tape will come in handy when you need to try on the facade. It is not recommended to immediately “mount” it on screws, since an error of 2-3 millimeters will mean all the work is in vain.
Don’t forget about the handle, without which opening the door will be problematic. It is also fixed with self-tapping screws, which are screwed into the back of the panel.
To ensure that the surfaces of the door and facade adjoin as tightly as possible, the heads of the screws should be recessed into the canvas.
It is easier to attach the workpiece than a homemade overlay. If you make the panel yourself, you may need carpentry tools, sandpaper for sanding, antiseptic impregnation and paint to finish the entire surface or just the ends.
Read more: Water flow switch device operating principle connection and adjustment
Dishwasher installation conditions
Before deciding to purchase a dishwasher, decide on the location and possibility of installing it.
This task is much easier to solve with free-standing modifications. They will require very little free space on any of the countertops of the kitchen work area, on the windowsill and even on the floor. The built-in model is installed only in a specially prepared niche.
The undeniable advantage of built-in models is their high hygiene, reduced noise level, and lack of visibility of the unit body, hoses and wires . All this makes such dishwashers more preferable. It is ideal to use kitchen units with a ready-made cabinet for installing a dishwasher. Otherwise, you will have to provide a suitable place yourself.
To do this, you first need to find out the exact dimensions of the main models offered by trading enterprises. Such information is presented in advertising brochures and prospectuses, on store websites, or on price tags in the sales area.
Next, using a tape measure, take measurements of all cabinets and other pieces of furniture in the kitchen. Take into account any free space, for example between cabinets, between a cabinet and a refrigerator, and so on. Based on the results of these studies, a car model is selected based on its dimensions.
Dishwashers from well-known manufacturers often have a width of 60 cm and less often 45 cm (narrow models). Narrow models have a height of 82 to 88 cm, which corresponds to the standard height of kitchen tables. The depth of all machines is 55 cm , which makes it possible to connect communications to fittings and connectors located on the rear wall.
The presence of free communication connection points or the possibility of parallel input is taken into account at the next stage of preparing the installation site.
To connect you will need:
- cold water pipes;
- sewer pipe;
- electrical outlet with a grounding terminal.
If the electrical cable, if necessary, is supplied without much effort, then with water supply and drainage pipes it is already more difficult. For this reason, the installation location is chosen next to the sink. The ability to equip risers with tee fittings will solve the connection problem quickly and at minimal cost.
Ready solution
Manufacturers of household appliances came to the aid of those wishing to place appliances in this way and released a model that combines a hob, oven and dishwasher. The multifunctional miracle appliance has 4 gas burners, a small oven, and a small dishwasher. The advantages of such a device:
- compactness;
- economical consumption of water and energy resources;
- ergonomics;
- combination of different types of kitchen appliances in one design;
- the price of the device does not exceed the total cost of three household appliances.
There are also disadvantages:
- the small size of the oven has only one sheet, so it will not allow you to cook a number of dishes, forces you to bake in several batches and is not suitable for a large family;
- The modest size of the dishwasher makes it possible to wash the same amount of dishes, so again, for a large family this is not the best option.
Thus, this interesting kitchen unit will be an excellent solution for a small family or a bachelor. The device will save space and will not cause any installation difficulties. It is enough to provide measurements of the multifunctional appliance to the kitchen designer for optimal placement.
To learn how to avoid mistakes when installing a dishwasher under the hob, watch the video below.
How to install a dishwasher in the kitchen
There are two options for installing the PMM: in a finished kitchen or in a pre-designated place in the kitchen unit. Dishwashers vary in type and size:
- Compact. Holds from 3 to 5 sets of dishes. Dimensions 50x60x50 cm. Installed on the countertop or under the sink.
- Narrow. Width 45 cm, capacity from 6 to 10 sets. Can be fully or partially built-in.
- Full size. Dimensions 65x65x90 cm, holds from 10 to 15 sets of dishes. Can be built-in or free-standing.
Typically, manufacturers provide space for placing equipment in any kitchen set. To do this, take the dimensions of a narrow dishwasher and add 5-10 cm to them on all sides. If your kit does not include a special cabinet, then it is better to choose a freestanding machine. You can install it in any convenient place, even between the cabinets.
When choosing a freestanding PMM, you need to take into account that the appearance of the cabinet is combined with the design of the kitchen.
By the way, for connoisseurs of beautiful, eco-friendly and high-status furniture, there are ready-made antique interiors using natural wood, created according to your own original designs. If you have prepared drawings in advance for placing a Samsung, Miele or other brand dishwasher, there will be no problems with installation. Otherwise, for embedding, select a cabinet close to the sink. Please note that the distance from the PMM body to the rear wall must be at least 5 cm for normal ventilation.
If you have a small family and the kitchen area does not allow you to install a full-size model, choose a tabletop option. You can put it under the sink, and the connection rules do not differ from other models.
Installation steps
The issue of installing a PMM, that is, a dishwasher, should be approached with the utmost responsibility. This is a serious task that not everyone can handle.
The entire procedure can be roughly divided into several successive stages. The work consists of:
Useful tips when choosing and installing PMM
- Before purchasing built-in appliances, measure the dimensions of your kitchen cabinet.
- The legs of the dishwasher can be adjusted in height. Use a level to position the machine level. Some Hotpoint Ariston and Whirlpool models are very sensitive to a tilt of even 2 degrees. This may affect their future work.
- Mount the machine near a sink. This will make it easier to connect the drain and water without having to extend the hoses. Experts say that extending the hoses can lead to leakage and will also put more strain on the drain pump.
- When built into furniture, install a metal plate under the tabletop to protect the wood from steam. In built-in models, the plate is included.
Please refer to the instruction manual. It shows the procedure for installing and installing the dishwasher. The kit includes templates for hanging the door.
- To connect equipment to the network, a separate moisture-resistant socket is used. Do not connect via extension cords or tees.
Communications for connection
The machine requires three external sources to operate:
- electricity - must come from the electrical network of the house to the outlet closest to the car;
- clean cold water - there should be a water pipe nearby with a threaded connection;
- Sewage system - to drain dirty water, there must be sewer pipes nearby with the possibility of connecting an additional drain point.
Choosing a place
When deciding how to install a dishwasher, it is necessary to comply with the main installation condition - ensuring free access to all communications. In this case, the electrical outlet, water pipe (preferably with a faucet for connection) and the sewer drain pipe should be located as close to the machine as possible. In almost every kitchen, this condition is satisfied by a place in the cabinet near the sink.
Conduct the communications necessary for functioning in advance
Kitchen cabinet remodel
There are two options here - a free-standing cabinet or built into a common kitchen countertop. Before installing a dishwasher, let's assume that the dishwasher exactly fits the width and height of the cabinet, so alterations should be minimal.
How to choose a good place
| Type of equipment | Dishwasher space | Advantages | Flaws |
| Partially built-in and fully built-in | Under the sink in the sink | The depth and width of many models are the same; proximity to sewer water communications | The bottom of the sink may need to be reworked; buying a new siphon |
| Base cabinet | The instrument panel is hidden behind a decorative facade | The need to remodel a piece of furniture | |
| Dismantling a niche in a kitchen set | Selecting a panel to match the color of the furniture facade | Reducing kitchen utensil storage space | |
| Compact models | For a free-standing household appliance | Easy installation | The need to consider access to communications; technology reduces space in the room |
Thus, compact models are easiest to fit into a finished kitchen.
A good place to install a dishwasher in the kitchen is chosen based on the dimensions of the device. At the same time, it is taken into account that there are:
- water supply pipes;
- sewerage;
- power line with socket.
Important! It is easy to lay a free power cable yourself if the need arises. It is much more difficult to move sewer and water pipes. Therefore, it is advisable to choose a place to install the PMM next to the sink. This is where it is possible to seamlessly connect to communications.
This option is suitable when there is a cabinet in the form of a cabinet not far from the sink. Its width should be more than 45 cm. This option is convenient because the machine hoses can be easily integrated into the communications system. To install a dishwasher, the cabinet is freed from shelves, back and bottom panels. After installing the device inside, it is connected to all systems.
This option is suitable for a large kitchen when there is no free cabinet of the required width. In this case, order a separate module for the kitchen unit and place it near the sink. Communication pipes are stretched below along the wall. To approach them, the module is simply moved aside. If the device is placed under the central tabletop, it will have to be removed. Otherwise it is impossible to approach communications.
To install a small appliance, you can use niches made in kitchen furniture for a microwave, oven and other equipment with small dimensions. To hide the device, the front panel is covered with a decorative overlay that matches the style of the rest of the furniture.
Possible embedding options
Manufacturers produce PMM models with standard parameters:
- height 815-875 mm;
- width 598 and 448 mm;
- depth 550 mm.
The range of dimensions allows for the use of several installation options. The control elements of the devices are located at the end of the door, and the legs can be adjusted in height. For a tight fit, the equipment is equipped with corner fasteners and self-tapping screws.
When installing it yourself, it is important to take into account the parameters of the kitchen unit, the presence of water supply and sewerage communications, as well as a free line with an outlet.
Advice! Install the machine next to the sink, where there is access to the main water supply and drainage units.
Cabinet installation
If there are cabinets more than 45 cm wide next to the sink, you can disguise household appliances. Installing a built-in compact dishwasher in a cabinet will allow you to connect the drainage and water intake pipes to ready-made communications. The work includes:
- removal of shelves, bottom panel and back wall from the cabinet;
- vertical adjustment of the PMM body using legs;
- connecting an extended pipe with a shut-off valve for cold water;
- laying a drainage pipe into a siphon;
- organization of an additional outlet;
- installation of a decorative front panel on the device door.
With a front panel on the device door Important! If necessary, a water seal with a drain pipe is installed.
Installation in a free-standing module
The method is relevant if the furniture set does not have suitable cabinets, but the kitchen area is spacious. Order a separate cabinet for a compact machine and install it next to communications. Connection consists of the following operations:
- aligning and securing equipment so that it does not move during operation;
- laying hoses and pipes along the walls for ease of access.
Important! The location of the PMM in a separate module eliminates the difficulty of dismantling if the hose breaks.
Niche installation
The presence in the kitchen set of a special niche for a microwave, oven or compact equipment solves the question of how best to integrate a household dishwasher into a ready-made, assembled kitchen.
Separating the niche from communication networks involves the use of long flexible hoses for supplying water and drains. The front part of the machine is covered with a cover for the facades.
Built into a niche Important! Compact dishwashers are suitable for a family of 2-3 people.
If embedding is not suitable
In small rooms it is advisable to install free-standing devices. What is the best way to install a small household dishwasher, experts say:
- place on the table if the dishwasher is no larger than the oven;
- place in an open module;
- place under the sink;
- allocate a small area for narrow models.
Connection to communications is carried out only after installation of the equipment is completed.
Advice! If there is no room for a built-in device, remodel the kitchen unit, move the lines, but be prepared for large financial costs.
What to do if embedding is not suitable
If you can't find room in your kitchen for a built-in dishwasher, then one option is a separate model. This option does not require any special installation. Just install it on the countertop and connect to the communications.
Consider freestanding and tabletop units.
Of course, there are other alternatives. For example, you can mount the front decorative panel on a free-standing machine. You can also undertake a complete reconstruction of the kitchen unit, highlighting the right space, or move the plumbing communications to another place, but all this requires considerable financial investment, as well as time and effort.
You can always allocate space to accommodate your much-needed “kitchen helper”.
We determine the location and calculate the dimensions
The installation of a built-in dishwasher must be planned immediately, along with the entire kitchen interior - this will be an ideal option. Take my word for it, it is much more difficult to find a place and install a built-in machine in a finished kitchen, so the sooner you think about the need to install a dishwasher, the better. Plan ahead and draw a sketch of your future kitchen. Try to take into account the location and size of all household appliances.
In addition, draw on the sketch the location of all electrical and plumbing communications. In this case, each socket, each pipe outlet will be in its place and will not interfere with the installation of household appliances in the future. You can see an example of a kitchen sketch in the picture below.
Some people believe that before ordering furniture for the kitchen, you need to buy household appliances, and only then, based on their sizes, make a drawing of the future set. This is not to say that this is a wrong approach, but rather inconvenient and expensive.
- Firstly, to buy all the equipment at once, you need a lot of money at once, and then almost immediately pay for the kitchen furniture.
- Secondly, the purchased equipment will need to be stored somewhere while the kitchen interior is being formed, and this may take several months.
- Thirdly, even if you buy equipment in advance, this also does not guarantee that the furniture makers who will make the set will not miscalculate the dimensions somewhere.
In general, experts say this: first look at the model of a built-in dishwasher at a retail outlet, measure its exact dimensions, and do the same with the rest of the built-in and non-built-in appliances. Next, give all the dimensions along with the sketch to the furniture makers; if they miscalculate somewhere, then you can try to correct this shortcoming by purchasing smaller equipment. For a built-in dishwasher, do the calculations like this.
- For example, a built-in dishwasher has dimensions WxHxD 450x820x550 mm.
- You will need to allocate space for the cabinet into which installation will be carried out, taking into account the thickness of the material.
- You also need to leave a gap of at least 5 mm between the walls of the dishwasher and the walls of the cabinet.
As a result, for example, the total thickness of the material (on both sides) is 20 mm, plus a 5 mm gap (on both sides), which means we add 450 + 30 = 480 mm to the width - this is the final width of the cabinet with the dishwasher. We leave a gap in height only at the top, but take into account the height of the legs. That is, the height of the legs is 60 mm, we add the total thickness of the material 20 mm and a gap of 5 mm, we get 820+60+20+5=905 mm - the minimum height of a cabinet with a dishwasher.
When calculating the depth of the dishwasher, it is necessary to leave space for hoses and electrical wires, about 80-100 mm; the cabinet may not have a back wall, so there is no need to include the thickness of the material in the calculation. We get 550 mm+100 mm=650 mm. As a result, the dimensions of the cabinet with a built-in dishwasher will be at least WxHxD 480x905x650 mm. Successful connection and installation of the “dishwasher” entirely depends on how correctly you calculate everything.
Preparing tools and components
Before connecting the dishwasher with your own hands, you need to prepare tools and components. The composition of these tools and components will depend on the features of the kitchen unit, the removal of communications and other factors. It is best to select everything you need immediately before installing the “dishwasher”, when there is a clear plan, a ready-made sketch and a partially formed interior. Approximately the following tools may be required:
- small adjustable wrench;
- flat and Phillips screwdrivers;
- tape measure (preferably laser);
- pliers;
- perforator;
- screwdriver;
- chisel.
As you can see, the list is small. Indeed, to install a “dishwasher” you don’t need any special tools, but you may need quite a lot of components.
- European sockets.
- Socket boxes.
- Copper two-millimeter cable with three cores.
- Tee for metal-plastic water pipe.
- Tangit type fumka.
- Tap on the inlet hose.
- Difavtomat.
- Set of rubber gaskets.
- Siphon with at least two outlets for drain hoses.
- Set of plastic clamps.
Sockets, a circuit breaker and a wire will be required if you are preparing electrical communications for kitchen appliances. Take sockets of the highest quality possible, with protection from moisture. For information on how to choose the right socket, read the article How to choose and install an socket for a washing machine. Although this text is about sockets for washing machines, the features of choosing a socket for dishwashers are absolutely identical.
Features of self-accommodation
Let's consider two possible options for installing equipment in the interior. This is installation into a new set, the design of which takes into account the order of a special niche for the dishwasher. And also, placement in an old kitchen, taking into account the presence of ready-made cabinets.
Installation in a new kitchen
Typically, built-in PMM models are made narrower. When ordering a kitchen, it is much easier to provide a place for the appliance in advance, otherwise it will be difficult to fit the appliance into the set without remodeling the furniture.
If there is nothing in the room except the walls, then make a sketch of the future kitchen. Consider the space for household appliances, the possibility of convenient connection (location of sockets, proximity to communications).
Have you already decided on your choice of dishwasher (Bosch, Whirlpool, Kandy)? If you want to fit the device into an Ikea kitchen, then measure the dimensions of the model in the store, enter the results into a sketch and pass it on to the furniture makers. Don't forget about space for ventilation. The walls of the PMM should not come into contact with the furniture. A minimum gap of 5 cm is left on the sides and back.
It is important to remember about connecting hoses and wires. Therefore, the cabinet can be ordered without the back.
The thickness of the facade is included in the calculations. This is a headset panel that will help hide your equipment from prying eyes. The method of attaching it to the dishwasher is taken into account. These can be bolts or self-tapping screws.
Accommodation in a finished kitchen
If space allows, move the kitchen cabinets apart to a distance of 45-60 cm. It is important to choose a place close to the sink. Also consider the distance of the outlets.
A conventional PMM on legs with wheels makes installation easier. You can put it in a cabinet or under the sink, and adjust the height of the legs. Additionally, there may be fastenings for fixing the case to the walls of the headset.
The installation of a free-standing machine under the countertop should take place in the following way:
- The top panel of the PMM is located close to the tabletop. But this should not prevent the door from opening.
- The desired height is set by adjusting the legs. If the legs are static and you need to raise the equipment, then fit a wooden box under the base.
Step-by-step installation instructions
Preparatory work is carried out at the first stage. You need to find the tools in advance (screwdriver, hammer, screwdriver, tape, sealant and flax), and check the serviceability of the socket.
Installation in a designated place
- Check the package and find instructions (preferably in Russian). It should contain a list of parts. This usually includes hoses, gaskets, fasteners, rubber apron, etc.
- Installation. Carry out the initial installation of the machine to understand where to connect the wiring and install the hoses. Make holes for them. Then lay the wiring and connect the hoses to the pipes.
- Glue protective tape to the inside of the tabletop, sealant to the sides, and secure the mounting plate with damper elements.
- Adjust the legs to height. Make sure they are on the same level.
- Attach noise protection.
This dishwasher can be installed in a pre-designated location.
Before securing the dishwasher, you need to install decorative front doors. The covers are installed using self-tapping screws. The long ones are used first, which are inserted in place of the short ones that were originally included in the kit.
Connection to sewerage and water supply
Connecting to a sewer pipe is not difficult. There are two ways. Insert the drain into the cuff of the sewer pipe or attach it to the drain under the sink. The first option is suitable for those who have an additional hole in the sewer. It is better to buy a special model with a siphon outlet.
Connecting to the water pipe is the next step. In our country, you only need to connect the machine to cold water. It's simpler and more efficient. A filter must be installed, since the produced sediment and limescale can quickly damage equipment parts and render them inoperable.
You must connect the dishwasher to the sewer very carefully.
Electrical connection
Keep in mind that the cord on the dishwasher is one and a half meters long. This means that the distance to the outlet should be the same. It is not recommended to use extension cords.
If you have to install an additional cable, then take a 2.5 mm copper wire, a grounded socket and a 16A switch.
When connecting the dishwasher to electricity, turn off the power supply
During installation and when repairing equipment, it is necessary to de-energize the line. To do this, disconnect a separate branch for rooms or the entire apartment. When the kitchen with the dishwasher is ready for the first start, testing is carried out. The first work cycle will reveal all defects, if any.
Tabletop protection
A common problem with kitchen furniture is its swelling and deformation. This is due to the close proximity to water and steam. To prevent moisture from getting on the countertop and end, you need to use vibration-proofing material up to one and a half millimeters thick. It is also worth installing additional steam protection. It is fixed to the very edge of the tabletop to prevent damage and distortion of the material. Usually the protective element is included with the machine, but if it is not there, then make your own. This can be a small metal sheet, plate or film.
The countertop protector is included with the dishwasher.
Metal saves you from steam. You need to take a small sheet and secure it under the tabletop. Only after this can you push the machine in and set it level. It happens that equipment does not take up all the space in the closet. It may even have shelves. To prevent them from deteriorating over time due to water and steam, cover them with insulating material.
Facade installation
Everyone loves external beauty, so before you integrate a dishwasher into your cabinetry, you need to think about aesthetic perception. The decorative strip must be created in the same color scheme as all the furniture. Although you can make an element yourself, it is better to use the services of craftsmen from a furniture factory. To secure the facade, use the screws included in the kit. There are holes for them in the machine itself. Don't do anything until you've done the calculations. Mark the locations for the holes with an awl or pencil. At the end, a handle is screwed in if required by the façade design.
The front is attached to the dishwasher door using the bolts included in the kit.
Upon completion of the preparatory work, the part is fixed with self-tapping screws to the machine door. You can also do without a facade. Then the installation will be faster and easier. Each housewife chooses what is best to do.