- How to diagnose that your washing machine bearings are worn out
- What problems can arise if bearings are not changed in time?
- Steps to take when replacing a front-loading washing machine bearing yourself
- Replacing a bearing when repairing a top-loading washing machine
- The nuances of performing work on machines from different manufacturers
- How much does it cost to replace bearings in a washing machine - price review
- Video: Replacing bearings in a washing machine with a cast tub
How to diagnose that your washing machine bearings are worn out
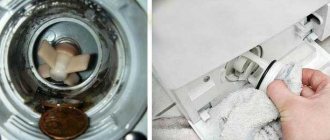
The most typical signs that a washing machine bearing has failed, or will happen in the near future, are:
- when the washing mode is turned on, the machine operates, emitting a characteristic hum, but the drum does not spin;
- the washing mode started, but during operation there was an unusual noise made when the drum rotated, and vibration uncharacteristic of normal operation;
- The laundry spin mode does not work, it remains damp (does not spin);
- the drive belt quickly fails (wears out);
- When loading laundry, you feel the drum swaying on the rotation axis.
What problems can arise if bearings are not changed in time?
Bearing failure is always an unpleasant event, because... replacing it is a rather complicated undertaking, but nevertheless necessary. This is due to the fact that failure to perform this operation can lead to negative consequences of varying severity:
- the bearing seat will break, which will require replacing the entire drum;
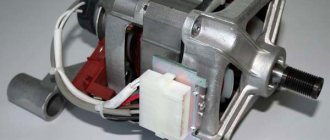
- the electric motor will burn out, which will require major repairs or replacement;
- if there is a belt drive, the belt installed between the engine and the drum shaft may break;
- other components that ensure the transmission of the rotational motion of the electric motor shaft to the drum of the washing machine, available in the design of the model (crosspiece, pulley, etc.), may be damaged;
- The integrity of the tank may be damaged, especially for models where this structural element is made of plastic, which, in turn, will lead to water leakage and, as a result, flooding of neighbors and damage to the electronic control system.
Briefly about prices
When you understand that changing bearings is inevitable, then you should not despair, even if you are not able to do it yourself. In service companies, such repairs will not cost you that much:
- for front-loading machines - 1-2 thousand rubles;
- for vertical - 1500 rubles;
- replacement in the forecastle - from 2 thousand rubles.
Prices by region may differ, but not by much; exact prices can be found in the service centers of your city.
If bearing failure leads to water leakage, the heating element may burn out, then the cost of repairs increases. The worst case scenario is that the electronics system burns out, then buying a new machine is inevitable, the old one will only be suitable for disassembly for spare parts.
Steps to take when replacing a front-loading washing machine bearing yourself
As already written above, replacing a bearing is a rather complex task, for which it is necessary to disassemble the washing machine. To do this you will need the following tools:
- hammer;
- rubber (plastic) mallet;
- pliers;
- Screwdriver Set;
- set of wrenches;
- gas key.
In addition, you must have silicone sealant, WD-40 aerosol, as well as appropriately sized bearings and seals, as well as lithol or another type of similar lubricant.
For your information!
If the user is performing such work for the first time, then in order to facilitate the assembly process and avoid mistakes, you can use a smartphone and film all types of connections of various components and electrical connections before starting the disassembly process.
The work of replacing the bearing on different models of washing machines may vary slightly, but, nevertheless, the main steps are performed in the following sequence:
| Illustration | Description of action |
| The back cover is unscrewed. | |
| The drum shaft drive belt is removed. | |
| The rotation of the drum is jammed; for this, use a screwdriver or other durable tool. | |
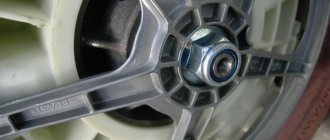
| The nut securing the pulley is unscrewed and it is removed. | |
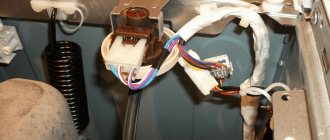
| The wires from the heating elements and other elements of the electrical circuit are disconnected. | |
| The elements securing the drum to the machine body and the electric motor are unscrewed. | |
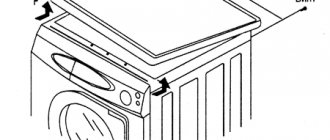
| The top cover of the washing machine is unscrewed and removed. | |
| The structural elements located in the upper part of the housing are disconnected, preventing the drum from being removed. | |
| The drum is removed from the machine body. | |
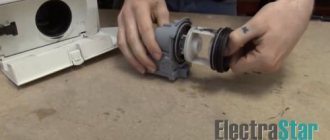
| Using a screwdriver, remove the oil seal. | |
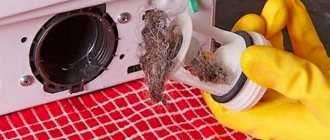
| Using a hammer and punch, first knock out the inner bearing. | |
| Then the outer bearing is removed in the same way. | |
| The seat is cleared of dirt, and the new bearing is pressed in using a mallet or a wooden block and a hammer. |
In order to knock out the bearing, you can use a core and a hammer, as in the case discussed above, or special pullers, if available.
Important!
When knocking out a bearing, it is necessary to strike along its entire circumference, otherwise the bearing may become crooked and jam, which will lead to unnecessary problems associated with its removal.
To make it easier to install the new bearing into the seat, it can be lubricated with grease or another type of thick lubricant. When installing a bearing located inside the drum body, you can use a hammer handle or a specially made piece of wood that matches the diameter of the seat. WD-40 aerosol will be required if any fastening elements will not be unscrewed, then they should be treated with this preparation. The washing machine is assembled in the reverse order to how it was disassembled. After completion, the functionality of the repaired household appliance is checked.
Installing the drum bearing and reassembling the ARDO washing machine
New bearings are lubricated with lithol and, together with the seals, pressed into their seats in the reverse order. After this, you need to put the tank cover on the drum shaft, put the pulley in place and install the cover with the drum on the body, not forgetting about the sealing gasket. Next, the lid is fixed on the tank and the clamping rim is put on.
Bearing seat lubrication
Pressing in a new bearing
Installing the oil seal
Tightening the rim tightening bolt is done by lightly tapping the rim around the perimeter in the direction of the lugs every 1.5-2 turns of the nut. This will ensure an even fit of this part.
Next, you should tighten the fastening of the heating element, not forgetting to put it in place. After this, the temperature sensor and electrical terminals are mounted, and the next step is to install the belt on the engine and drum pulleys. Next, you should begin installing the back cover of the washing machine, upon completion of which the latter can be considered ready for use.
Replacing a bearing when repairing a top-loading washing machine
A distinctive feature of top-loading washing machines is that the drum is attached to the body on two axle shafts, and not on one, as in the models discussed earlier. In this case, the bearings are changed on both axle shafts at the same time, regardless of which one has failed. Work on units of this type is carried out as follows:
- The outer and rear walls of the machine are removed.
- Electrical wires and hoses that could interfere with work are disconnected.
- The linings located on the sides of the drum, under which the calipers are located, with the bearings installed in them, are removed.
- The bearing on the side where there is no pulley is changed first, then on the opposite side.
- The seats are cleaned and lubricated before installing a new bearing.
- The units are assembled in the reverse order of disassembly.
Important!
On the side where there is no pulley, the thread securing the caliper is normal, right-handed, and on the side where the pulley is installed, it is left-handed.
How to change
When changing a part after removing the old bearings, the place where they were installed must be cleaned of accumulated dirt.
Additionally, you need to check the condition of the shaft and crosspiece.
They may also require replacement. Only after this can you begin installing new spare parts.
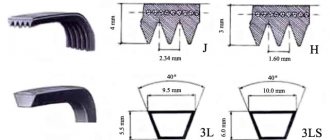
Choosing something new
In order not to make a mistake in choosing new bearings and oil seals, it is recommended to buy them after removing the old ones. It is possible that the store clerk will be able to select the correct parts based on the brand and manufacturer of the appliance, but this should not be relied upon. Purchasing by sample is safer.
If a top-loading machine requires a complete replacement of the hub into which the bearing is pressed, you should also take a sample with you. These elements can be either left- or right-hand threaded.
Installing the bearing on the washing machine
When installing an assembly of 2 bearings, work must begin with a small element. It is driven from the inside of the drum in the same way as its predecessor was removed. Make sure that the part is installed tightly. A sign of this is the changed sound of the blows. It should become ringing.
The second bearing is installed in the same way, only the work should be carried out from the outside of the drum.
After both elements of the assembly take their place, you need to proceed to installing the oil seal. Before this you need to lubricate it. It is placed in place in the same way as bearings - with the help of a chisel and a hammer. However, this one is more fragile, so less strong blows are required. The work is done from the inside of the drum.
The nuances of performing work on machines from different manufacturers
To repair some models from individual manufacturers, you need to know about the nuances determined by the design of these units. Washing machines of such brands as Indesit and LG, Samsung and Atlant have such features.
"Indesit" (Italy)
When repairing cars of this brand, it is initially necessary to clarify the design of the tank, because it may be different. New models are produced with a non-separable tank, and older ones with a collapsible one.
This determines the volume and sequence of operations performed. In addition, on some models the pulley mounting screws may have left-hand threads (W 84 TX), which must be taken into account.
If the brass bushing installed on the axis of the drum cross is damaged, it must also be replaced when performing such work. Also, models of this brand provide for double fastening of the drum axis, which is a certain nuance that should be remembered. The presence of a self-positioning sensor, which must be turned off when dismantling the drum, is another feature that you should know when doing the work yourself.
"LG" (South Korea)
For washing machines from this manufacturer, the tank is removed from the front of the device body. Modern models of this brand have improved technical characteristics that allow you to wash a significant amount of laundry in one load. In this connection, such devices are equipped with a tank that is significant in weight, which somewhat complicates the performance of the described work. In addition, when disassembling the drum, you should pay attention to the mounting unit for the electric motor, which is somewhat different from the type of mounting used by other manufacturers.
Samsung (South Korea)
The design of washing machines of this brand also involves dismantling the tank through the outer wall. When working with Samsung washing machines, you should be especially careful when knocking out the bearing, because If the bushing is damaged, the entire drum will have to be replaced. In addition, a distinctive feature of this brand is the use of two bearings of different sizes on one shaft. In this case, the larger one is knocked out from the outside towards the tank, and the smaller one from the inside.
"Atlant" (Belarus)
For machines of this brand, the drum is removed from the rear side, which is provided for by their design. The tank on Atlant brand machines is of a collapsible type, so there is no need to saw it when replacing bearings.
When assembling the tank, it is necessary to use a sealant, this will provide more reliable protection against leakage.
How much does it cost to replace bearings in a washing machine - price review
The cost of repairs associated with replacing bearings depends on a number of factors:
- region and location of the service center or repair shop;
- manufacturer's brand;
- features of a specific model, if any;
- availability of a warranty period after repairs are completed;
- urgency of work.
On average, the work of replacing bearings, performed by professional craftsmen, takes from one to three hours, which depends on the model of the washing machine and the design of the tank (collapsible/non-dismountable). The cost of replacing a bearing in a washing machine in different regions of our country is:
- in Moscow – from 1,000 rubles;
- in St. Petersburg – from 1,100 rubles;
- in Krasnodar – from 1,800 rubles;
- in Vorkuta – from 1,800 rubles;
- in Novosibirsk – from 2,000 rubles.
Although the work associated with replacing a bearing is quite complex. However, many users try to do it themselves; fortunately, you can find many stories on the Internet that tell you how to do it correctly. One such video is shown below.
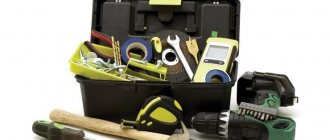
Preparing the tool
The set of tools for dismantling a washing machine does not depend on its model; you will need:
- two screwdrivers (slotted and cross);
- pliers or round nose pliers;
- open-end wrenches;
- set of heads;
- star key 17x19;
- rubber mallet and copper-plated hammer;
- steel drift or long pin;
- sealant, WD-40 lubricant;
- special puller.
The last device on the list is necessary to remove the bearings without damaging the housing. It is used when lubricating the latter, when special care is needed.
Advice! Buy a universal type puller - it is suitable for all types of bearings used in household appliances.
After selecting the tool, unplug the machine and install it in such a way that there is a good approach from all sides - this will make disassembly easier for you.