Despite the fact that the household waste shredder, or disposer as it is also called, appeared on our market quite a long time ago, for some reason it has not yet become widespread.
Many housewives still have the misconception that these kitchen appliances are ineffective and useless.
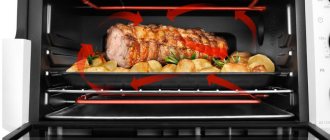
Some people have only seen such things in American films and TV series. At the same time, they are ready to buy ovens for a hundred thousand, using them once every six months, but for some reason they do not install a chopper.
In the USA, after aggressive advertising in the 50s, every second family today is required to have such a device.
Particularly powerful models can easily handle even glass. Guess where American investigators look first when searching for evidence in a house?
In Europe the situation is not so clear. In some countries, you can even get a criminal case for installing a disposer!
Our authorities are still more in solidarity with the Europeans than with the Americans.
Is a chopper really necessary in the kitchen?
At the same time, those in our country who finally decided to install a shredder under the sink forever forget about the overflowing bucket with unpleasant odors, accompanying midges and other parasites.
Most of the trash they accumulate is wrapping paper and candy wrappers. The main question that arises after installing a disposer is “How did I live without it before?”
Remember, for example, what can be the most unpleasant thing about a juicy watermelon or melon? Of course, their crusts, which can fill the entire bucket in one sitting.
The chopper grinds them instantly and without residue!
In the article we will tell you how to correctly install and connect the disposer without making stupid mistakes, which, in fact, give rise to false ideas about the uselessness and even danger of such devices.
Here is a typical review from one of the housewives about the unsuccessful use of this “waste meat grinder” at home.
Here are the opposing opinions.
First of all, the shredder is installed in apartments that have a centralized sewage system. If you have a private house with a septic tank, keep in mind that this thing greatly increases water consumption and speeds up the filling of the storage tank.
With regular use of the disposer, on average, you will use one cubic meter of water per month more than without it. But believe me, it's worth it.
There is no need to worry about electricity at all. With a power of 500W and operation for 3-4 minutes per day, electricity bills will increase by no more than 10 rubles per month.
The average service life of the device itself without replacing any parts is about 15 years.
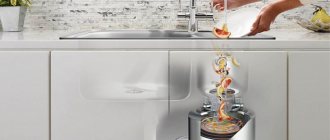
No. 2. Advantages and disadvantages of shredders
It seems that the benefits of adding a food waste disposer to your kitchen are obvious:
- Less waste ends up in the trash can. In fact, only dry inorganic garbage will be thrown away, which means that the speed of filling the trash can is reduced significantly, as is the number of trips to smelly containers;
- the unpleasant smell in the kitchen disappears , which is a constant companion of most organic products, which quickly begin to rot right in the bucket. The absence of organics and odor is the main step in the fight against insects and bacteria;
- the possibility of clogged sewer pipes is eliminated, at least due to large particles getting into the kitchen drain;
- safety . The design of the disposer is such that even a careless and curious small child cannot get hurt;
- caring for the environment. Food waste accounts for approximately 30% of all waste ending up in landfills. It turns out that using a disposer is an important step towards proper waste sorting and reducing the volume of waste in landfills.
disadvantages . Firstly, it will use a little more water. If the device is electric, then electricity consumption will increase, but only slightly. The most serious disadvantage is the high cost (prices start from 11,000 rubles), but a lot of advantages completely cover this disadvantage.
Domestic users are just beginning to discover the benefits of using disposers, and in the USA, for example, about 80% of homes are equipped with such devices. This is not surprising, since the shredder was invented in the USA. The first fairly primitive disposer appeared in 1927, and its inventor subsequently founded the company InSinkErator , which eventually became one of the market leaders.
Dimensions, weight and suitable washing
What is needed to install a shredder without any problems? Firstly, the drain hole in the sink must have a diameter of at least 90mm (European standard).
Mistake #1
If it is smaller, do not try to expand it yourself with metal crowns or other improvised means.
You'll just ruin the sink. Old sinks with a 60mm hole require a special cutting and flaring tool. Not even all plumbers have it.
The third party installer will also need the following dimensions:
- tabletop height and thickness
- sink depth
- disposer model
Pay special attention to the weight of the product. Some kitchen items can reach up to 11.5 kg.
Mistake #2
Not every sink can withstand such a load without deformation.
In this case, it is advisable to have an industrially produced composite sink or stainless steel plate of optimal thickness (manufacturers recommend about 1mm).
As for under-table mounted, integrated and glued-in sinks, only Bone Crusher provides a guarantee for the safe operation of its devices in such conditions.
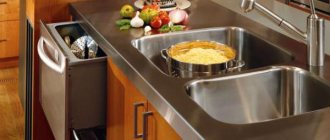
If the sink consists of two parts, then the chopper is most often mounted in a smaller sink.
Under the main one, it will take up too much space and clutter up most of the free space. See how much space is left when installing the disposer in an additional sink.
Although manufacturers paint similar pictures:
Mistake #3
However, if you have two sinks, it is advisable not to combine the outlets to the drain under one siphon.
Otherwise, sooner or later you will encounter the following problem.
This division would be more correct.
How to assemble and install
Let's move on to installation. This is what the printed instructions for one of the devices look like: