There are quite a lot of kitchen devices that simplify cooking, reducing the required time and effort. A blender is just such an assistant in the kitchen. We can say that this is a compact, multifunctional mini-processor that can replace meat grinders, mixers and other kitchen utensils.
Anyone who has purchased such a device knows that it expands the capabilities of any housewife, and therefore becomes indispensable. Despite the fact that this device is very easy to use, not everyone knows how to use a blender correctly. In this article we will look at the operating rules and recommendations for use depending on the type of kitchen gadget.
The purpose of a blender, or its main tasks
Blender - what is it? The name translated from English is blend - mixture, literally means mixer. As practice shows, this device not only mixes ingredients, but also grinds, beats, and chops them. The number of tasks that the device can handle depends on the selected model and configuration, which affects the price.
Basic tasks of the device:
- Beat.
- Stir.
- Rub.
- Grind.
- Shred.
How to use a blender and for what purposes depends on the recipe. But please note that the list of functions and features may change. For example, if you intend to crush nuts or make minced meat, it is logical that you will need a powerful device that can easily cope with chopping ingredients.
The motor needs rest during such manipulations: 1 minute of work = 1 minute of rest.
For families with children, the device allows you to independently prepare various purees; power also plays an important role here in order to quickly and efficiently grind potatoes, apples, pears, etc. The whisk attachment will simplify the preparation of desserts, as it will allow you to prepare delicate fillings, cream for pastries, and cakes.
How to use a Polaris, Bosch blender or a model from another manufacturer depends on the type of device. Initially, we will study the classification, then we will dwell on the operating features of each type of device.
Large powerful drill blender
We make a simple and very powerful homemade blender from a drill. We decided to make squash caviar. The question arose: how to chop zucchini?
Blender
too small and weak for such tasks, and the meat grinder is not able to grind into a homogeneous paste.
Small lumps remain, and the caviar turns out to be grainy. Therefore, I decided to make a large and powerful blender from a drill, which every homemade person has. The design turned out to be so simple that it does not require any drawings and is literally done “on the knee”.
Materials and tools
- Drill. (every DIYer has one);
- PVC pipe 50 mm (plumbing store);
- PVC pipe plug 50 mm. (ibid.)
- Metal chrome tube with a diameter of 16 mm (furniture fittings store);
- Plastic dowels 14 and 8 mm. (building materials store);
- Self-tapping screws 16 mm with a wide head (ibid.);
- Screws M8 and M6. (ibid.);
- Blades for mounting knife (household goods);
- 50 mm clamp (ibid.);
- Empty tin can (trash can)
Making a blender
The blender consists of 3 nodes. 1 – drive, 2 – housing, 3 – blade shaft. Since the drive is an ordinary drill, we will consider the remaining 2 nodes.
Making a knife shaft
Since the knife shaft is the most labor-intensive, we’ll start with it. The most optimal solution is to cut an M6 internal thread at one end of a rod with a diameter of 9 mm to a depth of 20 mm. Unfortunately, not everyone has access to a lathe (it can be done without a lathe, but it’s troublesome), so there is a second, very technologically advanced option.
At the end of a steel tube with a diameter of 10 mm. hammer in a plastic dowel with a diameter of 8 mm. And screw an M6 screw with knives into it. But I have never seen steel tubes with a diameter of 10 mm on sale anywhere. Therefore, those for whom the first and second options are unacceptable choose the third.
This is using a 16 mm tube, which can be purchased at any furniture hardware store. You should buy the one with the thickest walls. Because they are different... A 14 mm dowel is driven into one end of this tube. and the next dowel is hammered into this dowel 8 mm and into the dowel 8 mm. The M6 screw is screwed in.
Since it is impossible to clamp a 16 mm tube directly into the chuck of an ordinary drill, we also hammer a 14 mm dowel into which an M8 screw is screwed into the opposite end. Leave 30 mm of protruding screw for clamping in the drill chuck, cut off the rest.
Only in this option it is necessary to take into account that the optimal length of the knife shaft (without knives and the part that is clamped in the chuck) is 100 mm, and the length of the dowel 14 mm is 80 mm. it makes sense to shorten the dowels to 50 mm. We've sorted out the tube, now – fastening the knives.
On an M6 screw with a wide flat head, we put 4 blades for the mounting knife, broken off to the required length, through washers (I used 2 washers between each knives). We arrange the knives crosswise and tighten them with a nut. We screw this screw with knives into the 8 mm dowel. It screws in quite tightly, but holds securely. So, the knife shaft is ready.
Case manufacturing
The body is made from a PVC pipe with a diameter of 50 mm, a plug for this pipe, and a tin can. And another clamp. From the socket of the pipe we cut off the thickening for the rubber cuff, since it will not be needed. Next, take a suitable shallow empty tin can and drill a 1–2 mm hole in the center of the bottom. greater than the diameter of the knife shaft.
We drill the same hole in the center of the plug. Along the perimeter of the can we drill several holes with a diameter of 10 - 12 mm to allow the ground mass to exit (It is much more convenient to drill holes in a can using feather drills for wood). We combine the tin can with the plug and secure it with self-tapping screws.
We place a pipe on the plug and also secure it with self-tapping screws. To ensure that the pipe fits tightly onto the plug, several turns of electrical tape should be wound around the plug.
We measure the length of the knife shaft fixed in the chuck and adjust the body to this size. In the upper part we make 2 slots 30 mm deep.
Since the internal diameter of the pipe is slightly larger than the diameter of the drill neck, we need a gasket, which we will make from the remainder of the same pipe. We cut a ring 20 mm high and cut out a 15 mm section from this ring. We glue the ring on the inside of the extension so that it does not get lost. We glue it to one point so that it can be compressed.
Next, we attach the extension to the neck of the drill (or simply measure it with a ruler, which is somewhat more accurate:), mark the location of the key hole on it, and drill it with a 20 mm drill.
The body is ready. By the way, I forgot to write. If you don’t have a suitable empty tin can at home, you can replace it with any suitable lid, or use a plug for a 100 mm pipe.
Which will look much more “branded” :)
We put the body on the drill, without securing it completely yet, insert the knife shaft into the previously spread cams, turn the body until the hole for the key on the body coincides with the socket on the chuck, tighten the shaft with a key, and finally secure the body with a clamp. All.
As they say, the design does not require adjustment and starts working immediately when turned on. It also grinds potatoes into a homogeneous mass for hash browns, which previously had to be manually grated on a fine grater, because the meat grinder leaves lumps, apples for applesauce, crushes nuts for cookies, and much more. PS
Since I had a steel tube with a diameter of 10 mm, which I cut from another leaky heated towel rail before throwing it away, I used the second option when making the blade shaft.
Go back to the main page
Source: https://www.freeseller.ru/6600-bolshoy-moschnyy-blender-iz-dreli.html
Types of blenders
Our service center offers its services for repairing household appliances at a competitive price. We repair any breakdowns of modern household appliances. Leave a request and get a 15% discount - Leave a request
We have looked at what a blender is, now we move on to studying its classification. There are only two types:
- submersible;
- stationary.
Each of them has its own advantages and disadvantages; when choosing this kitchen device, it is worth considering the features of using each type.
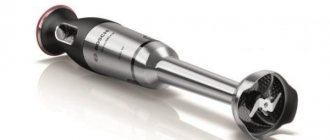
The submersible model is considered more compact, which is especially important for small kitchens. The product is presented in the form of a stick, on which there is a round plastic box at the top. There is a motor inside that is responsible for the operation of the device. Power depends on the price and brand; the more powerful, the faster the device copes with the task.
The kit includes a glass into which the ingredients are loaded and where the entire process of crushing, grinding, and whipping is carried out. The manufacturer includes different attachments in the kit, their number depends on the selected model. The main nozzle is similar to a leg with small knives; the material used is stainless steel. Companies often then add a whisk to the kit. There is a grinder-mill; there is a separate lid that is fixed on the base mechanism and covers the bowl.
The stationary model is presented in the form of a stand with a motor and a bowl where products need to be placed. There are stainless steel knives at the bottom. The bowl can be plastic or glass. What's great about this blender? There is no need to control the process.
The stand contains a motor that makes the entire mechanism work. Power – from 180 to 2270 W, respectively, if you need to crush ice or something hard, you need to choose a model with a higher power. There is a pulse mechanism of operation, the essence of which boils down to working with pauses for the motor. Models differ in bowl volume, so if a family consists of 4-5 people, it is better to choose a device with a capacity of 2 liters or more.
The stationary model requires a separate workplace; it is desirable that the coating be dry, even and located close to the outlet.
Among the disadvantages, one can note that the bowl is filled only to the specified level, and in general, all processes can only be carried out in the bowl from the set. As an example of a stationary device - inexpensive, with average power DEXP PL-0500, of relatively compact size.
Disassembling a Brown brand blender
If during use you encounter a problem that the Brown brand blender does not work, you can try to fix it yourself or take it to a service center. When deciding to troubleshoot problems yourself, use this disassembly algorithm:
- Using pliers, remove the cartridge, also known as a holder for attachments.
- Using a thin screwdriver or knife, knock out the weld seam by inserting the blades between the body and the casing. These steps must be repeated until the engine moves freely.
- Bending the clamps, remove the engine.
- Together with the motor, you can easily remove the board, using pliers as necessary.
- There are latches inside the back cover that need to be bent. This will release the back section.
- Using a screwdriver, pry up the speed controller and bend the power cable holder. Next, you can begin diagnosing and repairing faults.
Be very careful when handling the board as it is very fragile. If you damage it, the equipment being repaired can be thrown away.
Features of using stationary models
Simple, affordable Scarlett, Vitek, Philips. If you are ready to pay for the brand, then pay attention to Brown, Electrolux, Bosch. How to use a stationary blender? The following rules must be adhered to:
- You need to monitor the quantity of products; there should not be too much or too little. It is important to adhere to the standards specified in the instructions.
- If possible, use bowls of minimal volume.
- It is not recommended to immerse hot ingredients, this reduces the service life, and glass and plastic begin to turn yellow.
Advantages of a kitchen device:
- high power;
- does not require your presence;
- The lid closes tightly, reducing the risk of splashing;
- volumetric bowl.
Minuses:
- dimensions;
- limited functionality;
- It is difficult to grind small products in small quantities.
How to use a blender correctly? Before dipping the ingredients, you need to cut them into pieces, it is best that they are the same size. Knives carry out chopping and mixing of products to the required mass.
When the device is working, you cannot open its lid to add, for example, a product you forgot. During the loading process, you should focus on the marks on the bowl; you should not fill it right up to the lid and do not try to compact it. Now, knowing how to use a stationary blender, you can extend its service life and not spoil the appearance of the device.
Device contents
The configuration of the device depends on the principle of operation. The stationary blender includes a working base and a jug for loading products . Submersible models are more varied. Here, the set with the working base can contain various attachments: graters, whisks, choppers, mills.
look at the additional options :
- Mixing glass. It is advisable that the mixing container have high sides. In open, low containers, liquids will splash and it will not be possible to mix them thoroughly.
- The blender attachment is used for preparing pureed soups, smoothies, and baby food. Its functionality is similar to that of stationary models. The knives of such an attachment can be removable and monolithic.
- The whisk attachment will help you whip cream for a cake or prepare fluffy eggs for meringues. It is indispensable for home confectioners and anyone who likes to pamper their household with delicious desserts.
- The chopper bowl is used as a meat grinder for preparing minced meat and is used for cutting food for salad or home canning. They can be completely different in volume: from compact 0.35 liters to spacious 2.2 liters. The bowl may come with a grater, a knife for chopping ice or cutting food into slices.
- The mill is used for grinding harder products in small quantities. You can quickly prepare a portion of freshly ground coffee or turn sugar into powder.
- The puree attachment will help you prepare a really tasty side dish, and not an unpleasant paste. Plastic knives do not beat, but gently grate the potatoes, preserving their taste and attractive appearance.
How to use an immersion blender
In terms of compactness and functionality, the handheld device is still superior to the stationary model. How to use an immersion blender depends on your size. Most often, a simple model is equipped with a non-removable knife-chopper attachment. More advanced models already have gearbox covers, a whisk, a submersible chopper, a grater, etc. What exactly are you planning to cook? Take this into account when choosing a gadget.
But remember that it is better not to use such devices for the purpose of grinding very hard products. For example, coffee beans, crackers, frozen meat are not suitable for a manual model; a stationary model can cope with such tasks.
Manufacturers often indicate in their instructions that it is best to use only the glass or bowl that came with the kit. Otherwise, you may encounter splashing of the resulting mixture. If you decide to replace the container, then choose something deeper.
How to use a hand blender is described in the instructions. Most often you can find the following advice:
- The amount of ingredients in the bowl should cover the cutting part of the knife.
- Do not load hot, warm ingredients.
- While beating the fruit, remove the seeds, stems, and leaves.
- It is better to carry out the first processing of any product at minimum speed, gradually increasing it.
Pros of a hand blender:
- compact dimensions;
- multifunctionality;
- You can quickly chop small quantities of food.
Now for the cons:
- not suitable for cocktails;
- needs rest;
- works with a small volume of products.
Now let's look at the attachments that manufacturers often add to the kit with a kitchen device.
Hand blender attachments
How an immersion blender works depends not only on the power, but also on the number of attachments included. Accordingly, the more different additional elements in the set, the wider the functionality.
An immersion knife is an attachment that allows you to prepare a homogeneous, airy puree or puree soup. Using the attachment, you can make the sauce, then use the whisk to completely whisk the mixture.
The whisk attachment is originally intended for whipping. Now there is no need to spend 20 minutes, or even more, manually beating eggs, whites with a whisk or fork to get strong peaks. The whisk as an attachment on the device is an opportunity to quickly prepare sponge cakes, meringues, and various baking creams.
You cannot keep the submersible model turned on at maximum for a long time. This can cause the motor to overheat and burn out.
The principles of operation of a blender with grater and shredder attachments from the name of the elements themselves speak for themselves. Such attachments can easily chop and grate various vegetables and fruits for your dishes. This is especially useful during the period of preparing canned food for the winter. The blender will cope with the same cabbage, carrots, and blueberries with a bang.
Not often, but there is an attachment for cutting into cubes. Used to produce uniform cubes for salads. The chopper attachment is most often used for chopping herbs, onions, and garlic. Expensive models may include a hook. This attachment is designed for kneading dough.
The mixing attachment consists of a whisk and a chopper. Used for preparing airy dough and minced meat.
Now you know how an immersion blender works, depending on its configuration. When choosing a model, consider exactly what elements are present in the set, in addition to the standard knife and bowl.
What you can make from a mixer with your own hands: interesting ideas for creating new items
We don’t always throw things away right away; many people keep irons, hair dryers, and other household appliances in their closets. And it is quite possible to find an old mixer, maybe even still working, which has been replaced with a new modern unit. And it’s good that you haven’t thrown it away yet, because we’ve found some tips on what you can do with an old mixer for your home.
Figure 1 Don’t rush to throw away old things
You can make a grinder for sharpening knives or other objects only from a running mixer. To do this we need a part of the body with a motor. It is good if it is a stationary instrument with a removable portable flask. The transformation process will occur as follows.
- Prepare the mixer body, check its operation, as well as switching speed modes. If necessary, repair the electrical part of the equipment.
- For sharpening tools, a regular grinder disc with a diameter of 125 millimeters is suitable.
Figure 2 A section of 125 mm is quite sufficient for new equipment - On the back side of the disk, it is necessary to center the original metal nut as much as possible, then glue it to the disk with a hole in the center using liquid nails, and secure it with four more self-tapping screws for strength.
- Next, you need to screw the disk onto the mixer body until it stops along the thread. Then check the functionality of the new device.
- You can glue any cloth to the disc for grinding or polishing products. The quality of sharpening of household utensils depends on the thickness of the abrasive layer.
If the mixer was initially set to operate at several speeds, all sharpening and polishing must be done at maximum speed. It will be more productive.
Figure 3 Second life for a mixer - a sharpening tool
Connecting equipment to pedal control
It is not always convenient to select and manually control the operating speed of new equipment. You can add a pedal to your grinding machine as follows:
- disassemble the body;
- disconnect the electronic control;
- connect the motor directly and make the connection to the pedal.
However, you need to know that not every model is suitable for connecting to a new device. Incorrectly selected equipment will lead to engine overheating and failure. All this can end in a short circuit. It is not difficult to calculate the required power; each product has a label indicating the nominal parameters.
To calculate the optimal pedal load current, you need to divide the mixer motor power by the network voltage. In our case it is:
- 700 watts / 220 volts = 3 amps.
If the pedal has a factory rated load current higher than 3 amperes, it is quite possible to make such a connection.
This device is suitable for sharpening household knives, meat grinder knives, household tools, and can be used for polishing wooden, plastic or metal objects.
Figure 4 Foot pedal motor control frees your hands
Boring machine from a working old mixer
The engine in the old mixer has good power, its performance has been tested by time. You can make a drilling machine useful for everyday use with your own hands; for this you will additionally only need a motor from a portable mixer, 2 jars: coffee and freshener, the diameter of one should be slightly larger, and a small piece of decorative leather.
The step-by-step remodeling process is as follows.
Figure 5 Motor from a conventional mixer
- Disassemble the mixer body and remove the 220 volt motor.
- The fan must be moved as close to the engine as possible; to do this, you will need to remove all unnecessary elements that are attached from the base of the fan to the shaft housing. They do not bear any functional load on the future product. After this, you need to screw the fan to the end of the shaft leg.
- Next, you need to cut off the top from the air freshener can to the beginning of the narrowing point.
- The cut top should fit perfectly into the hole of the second coffee can. For reliability, it can be secured by cold welding and wait until it hardens completely. You first need to make small holes in a circle at a distance of 2-3 mm from the edge, which will serve for additional air exchange while the fan is operating.
- After the weld has hardened, it is necessary to insert an empty bearing of a similar size into the remaining hole for future fixation of the bur, then carefully press the hole with a hammer. After this, cover all voids from the inside with epoxy resin.
- Cut a rectangular hole in the jar to connect the control to the outside. Then insert the engine inside the housing and fix it on a metal frame, which should be pre-welded or used from improvised means.
- To close the bottom, you can use a metal drain from the sink; the holes will serve for additional air exchange. It should be welded using liquid welding.
- After assembling the equipment, its body should be refined with a piece of leather.
In the finished bur, you need to place a washer on the attachment to the shaft or tighten any fastener. With your own hands and zero investment, you have created a universal device with which you can create real masterpieces in your home.
Figure 6 You can find many options for using a drill in everyday life
Making interesting objects from flasks
If your stand mixer has a crack-free bulb and it is still in good condition, you can make a candle holder that will bring comfort and coziness on winter evenings. There are a lot of manufacturing options:
- secure wine corks to the outer surface, pour coffee beans inside and place a decorative candle; Figure 7 Coffee beans will fill the room with an invigorating aroma
- The outside walls can be glued using the decoupage technique, choosing a three-layer napkin covering that will suit the design. Be sure to fix the surface with PVA glue;
- glue a dark or black napkin on the outside, first cut out small patterns on it. The reflections of the candle will play interestingly in the slots on dark evenings;
- Glue bugles, beautiful buttons, dried flowers on the outside. You can apply PVA glue to the surface and immediately sprinkle with colored salt, semolina or decorative crumbs.
There are a lot of decoration options; you need to choose one that fits into the style of the room.
Figure 8 For external decoration, you can use special paints
Disassembling the mixer
If the mixer no longer works, and we have already thought of a use for the flask, there is no need to rush to throw away the housing with the motor. You can disassemble it and pick up something useful for future alterations. The disassembly process must be carried out as follows.
- Unscrew the connecting screws with a screwdriver.
- Visually determine the cause of the engine malfunction in order to understand which internal parts or assemblies may be useful later.
- If the engine is not running after disassembly, you need to pay attention to the following components and elements:
- mode switch;
- indicator light;
- engine. If you disassemble it, you can later use the rotor and stator;
- wires;
- coil with copper wiring;
- network wire.
So, finally, the good old mixer can serve as spare parts in future alterations.
Figure 9 Disassembling the old mixer
Do-it-yourself things are not only about saving money, it is also a manifestation of creative abilities. After all, it’s much more pleasant to use a tool into which you put your soul into making. Don’t rush to throw away old things; you can always find a use for them and give a second life to your once-loved equipment.
Figure 10 Second life for an old mixer
Source: https://TechnoSova.ru/dlja-kuhni/kuhonnyj-kombajn/chto-mozhno-sdelat-iz-miksera/
Safety precautions
Any equipment requires compliance with operating and safety rules. Before using the blender, be sure to read the manufacturer's instructions. Perhaps the company noted some recommendations in it, nuances of using this particular model of kitchen device.
How to use a Redmond, Bosch or another brand blender, according to safety precautions? Do not allow pieces of food to get into the motor. Do not get the motor wet; the device may be damaged. Make sure that no chips or cracks appear on the case, and that the power cord is not frayed or pressed. When working with the gadget, load it with products up to the set mark. In the blender instructions, each company indicates its own limits for different models. Therefore, it is better to immediately study all the information before turning on the device.
When finished, disconnect the device from the network. Especially if there are children in the family, you need to store the device higher and further away. It is best to immediately wash the attachment you are using and dry it thoroughly.
Remember - do not overload the motor. When using a manual model, you should take a break while working. The time required for breaks depends on the hardness of the products used. For example, nuts and grains require a break every 30 seconds; when cutting juicy fruits, a rest after 3 minutes is enough.
Expensive models have thermal resistance; this option automatically turns off the power when the device overheats.
Now you know how to use an immersion blender according to safety rules, but the main condition is to follow these recommendations, otherwise the device may fail.
How to assemble, turn on, turn off
For proper operation of a specific model, please read the operating instructions . Some mechanisms close “until a click”, others are tightened to the marks. To learn, for example, how to turn on and off a Polaris blender, you will only need instructions for this model. Methods of working with equipment from other manufacturers can damage the mechanisms and working parts of your device.
Before turning on the blender, make sure that all wires are intact and without damage. If you notice strange behavior of the appliance, for example, a burning smell during operation, quickly unplug the appliance and take it to a household appliance repairman.
Important! Do not turn on the appliance if it seems to you that the bowl or attachment is not installed correctly, is moving or sliding out of place.
It is recommended to perform all manipulations with knives and sharp objects before connecting the device to the network. Safety precautions are something that should never be forgotten. When completing work, wait until the mechanism stops, turn off the power supply, and only then remove or change attachments.
If there is a function for changing the operating speed, it is worth starting with low power and gradually increasing the speed. This way the products will be crushed better, and the mechanisms will not suffer from excessive loads.
What not to do
How to use a Brown, Electrolux, Bosch blender, submersible or stationary, was described earlier, now let’s look at what not to do during operation.
Remember that you cannot connect wet attachments to the device, as this may cause the gadget to malfunction. The case is best cleaned with a soft, slightly damp cloth. Children should not operate the device; they are allowed only with the presence and supervision of adults.
How to use the bowl of an immersion blender? Here it is prohibited to immerse large pieces of ingredients that have not been cleared of seeds, stalks, and seeds. Such large particles can reboot the engine, which will cause a breakdown.
Do not immerse the device in water or dishwasher.
Please note that a small portion of food in a stationary device can also cause overload of the motor. You cannot work at maximum power for a long time. Take breaks. It is prohibited to activate the device with wet hands, and the device should not run idle. Knives should not be held in your hands; you need to control the depth of immersion of the leg.
Mechanical damage and ways to eliminate it
Knowing how to fix a hand or stationary blender, you can save a lot, because most problems do not require large investments. In some cases, mechanical damage can block the operation of equipment. For diagnostics, you can use different methods, such as: disassembling the blender bowl or body.
Leaking engine gasket and bowl
If during operation a leak develops between the body and the bowl, do not hesitate to repair it. To do this, apply the following algorithm:
- remove the bowl from the body;
- unscrew the spindle;
- replace the old gasket with a new one.
When repairing a Scarlett blender with your own hands or another brand, please note that the spindle has a left-hand thread.
Damage to the lid latch mechanism or attachment
If the lid latches or attachments break during operation, they cannot be repaired. The problem can only be solved by purchasing a new component.
Please note that not every manufacturer offers replacement parts for their models. Take this point into account when choosing equipment, otherwise, after the bowl, lid or nozzle fails, you will have to buy new equipment.
Damage to the blender body
If the blender body is damaged during operation, it cannot be repaired. The problem can only be solved by purchasing new equipment.
Damage to the blender jar
Due to careless use, the bowl latches, which not only hold the container, but also operate the device, may fail. There is no point in trying to repair it, since it cannot be returned to its previous state. The problem can only be solved by purchasing a new bowl.
Leg repair
Most models, including the ELENBERG BL-3205 G blender, are equipped with a leg that cannot be restored. If it is made of metal, you can try to bend it manually. Even after returning to its previous shape, the leg will no longer work as well as before.
Please note that the monolithic leg cannot be restored. If it breaks, you will need to buy a new one that is compatible specifically with your device model.
Gearbox repair
Repairing a blender gearbox is a problem that you may encounter in cases where the equipment operates beyond its capabilities. This problem occurs due to overheating: the heated shaft melts the gear seats, which leads to its jumping off. To eliminate the breakdown, the device must be disassembled and visually inspected. If the gear is intact and just slipped off, it needs to be put back by replacing the fasteners or using superglue.
If during the repair you find that the gear is broken, you need to purchase the same one. No analogues or similar models will fit.
How to properly wash a blender after use
Every kitchen gadget needs cleaning. The device in question is no exception. You know how to turn on your blender, but did you know you need to clean the speed switch every now and then? It is best to use a soft cloth, slightly damp. But remember that the device must be disconnected from the network.
You must wash the device yourself; do not immerse it in water or dishwasher. The bowl itself and the removable attachments need to be washed under running water. Check your blender's instructions, as there are companies that allow removable attachments to be placed in the dishwasher.
If the elements are in grease, you can use a liquid detergent, but then you need to thoroughly wash the part, wipe it, and dry it. Please note that expensive stationary models have a self-cleaning option. This simplifies cleaning, since the device washes itself, you just need to fill it with cold water, drain it and wipe it dry.
Remember that you cannot wash the stand itself, where the motor is, you can only wipe it with a damp soft cloth. Now you know how to use the DEXP PL 0500 blender or other immersion model and care for the device.
Plastic needs special care; it is not advisable to drop it; it is better not to subject it to heavy loads. Do not use aggressive cleaning agents or sponges to wash metal attachments.
With proper use of the device, you can diversify your diet by preparing different dishes. Cooking time will be reduced by a couple of times, and proper care of the device will increase the operating time.
Stationary type
- In a couple of seconds it grinds any food into liquid porridge.
- Ideal for preparing sauces and a variety of cocktails.
- Each program is responsible for its own grinding mode.
- Requires dedicated space in the kitchen.
- The volume of loaded products is limited to the bowl.
- The grinding process is fully automated.
Most quality blenders available to the masses are made by Bosch or Polaris. These companies manufacture both submersible and stationary devices equipped with all the advanced features. Even if your device is made by another manufacturer, its operating pattern will not differ much from the leading Bosch models.
Look at the photo below, this is what different models of blenders may look like.
Nozzle functionality
Each blender may contain several types of attachments. Many housewives wonder: what is the purpose of this or that type of nozzle.
There must be a nozzle on the leg. It helps to puree various types of food and also mixes ingredients for sauce. Some devices are equipped with a special whisk with which you can beat eggs, and there is also a bowl with a small mill blade. This addition will help chop nuts, as well as grind meat and vegetables.
There are devices that have replaceable attachments that cut pieces of different shapes. If you purchase a blender like this, you will eliminate the need to buy a food processor. Stationary devices contain special attachments that can crush ice. If your manual unit does not have this add-on, then it cannot be used for frozen water and juice.
What to cook with a blender and its attachments
If you bought such a device yourself, then you probably already have plans for what to cook with it. But there are times when the device is presented as a gift, and you do not know what is being done with the blender. The main job that the device can handle is preparing any puree, including soup, cocktails and drinks. Using a standard attachment, you can prepare various sauces (for example, pesto) and gravies, grind meat into minced meat, even chicken with skin, onions and garlic into cutlets, turn breadcrumbs into breading, grind coffee, crush ice, prepare pate or mix mayonnaise. Using the whisk attachment, the whites can be easily beaten and a homogeneous dough will be mixed. It happens that the blender is equipped with a bowl with grater attachments: this will make it easier to chop vegetables for making soups, cutlets, and beautifully decorating finished dishes.
How to disassemble and repair a blender depending on the cause of the breakdown - minor faults
It is immediately necessary to note the fact that not all devices are capable of grinding food equally well. For example, low-power models are not able to cope with solid food, so if your blender does not work, or rather does not cut food, this does not mean that it is broken and needs repair. If, after turning on, the device starts to buzz, but no process occurs, you need to check two things:
- whether the knives rotate if they are not obstructed by food. If yes, then this means that your device is simply not capable of handling such a volume, and it does not need repair. To do this, you need to either add liquid or reduce the amount of grinding;
- in some cases it may not cut due to dull knives.
In the first case, you will not do anything, since your model is of very low power. But we will describe below how to replace the knife.
Check the blender before disassembling!
What can you grind in a blender?
You can grind many ingredients in a blender.
The most popular of them are:
- Vegetables, fruits and berries - cucumbers, tomatoes, carrots, cabbage, eggplants, zucchini, onions, pumpkin, apples, bananas, pears, etc. Almost any berries can be chopped. It is important to mention that when mashing boiled potatoes with a blender, it becomes more viscous and dense due to starch and this consistency will not be to everyone’s taste. You should also refrain from blending apples with metal attachments, since when it comes into contact with metal, the apple oxidizes and changes its taste.
- Various greens - parsley, dill, green onions.
- Nuts - peanuts, walnuts, cashews, almonds and others. At the same time, they can be ground into a paste.
- Meat - beef, pork, veal, lamb. The resulting minced meat has a slightly different, denser consistency, which makes the cooked meat more uniform, but less juicy.
- The blender can also be used as a coffee grinder - grind coffee and crush ice if you have a special grinder.
For better processing, it is recommended to pre-cut all products into pieces, and boil especially hard ones.
About
Types of device
The modern market offers for sale a wide selection of brands and models of immersion blender and stationary appliance. What type of device to choose and how to use an immersion and stationary blender are standard questions before purchasing.
Before choosing, you should consider the following factors:
- If you have a small child at home, you will have to regularly chop everything for him.
- Food preferences in the family.
- Free space in the kitchen.
- How often will you use the blender?
- What amount is being calculated?
- Amount of work in the kitchen.
- What additional devices are available?
- First of all, you need a blender with a lot of power.
- Preference to manufacturers' brands.
- Duration of the warranty provided.
- Before purchasing, study information about the selected model: how to use it, characteristics.
Manual
An immersion blender is a tool for working in the kitchen. It is necessary for making sauces, soups and other dishes with a liquid, soft consistency. The appearance is represented by a removable attachment with knives, which can be replaced with others, for example, whisks for whipping. The more removable devices included in the kit, the higher its functionality.
Attention! The nozzle is preferably made of metal rather than plastic. This is important for chopping hot foods.
The upper part of the electrical device serves as a holder, which contains the motor. The current is supplied through the power cord plugged into the outlet.
Attention! You can find hand blenders of cordless models on sale. They can be charged from the base like a phone. This is very important during a power outage. Cooking your favorite dish or feeding your child will not be difficult.
The difference between a hand-held device and a stationary one is that it is lowered into a container with ingredients, rather than poured into it. The set includes a plastic glass with a volume from 500 ml to 1.25 l, depending on the brand of the manufacturer. You can add the necessary products to this container, for example for a drink, and grind them there. Thanks to the dividing scale, the serving capacity is immediately visible.
The advantages of a hand blender are as follows:
- Small, compact size;
- There is a gear change;
- Easy;
- Easy to assemble and clean;
- Costs less than stationary;
- Easy and quick to use for its intended purpose anywhere in the apartment.
There are moments that slightly cause discomfort in operating the device.
Attention! You should pay attention to the warning sign that work should not proceed continuously. You need to stop every 10 seconds. This applies to all types of hand blenders, otherwise the device will overheat and may burn out.
Disadvantages of an immersion blender:
- When working, you must constantly hold it in your hand;
- Do not leave it in a container with ingredients - the structure is not stable;
- You work with food without a lid, so if you are not careful, the liquid will splash.
Important! When choosing, pay attention to the power of the device and purchase one with the highest number of watts.
Using a blender should include subsequent cleaning. The handle with the wire connected to it cannot be washed. Only the nozzle is removed. Pay attention to the incisor shaft itself. Dietary fiber is usually wrapped around it. You should wash it more thoroughly.
Stationary device
Many consumers prefer a stable stationary mechanism. A good machine can grind ice into crumbs and raw beef into minced meat. It has fewer functions than a food processor, but does an excellent job with most culinary tasks - chopping, whipping.
The disadvantages include:
- Noise;
- Availability of free space for its installation.
- Does not chop greens.
- More expensive than manual ones.
There are many more benefits. Allows you to easily cope with everyday chores and facilitates the preparation of preparations. Suitable for those who like to experiment in the kitchen.
- Professional models can replace mixers and meat grinders.
- Easily handles hard products.
- Convenient to use, hands free.
- Significantly saves time. While it's working, you can do something else.
- It is suitable for daily use. Easy to clean. Almost all models have a self-cleaning function.
- Power 800 W – copes with ice, 1000 W – grinds meat.
- Availability of speeds.
Important! The more often you plan to use the blender, the more serious the power and load, the more attention should be paid to the presence of additional useful functions (for example, protection against leaks and overheating, the presence of a self-cleaning function). Not only does it prevent incidents, but it also makes working in the kitchen easier.
The stationary device consists of the following zones:
- The non-slip bottom or feet are stable on any surface and stay in a stable position at any speed.
- Modern electronic reliability panels are not inferior to mechanics; on the contrary, they are more convenient and easy to use.
- A standard blender blade has 2 blades, but if there are 4 of them, the grinding process will be uniform and fast.
- The base is a bowl. Capacity from 0.4-2 l., the scale shows the amount of product that the mixer can process at a time. For the device to operate, the compartment cannot be fully loaded; a reserve volume of 15-25% is left. 1.5 liters for making a cocktail for 2 people - 1 liter dishes for 4 people.
- The bowl is installed on a housing containing a motor and a panel with control buttons.
- The bowl comes with a lid; it must be closed during use.
Important! When using an immersion blender, you can work with the main bowl or choose any container. There is no such system in a stationary hospital.
Electrical related breakdowns
Here everything is a little more complicated, so a more complete disassembly and repair will be required, since there can be many causes of malfunctions and here are the most common ones. Disassembling the handheld device is not difficult. To open the case, it is enough to correctly locate the latches on the handle and open them.
It is more difficult to disassemble a stationary model; in addition, it has significantly more parts and mechanisms. Therefore, you need to arm yourself with everything you need right away. You may need several types of screwdrivers, pliers, tweezers, and a screwdriver with an indicator. It is very important, especially if you are doing repairs yourself for the first time, to remember where and how all the mechanisms are installed. Otherwise, you will take the blender in for repair not with more serious faults, for example, a short circuit or a burnt out motor.
DIY blender repair
Problem with speed controller
Unfortunately, unless, of course, you are a radio technician, DIY repairs are very difficult and sometimes impossible. Since you need not only special tools for this, but also knowledge of physics. If the blender's speed switch is broken, it is better to contact a specialist.
But if you decide to repair it yourself, get ready for the fact that you will need to disassemble the blender. So, armed with a screwdriver, we unscrew the device’s body. All parts must be removed to gain access to the switch. The regulator is removed from the equipment and then checked in all positions. If the blender is working correctly, the contacts will be set correctly at all speeds.
Important! Before starting repairs, you need to listen to whether the speed changes in different positions of the switch.
Speed switch repair
If the blender stops: how to repair it
Sometimes it happens that the device simply does not turn on. There can be many reasons, as well as ways to eliminate them, so let's start in order.
There is a buzzing sound when turned on, but no action occurs - possible breakdowns:
- The most common is knife jamming. To determine this, you need to turn on the device and listen: if there is a buzzing sound, then the cause has been identified. To eliminate it, you need to remove the bowl and very carefully, it is better to do this with a foreign object, press the power lock button. Great, everything worked - the repair was limited to removing the bowl and knife.
- The problem is much more interesting, but also more deplorable, when a buzzing sound is heard, and the lock button is pressed, but the process does not occur. Here, the forecast is disappointing - the motor winding burned out. There are several solutions: contact the service center with the question that the blender most likely burned out and whether it can be properly repaired, or disassemble it and try to independently determine the cause.
The first sign of a burnt out engine is a strong burning smell, which occurs due to a short circuit in the system. Repairing it is possible, but only if it is limited to replacing the brushes. In other cases, it is cheaper to buy a new household appliance.
It is important to understand! Buying a new device in many cases will be more profitable, since the price of the motor is very high.
We check the most common causes of breakdowns
No buzzing sound when turned on
In this case, there are many possible breakdowns. And most often, housewives begin to panic even in cases where there is no problem as such:
- Before you start repairing the blender, you need to check the most basic thing - the functionality of the outlet.
- If this is not the reason, then one more thing needs to be ruled out - wire breakage. To check the cord, you need to disassemble the case, so you need to take a set of screwdrivers. Rare models may require you to use special nozzles, but, as a rule, a regular cross or flat nozzle is sufficient. Before disassembling the blender, it must be disconnected from the power supply. And only after that open the case. After it is separated, a power block will appear in front of you, to which the cable will be soldered or screwed. At the connection points you need to check the voltage with a special screwdriver. If it is there, then the wire is fine, but if it is missing, it is better to connect a new cord.
Checking the wire in the blender - In models that have a fuse, you need to check its serviceability. If this is the cause of the breakdown, you need to replace it with a new one and check the blender. But sometimes, even after replacing the old one with a new one, the fuse immediately burns out - a short circuit occurs. To fix the problem, you need to connect energy consumers to the source one by one and look at the result. You also need to check the integrity of the windings. If the problem of breakdown is not detected, then it is better to contact a workshop.
- The most serious thing is identifying damage to the board. These could be swellings or interruptions in tracks. They occur when the blender burns out. If such a defect is found, the blender cannot be restored.
As you can see, the malfunctions and methods for eliminating them are not as complicated as they might seem at first glance. Therefore, if you need to fix a broken blender, do not rush to contact a workshop, try to eliminate the reasons yourself.