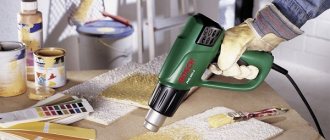
Perhaps this method is the most popular, you need to turn it on to the warm blowing mode and bring it to the ice. Despite many questions, you can and should use this method for quick work. But the experiment may accidentally end in the hair dryer breaking or overheating. In the worst case, water will enter the housing and cause a short circuit. Most housewives use a hairdryer.
- 10.1. Cleaning up the inside of the refrigerator
Important! You should use a hairdryer extremely rarely, only in emergency cases.
How to properly defrost using a hairdryer
- We remove all the food that is in it from the freezer, since it’s winter now and they can be taken out to the balcony.
- Turn off the refrigerator and place a container to collect melt water. We spread a towel on the stool, one edge of which is twisted into a tube; it will act as a kind of roller to direct the supply of warm air from the hairdryer. We place our hairdryer on a stool with a makeshift pillow and turn it on to medium air supply at medium temperature. Do not turn the hair dryer on maximum, this can lead to premature failure of the hair dryer! Leave the hair dryer in working condition, and only from time to time check the progress of defrosting and the hair dryer itself for overheating; usually at medium temperatures and medium speeds it can withstand a long time of operation. Our main task is to achieve a targeted direction of air supply to the icing in the freezer. But at the same time, do not try to pick up a hair dryer and place it in direct proximity to icing, this will not end well. At one time, I thus lost my hair dryer; one drop of water got inside and disabled it.
- Every 5–10 minutes, check the defrosting process; if necessary, turn the flow of warm air from the hair dryer in the desired direction. Do not try to break off pieces of ice using improvised means, as this may lead to deformation of the inside of the freezer.
- After the last piece of ice falls from the top of the freezer under the flow of warm air, turn off the hair dryer and leave the refrigerator alone for 30 minutes, allowing the last pieces of ice to melt naturally.
- Then we wipe all the internal parts with a damp cloth, put it in the freezer and once again give it the opportunity to dry completely. Only after this can you turn on the refrigerator! Don’t rush to immediately fill the freezer with contents; let the freezer reach its operating temperature and only then fill it with frozen food.
Carrying out preparatory work
It is important to thoroughly clean leftover food so as not to cause an unpleasant odor in the freezer.
Before defrosting the freezer compartment of the refrigerator, you need to unload all the food from it. To prevent spoilage of supplies, we advise you to carry out this procedure in winter, when some of the food can be taken out to a cold balcony.
To avoid interfering with rapid defrosting, remove all drawers and trays.
Also, defrosting the refrigerator is an excellent reason to improve relations with neighbors (ask to leave some of the food in their “home cold factory”) or to organize a noisy holiday for family and relatives with a mountain of various dishes from “freshly defrosted” products.
You should not get rid of ice thickness mechanically.
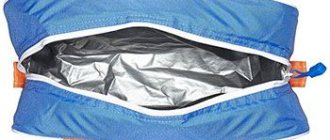
There are other options for keeping semi-finished products frozen. For example, put the food in a huge saucepan and leave it in a basin (or other container of suitable size) filled with ice water. Or put supplies in a thermal bag mixed with bags filled with ice cubes. Then leave it in a cool place, away from sunlight and other rays.
To store food, it is advisable to use cling film, foil and plastic containers with airtight lids.
The thermal package is sold in almost any hardware store. But, if you don't have time, it can be replaced with polyethylene foil or other reflective insulating material that you have on hand.
The refrigerator should be connected to a separate outlet with good grounding, without any intermediate extension cord.
Having sorted out your supplies, it's time to prepare your refrigeration unit for the main process. If you are the owner of an older model with a non-built-in tank for melt liquid, place towels or newspaper sheets under the device. Otherwise, you will have to wash not only the refrigerator, but also the floors.
Empty all compartments - there should be no product left in the chamber.
Modern models, as a rule, do not require this measure. Excess water in new refrigeration units is drained into a special reservoir at the back of the device.
To avoid the formation of a large layer of ice and keep energy consumption low, it is recommended to defrost the freezer once or twice a year.
Ways to quickly defrost a refrigerator
Housewives go to great lengths to defrost the refrigerator in a short time. Various improvised means are used: fans, vacuum cleaners, heating pads. Let's talk in more detail about emergency defrosting methods.
- Hot water is an excellent and also harmless option. Just don’t pour boiling water directly onto the walls of the refrigerator. It is better to use heating pads or place pots of hot water. Hot steam will greatly speed up the defrosting process. It is recommended to place a board under the pan to prevent damage to the plastic by temperature changes.
Important! To get quick results, change the water regularly.
- Fan. One of the simplest defrosting methods that does not require constant monitoring. To speed up the process, point the appliance at the top of the refrigerator. This way the result will appear faster.
- Spray. Fill a spray bottle with hot water and spray the walls of the refrigerator. The result can be seen in 15 minutes. The ice will gradually begin to thaw.
Important! To avoid getting burned, wear thick gloves.
- A heater can also be a good help. It is only important to ensure that no water gets on it, and that warm air is not directed at the seals.
- Vacuum cleaner. You can blow off the frozen walls of the refrigerator using a hose. Gently direct the air stream onto the ice. If you are the owner of a washing vacuum cleaner, then you can use it to remove thawed water.
- Mechanical cleaning. If too much ice has formed, try removing the top layer first. Spatulas and shovels will help you cope with the task. If the layer is too thick, then you will need “heavy artillery” in the form of a screwdriver or an awl. Use this method with extreme caution so as not to damage the refrigerator or your own hands.
Important! Avoid sharp objects to avoid damaging the refrigerator.
- Salt is a safe remedy. Excellent for dealing with ice. All you need to do is put a plate of salt in the refrigerator.
- Place bowls or pans of hot water on the refrigerator shelves. A common way to speed up the process is to place bowls or pans of boiling water on the refrigerator shelf or shelves and close the door. The steam should loosen the ice, allowing you to remove it after 20 minutes (if you defrost regularly). However, this method may damage the shelves. To ensure maximum protection from damage, place a thick towel under a bowl of boiling water.
- Using a hot cloth. You can use a cloth soaked in hot water to melt some of the ice. Focus on the small pieces at the edges, using a rag to grab chunks of ice to remove them.
- Vinegar 9%. Spray or wipe it on what you want to clean.
To speed up the defrosting process, methods can be combined. For example, place pots of hot water and turn on the heater. The result will not take long to arrive.
Before carrying out any manipulations, do not forget to lay towels or rags under the refrigerator. Once the main task is completed, wipe down all the shelves. Turn on the refrigerator and wait until the temperature reaches the desired temperature. Defrosting is not an easy process. But if you are not ready to change your equipment every year, you should take good care of it.
What should you not do?
- Do not use vinegar or similar substances to clean your refrigerator. They eat away plastic.
- Do not chip or scrape ice with a knife. Using this method, you will ruin not only the plastic surface itself, but also the channel underneath it, which can lead to serious damage to the device.
- When heating the ice layer with a hairdryer or fan heater, do not let the air flow directly onto the door rubber.
- Do not rub the walls of the device with abrasive sponges or powders. They can also damage the surface of the equipment.
When cleaning the refrigerator, it is unacceptable to use metal brushes, rough sponges, or abrasive cleaning agents.
Safety rules for non-standard defrosting methods
The first thing you should do when working with the device is to unplug it from the outlet. After all, water is a good conductor of electricity and this can have a negative effect on you. Second, but no less important, is care when working with heating devices. Do not point them at the connecting rubber, as it may melt. Deformation will allow warm air to easily enter the refrigerator. Subsequently, a new “fur coat” will appear much earlier.
After work, thoroughly wipe everything around, including the internal shelves. Turn on the refrigeration unit, but do not put food in immediately, wait until the temperature drops to normal, otherwise the food will spoil.
Refrigerator defrost frequency
This depends on the type and condition of the installation. Just like how long to defrost the refrigerator. Some refrigerators can be started in as little as 2 hours, while others can sit for 10 hours.
How often should you defrost an old type refrigerator? Once every 2-3 weeks, or at the moment when an ice crust begins to form on the freezer, preventing you from closing the door tightly.
With the advent of “No Frost” technologies, the process was reduced to once every six months. This technique copes with frost on its own. Therefore, many are interested in: why defrost a refrigerator with this system.
There are two reasons. The first is the smell. Crumbs, leftover drinks and food can accumulate in the refrigerator, causing an unpleasant odor. The only way to get rid of it is the classic method - a rag and detergent.
The second reason is ice, which may still periodically appear on the inner walls. It requires timely cleaning. But doing this with the refrigerator on is difficult and even dangerous.
How to defrost a refrigerator correctly
Any refrigerator needs care. To do this, it is defrosted and washed.
Important! If the compartments of the refrigerator are not washed, bacteria will begin to multiply intensively in it, which will lead to rapid spoilage of food. Disconnecting the device from the power supply must last for at least 12 hours. During this time, the refrigerant pressure in the system gradually decreases. Turning on the unit prematurely will result in compressor failure and costly repairs.
Preparatory stage:
- The temperature regulator in the device is set to zero;
- disconnected from the network;
- a rag is placed next to the door;
- disconnect equipment from the power supply;
- remove all food from the refrigerator;
- remove shelves, drawers, pallets, grates - all elements that can be detached are best washed separately;
- leave the freezer open and wait for the ice to disappear;
- accumulated water is collected with a sponge.
To assess the thickness of the ice layer, you can remove the back wall of the freezer. If it is thick, this indicates either improper operation of the device or a malfunction in its operation.
Defrosting procedure:
- Defrosting and cleaning equipment should not be carried out in too hot or too cold weather. External temperature maximums and minimums are an unnecessary and unnecessary test for a refrigeration compressor.
- If the equipment has two cooling circuits, only one of the chambers can be defrosted. If the refrigerator has one cooling circuit (which happens more often), i.e. It is not possible to turn off only one of the cameras and leave the other running; it must be disconnected from the power supply. Remove all food from the refrigerator and leave the doors wide open.
- The entire refrigerator needs to be washed, so it is advisable to move it away from the wall and kitchen unit so that you can clean not only the internal chambers, but also the external panels, including the back wall, where the most dust accumulates. Pay special attention to the handles and other parts of the surface of the device that are most often touched by your hands.
- You can speed up the thawing process and bring the temperature inside the refrigerator to room temperature, and at the same time dry the wet areas of the internal walls of the device, using a regular hair dryer. If you don’t have a hairdryer, you just need to leave the refrigerator open for an hour and a half. Under no circumstances try to scrape frost and ice from the walls of the appliance with knives or spatulas! This way you will probably damage your equipment.
- When the device has completely cooled down, you can proceed directly to cleaning it of dirt. It is important to remember that you should absolutely not use any chemicals to clean the internal chambers of the refrigerator! Refrigeration equipment stores food, and you do not want chemical particles harmful to human health to subsequently settle on it.
- Since the ventilation system is an important part of the No Frost technology, the first thing you should pay attention to is the ventilation openings in the refrigerator and freezer compartments. Take regular cotton swabs, soak them in clean warm water or a mild soda solution and carefully apply each hole. Under no circumstances remove or unscrew the panels covering the ventilation! This is a violation of the warranty agreement, which means that in the event of a breakdown, you will be denied free repairs. This may violate the terms of the warranty agreement between you and the manufacturer. For external panels, you can use regular cleaning products, with the exception of powders, which may cause scratches.
- After the ventilation mesh is clean, you can begin to work on glass shelves, door pockets, pull-out containers for vegetables and fruits, and other elements of the interior of the refrigerator. You need to use the same aqueous solution of regular table soda. Particular attention should be paid to the rubber seals that ensure the refrigerator doors close tightly. Rubber is an excellent breeding ground for bacteria and germs, so regularly wiping it with detergent is a must.
- After treating all the internal surfaces of the refrigeration device with a soda solution, you should go over them again with a regular damp cloth dipped in warm water. Then they need to be wiped dry with a soft cloth so that there are no streaks or water stains left. The doors of the device can be left open for some more time so that the refrigerator chambers dry completely.
- Now your refrigerator is clean and you can return all the shelves and containers to their place, close the doors and move the device back to the wall. Unlike classic refrigeration equipment, No Frost refrigerators gain cold faster, so food can be placed on the shelves immediately after it is plugged in.
Defrosting a windy type refrigerator
Defrosting is carried out as follows: an evaporator is installed behind the rear walls of the chambers, onto which cooled air enters. The air flow direction is controlled by a built-in fan. The ice in such a system is able to thaw on its own, so defrosting a two-chamber Bosch unit takes less time. If there is no need for cleaning, you can defrost a No Frost refrigerator of this type without removing food. However, it is recommended to clean the ventilation grilles as often as possible.
Defrosting a drip-type refrigerator
The operating principle of drip defrosting involves the operation of an evaporator mounted on the wall of the refrigerator compartment. When the compressor operates, frost accumulates on this part. When the engine is turned off, the ice begins to thaw. The resulting liquid is discharged through gutters into a container located outside the chamber. Here the water turns into steam. When the holes in the evaporator area become clogged, frost accumulates, causing refrigerators to take a long time to defrost. When cleaning the main compartment, you need to properly clean the water drainage gutters.
Causes of ice formation
If the thickness of the ice on the walls of the freezer has reached 5–7 mm, it is time to defrost the refrigerator.
The reason for the appearance of ice inside the freezer is water vapor, which inevitably gets inside and gradually condenses on the walls, changing the state of aggregation from gaseous to solid. The build-up of a layer of “snow” inside the freezer is not in itself a malfunction. However, if after defrosting the ice freezes within two or three days, there is a high probability that the device is not functioning properly.
If you are concerned about the safety of your food, put it in a regular bag along with pieces of ice and tie the top. This way the food will stay cold longer.
Possible causes not related to breakdown:
- The freezer door is not closed completely.
Due to the strong overload of the chamber with various products, the door rubber may not fit tightly, allowing warm air from outside to enter the freezer, which contributes to the formation of “snow”. - The “super freeze” mode is activated.
In some refrigerator models, this mode is turned off not automatically, but manually. - The internal temperature is too low.
The optimal temperature value in the freezer should be from – 19 to – 17 degrees Celsius. Even during extreme heat there is no need to reduce it! A refrigerator in good condition maintains the set temperature, regardless of the environment.
Try to defrost when the shelves are not crowded with a variety of products.
Even if you are sure that you have never tinkered with the settings, we advise you to check the above parameters. After all, this is much faster than another “refreeze”.
At least ten minutes must pass from the moment of shutdown until the refrigerator resumes operation again.
When you are convinced that the refrigerator settings are correct, but frost continues to form at record levels, the most likely reason is a breakdown of the unit.
Don't wait until frost takes up half of your refrigerator. As soon as it becomes noticeable, it should be eliminated.
The most common faults are listed below:
- The cause of ice at the bottom of the freezer was most likely a clogged drain hole.
- If the back wall is covered with a thick layer of “snow”, the temperature is higher than the set one, and the motor runs almost non-stop, then most likely the system in the refrigerator that is responsible for clearing the freezer of unnecessary ice has broken down.
- The reason for the rare shutdown of the refrigerator, combined with a uniform layer of ice on the walls, is the failure of the temperature sensor.
- If the ice is uneven and the snow “mountains” are located closer to the door, this indicates a damaged rubber seal of the freezer, or an imbalance in the appliance door fastening system. Uneven ice near the evaporator indicates a possible freon leak.
Remember that regularly resorting to quick defrosting is highly undesirable - this can harm the system and shorten the life of your equipment.
How to properly clean a refrigerator after defrosting
Cleaning up the inside of the refrigerator
- When cleaning a household appliance, start by cleaning its internal parts, moving from top to bottom and paying special attention to the corners of the chambers;
- do not forget to wash and disinfect the drain hole on the back wall of the refrigerator compartment: clean it with a brush, then draw detergent into a syringe (without a needle) and pour it into the channel;
- clean the holes on the fan grille with cotton swabs soaked in cleaning product;
- wash the outer parts of the case, wipe the condenser located on the back wall with a slightly damp sponge;
- Wash the sponge or rag from any remaining cleaning products, fill a bowl with water and rinse all surfaces with it;
- take a dry towel and wipe the refrigerator inside and out;
- leave the device with the door open so that all moisture from the internal surfaces completely evaporates;
- Reinstall the shelves and drawers in their original place, plug in the device and after half an hour place the food in it.
IMPORTANT! According to the recommendations of manufacturers of refrigerators with a no-frost system, such units can only be connected to the network 12 hours after being turned off.
Refrigerator cleaning products
To wash your refrigerator, you can use both chemicals and homemade products.
Dish detergent:
- pour hot water into a bowl, add a couple of teaspoons of washing gel to it, mix the ingredients until foam forms;
- soak a soft sponge in the solution, wipe all elements previously removed from the device (shelves, grilles, drawers) and the internal and external surfaces of the refrigerator;
- After removing dirt, be sure to rinse off any remaining cleaning product with water.
Other chemicals in the form of various sprays, liquids, foam, wet wipes (Top House, Silit Bang, Horse) are also suitable for cleaning the refrigerator.
In addition to excellent cleaning properties, which allow housewives to get rid of contaminants in the device in a short time, most of these products also have disinfecting abilities.
IMPORTANT! When working with special preparations, do not forget to wear rubber gloves. After cleaning surfaces, be sure to wipe them with a cloth dampened in clean water.
Traditional methods will also help you rid your refrigerator of stains of various origins:
- make a soda solution from 2 tablespoons of powder and 1 liter of water, treat the inner walls of the chambers with it, rinse the surfaces with water;
- grate half a bar of laundry soap, mix the shavings with warm water. Use the product to remove dirt from problem areas;
- dampen the sponge in hydrogen peroxide (3%) and wash the chambers.
The sealing tape on the door of the device can also be cleaned with dishwashing detergent and hydrogen peroxide.
The use of vinegar, soda to remove mold or grease from a rubber element is unacceptable, since these substances can damage the part and break the seal of the chambers.
If you notice that the tape has lost its elasticity, apply a little olive oil to a rag and rub it into the seal.
IMPORTANT! To clean the refrigerator, do not use aggressive chemicals (containing chlorine, concentrated acids, alkalis) or abrasives. Treat the surfaces of electrical appliances only with soft cloths or sponges.
Do you want to understand better than others?
- Is it necessary to defrost an LG No Frost refrigerator - It is a mistaken belief that refrigeration units equipped with an automatic defrosting function do not require special care. Defrost refrigerators with the No Frost system...
- Why do you dream of an empty refrigerator filled with food? - It is impossible to imagine any home without a refrigerator. From this article you will know why he dreams. For what reasons does a person see empty or filled...
- How to turn off the LG No Frost refrigerator to wash it - Any refrigerator needs care. To do this, it is defrosted and washed. Important! If the refrigerator compartments are not washed, bacteria will begin to rapidly multiply in it, which will lead to...
- Instructions for defrosting a refrigerator - After purchasing a new or used refrigerator, the question arises of how to properly care for it in order to maximize its service life. One of the main criteria for this is...
- How to quickly get rid of the smell of mold in the refrigerator at home - Owners of units that are no longer new often encounter the appearance of mold in the refrigerator. The fungus appears regardless of whether it sits idle at the dacha or is used daily...


