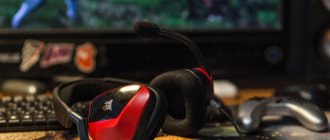
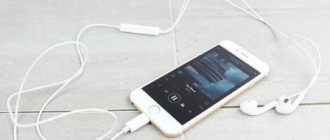
Stereo headphones
(headphones) is a mobile sound-reproducing device designed for individual listening to music and speech.
According to their design, headphones are:
- Intracanal (droplets, plugs, barrels, vacuum bags, earplugs), which are inserted into the ear canal;
- Overheads that are inserted into the auricle;
- With a headband on which two phones are mounted;
- With a headband on which two phones and a microphone (headset) are installed.
In the vast majority of headphones, the sound signal to the phones and microphone is supplied through wires, chafing of which is the main cause of failure. If you wish, such headphone malfunctions can be easily fixed with your own hands, which is what will be discussed in the article.
How to disassemble headphones?
General instructions
Disassembling headphones is not as difficult as it might seem at first glance. In most cases, you can open the headphones in a couple of minutes; all you need is more or less “straight” hands, a knife, a screwdriver and a soldering iron (optional).
- We remove the ear pads . Sometimes you don’t have to remove them, but it’s better to remove the extra clutter.
- Let's disassemble the body . It is usually held in place by screws, latches, or glue, depending on the form factor.
- Carefully take out the driver . Solder the wires if necessary.
- Let's disassemble the headband . If there is, and if necessary. Held on with screws and glue.
- Let's disassemble the remote control . Most often it is on glue.
This is the general logic of action. Of course, there are significant differences depending on the form factor. We will look at them below
⭐ Prices for the best wireless headphones in 2021:
1.1 How to disassemble wireless bluetooth headphones
1.1 How to disassemble wireless bluetooth headphones?
You can disassemble Bluetooth headphones according to the general instructions above. What happens next depends on the design; it will be discussed in more detail below. The main thing is to realize that wireless headphones have more “filling” - not just the speaker.
If you want to open your wireless headphones, you will definitely see one or more boards inside : a Bluetooth module, a battery and a DAC, at a minimum. They can be in capsules (for full-size, on-ear and completely wireless “plugs” or earbuds) or on a wire connecting the capsules. The boards are also secured inside with screws or plastic latches.
Usually there are 2 blocks on the wire: one with buttons (here is the DAC, Bluetooth module) and the other with a connector for charging (here is the battery). They are usually glued together from 2 or more parts, and are opened with a knife or other thin, dense object along the seam.
1.2 How to disassemble wired headphones
1.2 How to disassemble wired headphones?
Wired headphones are disassembled according to the general instructions above. Unlike Bluetooth models, they don't have as many electronics. If these are “large” headphones (full-size or on-ear), most likely there is quite a lot of free space in the cases. When disassembling, it is more difficult to break or damage something.
⭐ Prices for the best wireless TWS headphones in 2021:
Disassembling wired headphones
There are a variety of headphones on the market with different designs for computers and smartphones. Some are created permanently - with glue, others - with latches, and others - with screws or bolts with nuts. It’s not easy to understand them all, but we’ll try to touch on each model.
Full-size and overhead
On-ear and full-size – gaming, audiophile and studio models. Much depends on the design, but the principle is the same. For repairs and diagnostics, start with the speaker to which the cables lead.
- Remove the ear pad using gentle hand movements to avoid damaging anything.
- Use a screwdriver to unscrew the screws hidden under it or on the back side.
- Use a spatula to hang the lid. If it doesn’t dismantle the first time, do it in several places, but don’t overdo it. It is attached according to the tenon-groove principle, and to remove it, apply force, but within reason.
- After a characteristic click, slowly move the element away with your hand - the speaker is attached to it.
Thin cables are soldered to this - sudden movement or tension - they will come off at the soldering site or break.
After repair or diagnostics with a positive result, the headset is assembled in the reverse order.
The video below shows in detail how to disassemble and repair wired full-size headphones.
In-channel and plug-in
In-canal ones include vacuum and plugs, inserted ones include inserts, drops, tablets. If there are silicone or other pads, remove them.
Find the junction between the parts of the case and a sharp object (if it’s metal, be very careful), try to make a cut around the circumference - the headphones are assembled with glue, and this connection must be broken (see photo below).
Among the cheap models there are devices with a monolithic body.
Next, use small, non-serrated pliers to avoid scratching the plastic body and damaging the paint. For reliability, place a piece of paper or a piece of cloth under the sponges in one or two layers.
Do not press too hard; if the body does not crack, it will become deformed.
The case will fall apart in two, but the upper part should be held - cables are soldered to it and a speaker is attached. As a result, gain access to electronic components.
Electrical circuit of headphones
To successfully repair any wired headphones, it is necessary to understand their structure, electrical circuit and wiring procedure.
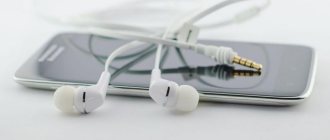
The presented electrical diagram shows the wiring of headphone wires to jack (mini-jack) ⌀3.5 mm connectors that are widely used for transmitting audio signals.
Mini-jack 3.5 plugs are widely used for transmitting audio signals in headphones and microphones, sound cards of computers and tablets, cell phones, audio amplifiers and audio speakers.
Until 2012, the pinout of mini-jack 3.5 connectors was carried out according to the OMTP (Open Mobile Terminal Platform) standard. In the diagram these are jacks of the TS, TRS and TRRS OMTP types. Since 2012, a new CTIA (Cellular Telephone Industries Association) standard has been adopted, according to which all audio systems are currently soldered; in the diagram this is the TRRS CTIA jack (located on the right in the photo).
The polarity of the R+ and L+ channels is indicated conventionally, since the audio signal represents alternating current. But this is necessary for phasing the left and right channels. For a mono system, a single wire transmits an audio signal to two headphones connected in parallel. But the polarity of connecting the speakers must also be observed.
Disassembling and repairing the plug
A faulty plug is detected by kneading the incoming wire with your fingers. The headphones are connected to a mobile phone or computer, play a music file, and then begin diagnostics.
Typically, copper strands break at the entrance to the rubber or plastic casing of the plug and inside it. If, while kneading the cable, sound appears in the speakers from time to time, it means that the plug needs to be disassembled and repaired.
Recommendations: How to fix headphones yourself if one stops working
, The earphone does not work: fault diagnosis, repair methods
, DIY headphone repair
The plug restoration procedure consists of the following steps:
The plug is cut off with pliers from the headphone cable.
The purpose of the repair is to remove the metal part from the casing. The element is firmly soldered. Trying to save the old casing is unwise. It's easier to cut it lengthwise with a sharp knife.
The metal part of the plug is carefully removed from the casing so that the contacts do not break off. Soldered wires should also be saved. The color of the insulation makes it clearer where to solder the wires of the headphone cable.
In the event of a break in the wires from the contacts on the solder itself, the standard circuit shown in the photo is used for connection. The color of the insulation in the headset cable varies from manufacturer to manufacturer. Most often, the common core is in black or yellow insulation. To be sure, it is better to ring the tester from the speakers to the place where the cable is cut.
The headphones can be equipped with a microphone. In such models, instead of three, four wires are hidden under the cable braid. The connection occurs according to a different scheme, shown in the photo.
The cable cut off from the plug is stripped. First, remove the main braid and free the ends of the cores. The edges of thin wires are cleaned with a sharp knife. It is enough to remove 5 mm of the insulation length so that it is enough to solder the copper core to the plug contact.
The wires are twisted from thin veins, and they are all coated with a protective varnish. This coating prevents soldering. The varnish is removed by scraping with a knife or burned with fire from a lighter. The ends of pure copper wires must be tinned. The common wire will be connected at one contact, so it is immediately soldered together.
A new housing for the plug is made from the bottom cap of a ballpoint pen. The wire is inserted through the hole for the writing rod. The put on cap is moved along the cable further from the soldering point.
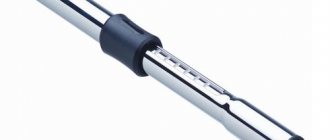
Following the cap, a piece of heat-shrinkable tubing is placed on the wire. The sleeve will protect the wire near the new plug casing from breaking.
The cable cores are soldered to the plug contacts. It is important not to forget about matching the wires to the color of the insulation. Functionality is checked by calling a tester. It’s easier to plug the plug into the connector of your mobile phone or computer.
If both headphones work normally, put heat-shrink tubing on the plug contacts. It is heated with the fire of a lighter. The tube will fit tightly around the plug contacts. To be safe, you can press it with your fingers while the plastic is hot.
Finally, the inside of the cap is lubricated with epoxy resin. A little glue is applied to the heat shrink tube. The cap is moved along the cable until the back of the plug is completely inserted into it up to the limiter. After a day, the resin will harden and the headphones can be used.
Plug failure
If your headphones break, the first thing you should pay attention to is the connection between the plug and the cable. Often the cause of the breakdown lies precisely in this place. Due to frequent bending, the cable cores break, so the signal does not pass into one “ear” of the gadget or into both at once . The microphone may also not work.
The breakdown is quite easy to detect. When the gadget is turned on, you need to try bending the cable at the site of the supposed breakdown in different directions. If a sound appears or a crackling noise is heard, this means that one of the wire strands is broken. What to do if a problem spot is found on the cable?
To repair headphones, do the following.
- Cut the plug from the cable.
- To repair the plug, the inside of the old one will be used with a slight modification. To remove this part, you need to cut the plastic shell using a utility knife, as shown in the picture below.
- After cutting the plastic, remove the insides of the plug. You will see contacts to which several thin wires of different colors are soldered. In the same way, you can disassemble iPhone headphones.
- Remember or sketch on paper which contact and color the wire was connected to. The figures below show standard cable wiring diagrams. The color of the conductors may differ in different models, in this case, green is the left channel, red is the right, and copper (without insulation) is common.
- If you need to repair headphones with a microphone, which are connected with one plug (usually there are 2 plugs on the cable), then the wiring diagram will be as in the figure below.
- Next, you need to free the internal cable cores from the external (general) insulation.
- Headphones cannot be repaired without a soldering iron. This is explained by the fact that it is necessary to connect common wires and tin the tips of all conductors using flux and solder. Since the conductors are covered with insulation (varnish), the tinning process will be a little difficult. To make it easier, it is recommended to lightly heat the ends of the wires using a lighter. You can also clean the ends from the varnish layer using a regular knife.
- To continue repairing headphones with your own hands, for example, Defender headphones, you need to find a ballpoint pen, from which you only need one part, namely the bottom. It will serve as a housing for the plug.
- Prepare a small piece of heat shrink tubing to protect the wire from sharp bends.
- At the next stage, you will need to put the tip of the handle and heat shrink on the cable, and then solder the tinned ends of the wires to the plug part.
- We solder the contacts, strictly following the wiring diagram (using our sketch).
- After you have soldered all the conductors, you need to check whether the headphones are working or not. To do this, you can use a multimeter and call all contacts. If there is no device, then simply plug the plug into the phone socket and turn on music playback on it. Make sure that both channels of the headset work separately by turning the balance control in the equalizer.
- If the test result is positive, place the heat-shrink tube over the soldering area and use a lighter or hair dryer to ensure a tight fit to the plug.
- To proceed, prepare a small amount of epoxy resin.
- Add a few drops of resin to the tip of the pen and slide it onto the soldered plug. At this point, the headset repair is considered complete.
The procedure for replacing the plug is the same for all types of headsets, for example, such as: Beats By Dr headphones, Sennheiser HD 215, Razer Kraken Pro, as well as for Steelseries Siberia v2 headphones, Audio-technica ATH-ES7 and headphones Defender.
Advice from the experts
Service technicians who service and repair electrical equipment of popular brands draw attention to the fact that headphones from many manufacturers consist of more than just wires and speakers. Most models are equipped with volume controls, microphones, mute and talk buttons and other parts that are located in cases or attached to a cord (Samsung, DEXP, etc.).
Printed circuit boards with radioelements of electrical circuits are also placed in housings. As a rule, these boxes are non-separable and made of plastic. The wires entering and exiting them also often break off and do not transmit sound. The method for restoring them is similar to the processes described above. In this case, the case is carefully cut and the wires are resoldered.
If the need arises to repair microphones, potentiometers and other components, it is not recommended to do this, since it is unlikely to carry out the repair yourself (the work is too delicate), and it is not advisable to have it repaired by a service provider. It is better to replace them with serviceable parts. The body halves are glued together after the repair is completed.
As you can see, repairing the headset when typical malfunctions occur is not so difficult. If you have the appropriate tools and the ability to work with jewelry, you can give your gadget a second life without significant material costs. This video “Repairing headphones with your own hands” will help:
Let's use the pliers
Tricks with a knife will not be enough, and to disassemble the earphone you will have to turn to pliers for help:
If you use standard pliers, then there will be nicks on the earphone, so it is advisable to use pliers with flat noses without teeth. But even with these, you can damage the earphone, for example, in my case, the coating came off a little from the earcups - some kind of varnish, the existence of which I did not even suspect