Why does the washing machine jump?
The first cause of strong vibrations may be transport bolts that have not been removed . They firmly fix the tank inside the housing so as not to damage it during transportation. Before starting work, bolts and other fixing elements must be removed. It is strictly prohibited to operate the machine with them.
The next reason for vibration is uneven distribution of things in the tank . If you start the device with an empty tank, it will not vibrate. The same thing will happen if you distribute things perfectly evenly - in an even layer around the entire circumference of the tank. In reality, such a distribution is impossible to achieve; even those evenly distributed at the beginning are mixed during the washing process.
Faulty tank suspension and support bearings. Loosening of the counterweight.
The purpose of the system of springs, dampers and counterweight is to make the natural frequency of the tank much lower than the frequency of its rotation. This reduces the amplitude of vibrations and the amount of vibration transmitted to the body.
To better understand the content of the previous paragraph, remember: at the beginning of the spin cycle, the body of the loaded machine sways more strongly, and then, with an increase in the rotation speed of the tank, the swaying turns into a slight trembling or, with the correct distribution of the laundry, practically disappears.
Swing the tank - after that it should make no more than one oscillation and stop. Otherwise, the shock absorbers are faulty and must be replaced.
Open the casing, inspect the elastic elements - metal ones should not have deformations, rubber ones should not have tears or cracks. Defective parts must be replaced! Check the counterweight fastening - if it is loose, tighten the nuts.
Faulty bearings. There should be no squeaks or knocks when the equipment is operating.
Rotate the tank by hand and rock it from side to side. If you detect squeaking or beating, replace the faulty parts.
Troubleshooting
The first thing to do if the washing machine jumps during the spin cycle is to check that the installation is correct. The unit must stand on a flat, hard surface, preferably on a monolithic floor. If you place the device on a wooden surface, then vibrations and noise during spinning cannot be avoided.
You also need to check the adjustment of the legs, which can unwind during operation of the machine, which in turn will cause the equipment to lose stability. To avoid such a problem in the future, it is necessary to secure each support with a lock nut.
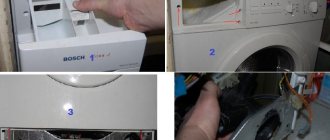
When installing a new washing machine, users quite often make the following mistake: they forget to remove the transport bolts. They are located on the rear panel and serve to secure the tank when transporting equipment. If they are not dismantled, the machine will vibrate and make a lot of noise when washing, and will soon fail altogether. You can unscrew the fasteners using a wrench.
Be sure to remove the shipping bolts before use.
Once the installation issue has been resolved, it is important to check the laundry load volume. If the clothes in the drum are unevenly distributed, clumped or there is too much of it, this can lead to increased shaking of the washing machine
In this case, stop the machine during the spin phase, distribute the clothes manually or remove a few extra items, and then resume operation of the unit.
If you are still wondering why the washing machine jumps during the spin cycle, remove the top cover of the housing and inspect the special springs that hold the tank on top. They quickly wear out and lose their elasticity, which affects the operation of the unit. Within a few months after purchasing the equipment, the springs may fail. If you have the necessary spare parts, it is easy to replace parts at home.
To get to the springs, just remove the top cover of the washing machineIn machines from Indesit, Bosch, Samsung and models of other brands, shock absorbers designed to dampen tank vibration often fail. You can access them through the rear or front panel of the device (depending on the model). The shock absorbers are attached with bolts or plastic clips: one side to the tank, the other to the bottom of the body. When they wear out, they weaken, causing the washing machine to vibrate strongly during the spin cycle. To replace parts, you need to disconnect the fastenings of the old shock absorbers and install new ones, securely fixing them in place. Replacement is not difficult if you have at least minimal knowledge about the structure of the washing machine.
Proper shock absorbers hold the tank and reduce vibration levels
Often, the washing machine rattles and jumps due to the destruction of counterweights - plastic or concrete blocks that are bolted to the tank and balance it. Over time, fastenings can become loose, resulting in increased vibration and noise. The material used to make the counterweights also matters. For example, an LG machine has concrete parts that often crack or crumble. Plastic blocks are considered more durable and reliable. Despite this, they also need regular inspection, especially if the machine constantly rattles during the spin cycle. Timely checking of counterweights for destruction or loosening of fasteners will help to avoid strong vibration and prevent damage to other parts.
Over long periods of use, the mountings of the counterweights weaken.
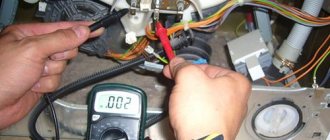
When answering the question why the washing machine shakes during the spin cycle, one cannot help but talk about the bearings. These parts wear out over time and become a source of noise, namely squeaking or grinding as the drum rotates. If the problem is left unattended, the bearings will completely collapse, which will lead to free movement of the drum shaft on which they are installed. At the first symptoms of a malfunction, it is worth replacing the supporting part, otherwise the cost of repairs may increase significantly. It is difficult to replace bearings at home, so entrust the work to a specialist.
Only a professional can replace worn bearings
When the washing machine jumps and knocks, it creates discomfort for others and can end badly for the equipment.
In order not to cause the unit to suffer serious damage, it is important to identify the cause of the malfunction at the first symptoms and eliminate it as soon as possible. We hope our recommendations will be useful for those who are looking for ways to cope with the constant rumble and vibration of the device
Correct installation of the washing machine
The first installation requirement is a horizontal floor. When deviating from horizontal, the vibrating machine will slide in the direction of the slope. If the floor is not ideal, you need to build some kind of podium that creates a horizontal surface. At the same time, it itself should not slide on the floor surface.
The second requirement is the horizontality of the equipment itself. Or verticality. It depends on what is chosen as the criterion: the top plane must be strictly horizontal, any side edge must be vertical.
Why is this necessary? Even with the most careful distribution of things, they will move during the washing process and create a beating when the tank rotates quickly. In an unevenly parked machine, the beats will deviate from the calculated ones and, as a result of the uneven load on the supports, can cause displacement.
Is the impact of deviation significant? It’s better not to analyze it, but simply level the car. This is not such a difficult operation.
How to level a car? What will be needed for adjustment?
Before starting work, prepare a level approximately 1 meter long. No longer needed. If there is no such long one, we will take what is available. But we must keep in mind that the shorter the level, the less accuracy.
You will also need two open-end wrenches. The size must match the adjusting nuts on the legs of the washer.
Step-by-step instructions for installing a washing machine
We check that the platform on which the device will stand is horizontal. In fact, it is not the horizontality of the entire platform that is important, but the plane passing through the spots on which the legs will rest.
Using a level, we check the horizontality of the site along both diagonals. If horizontality is maintained here, we check along two adjacent sides. If everything is in order here, we place the car with its feet on the proven platforms. If the floor is not horizontal in any directions, we place stands on low places, achieving horizontality in all directions.
Stands can be made from any flat and hard material. It is recommended to stick a thin sheet of rubber on the side in contact with the floor. Its purpose will be described below.
Now we place the washing machine on the platform or on stands. By adjusting the height of the legs, we achieve horizontality of the upper surface. We check the correct installation of the verticality of the side ribs.
If everything is fine, tighten the locking nuts on the adjusting screws of the legs and check again whether the vertical-horizontal alignment has been disturbed during locking.
Now try to rock the car left and right and diagonally. If it doesn’t sway—not almost, but doesn’t sway at all—that means it’s positioned correctly.
But there is one more nuance. As already noted, it is almost impossible to completely eliminate vibrations, so there is always the possibility of equipment leaving its rightful place.
Remember when they used to put a sheet of rubber on the footrests? This is so that with small vibrations they do not slip on the floor and do not allow them to move.
Find a rectangular sheet of rubber 1–1.5 cm thick, and about 5 cm larger than the size of the machine. The hardness should be such that the legs will penetrate it by about half the thickness. Place it on a horizontal surface under the car, and the likelihood of it leaving will be reduced to zero.
How to connect the washing machine correctly
To ensure trouble-free operation of the washing machine, it is necessary to install it correctly, choosing the optimal location. Before first use, be sure to read the instructions in order to operate the device safely. The rules for connecting equipment consist of the following steps:
- choosing a place where the washing machine will be located;
- preparation for operation;
- connection to water supply;
- sewer connection;
- connection to the electrical network;
- installation of equipment.
First of all, you need to choose a location for the device. If the bathroom is small, then the machine can be placed in the kitchen or bathroom. The main thing is that the floor in this place is level, so that it is possible to connect sewer and water pipes, as well as connect the device to electricity. As for the bathroom, excessive humidity can negatively affect the parts, thereby shortening the service life of the equipment. Using the machine in the bathroom is not very convenient, considering that washing can last for hours. If the washing machine is placed in the kitchen, the beautiful appearance of the shiny front panel may be ruined by splashes and stains.
The device preparation stage includes the removal of packaging materials and other shipping parts, such as staples and bars
Important: Do not turn on the washing machine before you have removed the transport bolts, as this may cause it to malfunction. If the kit contains plastic plugs, they should be installed in place of the bolts
It is important to understand that connecting equipment to the water supply is a responsible matter, since improper implementation of this item can lead to water leakage. Usually a water hose and the necessary fittings are supplied, but its length may not be sufficient to connect to the pipe in the required place
There are two ways to solve this problem: purchase a longer hose or connect the pipe directly to the machine. If you decide to go the first route, then when buying a part, you should take the length with a margin so that the tube does not get stretched, much less twist, stopping the water supply.
Connecting a washing machine to the sewer is possible in two ways: fixing the pipe to the drain of the bathtub or washbasin, or connecting the pipe to the sewer pipe. The first option does not provide reliability, since the hose may be accidentally touched and water will spill onto the floor. It is optimal to connect the device permanently, in which case the reliability of the connections will be guaranteed. When connecting household appliances at this stage, it is necessary to take into account the length of the drain hose and the presence of a special siphon, which will prevent sewage and unpleasant odors from entering the device.
When connecting the device to the mains, please note that the machine consumes quite a lot of energy. Therefore, this procedure must be carried out carefully, taking into account the fact that the machine is in contact with water and current. To ensure safe operation, it is recommended not to use extension cords, but to supply electricity using special plastic boxes. The use of sockets with the appropriate degree of electrical safety is considered the best option.
After you have connected all the required hoses and removed the shipping bolts, you need to level the washing machine using the adjustable feet. It is recommended to place the device on a concrete surface to ensure a stable position. Do not place various objects under the legs in an attempt to level the equipment.
Remember that vibration during the spin cycle may indicate serious problems with the device.
Operating tips to reduce vibration
Do not overload the drum when washing. The suspension system is designed to work with a certain load. Excess will lead to excessive vibrations, and in the long term to premature failure of components.
Before starting, distribute things evenly around the circumference of the drum. There are models that can do this on their own, but still help them - artificial intelligence is not that smart yet.
If your machine is a top-loader, you can keep something heavy on it, such as a laundry basket. This will increase resistance to vibration.
Place the machine at a distance of at least 5 cm from the walls so that in an emergency it does not damage them or itself.
Level adjustment of legs
The drum of the machine, rotating even at low speed, creates vibration. If the laundry is unevenly distributed, it becomes stronger. Vibration is dangerous because it wears out machine parts faster. How to install a washing machine so it doesn't jump? The answer is simple - align the legs.
Attention. Adjusting the legs in height will reduce vibration and give the device stability.
To begin with, by adjusting the height of the legs, the machine is brought into a stable state (so that it does not swing) . After this, take a building level and install it parallel to the front wall. The front legs are adjusted so that the air bubble is exactly in the middle.
Then the level is alternately moved to the side walls of the machine and the rear legs are adjusted. The end result of the work should be a position where the body of the machine is stable, and the level shows a strictly horizontal position both in front and on the sides.
Installation without level
If you don’t have a building level, you can use a glass or saucer of water instead. Place the dishes with water on the top lid of the washing machine and adjust the legs so that the water in the glass or saucer is at the same distance from the edge of the dish.
How to install stands
If you purchase individual stands, there may be some problems with their installation. But if you follow some tips, the installation process will not cause any difficulties.
First you need to place the washing machine on its side in order to gain access to all the legs. After this, you should thoroughly clean the legs from possible traces of rust, and if any irregularities occur, eliminate them.
When the legs are completely ready, you can begin installation. If the stands do not provide a strong connection, then you just need to place them under the legs of the washing machine. In case of necessary fixation, you will need to purchase glue for connecting metal and polymer surfaces. Then you can simply glue the stands and return the machine to its usual position.
Important! The best option when choosing glue is semi-synthetic based glue.
Next you should test the work. If everything is done correctly, the machine will not vibrate during operation, thereby ensuring a better washing process.
If the machine continues to jump, then you should use other pads, or carry out the installation process from the very beginning.