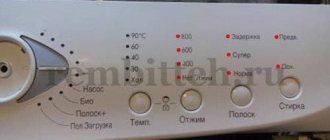
Modern automatic washing machines from Samsung have a very developed fault diagnosis system built into them. The group of error codes - HE, HC, HC1, HC2, E5, E6, HE1, H1, HE2, H2, HE3, refers to elements that heat water, drying air and create steam.
If there is a breakdown, they are shown on the display. If it is not there, then the Samsung washing machine informs you with a light indication, as follows. The program and temperature selection buttons are lit - 60 and 30°.
Error code display by indicators
- HE, HC, HC1, HC2, E5, E6, HE1, H1 - no water heating
- HE2, H2 - drying problems
- HE3 - steam function
- Replacing the heating element
- Conclusion and video
- Samsung washing machine catalog with reviews
HE, HC, HC1, HC2, E5, E6, HE1, H1 - no water heating
E5, E6 - these codes are typical for older car models. Let's look at the reasons that lead to this situation:
- The heating element burned out. It is open or short-circuited.
- Damaged contacts or wiring.
- The NTC sensor is faulty.
- If there is no water in the tank or the temperature exceeds 100°.
Diagnostic work
Let's consider the procedure for self-repair. It is important to note that in most Samsung AGRs, the heating element is located at the back of the tank. And in order to access it, you just need to remove the back cover.
Expert opinion
I work in the household appliance repair industry. Extensive experience in restoring washing machines and dishwashers.
Ask a Question
Important! But, on some old-style machines, the heating element is located at the front. And to work with it, you need to perform partial disassembly - remove the top cover, pull out the panel with control buttons, dismantle the front part of the case.
That's it in a nutshell. This is described in more detail in the disassembly lesson. For BOSCH and Siemens machines it is carried out in a similar way.
Online diagnostics of a washing machine
If your machine stops washing or rinsing clothes normally, then some kind of malfunction or breakdown has occurred. You can try to find the problem yourself.
Let's look at diagnosing and solving problems:
- After gaining access to the heater, be sure to remove the terminals from the contacts and check with a tester. The resistance of a working heating element is 30-35 Ohms. And it should be constant, not “jumping”. That is, do not change the values at the time of measurement. If there are inappropriate parameters, set a new one.
- We check the integrity of the contacts and the absence of oxidation. We use a multimeter to test the wires from the heater to the control module. It happens that they break at a bend. Koreans are very economical with the length of wires - there is no excess.
- The resistance of the NTC sensor for Samsung washing machines at room temperature is 12 kOhm. When heated, it should decrease. If the characteristics do not correspond, then replacement is necessary.
- The temperature in the tank can exceed 100°C if the NTC sensor is faulty or the wires coming from it are damaged. In this case, faulty elements are also changed. If there is no water in the tank during washing, then you need to check the filling system for blockages.
Important point! There are treacherous situations with a tubular heater. It shows normal resistance, but there is a leak to the housing. This can lead to error H1 or strange malfunctions in the operation of different wash cycles.
HE2, H2 - drying problems
Some washing machines are equipped with a built-in drying system. Error codes HE2, H2 can only appear in such machines. The device uses a heating element that heats the air. With its help, the laundry is dried directly in the drum.
This system also uses a blower fan and fuses that trip when overheated. This error occurs mainly when the heating element burns out.
Expert opinion
I work in the household appliance repair industry. Extensive experience in restoring washing machines and dishwashers.
Ask a Question
Very often this is caused by a blockage in the air pipes or a malfunction of the fan motor. Therefore, when diagnosing a rupture in the heater, you need to identify the source and check the elements listed above.
When the fuse trips, this code also appears because there is an open circuit. They can be disposable - in this case replacement is necessary, or multiple - here you just need to turn it on.
This code also appears at temperatures exceeding 145°. When it cools down, the machine will resume operation. But if this happens again, then the temperature sensor needs to be replaced.
Are you using citric acid?
Oh yes! No
Error interpretation
One of the common errors found in washing machines from Korean manufacturers is the H2 code, which indicates a malfunction of the water heating system. The combinations of symbols H2 and 2H should not be confused: if the first value is an error, then the second indicates the time remaining until the end of the wash. The letter H here stands for hours, i.e. 2H lights up on the screen indicate that there are 2 hours left before the end of the program.
Error 2h (not to be confused with error h2)
As a rule, error H2 on a Samsung washing machine is displayed if, ten minutes after starting the program, the water temperature in the device’s tank has increased by less than two degrees.
If your device does not have a digital display, it will also be able to report a problem. In this case, all indicators will start flashing, except one of two pairs: temperature 40 C and 60 C or 60 C and cold water. These pairs will glow continuously.
In the event of a breakdown and error code H2, the device may stop working. However, some machine models can continue to be washed, but in cold water. It is very easy to determine this; you just need to touch the glass on the loading hatch door with your hand: it will be warm if the water heats up.
HE3 - steam function
This error is generated by Samsung machines equipped with a steam system. The washing principle in them differs from classic models. The water turns into steam, which is then used to process the laundry.
It has its advantages and disadvantages. As a rule, such models are significantly more expensive. The main advantage is delicate washing, comparable to dry cleaning.
HE3 appears when there is a malfunction in this system. The mechanism is quite complex. And if it fails, it is better to contact a specialized service for repairing household appliances.
Probable reasons for failure
When you find a similar signal on the screen, get ready to fix the problem, because the problem is not related to voltage changes in the electrical network. It also cannot be associated with short-term interruptions in electronics.
What should be considered the main problems? There are two of them:
- temperature sensor failure,
- failure of the control board.
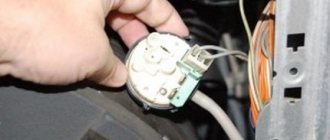
The temperature control device sends data about the heating of the heating element. Using such a sensor, the control module regulates the temperature of the heating element in accordance with the specified program. If the sensor is broken, then the management module loses the ability to control the performance of the heating device, and after turning on the CM, it heats up to the maximum level. At the same time, the module responsible for control and not having updated information from the temperature sensor, in emergency mode, turns off the heater and sends the NOT 1 signal, interrupting the wash.
Quite often, the temperature controller is installed directly on the heating element, and finding it is not difficult. True, you will have to get to the heating device by partially disassembling the washing machine.
What to do if the problem is not in the sensor? In such a situation, it is recommended to look for a breakdown directly in the management module. If a track or triac responsible for controlling the heating element burns out, then exactly the same signal will appear on the screen, but repair work will be much more complicated and will require large financial expenses.
Replacing the heating element
If the heater malfunctions, you can replace it yourself. In the latest models of Samsung washing machines, the heating element is located at the back of the tank.
Expert opinion
I work in the household appliance repair industry. Extensive experience in restoring washing machines and dishwashers.
Ask a Question
Important! Before starting work, be sure to turn off the power to the device!
- Remove the back cover by first unscrewing the screws.
- We pull off all contacts: power, grounding and from the temperature sensor.
- We unscrew the screw located in the middle, but not all the way. A socket wrench is required, usually size 10.
- Then press the screw firmly. We need him to go inside.
- Afterwards, use a slotted screwdriver to pry up the edges of the heating element and pull it out.
- The NTC sensor is pulled out of the housing.
Work to replace the heating element
Sometimes the heater is “welded” to a mount that is located inside the tank. In this case, you need to be patient and carefully and gradually pull it out, swinging it slightly.
How to fix the breakdown?
It is believed that the temperature sensor cannot be repaired - it is simply replaced with a new analogue. But you should first verify that the device is faulty by checking it with a multimeter. If the device proves a complete failure, then you can go to the store.
To perform such work, you should remove the front panel of the machine by unscrewing several screws. Having gained access to the heating element, you must perform certain actions:
- disconnect the wiring from the temperature controller, remove the part from its niche;
- measure the resistance indicator. If the device shows “zero” or “one”, then the sensor can be dismantled and thrown away;
- Having installed the new sensor, we assemble the machine in reverse order and conduct a test run.
In the case when the functionality of the temperature sensor is fully confirmed, and the wiring with the contact group is beyond doubt, we look for the problem in the machine control module. It is not recommended to repair this element yourself, since the work involves certain difficulties, and even a small mistake will only aggravate the failure and create additional financial costs. In this case, you should contact the service center for help.
DIY repair
If the machine displays error he2, you can be sure that the reason lies in the heating device, in the heating element. With a high degree of probability, the temperature sensor is working normally, the power circuit is not broken. To finally verify this, you should disassemble the device, get to the heater, disconnect it and test it.
Disassembling the machine
It is important to understand that disassembling a machine is a rather complicated process; it would be a good idea to read the documentation again, and it is advisable to watch a video on the topic.
- The washing machine should be unplugged.
- It is necessary to remove the laundry from the drum and completely drain the water. To do this, you will need to unscrew the filter, having first laid out a rag on the floor.
- It is advisable to move the machine to a room convenient for work. It is important to understand that the washing machine is a large thing, and in order to get to the heating element you will have to disassemble it almost completely.
- The top cover is removed, which in most models prevents access to the control panel.
- There are two screws in the niche near the powder tray; they need to be unscrewed.
- The screw holding the control panel to the side is removed.
- The clamp holding the cuff is released. You don’t need to remove it yourself, just tuck it deeper inside the car.
- The lower (narrow) panel of the washing machine is removed. Underneath are the screws that hold the front panel down. They also need to be unscrewed.
- Using maximum caution, remove the control panel. It is important not to damage the integrity of the wires going to it, otherwise the repair will drag on indefinitely.
- Under the removed control panel there are two bolts holding the front panel on top. They also need to be unscrewed.
- Carefully remove the front panel by pulling it towards you. It is important not to pull out the interlock wire; it must be carefully disconnected.
Access to the heating element is open; it is located at the bottom of the tank, exactly under the hatch. The wires going to it are disconnected; it would be a good idea to first sketch out a diagram of their location, or simply film it with a mobile phone camera.
Testing heating element
Once you have access to the heater, you should check its functionality. To do this, it is not necessary to remove it, just disconnect the wires going to it. The best device that allows you to quickly and accurately determine whether a heating element is “alive” or not is a multimeter.
Using the multimeter switch, it is switched to resistance measurement mode. The measurement principle is simple - a damaged element will have infinite resistance. The resistance of a working heating element is at the level of 25-30 Ohms and depends on the specific model.
If a break is detected, the heater must be replaced, but if its resistance is within normal limits, it is worth checking the integrity of the wiring, and possibly the functionality of the control module.
Heater selection
Ten is a device that often fails. The main cause of breakdowns is scale. In most populated areas of our country, the water supply is far from ideal, which entails a whole bunch of all kinds of problems.
There is an opinion that new heating elements and devices with a ceramic coating are less susceptible to scale formation and are therefore more durable. This is a very controversial statement; it seems reasonable not to spend money on expensive devices, but to buy a regular heater that has the required characteristics.
When choosing a heater for a Samsung car, you should not chase power; it is better to buy a heater with the same parameters as the one that was installed from the factory. Some models may refuse to work with heating elements that have a power different from that specified in the documentation.
It is important to pay attention to the reputation of the seller and be sure to demand a guarantee. Few people would like to pay money and then dismantle the car again a week later.
Replacing the heating element
The old heater is dismantled. It is necessary to remove as much dirt and scale as possible from the niche in which it was located. The seat is additionally treated with fine-grained sandpaper. The walls of the niche are lubricated with laundry soap. The new heating element “sits” in its place. Fixed. Wires are connected. It is worth carefully inspecting the terminals; if oxide is present, you may need to clean them.
After the heating element is replaced, all that remains is to assemble the machine. To do this, all steps are performed in reverse order. The main thing is not to rush, but to systematically connect everything that was previously disconnected.
The machine is installed in its original place, water and power are connected. Next you should do a test wash. If the machine was assembled correctly, there will be no problems. The program will start, work normally, and with the new heating element the machine will work for many more years.
