Connection diagram
To begin with, let’s determine that the connection of an infrared heater to the electrical network occurs either through a socket (most often), or directly through a machine in the distribution panel.
The thermostat is supposed to be built in between the heater and the machine.
We will look at two connection schemes.
Standard
Before you begin the process, you need to understand the power of the controller. Thus, a regular temperature controller can serve several IR heaters at once. In fact, the number of connected heating devices depends on their power.
One thermostat has a power of 3 kW. It is quite enough to service 3 heaters, which are most often used both in apartments and in private houses.
Most controllers are equipped with 4 terminals: two at the input (phase, zero) and two at the output.
The standard connection diagram for an infrared heater via a thermostat is simple. In order to create it, you will need to stretch two wires from the shield to the controller connecting zero and phase. Next, two more cables are passed from the thermostat through the output terminals directly to the heater itself. Thus, we get a sequential connection of all devices from the network.
If you need to connect two or three infrared heaters at once, then the first part of the procedure remains unchanged. The thermostat is connected in the same way. But if you plan to install two heating devices, you should run four wires from its output terminals, and six wires if there are three heaters. Two cables for each heater. We got a parallel connection.
You can optionally use a series connection circuit. Then, first, the wires from the thermostat will go to the first heater, and from it to the second, and so on.
There is another version of the circuit with a simple connection of an infrared heater. It is as follows: the phase wire from the machine is connected to the heating element, and the zero wire is connected to the thermostat. But this method should be used as a last resort, when it is not possible to connect the thermostat in any other way, since it is unreliable.
Using a magnetic starter
It is better to use this scheme when you need to connect several infrared heating devices at once, or one industrial model.
This method involves installing an additional device - a magnetic starter. It is a switching device from the family of electromagnetic contactors. It can be used to switch powerful loads caused by alternating or direct current.
The purpose of a magnetic starter is to frequently turn on and off power electrical circuits.
There are many connection diagrams where this switching device is involved, but we will consider only one. The first part of the process remains unchanged; the machine and the thermostat are connected in the manner discussed above. However, from the output terminals of the thermostat, two cables are led not to the IR heater, but to the magnetic starter, from which they go to the heating device.
What is a "thermostat"
Imagine: you turn on a heater (for example, an oil type or a convector), and it starts working without stopping, heating, heating and heating. Which will ultimately lead to overheating and breakdown (if not short circuit and fire). So, to avoid such situations, a thermostat is built into modern heaters.
It is a small but important device whose mission is to maintain a given temperature regime. And the installation and adjustment of temperature indicators for heating devices is carried out using special regulators. Many people confuse the two concepts “thermostat” and “thermostat” - they are not the same thing, but they are inextricably linked.
Connection nuances
Let's talk a little about how to connect such a device. Ceiling or wall heaters can work normally, but the efficiency of the built-in thermostats is very low, because the sensors will not be triggered by the temperature in the room, but due to the heating of the body of the heater itself. Therefore, the correct installation scheme involves remote placement of control parts. The installation of a thermal regulator must be carried out taking into account the zonal use of such a device, otherwise it will be incorrect. To carry out this procedure correctly, you must adhere to a number of standards:
- if a ceiling heater is installed, then it would be better to place the thermostat somewhere further away on the wall; such installation of a heater of the type in question requires installing a regulator there, but not far from the device;
- It is better to place the regulator from the floor at a height of 150 centimeters;
- installation will depend on the chosen mounting option - if the heater is built-in, then you will need to groove the wall, and devices for installation on the wall require a box for power cables and a thermal sensor;
- if the installation diagram requires placing the device on the outer wall of the building, then thermal insulation material must be installed under the housing, this makes it possible not to cause accidental activation of the relay;
- The selected area for installing the temperature regulator should be located relatively far from windows, doors and heating equipment.
Typically, the thermostat is equipped with two pairs of terminals that are connected to the electrical panel and the heater itself. If, in accordance with the diagram, several heating devices are supposed to be turned on, then they must be turned on in parallel. Then two connection options will be possible:
- when there are so many wires coming from the thermostat that it corresponds to the number of connected devices;
- when only two conductors come from it, which alternately supply energy to the equipment.
During installation, it is necessary not to confuse the connection points of the neutral and phase conductors, because a number of models of electric regulators are very sensitive to this point. In addition, it is planned to install a contactor or magnetic starter. If it is needed, then the output type terminals of the thermostat are connected to the control relay, and the heaters are connected through contacts located on the starter.
Required tools and materials
In order to quickly and easily install an infrared heater on the ceiling, you will need the following tools:
- Drill or screwdriver (drill holes for fastenings).
- Pliers (for shortening wires).
- Indicator screwdriver (determine phase and zero).
- Metal detector (optional, used to search for wiring and metal objects in the wall, so as not to accidentally hit these objects when drilling holes. You can make your own metal detector from improvised means.
- A simple pencil and a construction tape (mark the mounting points on the wall).
As for additional materials, to install and connect an infrared heater you may need:
- Demountable electrical plug.
- Three-core copper cable, cross-section 2.5 mm2.
- Wall mounts (purchased as needed, as only ceiling brackets are included in the kit).
Having collected all the necessary list of materials and tools, you can proceed to mounting and connecting the heater..
Model with remote sensor
The recommendations listed above will help you understand how to connect a ceiling infrared heater to a thermostat. This principle also applies to almost all devices that are installed on walls or ceilings. However, with an infrared heater that is located in the floor, the situation is different.
In this case, a special heating film is placed under the laminate or linoleum. This system is called "warm floor". It is more efficient than wall or ceiling heaters. To control its heating, thermostats with a remote sensor are most often used.
In this case, another wire will come off the device. A small temperature sensor will be installed at its end. It must be mounted directly next to the film in the floor. For rooms with medium and small areas, infrared heated floors can be connected from an outlet. Its power rarely exceeds 1.5 kW.
Features of the thermostat and sensor
A temperature sensor for a heated floor is a device that determines the temperature of the floor or air and transmits information to the thermostat, which is a three-meter long copper conductor connected to a thermal resistance. To protect it from external influences, the sensor is protected by a glass bulb, and the wire is covered with PVC insulation. The length of the device can be reduced or increased up to 50 meters.
Most often, if a sensor for a heated floor thermostat breaks, it is not repaired, but a new one is purchased. If one of the components is incorrectly replaced, it often happens that the interval between turning on and off the heating system increases to 5 degrees.
Connecting thermostats to infrared electric heaters
Efficient operation is ensured by correct installation. First, you need to think about where the equipment will be located. The device should not be located in an area of high humidity or near heat sources. If these rules are not followed, the temperature measurement may not be accurate, which will lead to improper operation of the heating device.
The next important question is how to connect the thermostat to the power source and to the heater itself. An automatic shutdown relay is used to close the circuit. Here are the most common connection diagrams.
The first way to connect a thermostat to an infrared heater is to use one thermostat per heater. This option is the simplest method of connecting a thermostat with your own hands.
The second method involves parallel connection of two heating devices to one thermostat. First, the first electric heater is connected in series, from which wiring is made to connect the second device. There is an option to use more than two electric heaters with one thermostat.
Despite the complexity of the connection, this scheme is the most practical. Here, the operating principle of the device is based on the use of an electromagnetic starter for the safe use of an electrical appliance.
Some manufacturers can offer you a ready-made circuit, having their own magnetic starters for sale. Therefore, if you have little understanding of electrical engineering, it is better to first carefully read the connection instructions, or trust the work of professionals.
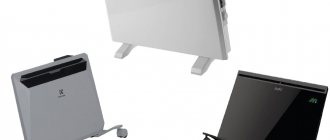
Cost and types of infrared heaters with a temperature controller using the example of three popular samples. Wall- and ceiling-type infrared thermostat models are the most popular in their product segment. Their main distinguishing quality is their compact dimensions.
In addition, potential customers are attracted by the original design of the product and the ability to select a thermostat to match the design of the room. Let's consider several options.
Calculation of the required number of IR heaters
If the IR heater is suspended from a wooden or suspended ceiling, for fastening you should use, for example, metal hooks, which usually come with the device. They can be easily screwed in without the use of additional tools. But if the ceiling is concrete, you will need to make holes in it using a hammer drill.
You should decide in advance on the number of IR heaters that you will need to install in each room. To do this, you should study the performance characteristics of these devices, paying special attention to their power. Of course, you also need to take into account the area of each room.
For example, if the area of the room is approximately 20 m2, then for high-quality heating two IR heaters will be sufficient, the total power of which will be approximately 2000 W.
If you plan to install it in a kitchen with an area of no more than 10 m2, the installed heater should have a power of approximately 800W. When installing in the kitchen, you can use ceiling or wall mounts.
If necessary, in a remote area of the kitchen, you can install another 500W infrared heater. But it should be remembered that these devices should be positioned in such a way that the entire space is heated evenly. But it is not recommended to have a refrigerator in the heating zone.
Connecting and installing the thermostat
There are two known options for connecting a thermostat. These are methods for connecting two-core and single-core wires.
Connecting a two-core cable to the thermostat
A two-core wire is used in the case when the TR requires full power from the electrical network for the functioning of a closed system for controlling the heating mode of a certain volume. These are integrated circuits built on microprocessors.
The data received from the sensor in the form of changes in current strength and resistance values are analyzed by the device. As a result, commands are sent to the starter of the heating elements with a given period of time and a boundary threshold for heating a specific space.
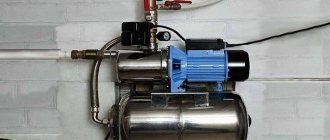
Note! An example of connecting a two-core wire is a diagram showing how to connect a thermostat to the circulation pump of a water heating boiler. Connection diagram to the circulation pump
Connection diagram to the circulation pump
Connecting a single-core cable to the thermostat
A single-core cable is used in the connection circuit of thermostats in the case when the device itself is installed in the break of the phase wire leading to the positive terminal of the heating element. That is, the cable serves as a phase break in the mains current supplying the heating elements.
Does it make sense to get involved with infrared heaters?
There are approximately the same number of fans and ardent critics of heating residential premises using infrared radiation installations. It is worth recognizing that, despite the fierce criticism of fans of water heating, the idea of using electric infrared heaters is becoming increasingly popular.
Radiant electric heaters have their own rather interesting advantages:
- Versatility. The infrared heater can be installed on any surface, at any angle, without restrictions on height and method of fastening;
- Locality of heating. An infrared emitter allows you to organize heating of part of the room, even if it is not possible to limit the loss of warm air;
- Easy to install. It is enough to correctly lay the electrical wiring to the places where the heaters are installed, connect the input to the house and a meter designed for increased power consumption of electricity;
- Low inertia of infrared heaters. Heating of the room stops 10 minutes after the electric heater is turned off;
- Possibility of smooth adjustment and precise dosage of room heating.
For your information! Due to the very small thermal inertia of infrared heaters, the air temperature in the room can be adjusted with an accuracy of half a degree; it is enough to install digital or even mechanical thermostats.
Of course, similar options for maintaining the air temperature in a house or apartment at a given level can be implemented using heated floors or electric convectors, but in both cases, good results can only be achieved in closed rooms, when there are no drafts or passage rooms.
Practice once again proves that the use of radiant devices makes it possible to heat a room no less efficiently than using convectors or water and oil radiators. In this case, it is important to choose the right scheme and method of installing the infrared heater.
Conventional electric water-oil heaters and radiators, regardless of the installation scheme, heat the air by convection:
- Most of the heat-transfer surface is covered with a casing or screen to improve, according to the developers, the flow of air to the spirals or tubular sections;
- In some designs, convection electric heaters simply unsuccessfully copy the shape of cast-iron central heating radiators;
- Such heater designs are designed for installation in window sill niches, where warm air mixes with the flow of cold air from the ventilation valve and spreads well throughout the room. In all other cases, the efficiency and economy of air heaters is significantly lower than that of infrared heaters.
Important! There are quite a few comparison tests that measure heating performance, but the most reliable data shows a difference between infrared heaters and convectors by almost 18%.
In addition, infrared heaters are practically insensitive to the position of the housing, whereas for a convector, manufacturers require installation only in a vertical position, with an inclination angle of at least 4-7o.
Low temperature infrared heaters
The most frequently criticized disadvantage of an infrared heater is related to the high temperature of the radiating surface. Most often, a spiral or ceramic panel heats up to 300-500°C, which can cause dry air in the room.
Relatively recently, so-called cold or low-temperature heaters began to be used for heating. New infrared heaters look like ordinary square facing slabs measuring 60 cm or 50 cm. The smooth heating surface is made of polymer ceramics; on the reverse side there may be a protective grille or a plastic panel covering the heating element.
Such heaters heat up to a temperature of 90-95°C, so even with prolonged contact with fabric, curtains or furniture there is no damage. Installation of such an infrared heater can be done almost anywhere, but preferably no closer than 40-50 cm to open parts of the body, you can use the advice in the video:
The most important thing is that the room heating efficiency of such a heater is approximately 20-25% higher than in comparison with vaunted convectors and oil radiators.
Connecting a thermostat to an infrared heater
Before proceeding with the installation of the heater, you first need to decide on the installation location of the equipment
It is very important to choose the right location to ensure the safest possible use of the device and its trouble-free operation. A few tips will help with this:
Tip 1. Do not place the device where there is high humidity. This is extremely unsafe, especially for electric-type thermostats.
Tip 2. Exposure to sunlight will negatively affect the operation of the device, so it is best to choose a place hidden from the sun. The fact is that, being in the sun, they will begin to show inaccurate data, which will negatively affect the heating process.
Once the location has been selected, you can proceed to preparing all the necessary tools and the installation itself.
Required materials and tools
One of the main tools required is a tape measure - it will allow you to measure the required distance from the ceiling to the selected location for installing the device. Additionally, it is worth stocking up on a building level in order to carry out the installation as smoothly as possible.
Also during the installation process you will need the following tools and materials:
- drill or bit;
- perforator;
- dowel;
- bracket.
Thanks to all these devices, it is possible to install the equipment.
Installation features
When installing the heater, it is worth considering some features, and one of these features is also the mounting of the thermostat. You can consider the process of installing and connecting a thermostat using the example of a Balu brand thermostat.
In order for the device to efficiently cope with all the functions assigned to it, you must first familiarize yourself with the installation rules, and then perform it as correctly as possible
Among the basic rules that you need to pay attention to are:
- The thermostat can only be installed 1.5 meters from the floor.
- Before installing the device, you need to place a layer of insulating material under it.
- Under no circumstances should the thermostat be mounted next to pieces of furniture or behind curtains.
The last point is due to the fact that such an arrangement will be extremely inconvenient, as well as dangerous due to the lack of air that would cool the operation of the device.
Selection rules
But it’s not enough to know which manufacturers’ products you can trust. It is also necessary to evaluate in advance the basic criteria for choosing a specific thermostat model.
- Control over the heating temperature of air masses in the room. First of all, you should make sure that the device controls exactly this indicator, and, for example, not the degree of heating of the heater itself. Otherwise, the acquisition may be completely useless.
- It is important to take into account the maximum power of the heating device itself. It is on this basis that the power of the thermostat should be selected. The best option is when the power of the thermostat itself is at least 20% higher than the maximum power of the heater.
- It is necessary to take into account the type of room, its location and specific characteristics, in particular, air humidity, frequency of ventilation and some others. The worse the operating conditions, the more powerful and secure the thermostat itself should be.
- It is necessary to determine the tasks that this device will perform.
Types of infrared heaters
Today, infrared heating devices are in high demand. This is an effective equipment that can quickly heat a room to the required temperature. The principle of their operation is simple. The rays emitted by the heater are similar to the heat from the sun. They heat up objects in the room. At the same time, the air remains cool.
Many buyers of such devices have a question: why do we need a heating control unit? Is it possible to connect an infrared heater without a thermostat? Theoretically, the presented equipment can operate without a regulator. However, when it is included in the circuit, it is possible to create optimal microclimate conditions in the room.
Infrared heaters can be installed on walls, ceilings or mounted under floor coverings (infrared film). Each of the presented varieties has its own characteristics. However, their general principle is similar.
Scope of application
The devices are used to regulate heating in residential and industrial premises. Office buildings set a temperature range at night that maintains minimal heating until people arrive in the morning.
In private homes, the functions of the controller depend on the model. There are outlet devices that simply turn the heater on and off, but complex options are installed for complex coordination of all equipment. For example, such thermostats are part of the “Warm House” control system.
Connection options diagrams
Any type of thermostat requires proper connection. For this purpose, you can use several diagrams that reflect all the features of the process. You should first take into account that you cannot place the heater with a regulator close to heat sources or in rooms with high humidity, as this will lead to incorrect operation of the control system.
Infrared panels will easily complement any interior
To operate you will need an automatic type relay. This element will act as a power source for the device. After selecting all the necessary parts, you can use one of the following connection diagrams:
- in the first case, you can use 1 heater and 1 thermostat. The machine has 2 pairs of wires, one of them is directed to the thermostat. One wire is neutral, the other is phase. The connection is made accordingly. Using the second pair of elements, a connection is made to the infrared heater;
You can connect one heater to the regulator using wires
Connecting two heaters requires wiring from a thermostat
When connecting several devices, an individual circuit is developed
Features of thermostat models
Connecting the regulator to infrared electric heaters from different manufacturers requires taking into account the features of the device. One of the most popular electric heaters from Ballu is the Bih series, which are ceiling models. They can be connected to a remote controller, and it is also possible to combine several heaters into a whole system. Electronic models of thermostats are often used for connection.
The thermostat is convenient for both ceiling and other infrared heaters
Ballu thermostats combine well with infrared electrical devices of the same brand. The kit includes connection instructions, which makes work easier. The mechanical device has a built-in air temperature sensor, as well as an adjustment wheel, the range of which is often from 5 to 30°.
The regulator and heater of the same brand go well together
The Timberk brand produces both infrared heaters and temperature control devices. Modern models of regulators are produced complete with a remote control, as they are connected according to a circuit diagram to ceiling heating systems. The operation of the device is visualized using multi-colored sensors. Many models have the ability to program shutdown with a delay of 13 hours, and the step is 60 minutes.
The Timberk range includes diverse and modern regulator models
Universal control devices of the Eberle brand and the Instata 2 series are suitable for infrared, water and air heating systems. Digital and push-button control, the presence of a control unit allows you to control one sensor. The result of the work is visualized on the display, it is possible to program the mode for 7 days in advance.
Eberle's assortment includes regulators for heating boilers, as well as for infrared devices
Many brands that produce infrared heaters supplement their range with various types of thermostats. This allows you to create a high-quality chain of devices from one company, which facilitates connection and ensures reliable operation of the system.
Recommendations for proper installation
Universal and simple rules for connecting control devices to infrared panels should be followed for safe and uninterrupted operation of the equipment. Basic tips for installing and placing elements are expressed as follows:
- one thermostat can be installed in each room heated by an infrared heater;
- The sensor can be mounted on the surface of the infrared panel, but a heat-reflecting screen must be installed between them;
- ceiling heaters equipped with a control sensor do not have a power of more than 3 kW;
- It is recommended to install the regulators at a height of 1.5 m from the floor level.
The regulator on the infrared panel has a laconic design and does not spoil the interior of the room
Video: design and connection of a mechanical thermostat
Equipping infrared heaters with a thermostat allows you to remotely or manually regulate the operation of the heating system. Thanks to such control, it is easy to create an optimal atmosphere in the room, eliminating overheating or insufficient heating of the space.
Noirot Royat 2 1200
The infrared quartz heater Noirot Royat 2 1200 is a universal wall-mounted option. Programmed with three operating modes, it is ideal for installation in any room.
- Control valves: features
- What types of boilers are there?
- What is an ATS for a generator?
The possibility of greater coverage of the heating area is achieved by rotating the surface of the heating device at an angle of up to 30 degrees. The control panel, for ease of use, can be mounted on both the left and right sides of the heater.
Specifications:
- the heating element is made of quartz;
- the device operates at different powers of 0.3,0.6,1.2 kW;
- device dimensions 0.45x0.12x0.11 m;
- presence of a safety device and thermostat;
- low noise when the heater is operating.
Unlike the previous two models, this heater has a higher cost, around 9,700 rubles.
The question of how to choose a thermostat for an infrared heater can turn into a difficult task. In addition to its main function - heating the room, the potential buyer is interested in the cost-effectiveness and safety of the device.
Ceiling heaters with thermostat
This type of infrared heat emitters has its pros and cons, so when choosing them for your dacha, you should rely on the following parameters of the device:
It is important to consider what is made of and how much an infrared ceiling heater with a thermostat weighs. So steel models are cheaper, but not every ceiling will support their weight
Made of aluminum, it will cost more, but it will be suitable for a summer house with any ceiling. If it is assumed that the heater will be the only source of heat in the house, then its power should be calculated based on the area of the room. As a rule, 100 W are required to heat 1 m2. The wavelength emitted by the device also matters. The shorter it is, the smaller the area it can heat. If the ceiling in the country house is high, then you need to choose a long-wave infrared ceiling heater.
If you need to install a ceiling heater in a country house that is not visited in winter, you should choose a device that is protected from condensation and moisture. Since the temperature will be kept at a minimum during this period, it may cause water droplets to form on the ceiling, which may damage the device and create a short circuit. The thermostat for the ceiling heater is selected depending on how often the owners “visit” their dacha in winter. A mechanical device is suitable when someone permanently lives at the dacha. The settings in it are entered manually, and the operating principle is based on turning the heater on/off as the air in the room heats up or cools down. An electronic thermostat or programmer can cost almost the same as an infrared ceiling heater, but can be controlled remotely, setting the unit up to a week in advance based on the time of day.
Important: the use of a thermostat is mandatory not only to save energy, but also to ensure the safety of its operation. In the event of a power outage, expensive models of thermostats save settings and prevent short circuits in the network
Manufacturers
Today, many global brands manufacture and sell thermostats for various types of heaters. Among them there are those that produce only 1 type of such device, and there are those that offer customers different types. Before purchasing, you should first pay attention and study the range of such manufacturers.
- The Chinese brand Sardo offers customers a wide range of outlet thermostats. All models are simple and easy to install and operate. They allow you not only to create the most comfortable temperature in any type of room, but also do it safely and inexpensively.
According to the owners of such thermostats, the electricity consumption of the heaters themselves is reduced by almost 20%.
- Ballu is another manufacturer that produces thermostats of any type. All models are manufactured in accordance with the strictest safety and quality requirements. That is why they are not only simple and effective to use, but also completely safe.
- Eberle is another manufacturer whose product range includes models of all types of thermostats, with the exception of outlet ones. Each device is easy to operate and install, allowing you to increase the efficiency and safety of using heaters of any type and power. The assortment includes models of thermostats not only of different characteristics and sizes, but also of different colors.
- Terneo - this brand specializes in the production of mobile thermostats, in particular, socket type. Each device has high-quality assembly, compact size and can be installed on any type of heater. Long-term and safe operation, stylish and modern design combined with an affordable price - this is exactly what best characterizes the products of this brand.
All of the brands described above have been on the market for quite some time. Therefore, their products are well known to both ordinary people and professionals. It is their reviews that confirm the high quality and durability of thermostats from these brands.
How to connect a heated floor to a thermostat
Unlike electric heated floors, where the temperature controller is included and the diagram provides for its connection, underfloor water heating in the basic version is not equipped with automatic equipment. They need to be chosen from two types:
- Mechanical adjustment using a thermal head and a remote coolant temperature sensor.
- Using an electronic thermostat with a servo drive.
There is also a way to centrally control the smart home system from the controller, but due to its high complexity, we will not consider this system. The simplest diagram for connecting a heated floor with a three-way valve and a thermal head with a submersible temperature sensor is presented below.
Connection to underfloor heating
The thermal head, whose drive is installed in a three-way valve, uses an immersion sensor to measure the temperature in the supply manifold, to which the heating circuits of all rooms are connected. When the coolant temperature reaches the set temperature, the head drive actuates the three-way valve, as a result of which water begins to circulate inside the underfloor heating system. The supply of coolant from the boiler is stopped or limited.
This kind of microclimate control is indirect, with coolant flowing to all rooms at the same temperature. A heated floor connected to an electronic thermostat, guided by a room temperature sensor, does not have this drawback. The following diagram will help you make the correct connection.
Connecting a heated floor to an electronic thermostat
To connect a room thermostat to the distribution manifold, you need to install it on the wall indoors, lay the power wires to the home electrical network and to the switching unit, the latter must be placed on the rail above the distributor. Next, the plastic cap is removed from the supply line valve and a servo drive is installed in its place.
The final connection of the heated floor to the thermostat is completed by connecting the wires from the servo drive to the electronic unit. The terminals on all devices to which wires must be connected are indicated in the electrical diagram included with each product. Now the coolant will be supplied to each circuit depending on the actual temperature in the room where the thermostat is located.
About the design of thermostats
Thermostats are divided into mechanical and electronic. The latter are more expensive, equipped with a liquid crystal display, and perform a number of additional functions.
Mechanical
A mechanical thermostat looks like a small plastic box with a circular knob for setting the temperature. Convenient risks marked with numbers will allow you to easily select a mode. The number 20 is replaced by a large convex circle. You don't need keen eyesight to find the icon. The trick helps people with poor vision and will also help the average person in the dark.
Inside the device there is a sensitive element that determines the accuracy of the device as a whole. Typical error is half a degree. Not bad at all. The limits for changing settings fall within the range of 5 – 30 degrees. Thermostats for infrared heaters are essentially reminiscent of a relay that is activated when the temperature in the room passes through a limit value. There are input and output contacts, the task of the device is to close and open the circuit between them.
The operating principle is mechanical, no external power is required. The response limit of the sensitive element is adjusted with a knob.
It is important to pay attention to the maximum operating power of the device. The thermostat for an infrared heater is capable of regulating the supply of electricity to a number of lines. It is permissible to install the only regulator per room or house
Example: thermostat power is 2 kW, the power of four heaters is 3.2 kW in total (1 + 1 + 0.6 + 0.6). Obviously, two regulators will be enough, each will control a pair of infrared emitters
It is permissible to install only one regulator per room or house. Example: thermostat power is 2 kW, the power of four heaters is 3.2 kW in total (1 + 1 + 0.6 + 0.6). Obviously, two regulators will be enough; each will control a pair of infrared emitters.
Electronic
A lot of temperature sensors have been released on the market.
For example, we will meet thermostats with an infrared sensitive element. As is known, heated bodies emit electromagnetic waves (devices on the topic of the article operate based on the phenomenon), they are perceived. The frequency of radiation is measured, which directly depends on temperature. This way the thermostat knows when it is time to stop supplying current to the infrared heaters.
The electronics are distinguished by a liquid crystal display and clarity; they will allow you to set a program, say, for a week in advance by day and hour. What you are prepared to do manually on mechanical models is done automatically here. This is convenient; heating can be started a quarter of an hour before arriving home. Which is basically impossible for mechanical thermostats.
The next step in evolution is “Smart Home” class devices. The thermostat communicates with the control center at a frequency of over 800 MHz and is capable of controlling a myriad of heating devices. There is no need to remind you that commands from a smartphone will help start heating the premises at the right time. This option is convenient if you are in a hurry and do not have time to turn off the heating. Wherever the owner is, the devices will obey.
Many devices are universal. Connecting the thermostat to the infrared heater can later be replaced with a Warm Floor system without hassle. The point is to correctly configure the sensors for measurement. Thermostats should not be exposed to direct sunlight or drafts. Devices should not be placed on the external wall of the room.
Most smart devices are equipped with self-monitoring functions. If the sensor fails, the heating devices are switched to 30% activity mode. This prevents the house from cooling completely and ensures that the premises do not overheat.
It is worth adding that electronic thermostats are many times more accurate than mechanical ones.
How does a thermostat work?
Such a regulator consists of two main components:
- A temperature sensor installed near a heat source and/or in a heated room.
- A control unit that processes the signals from the temperature sensor.
These structural elements interact with each other according to the following scheme:
- The control unit receives the heater operating program, which indicates the temperature in the room or the degree of heating of the heating element.
- The temperature sensor reads the “degrees” in the room and/or at the heating element, transmitting this information to the control unit.
- The control unit turns on the heating element if the temperature transmitted by the sensor is less than the programmed value. And turns off the infrared panel if the temperature in the room or at the heating plate exceeds the programmed parameter.
As a result, ceiling and wall infrared heaters with a thermostat consume only the required “volume” of electricity, warming the room only to the desired temperature. In this case, calibration of heat transfer and temperature is carried out in steps of 0.1-1.0 °C
Typical types of thermostats
Modern manufacturers produce two types of thermostats:
Mechanical devices. Such regulators use a special plate or diaphragm made of a temperature-sensitive material as a temperature sensor. Therefore, thermomechanical regulators, in fact, do not have a control unit. The plate closes or opens the contacts of the electrical circuit that powers the infrared heater, “influenced” by the actual temperature in the house. And all regulation consists of fixing the set temperature using a mechanical lever, with the help of which the elements of the plate temperature sensor are positioned.
- The main advantage of such a regulator is the ability to operate without supplying electricity to the device.
- The main disadvantage is the low calibration accuracy - from 0.5 to 1 °C.
Connection diagram of an infrared heater to a thermostat
Electronic devices. The temperature sensor of such a device detects thermal radiation by reading electromagnetic waves of a certain frequency. At the same time, both the temperature “overboard” and the degrees in the house are controlled. The control unit of such a controller receives signals from the sensor and processes them according to a built-in algorithm (program). Electronic devices have only digital controls. The algorithm for processing signals from the sensor is set using factory programs or buttons on the case. Information about temperature and operating modes is displayed.
- The main advantage of such a device is high accuracy - calibration is carried out in increments of 0.1 °C. In addition, there is some control autonomy. For example, infrared heaters with a thermostat for a summer residence can be programmed to operate for a week based on the air temperature outside the house and not even leave the country to monitor and adjust the operation of the heating system. Mechanical regulators cannot do this - the user will have to “turn the adjustment wheel” almost every day.
- The main disadvantage is that it only works when there is voltage in the network.
How to connect a thermostat to an infrared heater?
When installing a thermostat, you need to follow the following generally accepted rules:
- A separate regulator is installed in each heated room.
- A heat-reflecting screen must be installed between the temperature sensor and the supporting surface.
- Infrared ceiling heaters with a thermostat cannot be more powerful than 3 kW.
- The recommended placement height is 1.5 meters from the floor level.
The installation of the device itself is carried out as follows:
- A separate line is “pulled” from the central panel to the regulator, which ends at the incoming “zero” and “phase” terminals.
- A power supply line is drawn from the regulator to the heater, starting from the outgoing “zero” and “phase” terminals.
- External temperature sensors are connected to the corresponding connectors of the thermostat, connected to the regulator using separate lines or wireless communication protocols.
Exact installation diagrams are given in the data sheets for specific models of control devices.
What is a thermostat
A thermostat or thermostat combines two devices.
The first one measures the indoor temperature at certain intervals and records this data. The second device regulates the operation of the heater.
Internal electronics or mechanisms (depending on the design and features of a particular model) coordinate the operation of the two units. The thermostat takes temperature measurements and if they are higher than the set mode, a signal is sent to the heater to stop working. Next, the temperature is measured in the same mode and as soon as it drops below the desired temperature, the heater turns on again.
Thus, connecting an infrared household heater through a thermostat allows you to constantly maintain the desired temperature in the room.
Types and characteristics of thermostats
Thermostats are presented in a wide range of models; they can have different designs and vary greatly in size. Their main difference is in the principle of operation; they can be electrical or mechanical.
- Mechanical. They have poor functionality and only allow you to set the temperature that should be maintained indoors. The front panel of the thermostat can also have an operation indicator and a power button. This device measures temperature rather approximately, but this is quite enough to create comfort in living spaces.
- Electronic. They are equipped with a display on which you can set fairly accurate temperature readings, set a schedule for changing the temperature at night, and adjust the operation of the heating system for a week or even a month. Some models are controlled remotely, including using mobile phones.
Electronic thermostat
Mechanical thermostat
On a note! The main difference between mechanical and electronic thermostats is their cost. The former are much cheaper, although they do their job just as effectively. Moreover, regardless of the chosen model, any thermostat only regulates the switching on and off of heating devices by controlling the temperature inside the room.
Thermostat Ballu BMT 1: how to connect
The most common and well-known to many is a thermostat with an air temperature sensor Ballu BMT 1. It has proven itself in operation.
Sequence of work:
- Laying cables;
- Installation and connection of the device.
First of all, you need to choose a place to install the heater. After this, you can start laying the wires. To ensure fire safety, you should choose a wire with a cross-section of at least 2.5 mm2.
Having laid the cables, we install the thermostat. Next, we connect the device. To do this, you need to understand the circuit, since many people are completely unclear how to connect the device correctly.
From left to right, the regulator terminals are labeled (3, 4, 1, 5, 6). We connect the supply phase wire to the terminal numbered (1). The neutral wires are connected using the terminal numbered (6). The working zero and the device zero are connected to one terminal.
After this, from the terminal numbered (3), you need to make a jumper to terminal (5). With this jumper, the device indication is connected. The phase wire leading to the heating device is connected to terminal (4).
In order not to get confused when connecting, you need to know the color marking of the wires. Phase wire (white or brown), neutral (blue), ground (yellow - green). It is worth noting that this circuit is suitable for connecting the F2000 thermostat.
Specifications
Operating parameters depend on the version, filling and control circuit. Some thermostats for quartz heaters or oil heaters are connected to 2–3 remote sensors. The built-in GSM modem carries out voice notification and electronic mailing about the state of the microclimate to specified telephone numbers indicating operating parameters.
Capabilities of modern thermostats:
- connection to eight telephone numbers and regulation of 4 alarm zones in the home;
- coordination of parameters and setting tasks via mobile communication or voice message;
- sending an SMS message when there is a power outage or low battery;
- models can withstand power of 2 - 3.5 kW.
When connecting, the current consumption of the heaters is summed up; this value should be less than the maximum value for the thermostat.
Detailed instructions for DIY installation and connection
You can enjoy all the above benefits only by installing the device correctly. The work is carried out in 5 stages and requires strict adherence to the instructions.
Preparatory stage
First, you need a set of tools so that you don’t have to be distracted during installation. Must be present:
- Roulette.
- Pyrometer.
- Screwdriver.
- Screwdriver.
- Drill (perforator).
- Pliers.
Where and how to install an IR heater?
At this stage, the location of the infrared heater is determined. It can be installed on a wall, ceiling, or with a slope.
IR with a power of up to 800 W is installed in residential premises. If we are talking about public buildings, then the power starts from 1.5 kW.
The surface must be strong to support a load of 20-30 kg.
Do not install the heater near flammable objects
Location and height from the floor
IR is recommended to be installed next to surfaces that absorb heat.
Wood, carpets, and stone surfaces work well. Reflective surfaces should be avoided, since when using the device the owner will receive a minimal effect. Electrical wiring must be laid on a non-combustible base. The location of the heater largely depends on the specifics of the premises. There is an optimal scheme for placing IR in residential buildings. It looks like this:
- A pyrometer can measure the coldest place that needs heating. In the case of installing several heaters at once, it is required.
- The height from the floor should be 1.5 m in residential areas. If a person spends a lot of time under the heater, the value should start from 1.8 m.
- If the installation of a high-temperature infrared heater is carried out in public buildings, offices, then the distance should be 2 m.
Installation of the device
You can do the installation yourself without spending a penny. The only difficulty is that it requires certain skills and knowledge, as well as knowledge of the installation process.
During installation and connection to the electrical network, it is prohibited to turn on the heater.
Progress:
Determine the mounting height from the ceiling and floor using a tape measure. Tighten the bolts or drill a hole with a drill (perforator) if the wall is concrete
It is important that the distance between the attachment points is the same. Insert dowels into the drilled holes. Install fasteners. Secure the device into the fixing holes. The designs of different heaters may differ slightly, so do not ignore the manufacturers' recommendations
The designs of different heaters may differ slightly, so do not ignore the manufacturers' recommendations.
Electrical connection
To save energy and provide a comfortable temperature, the infrared heater is mounted together with a thermostat. The device automatically turns off the IR when the room reaches the specified temperature. As soon as the air in the room cools down, the thermostat turns on the IR.
Connecting to the network together with the thermostat takes place in 4 stages:
- Attach the thermostat to the wall at a height of 1.4 m from the floor near the infrared heater.
- Select a wire that is resistant to heavy loads. It must be laid inside the walls and ceiling from the IR to the thermostat.
- The wire is masked with plaster or special boxes.
- The heater wiring is switched parallel to the main line.
When installing heaters in several rooms at once, one thermostat will not be enough. One device is required for each room.
Connection diagram for several heaters via a thermostat
The connection involves connecting the cables of several devices to the thermostat. Next, the thermostat is connected to the junction box.
The best option is to create a separate machine in the switchboard. This will prevent the risk of overload.
Advantages and disadvantages
The device saves electricity, because when the task is set correctly, the heaters operate no more than 5 - 8 hours a day.
- optimization and unified settings of individual heaters, convectors and the entire heating system;
- maintaining the minimum required temperature in the absence of a person in the house;
- redistribution of the heating force of heating devices throughout the entire apartment or office, while the activation can be set in a cascade, eliminating overload of the electrical network.
The disadvantage is that it is not recommended to install thermal switches in bathrooms due to high humidity and steam, and also to place them close to heaters, cold sources, in a drafty basement or in the sun.
Conclusions and useful video on the topic
Types of thermostats and their comparison:
By choosing the optimal thermostat model and correctly installing it in the outlet, you can make your life much more comfortable.
Now, in order to maintain the desired temperature in your home/office, you don’t have to constantly pay attention to the heater, turning it on and off. The thermostat itself will control this process, taking into account the settings set by the user, which will help to save energy.
Are you looking for a practical and convenient plug-in thermostat? Or do you have experience using such devices? Please leave comments on the article and share your impressions about using thermostats for heaters.
Types of IR installations with thermostat
Heating devices usually differ in their location, namely:
- Floor-standing.
- Ceiling.
- Wall-mounted.
There are also film IR heaters, which are manufactured in the form of:
- Panels - thin rectangular, with a flat surface, equipped with heating elements.
- Heat lamps with special reflectors, as well as spiral heating elements.
- Polymer film with a thin layer of heating parts.
Panel infrared heaters
Heaters also differ not only in shape (film, plate, spiral), but also in the material from which they are made. There are:
- Quartz devices use a tungsten filament sealed in a vacuum quartz tube or a monolithic tile consisting of quartz sand.
- Halogen installations using inert gas as a source of infrared rays.
- Carbon heaters, which use carbon fibers or plates as a radiation source.
- Ceramic, which consist of appropriate plates for uniform heat distribution.
Installation
To install IR heaters, you will need a standard set of tools, which is available in almost any home. To install you will need:
- screwdriver;
- pliers;
- several screwdrivers;
- roulette.
When installing IR heaters, you should remember that they must be located at a certain height. Typically it ranges from 2.2 to 3.5 meters. The heating device should be 0.5 meters above the top of the tallest family member. In addition, these heating devices should not be placed close to permanent locations of people, as this may adversely affect the health of the latter. As practice shows, the ideal place for its installation is near the window.
To understand how to properly install this device, you should draw up a detailed diagram in advance and make the necessary calculations, especially if several IR heaters are installed in the room. Remember, they should not connect from the same network source. Their work should be parallel. It is recommended to make a separate automatic device on the distribution panel to avoid overloads.
If you intend to install, then this process will be much more complicated than installing its electrical counterpart. After all, for its operation it will require regular gas refilling. Most often, such heating devices are installed in summer kitchens, verandas, playgrounds, etc. But you should not install an infrared gas heater yourself. This should be done by a specialist, since working with gas is quite a risky undertaking and will require the appropriate skills and experience.
Preparatory work
The IR heating device is installed on a surface (floor, ceiling, wall) in accordance with its intended purpose: floor, wall or ceiling device. Depending on the design, the design may include an element such as a thermostat. Its main task is to control the temperature level in the room where the IR device operates.
In doing so, a number of questions are addressed:
The thermostat is mounted at a level of 1.5 m. This is necessary for ease of use. When connecting film decorative IR heaters, a wireless thermostat is used
It is important to avoid areas subject to drafts. Otherwise the device will not work efficiently. An area for installing the heater is selected: near a door or window
If the room is quite large, then it is recommended to install two low-power units instead of one powerful unit. But in this case, you need to calculate the total power if you plan to connect to a thermostat.
To work you will need tools: drill, screwdriver, ruler, screwdrivers, pliers, etc. Depending on how and what the heater is equipped with, a rigid bracket for installation may be required, which usually has to be purchased additionally. But installation can be done without such an element; again, it all depends on the configuration. You will also need wires, the length of which is determined by the installation location and distance from the power source.
Connection work
Installing an infrared ceiling heater in a room where suspended or wooden ceilings are installed is done quite quickly due to the ease of manipulation: hooks are screwed into the finishing material, on which the heater is suspended. If the room has a concrete ceiling, then in this case you will need a hammer drill. This is the easiest way to connect.
We watch the video, installation work of the ceiling heater;
But the vast majority of users prefer a more economical solution - using a thermostat. In this case, installation is carried out in several options depending on the equipment set:
- A thermostat-heater pair is connected. In this case, two wires are supplied from the circuit breaker (hereinafter referred to as simply a circuit breaker): “zero” and “phase”. Installation is carried out in accordance with the device markings. Next, the thermostat is connected to the heating equipment, also taking into account the markings. You must first open the socket for connection. It is usually hidden in the housing under a removable cover held in place by fasteners.
- Installation and connection of an infrared heater of more than two types per room is carried out through a parallel connection. Otherwise, the installation steps will be identical: wires are connected from the machine to the thermostat, from which heating devices are already connected.
- A more complex option: installation by connecting a magnetic starter. This solution is preferable when connecting an industrial heater is planned.
Some features of installation work
To ensure safety, care must also be taken to ground the device. For this, a yellow-green cable is used, which is connected to the appropriate terminal. It is difficult to make a mistake here, since the markings help to complete the installation without unnecessary difficulties. In order for the room to be heated as efficiently as possible, it must be installed in the most suitable position to ensure high performance.
Thus, the connection process itself should not cause difficulties for the user
But first it is important to choose the right site for installing the device
Only in this case will there be a high degree of efficiency from its work. If the room is more than 20 sq. m, it is recommended to use two heaters, the total power of which will not exceed 2 kW. For small areas (up to 8-10 sq. m), a compact low-power device with 800 W is quite sufficient. It is more advisable to install heaters near entrance doors and near windows, but thermostats, on the contrary, are “afraid” of drafts and work less efficiently.