An electric hair dryer is the most important accessory in a woman’s life. Largely thanks to this device, a woman is always attractive and desirable to a man. You can not only dry your hair with a hairdryer, but also create a beautiful styling that emphasizes the natural beauty of a woman. A hairdryer is also the first item in the hands of a makeup artist in a beauty salon. It is almost impossible to imagine the life of a modern woman without a hairdryer. But, like any other device, it is susceptible to breakdowns. How to determine the malfunction, how to disassemble the hair dryer and repair it, if possible, will be discussed in this article.
General arrangement of hair dryers
Due to their widespread use, regardless of the manufacturer, most hair dryers have a similar design. The main elements are the heating element and the electric fan. The heating element is a regular spiral, which is made of alloys with high electrical resistance. Thanks to this, the spiral can heat up to high temperatures and not burn out. Electric hair dryers use nichrome wire as a heating element. Even with very high resistance, the spiral will certainly burn out if it does not have cooling.
Hairdryers have air cooling, that is, the heating element is cooled by a strong air flow. The flow force is designed to prevent the coil from burning out. The main element in the cooling unit is the electric motor. The power can be different and varies depending on the class of the hair dryer and its manufacturer. The higher the class of the hair dryer, the greater its power. High-power motors are installed on Rowenta hair dryers. We will explain how to disassemble it below. Motors for hair dryers are produced in low-voltage versions. The supply voltage, as a rule, does not exceed 12 volts. This is necessary to ensure the compactness of hair dryers and their safe operation. To reduce the voltage to the required level, the circuit includes a step-down coil, which is built into the heating element. In addition, the hair dryer has a power button, which can also be a power regulator.
What else could it be
Another reason for overheating may be false information from the manufacturer. For example, he indicates high power on the packaging, but does not inform the potential buyer about low-quality and/or obviously weak components. It turns out that the motor is powerful, but other parts do not suit it functionally. These are the tricks of dishonest manufacturers, which they often resort to.
If the hair dryer works and then goes out, the reason may be a lack of voltage in the network or a problem with the cord. It is necessary to check the outlet and the power in it. Inspect the cord; it may be cut or broken in some place. The most vulnerable points of the cord are the connection to the appliance and the electrical plug. The button to turn the device on and off often gets stuck. The problem can be solved at home. If you are not confident in your abilities, have the device repaired.
If the air does not warm up to the required t 0 and the motor stops, you need to check the spiral. At home, you can check using a tester. If the problem is with the filament coil, it is better to replace it. When repairing a spiral, repeated problems may arise in just one or two months.
The most difficult problem is the failure of the electric power unit. If the electric motor breaks down, you can hear a burning smell and see sparking in the area of the installed fan. To replace the motor, you need to contact a service center.
Disassembling the hair dryer
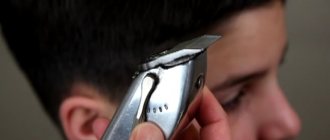
As a rule, hair dryer bodies are made of plastic, which are fastened with self-tapping screws. You need to unscrew them with a figured screwdriver. Next you need to move the body halves apart and disengage the latches. The latches are very fragile and it is important to use caution to avoid breaking them. Especially if you want to disassemble the Rowenta hair dryer. How to do it right? The main thing is to unscrew all the screws. It happens that hair dryers, depending on their design, use hidden screws. They may be located under stickers or manufacturer logos. If you do not unscrew them, then during further disassembly you have every chance of breaking the latches.
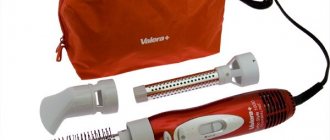
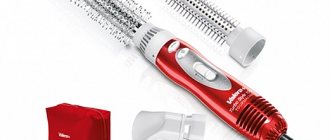
There is one more feature if you don’t know how to disassemble a hair dryer brush - such devices consist of several parts and have a rotating head. When disassembling such a device, you need to carefully remember in what order and how the parts are attached to each other. This is very important and necessary for the subsequent correct assembly of the hair dryer.
Troubleshooting
We learned how to disassemble a hair dryer. Now we need to find and fix the problem so that it can be used for a long time. If the hair dryer does not want to turn on at all, then the first thing you need to do is check the integrity of the electrical cord and plug. A visual inspection will help determine the serviceability of the plug. If upon inspection traces of burning or melting are visible, then such a plug must be replaced. Often the electrical plug and cord are one piece, then the entire cord needs to be replaced.
To protect the hair dryer from overheating, a thermal switch and a thermal fuse are used. The first is contact plates, which, when a certain temperature is reached, open and break the circuit. The thermal fuse also protects the hair dryer from overheating. If there is severe overheating, the fuse burns out and opens the circuit. The malfunction may also include a non-running engine. This can often happen with a Philips hair dryer. How to disassemble it is written above.
Hair dryer repair
If a cord is found to be faulty, it must be replaced. The integrity of the cord can be checked with a multimeter. Turn on your multimeter to measure resistance, and measure the resistance of the cord wires one by one. A healthy core will show zero, and a burnt one will show infinite resistance.
The thermal fuse is a single piece. It is short-circuited and when the critical temperature is reached it simply burns out. This can also be checked with a multimeter; if such a defect is present, then the fuse must be replaced. In this case, you will need a soldering iron and a new fuse.
The malfunction may also lie in the thermal switch. The bimetallic plate is the basis of this device; due to high temperature, it can lose its properties and stop working. Then such a switch must also be replaced, since it will not be possible to restore it.
Another reason for repair may be burnout of the heating element. This most often happens with the Scarlet hair dryer (you can find out how to disassemble it and repair it from the article). Burnout of the spiral can occur for two reasons: failure of protection and long service life. In this case, you need to replace the spiral, first restoring the protection. A non-working engine must be replaced.
Typical Inspection Procedure
If the device has no signs of life and is unstable, the inspection begins with the power circuit. Below is a schematic description of the repair of Rowenta hair dryers.
Attention! The described types of work require skills in handling electrical appliances. The authors decline responsibility for damage to health and property that occurs when attempting to follow the recommendations given for repairing hair dryers.
Inspection of the power wire begins with the socket. Some of the faults lie there: there is no voltage - the hair dryer does not work. If there is voltage in the outlet, inspection of the cord begins at the point where it enters the housing, moving towards the plug. Work is performed on a de-energized device. A visual search is carried out for kinks and irregular formations - burns, insulation damage, fractures.
Then the hair dryer body is disassembled. Inside you have a chance to see the electrical resistance options:
- A pair of detachable contacts.
- Soldering.
- The wiring is sealed in plastic caps.
Permanent connection
The last element of the list characterizes a non-separable connection, therefore, the case for testing is extremely complex. Skillful hands, or rather, smart heads, Ukrainian brothers in wisdom are advised to use an ordinary needle to repair a hair dryer. Those who immediately grasp the train of thought will skip the next paragraph; start testing directly.
Repairing a hair dryer with your own hands begins with checking the wiring. A Chinese tester, a light bulb, and an indicator will do. A needle is attached to one terminal, which is then inserted into the power core in the area of the cap through the insulation to the copper. The second terminal feels the legs of the plug. The call goes through for both wires. When repairing a hair dryer, you shouldn’t make more than 1 puncture per wire (some will also try to look for the break point), since the nature of the operation involves moisture getting in from wet hair.
Contact pad
Even a child can ring the wire, having visually distinguishable junction points in front of his eyes. If damage is found, it is recommended to buy a new cord equipped with a non-detachable plug. The possibility of moisture ingress limits the choice of insulation of conductive parts used to repair the hair dryer.
Cases are common: the first glance reveals the location of damage to the cord entry into the housing. Sludge, carbon deposits, black insulation indicate the location of the fault.
At the junction with the hair dryer body there is a vulnerable wiring point. The hostess takes the delicate device by the cord, shakes it from side to side, and winds the cable around the handle. A core with a crack sparks, the insulation heats up, burns, and the copper melts. This is the mechanism of damage to copper conductors.
Switch and switch
When updating, it is useful to short-circuit the switch and check: the hair dryer will change its behavior radically in response to a simple step. There are three-position switches, each short-circuited position is checked separately. Remember, sketch out the original wire layout before you begin repairing the hair dryer.
Checking the speed and temperature switches uses a similar circuit.
Inspect the defective element identified during the restoration of the hair dryer. The deposits are cleaned off with a file, sandpaper, or eraser. Contacts are wiped with alcohol. Faulty components are replaced with equivalents. A radical method is to short-circuit the power button while searching for suitable components.
Fan
Relatively often, the air duct of a hair dryer becomes clogged. It is necessary to remove the filter, if any, and clean it thoroughly. Use a soft brush to remove dust from crevices.
No blade rotation or low rpm is often observed when hair is wrapped around the motor axle. The propeller must be carefully removed from the shaft, avoiding unnecessary effort and distortions in every possible way. After this, foreign objects are removed.
Spirals
A hair dryer usually has several heating elements. Visually they should all look uniform. Make sure of this when fixing the hair dryer by opening the case. Detected breaks are eliminated by twisting the ends, soldering and tinning. You can also get thin copper tubes and crimp the ends of the broken spiral inward.
During repairs, defects in heating elements can be observed visually. A careful inspection will tell you how to fix the hair dryer. It is effective to replace spirals with similar purchased or homemade products made from nichrome wire.
Engine
The electric motor of a hair dryer can be powered by both direct current and alternating current. If the diode bridge is burned out, the windings are damaged, and normal operation is disrupted. A terrible crackling sound and sparks when turned on indicate a motor malfunction.
The motor windings are desoldered when repairing a hair dryer from the electrical circuit. For each wire, find the pair that rings. The terminals are connected in threes; none should hang in the air. Replacing the winding when repairing a hair dryer is carried out only in a workshop. However, folk craftsmen work no worse than machines. Those who wish will try it.
If the windings are in good condition, the brushes are inspected, the copper surface underneath them is cleaned, and the tightness of the fit is assessed.
The axle should rotate freely. When repairing a hair dryer, it doesn’t hurt to lubricate the rubbing surfaces and manually work in problem areas.
Chip
The getinax backing sometimes cracks, tearing the track. Tin the damaged area and lightly cover it with solder.
Damaged capacitors swell slightly. The upper edge of the cylinder contains shallow slots; when the product breaks, the side swells, bending outward. Replace such a capacitor first if you find a characteristic defect.
Burnt out resistors turn dark. Some remain operational; it is advisable to replace such a radio element.
Prevention
To avoid unnecessary expenses on repairs, it is advisable to carry out preventive maintenance of the device. This will also require disassembling the hair dryer. How to do prevention? First of all, this is a visual inspection. Inspect the hair dryer you are using for external damage: integrity of the cord, plug, possible melting on the body. If there is such damage, then the hair dryer needs repair or replacement. Important! Do not use a damaged hair dryer; this may result in injury or fire.
From time to time you need to clean your hair dryer. During operation, the hair dryer becomes clogged with dust and cut hair. To clean it, remove the back cover with the protective mesh. Through the opened hole you can get to the heating element. Using a soft brush, gently brush away dirt and hair from the mesh and clean the coil. So you have learned how to disassemble a hair dryer in order to repair it. Let's summarize.
Expert advice
Of course, cleaning a hair care product when it suddenly stops is possible at home. However, more complex repairs are best left to specialists.
To avoid problems associated with the sudden stop of the device, you need to learn how to choose the right hair dryer from the beginning. Pay attention to the motor power and other technical characteristics.
It is recommended to buy a hair dryer in specialized stores, avoiding tempting offers from market sellers. An important criterion for choosing a hair dryer for home use is the name of the manufacturer. It’s better to overpay a little, but be calm and not worry about the quality of the chosen hair dryer.
When purchasing a device, ask for a receipt and check for instructions for use from the manufacturer. It must come with a hairdryer.
Before using the hair dryer, read the manufacturer's recommendations and follow the instructions.
Keep an eye on your household appliance and service it regularly. Store in a safe place out of reach of small children.