Features of assembling a circular saw with your own hands from a grinder
Before building a machine, it is important to determine its purpose. To prepare firewood and perform simple cutting, a securely fixed table with a slot for saws is sufficient. But such a machine can hardly be called safe or functional.
To perform more work, it is worth making a circular saw equipped with a coordinate table. It must have guides. This will help change the degree. In this case, it is worth considering the possibility of switching speeds and replacing disks.
You can make a circular saw from different tools. Almost every man has a grinder in his assortment of tools. It is often used at home. To make a stationary installation, you must use a workbench or a special table. The tool must be fixed from below.
So, how to make a circular? To do this you need to do the following:
- Pull the metal band clamp onto the tool. Its screed must be placed at the bottom.
- Fold the metal strip in half and secure it in the area of the holes.
- Make holes in the grinder gearbox.
- Attach the axle handle.
Note! You can make a handle from a metal rod or tube. In this case, the workpiece should resemble a staple in shape.
You can make a tool from a grinder
Working with a saw and grinder
Tools and materials:
- grinder 150-180 mm;
- drill;
- self-tapping screws;
- steel clamps;
- sheet steel;
- pliers.
Circular saw diagram.
Before you make a circular saw yourself, you need to try making it from other tools. Most often, the process is organized with the help of an angle grinder, because it can be remade much faster and easier than any other analogues.
The simplest option best damages the instrument. To do this, you will need to screw the tool to the base using metal screws. If desired, you can make through holes with a drill and tighten them with bolts and nuts, which will be much more reliable in operation, because the tool will no longer strip the thread in case of strong tension. The only nuance that should be taken into account is the factory imbalance of the tool, due to which you will have to fix it very carefully so that there is not even a small chance of movement.
If desired, you can complicate this design, and this will also protect the instrument from unnecessary interventions inside. For fastening, you will need steel clamps that wrap around the tool at 3-4 points and then secure it with bolts on both sides. This design is very reliable, but special attention should be paid to the quality of fixation in order to avoid even small misunderstandings.
Diagram of a station for a circular saw.
For those cases where the tool is made stationary, you can use more powerful options for angle grinders. The angle grinder itself is attached to the reduction gearbox using bolts or self-tapping screws (depending on the ability to make a joint without damaging the tool, because sometimes the mounting locations do not match), after which they are installed together on the table top and screwed in the highest quality way.
The most reliable method will also be the most difficult, because it will require the support of a turner-miller. His task is only to carve a special part that would be suitable in its parameters for coupling the grinder and the tabletop. This coupling method is the most reliable; moreover, even microscopic movements are excluded, which is not possible to achieve in every factory tool.
One should take into account the fact that in any case the protective casing is removed, and instead a homemade one is made from sheet steel. It will no longer be possible to use the mount for the casing due to the fact that it is used for coupling, and the homemade product should be mounted directly to the tabletop. To make it, you need to cut a semicircle from sheet steel, the end of which is bent and clamped with pliers. This design will withstand any surprises after it can be screwed on.
When choosing an angle grinder, you need to be extremely careful so that the number of revolutions is small and the power is high. If the speed exceeds 4500 rpm, you will have to use reduction gears, because otherwise, the cutters will grind down very quickly.
It is very important to remember that under no circumstances should a circular saw made from an angle grinder be remade back, because For this reason, every day in all parts of the world people are admitted to hospitals with injuries of varying degrees of severity. Even if an angle grinder is urgently needed, and there is no other option, it is better to be patient, because even the factory protection will most likely not save you.
Saw conversion
Tools and materials:
Diagram of a carriage for a circular saw.
- chain Saw;
- flat steel roller;
- nozzle for cutters;
- reduction gear;
- welding machine.
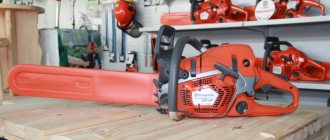
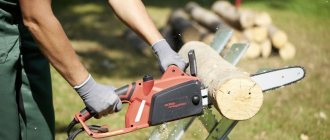
Electric saws and chainsaws are a gift from the 20th century, which fits very harmoniously into life, but there are situations when it is desirable to remake them, which is not easy. Please note in advance that this alteration is of a momentary nature, but if desired, you can repeat it over and over again without any damage (the replacement will take some time).
In order to get a circular saw, you only need to weld a movable wheel at the very end of the boom and cut off the end itself. The wheel must perfectly follow the contour of the cut element so that the chain does not stretch or fall off when moving.
An adapter for cutters is attached to the side of the wheel. This adapter is removable so that there are no difficulties when sawing with a chain.
With high-quality modification, the wheel will not in any way harm the performance of the chainsaw in the absence of cutters at this moment. In addition, the basic operating speed allows you to do without serious third-party modifications.
Advantages of homemade equipment
A homemade circular saw is considered a fairly popular tool. It is easy to manufacture and has a high degree of reliability.
So, a DIY circular saw has the following advantages:
- versatility;
- ease of manufacture;
- cost savings;
- reliability.
Today you can find many drawings that allow you to design stationary or mobile saws of different sizes. For this you can use drills, grinders and other tools.
Some craftsmen combine a circular saw with a jointer, placing them on the same base. These devices can operate from a common engine. With the help of such a machine, it is possible to achieve perfect cleaning of a wooden surface. Therefore, the combination of a jointer with a circular saw is considered a very functional solution.
Features of a circular saw
Knowledge of these features is extremely important; you must take into account the operating modes of the saw, know the type of loads and take all possible measures to strengthen the most important components. Only with this approach can long-term and safe operation of a homemade machine be achieved. DIY circular saw.
What are the common features of woodworking machinery?
- High speed saw teeth. This ensures the quality of sawing. But high speeds of the saw blade cause serious injuries; during the manufacture of the machine, great attention must be paid to safety precautions. All devices available on industrial copies must be installed. Don’t think that some of them are superfluous, and you will be able to modernize factory samples for the better. All safety rules are written in the blood of injured people, do not repeat tragic mistakes.
A circular saw is an effective and functional tool for cutting a wide variety of materials.
- Strength of all nodes. This means the inability to withstand significant static loads, although this is very important. The table can easily absorb large forces of this type, but at the same time vibrate under the influence of even relatively minor dynamic multidirectional loads. This condition does not have a negative impact on safety, but noticeably deteriorates the quality of the cut. Marks of teeth are noticeable on the surface of lumber, it is difficult to maintain specified linear dimensions, etc.
The quality of work also depends on the selected circular saw blade.
- Fire and electrical safety. Absolutely all electrical devices, motors, starters and other special fittings must be installed in strict accordance with the requirements of the PUE. You need to know that dry sawdust not only burns well, but also forms an explosive mixture at a certain concentration in the air. By the way, burning sawdust is difficult to extinguish; it floats on the water and continues to burn.
The Makita 5017 RKB circular saw is equipped with a plastic container for collecting sawdust and an effective dust extraction system
There is no need to make the simplest machine at the expense of safety devices; strictly follow the recommendations of the designers. Decide what you need, a woodworking machine or fresh problems?
How to make a circular saw with your own hands: preparatory stages of work
How to make a circular with your own hands? To do this, you need to prepare everything you need - buy or use existing parts. Before purchasing structural elements, you need to draw up a detailed drawing. Without a diagram, it will not be possible to take into account the dimensions of the mechanisms and create a complete set of parts.
To make such a tool, you can use a drill or grinder. Some craftsmen make a device from an automatic washing machine. To make the device more functional, it can be supplemented with a lifting mechanism.
Design elements of a self-made wood sawing machine
Creating a stationary circular saw with your own hands has a number of features that need to be taken into account.
Making a carriage for a circular saw with your own hands
The function and operation of the device may vary depending on the availability of various accessories. One of them is the carriage. To construct it you need to do the following:
- cut the plywood slightly wider than the table;
- Attach guide bars from below - the interval between them should coincide with the width of the table;
- Fix the stop bars on top.
Note! To make the coating easy to clean from sawing waste, it is recommended to coat it with varnish. This material is applied in several layers.
The manufacture of the carriage has a number of features
How to make a shaft for a circular saw with your own hands
The shaft is considered an important element of the circular. It is made from round steel grade 45. In this case, the diameter of the workpiece must match the dimensions of the saw blades. The most commonly used is 32 mm. Saw blades must be installed between the flanges and clamped with a nut.
To use a saw to work with different materials, you need to provide several operating modes. Therefore, it is worth making several grooves on the shaft. This will make it possible to move the pulleys and change the speed.
What discs should you use for circular saws?
These elements have a major impact on productivity and quality of work. The discs can be designed for processing metal or wood. In the first case, the circles should have small teeth. There are also universal models.
Disks can be monolithic or carbide. The first type is made from a single piece of high-carbon steel. Such parts have an affordable price, but at the same time they have to be sharpened frequently. Carbide elements have a higher degree of wear resistance, but are much more expensive.
Do-it-yourself parallel fence for a circular saw
This is an important element that is needed for working with large workpieces. The emphasis can be made from different materials - plywood sheets or chipboard. On average, its dimensions are no more than 25 mm. The stop can be fixed with sides or self-tapping screws.
To focus, you need to do the following:
- take 3 strips of laminated chipboard and make a U-shaped profile;
- Make a guide channel from 2 slats and bolt it to the end of the table;
- make an inverted T-shaped structure from MDF - it needs to be screwed to the stop and placed in the channel.
DIY circular table
To make a table, you need the following:
- plywood;
- bars;
- several fragments of chipboard;
- bolts.
To make a tabletop circular you need to do the following:
- Assemble the top of the table from laminated chipboard sheets. It resembles a box without a bottom. The fragments need to be secured with bars. Their length should be greater than the height of the sheets.
- Turn the structure over and fasten the bars with additional jumpers.
- Cut a tabletop from a plywood sheet. Use a jigsaw to make a hole in it lengthwise and place a saw blade there.
Note! To modernize the structure, you can use a metal corner instead of bars. It is worth making a shelf at the bottom of the structure.
To get a reliable stationary structure, you need to make a table.
There must be markings in the form of a grid on the working surface of the device. It will help make the work more accurate. Also, the use of a protective casing should not be neglected. This element helps protect the device from mechanical influences during operation.
Making a table top for a circular saw
Assembling the table begins with making the tabletop.
The plywood sheet is marked so that the two edges of the lid are the same size as the edges of the iron sheet. Plywood is cut out using a hacksaw or jigsaw. The edge of the cut can be processed with a milling cutter, but this operation is not necessary. Since the main parameter in the frame is reliability, and not an attractive appearance. The tabletop is rubbed “roughly” with sandpaper.
At the bottom of the tabletop there is a slot for a circular circle . To do this, you first need to measure the dimensions of the sole of the unit. The easiest way to do this is to unscrew the disk from the device and simply circle the desired part of the saw. These measurements are required to determine the seat.
Using a hand cutter, the bars are selected to a depth of approximately 0.9−1.1 cm. If you do not have a cutter, then this work can be done using a chisel, but it will take much more time.
Then, when the seat is made, try the saw on and, if necessary, adjust the recess. Mark the slot locations for the circle and fixing the fasteners. If you need the circle to rise and fall, then you need to install a pendulum mechanism for the tabletop.
In this case, the slot must be made in the shape of a truncated pyramid. In this case, the hypothetical top of the pyramid will be directed downward. The frame itself for the lifting mechanism is best made from steel corners , which are welded to each other.
Making a table frame
The markings for fixing the transverse and longitudinal slats, which serve as stiffening ribs, are best installed on the underside of the tabletop. The planks themselves are made from timber. You will need:
- Two transverse parts, length equal to the width of the table top minus 7-9 cm on each side.
- Two longitudinal ribs, the size equal to the length of the lid minus 7-9 cm on each side.
Then you need to make nests for the screws . The slats must be fixed on the lid so that the tabletop extends 7-9 cm beyond the edges of the frame. The fasteners must be as reliable and durable as possible.
The first fastener should be installed approximately 40-50 mm from the edge of the rail. The distance between the screws is approximately 23-25 cm. All parts must be drilled through . The self-tapping screw is attached to the side of the lid so that its head is completely recessed into the wood.
First, the transverse ribs are secured. To make the table top as strong as possible, the edges of the slats must first be coated with wood glue . The structure is fixed with clamps, and without removing them, screws are screwed in.
Allow the tabletop to dry completely. Afterwards, the longitudinal slats are installed in the same way. Then the parts of the frame are pulled together, installing two fasteners on each side. Now the clamps can be removed.
Attaching the legs (supports)
The table legs are made of timber. The height of the supports is selected individually. In practice, it is most convenient to work at the machine when the tabletop is located at hip level .
Before fastening, each support must be planed so that the leg goes down to an angle from below. So, the area of the base of the support should be slightly larger, in contrast to the area of the top. It is best to secure the legs using steel corners. They need to be pressed a little so that the base of the machine is in the “spacer”. This gives the table additional stability . Bolts with washers are used as fasteners; they are secured with their heads facing outward. Otherwise, during work you can be injured by the protruding parts of the fasteners.
The whole structure will be more stable if additional supports are tightened with diagonal slats. They are attached in pairs on each side of the machine.
The surface of the lid is polished and varnished or a steel sheet is used for coating, which is attached to self-tapping screws. At the very end, the instrument is attached directly to the prepared place.
additionally make markings on the table top ; this will help you cut the wood smoothly and correctly. The control panel of the circular saw is located on the outside of the machine. As a rule, it is mounted on one of the table legs. That's all, your DIY circular saw is ready.
Possible options for small, DIY circular saws
To create a small saw, you should apply the same rules as when creating a device from a grinder. But in this case, it is worth using the frame as a stand, not the sawhorses. You need to install a small table with a fixed tool on it.
When making a tool, it is worth choosing the right height of the structure at which the material to be cut will lie. If you place it too high or too low, there is a risk of discomfort.
If you need to make a very small saw, you can use a PVC pipe. In this case, it is permissible to take the engine from a children's toy. A glue gun is suitable as a connecting material. The circular machine can be powered from the mains or from batteries.
Important! To make the device autonomous, you need to make a special compartment in it designed for batteries.
A compact device is made for processing small workpieces
Do-it-yourself circular: safety of use
To avoid injury, you should adhere to the following rules:
- Do not use wood with metal elements such as bolts or nails.
- Do not cut boards larger than 2 m alone.
- Do not make sudden movements. As a result, the tool may jam, causing it to break.
- Before starting work, put on gloves and goggles.
- Remove wood waste in a timely manner. They may cause a short circuit or cause a fire.
- Make markings only when there are supports or fixing devices. This is especially true for long boards.
- If there are knots or branches on the wood, it must be dissolved before starting work.
It is strictly prohibited to use a sawing tool in the following situations:
- no guide elements;
- no casing;
- there are no guards that protect fingers from damage - these include a riving cutter;
- the gap is too wide - more than 10 mm;
- The riving knife is located above the saw blade.
A high-quality tool with ideal performance properties allows you to perform different types of work. To create a good device, you need to carefully study the drawings and prepare everything you need. Strict adherence to the device manufacturing technology is of no small importance.
