Do-it-yourself conversion of a power supply from a computer
When operating with an average load, the current consumption is significantly less than the starting current. The average starting current of various screwdrivers with an operating voltage of 12V is approximately 18A. Let's assume that the maximum current does not exceed 20A. Then, since P=U×I, you will be satisfied with a power supply with a power of 240W or more with an output current of at least 20A. Now that you know which converter is suitable for powering your Shurik, all that remains is to modify it a little.
- Label the +12V output and ground. You can identify them even without a tester. The common wire has black insulation. Power supply +12V – yellow.
- Unsolder the output harnesses from the power supply board and remove them along with the connectors. Leave only two wires - black and green.
- Close the remaining wires together and insulate the connection. This is necessary to simulate the power supply start signal from the motherboard.
- Solder 2 pieces of stranded copper wire to the +12V output and to ground.
- Lead them out of the housing through the harness hole.
- Connect the network cable to the standard socket of the power supply.
Connection
You should not install a capacitor with a capacity of several tens of thousands of microfarads in parallel with the motor, as some experts advise. Firstly, with a starting current of about 20 A, it will be of little use. Secondly, it will make it difficult to start the power supply. If, when you gradually press the start button, the chuck accelerates and rotates normally, and after a sharp start of the screwdriver the engine stops, it means that the current protection of the power supply unit is triggered. It should not be removed from the device; you just need to increase the shutdown threshold. How to do this in practice depends on the design of your power supply. Theoretically, it is necessary to attenuate a signal at its input that is proportional to the output current.
- Disassemble the housing of the faulty battery. To do this, use a Phillips screwdriver or an asterisk to unscrew the screws from the bottom and remove it;
- Remove the batteries from the case;
- Make a hole in the bottom for the wires;
- Insert the wires into it;
- Strip their ends, tin them and, observing polarity, solder them to the contacts at the end of the case;
- Secure the wires in the hole with a glue gun. And if you don’t have it, then wrap several turns of electrical tape around them from the side of the body and pull the wires out so that the bottom divides the winding in half;
- Assemble the body, putting the bottom in place, and screw the screws into place;
- Installation of the modified housing into the screwdriver handle is complete. Now plug the power cord into a 220V socket. Turn on the power supply switch and, by pressing the Shurik start button, check whether you did everything correctly.
Feasibility
Of course, working with a tool with a short cord is not nearly as convenient as using a battery-powered one. But the alteration will not take much time from a person with electrical installation skills. But it will allow you to finish urgent work. And then slowly decide what to do with the screwdriver - repair it or throw it away and buy a new one. You probably won’t want to constantly work with such a tool; a cheap Chinese electric drill with a power extension cord will be much more convenient. In addition, during prolonged operation the power supply becomes noticeably hot. In order for it to cool down, you need to periodically take breaks from work, which affects the result.
Source: pro-instrument.com
Connecting a 12 volt screwdriver to an ATX power supply
Battery screwdrivers are very convenient to use and are widely used by both professionals and home craftsmen. The battery is usually the first to fail. Currently, all manufacturers of power tools have switched to lithium batteries and purchasing a new nickel-cadmium battery for an old screwdriver is becoming more and more problematic, and the prices for these batteries are much higher than for lithium ones.
Of course, it is possible to purchase batteries on various services that sell Chinese goods. But it takes time for the package with the “cans” to arrive, and again, these are certain costs. There is an alternative to buying batteries/cans - connect the screwdriver to the mains power supply and forget about quickly draining the batteries. Powerful power supply on Aliexpress. There are many inconveniences due to the power cord, but you always have to sacrifice something.
Fault prevention
Batteries are made of several elements put together, which do not fail simultaneously, but in parts. To determine the broken part of the battery, it is necessary to fully charge it and allow it to work at full power until discharged. After that, disassemble and measure the voltage of each individual element.
Parts on which the voltage will be absent or inferior to other elements must be completely replaced. Repairs are carried out using a soldering tool. All battery cells are soldered together with the same wire strip that originally connected the parts.
How much current does a screwdriver consume?
Before choosing a suitable power supply, you need to understand what current consumption you need to count on. Unfortunately, cordless screwdriver manufacturers do not indicate the current consumed by the motor. The capacity of the battery itself in ampere-hours, which is necessarily indicated on the battery, does not allow us to understand how much current the screwdriver consumes in operating mode
. The maximum that the manufacturer can indicate is the power in watts, but this is very rare, usually the power is indicated directly in torque.
If the power in watts is still indicated, we can have an idea of the current consumption and select an appropriate power supply with a small current/power margin. To calculate the current, it is enough to divide the power in watts by the operating voltage of the screwdriver, in this case it is 12 volts. So, if the manufacturer indicated a power of, for example, 200 watts - 200_12 = 16.6 A - this is the current consumed by the screwdriver in operating mode.
However, the indicated power is very rare and there is no universal figure that characterizes all 12-volt screwdrivers. You need to understand that when the motor shaft is fully braked, the currents can significantly exceed the rated ones and calculating this value is not very easy. At the same time, an analysis of various forums and our own experience has shown that a current of 10 A is often sufficient to operate a screwdriver; this is enough to perform many screwing and drilling functions. It is known that current surges during complete braking of the shaft can exceed 30 A.
Well, what conclusion can be drawn from all this? A 12 V power supply providing 10 A current is suitable for a screwdriver; if it is possible to use a 20-30 A unit, this is even better. These are average figures that apply to most screwdrivers.
Is it possible to convert a cordless screwdriver into a corded one?
A cordless screwdriver is a fairly convenient tool, but sometimes the advantages of such models turn into disadvantages. When the battery is completely discharged, you need to buy a new battery. It can be very expensive, and in some cases it is simply impossible to find a suitable battery, for example, if the model has long been discontinued.
Converting a screwdriver to work from the network is quite possible. This will require some effort, but the improved device will no longer need to reinstall the batteries.
If you remake a cordless screwdriver, the torque in it will always remain the same
power unit
We will not consider purchasing any units or transformers, and if we do buy it, it will be a new battery! We will consider using what we have on hand. I’ll say right away that the charger from the same screwdriver is only suitable for drilling overripe bananas, its power is too low.
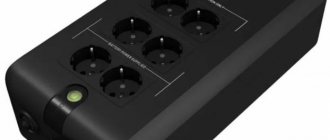
Ideally, a step-down, powerful 12 V transformer, for example from a computer uninterruptible power supply, would be suitable. The power of such a transformer is usually 350-500 watts. But I didn’t have such a transformer, but I had a lot of computer power supplies. I am sure that if someone has various electronic junk, ATX computers are definitely lying around in it.
Mock Tests
Before starting to build a working structure, you should test everything on the knees, make sure that the screwdriver is operating stable under load and that there is no severe overheating in the power supply.
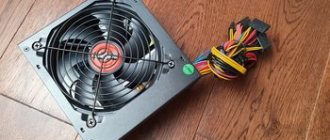
We take the computer power supply and check it: plug it into the network, find green in the output bundle of wires (they say it can be a different color, but I always came across green ones) and connect it with a jumper to any of the black ones (all black wires at the output are the common output, in our case it is a minus). The unit should turn on and a voltage of 12 volts will appear between the black and yellow wires. You can check this with a multimeter or by connecting any computer cooler to the named terminals.
If everything is in order and the unit produces about 12 volts on the yellow (+) and black (-) terminals, continue. If there is no voltage at the output, we look for another unit or repair this one; this separate topic will be described separately.
We cut off the plug from the output of the block and take 3-4 yellow and black wires coming from the block and connect them in parallel. When cutting off the plug, do not forget about the green starting conductor, it must be shorted to black. We received a 12 V source with a decent current load capacity of 10-20 A, the currents depend on the model and power of the unit.
Now we need to connect our 12 V to the terminals of the screwdriver without a battery; we look at the polarity of the connection using the battery. Well, we check the screwdriver - at idle speed, then slowing down by hand. At this stage, I encountered a problem: when I press the button fully, the screwdriver works, but when I slowly, smoothly press the screwdriver button, the power supply goes into protection. To reset the protection, you must disconnect the unit from the network and turn it on again. This won’t work at all, we need to somehow correct this instability.
In my opinion, this phenomenon may occur due to the fact that the power supply and the screwdriver button are controlled by PWM controllers; due to interference along the power wires, the controllers somehow interfere with each other. We are trying to solve this problem using an improvised LC filter.
I assembled the filter in 5 minutes from what was at hand: 3 electrolytic capacitors of 1000 uF at 16 volts, a non-polar capacitor of less than 1 uF and wound 20 turns of copper wire with a diameter of 2 mm on a ferrite ring from another unit. Here is his diagram:
And this is what he looks like. This is a purely trial version, in the future this design will be transferred to the battery housing of the screwdriver and will be made more accurately.
We check the entire structure: the block does not go into protection in any position of the button, great! Now you can try tightening several screws - all in a bunch. It seems that the screwdriver will be able to tighten larger screws.
Well, now you need to remove all the snot and piles of wires, remove the “dead cans” from the battery case, replace them with an LC filter, and test the screwdriver in more realistic conditions.
Assembly of the working structure
For ease of use and connection, I brought the cord from the power supply into the battery case. I took a 3.5 meter long cord that was available. I removed all the battery cells from the battery and installed an LC filter. Now, if I somehow get a working battery, I can always put it on a screwdriver and put the power supply away as a reserve. I didn’t throw the batteries out of the battery, I have an idea where to use them, but that’s a topic for another review.
Since the cord connecting the unit to the screwdriver has a certain resistance and inductance, you can try to close the terminals of the L1 coil with a jumper. In theory, this could increase power by a tiny amount.
The screwdriver feels great with a cord, but to be honest, it seemed a little weak to me when braking by hand. But trial tightening of the self-tapping screws dispelled my doubts: self-tapping screws 35 mm long can easily be screwed into 20 mm plywood. This means that a screwdriver will cover most repair needs.
I cut off all the output wires from the block, leaving the green starting wire; I soldered its end to the common conductor of the board, where all the black ones are soldered. It's best to carefully desolder all the wires, but my soldering iron was too weak for this and had to be cut. I soldered two short, hard copper wires to the common contact and +12 (where the yellow ones are soldered) and connected them through the terminal block to the cord to the Shura.
This is where we will finish this review; we have achieved what we wanted - the screwdriver works perfectly with a computer power supply. In the future, I plan to make a high-quality plywood case without cracks for the power supply board - tests have shown that the heatsinks on the board do not heat up at all and you don’t have to worry about overheating of the elements in a closed case.
Assembling a working battery from two that have lost capacity
From two faulty devices you can assemble one that is suitable for use.
Important! By connecting a power supply to the body of the faulty battery, a second repaired one will provide mobility when performing small amounts of work.
Finding faulty elements
The battery is assembled from individual elements. They do not fail at the same time, but even one faulty element impairs the performance of the entire battery.
To determine the parts that have lost capacity, you must:
- charge the battery;
- work until power loss;
- disassemble the battery;
- measure the voltage on each element separately.
Batteries on which the voltage is noticeably less than others or absent altogether must be replaced.
Battery repair
After identifying and removing the faulty parts, the remaining parts are assembled into a device suitable for further use. The connection is made by soldering, wires with a cross-section of 1.5 mm² or a strip similar to the one with which the parts were connected before.
If there is an insufficient number of serviceable elements, we purchase the missing ones or convert the instrument to a 220-volt mains power supply.
Knowing how to convert a cordless screwdriver into a corded one with your own hands will help you save money and not have to purchase a new device.
Few additions
To compensate for losses in the cord connecting the screwdriver to the power supply, it is useful to increase the voltage by 2-3 volts. But this is provided that you know the circuit design of ATX computers and know what to do.
If it is possible to use a powerful transformer, then its output, secondary winding should have an alternating voltage of 12 V. If the voltage is different, it is recommended to adjust the secondary winding by unwinding (if the voltage is more than 12 V) or rewinding (if less than 12 V) several turns. It is worth noting that when rectifying and filtering the 12 V AC voltage, it turns out to be about 14.4 V without load. So don’t let this confuse you, this is the EMF voltage and it is natural that it is higher than the nominal one.
In addition to the transformer, a rectifier is assembled; the diodes should easily hold 30 A. It is more expedient to place the capacitor filter in the battery case, as in the ATX version.
Source: yserogo.ru
Method for converting a screwdriver
After purchasing and checking the power supply, it will have to be disassembled. It’s great if the body is secured with screws and not glued. In the latter case, a hammer is useful, which is used to tap along the entire perimeter of the seam. There shouldn't be any difficulties. If problems still arise, then take the knife, place it with the tip down, and gently tap the handle. The body will probably begin to diverge.
Next, the leads and cord are separated
. In the area where the battery was, you need to place the contents of the case. Later, a cord is brought out through the hole here to perform work from the network and soldered to the power supply. Its output is connected to the terminals, while maintaining polarity. All that remains is to assemble the case and connect the power supply to the screwdriver for testing.
By the way, if the battery case does not match the dimensions of the power supply, then you will have to build a suitable socket into the handle of the device.
To prevent the voltage from going to the battery during operation of the tool, you should connect the unit parallel to the supply terminals and place a diode of the required power in the positive wire gap. It must be installed with the minus pointing towards the motor.
Converting the screwdriver power supply to work from the network
An indispensable assistant in the work is a screwdriver. Its use is effective not only in the home, but also in professional activities. Currently, it is difficult to imagine carrying out repair and finishing work without this universal power tool. The screwdriver can work anywhere, regardless of the presence of a power supply. But the battery of power tools tends to discharge, and the number of charge cycles is limited. On average, a battery lasts about three years, and then it has to be replaced, so craftsmen began to convert the power supply to a network version.
How to convert a battery device to a screwdriver from a 220 volt network
Nowadays, a screwdriver is one of the devices that we often use in everyday life. In production it is additionally indispensable. This popular rumor device is suitable for performing various electrical and construction work. When using it, they assemble furniture and other objects whose design requires threaded connections.
The battery-powered screwdriver is compact and portable. Unfortunately, not everyone is happy with these advantages, since the device’s battery quickly runs out, and you have to stop working halfway through the journey. Therefore, many owners of this tool are interested in the question of how to recycle a screwdriver with a battery to a network one.
A prerequisite for this solution is, in addition, the fact that when the device is not used for a long time, its battery discharges independently, which leads to the breakdown of the screwdriver due to the destruction of certain parts. Repairing a failed battery is impossible, and purchasing a new one is rarely possible. Often, components can always be purchased only from official representatives of the manufacturer. Accordingly, the price of a new battery will actually be equal to the price of a new screwdriver. Therefore, some craftsmen decide to turn the screwdriver into a network one.
Materials and tools required for this:
- The charger for this reason is a screwdriver;
- Its original battery;
- Soft multi-core electronic cable;
- Soldering iron and solder;
- Insulating tape;
- Acid.
First of all, you need to solder the loose ends of the cable to the terminals of the charger. You need to know that copper cable wires with brass contacts can be soldered only after they have been treated with acid. Experts advise using special solder, but simple methods in the form of acid treatment are also used.
Is it necessary to modify the screwdriver?
When the battery no longer holds a charge, the indispensable mechanical assistant turns into a useless tool. It is not profitable to buy another battery , because the cost of a battery can sometimes reach up to 50% of the price of a new tool. Therefore, every zealous owner begins to think about the issue of converting a screwdriver to power from the mains.
You can try to restore the battery characteristics, but this will be a temporary solution. Anyway, in the future the device will quickly discharge. Do-it-yourself conversion to power a screwdriver from a 220 V network is the best option for restoring the functionality of the equipment. What does this solution provide:
- the device can continue to function fully;
- there is no need to use batteries that require charging;
- The torque of the equipment does not depend on the state of charge of the battery.
The only disadvantage is the dependence on the length of the power cord and the availability of an electrical power source.
Converting a screwdriver to a mains-powered one using laptop charging
If the battery fails, the household screwdriver can of course be switched to mains power by introducing certain changes into its design. This will not require a huge expenditure of money, time and effort. The positive aspects of such a transformation are obvious: you will not need to constantly charge the battery, and, however, there will be no downtime during operation. After all, the shorter duration for charging the device is more than 3 hours.
But, when deciding to carry out such a transformation with your own screwdriver, you should be aware that from now on, alternating current is required to perform work with it. You can no longer use it far from communications.
If you need to connect a screwdriver to the network, you can use the charger from an old laptop. It is identical to, and can easily be found in every family, or in other words, workshop. However, check what output voltage is shown on your charger. In our example, 12–19V chargers are suitable.
Scheme of your actions:
- We remove unusable batteries from the failed battery pack.
- We charge the laptop.
- We cut off the connector and strip the wires of insulation.
- We solder the bare wires or wrap them with electrical tape.
- We make an outlet for the wire in the housing.
- We assemble the structure.
Device mobility
When switching battery-powered equipment to mains power, one of the main distinguishing properties is lost - mobility. Therefore, if you decide to alter the power supply of a screwdriver, you need to determine exactly which device you want to use in the future.
There are two concepts on how to convert battery-type equipment into network equipment:
- The power supply (PSU) will be external . This version provides for the presence of a separate device. But don’t let this scare you, even a heavy and large rectifier can simply be located near the power outlet. All the same, you will be limited by the length of the power cable either to the outlet or to the power supply. According to Ohm's law, decreasing the voltage for the same power increases the current. Therefore, the power cord of a 12-19 volt device must have a larger cross-section than a 220 volt network cable.
- The power supply is built into the battery housing . In such a device, mobility is almost completely preserved; only the length of the network cable can limit the operator’s movement. One problem may arise if it is necessary to install a high-power transformer into the battery housing of a screwdriver. But the modern radio engineering industry makes it possible to solve this problem; there are a large number of compact rectifiers on the radio equipment markets.
Each method finds supporters because it has a certain set of characteristics.
Screwdriver device
This mechanism consists of the following parts:
- DC motor. It has the shape of a cylinder; instead of an excitation winding, the housing contains permanent magnets. This simplifies the design and provides sufficient torque at low speeds. The drive (sun) gear of the planetary gearbox is mounted on the electric motor shaft;
- Reversible speed controller. The adjustment circuit is assembled on a PWM controller and a field-effect transistor. Reversing is carried out by switching the polarity of the power connection to the motor brushes;
- Planetary reductor. Made in a separate building. It got its name because of its resemblance to the solar system. Consists of a ring gear, a central (sun) gear, satellites and a carrier. The ring gear transmits force through the spring-loaded balls of the load regulator. There are models with two-speed gearboxes. Increased speed is activated when using the device as a drill;
- Rotation force limitation mechanism. Serves to limit the force when tightening screws. Transmits torque through balls pressed by an adjustable spring;
- Removable battery. Consists of individual elements in one housing. The voltage in different models ranges from 9 to 18 volts.
Screwdriver device
Power supply options
There are several options for converting a screwdriver to work from the mains. The task is to power the device's electric motor using an intermediate source.
We use a laptop charger
You can make a 12 V power supply for a screwdriver with your own hands, even without technical knowledge. You just need to find an unnecessary laptop charger that has technical characteristics similar to those for powering a screwdriver. The main thing is that the output voltage matches the desired one (12-14 volts).
To achieve this goal, you must first disassemble the battery and remove faulty elements from there. Then follow the following manipulations:
- We take the charger from the laptop.
- We cut off the output connector, expose it and tinning the ends of the wires.
- Solder the stripped wires to the battery input wires.
- We isolate the soldering points to avoid short circuits.
- We make a hole in the housing so as not to pinch the wire, and assemble the structure.
The basis is the power supply from the computer
To make such a device, you will need a unit from a personal computer in A.T. format. It is not difficult to find; it is an old model of a power supply device that can be easily purchased on any radio components market. It is important to know that you can use a unit with a power of 300-350 W with a current in the 12 V power supply circuit of at least 16 A.
It is AT format blocks that correspond to such parameters. There is a power button on the body of this device, which is very convenient during operation. A cooling fan is installed inside and an overload protection circuit is mounted.
The procedure for reorganizing the block:
- We remove the cover of the BP case. Inside we will see a board with many wires going to the connectors, as well as a fan.
- The next step is to disable power-on protection. We find the green wire on the large square connector.
- We connect this wire with the black one from the same connector. You can make a jumper from another piece of wire, or you can simply cut it short and leave it in the housing.
Then in the output bundle we find a smaller connector (MOLEX) and perform the following operations with it:
- We leave the black and yellow wires, and cut the other two short.
- To make it easier to locate the power supply during operation, we solder an extension cord to the black and yellow wires.
- We attach the second end of the extension cord to the contacts of the empty battery compartment. This must be done by soldering, you can make a good twist, and you must strictly observe the polarity.
- We make a hole in the housing so as not to pinch the wire during assembly. The device is ready.
If you want to refine your design, that is, hide it in another case, drill holes for air flow to prevent overheating of the power supply.
Power from car charger
Having a charger for a car battery, it is quite simple to make a device to power a screwdriver. To make the modification, you just need to connect the power terminals of the charger output to the power supply of the electric motor.
Why remake a cordless screwdriver?
Why remake a screwdriver and when does the need arise?
If you are reading this article, you have probably already appreciated all the convenience of this tool. Without unnecessary wiring and at any time, you can use it even in the most inaccessible places, until the battery runs out. This is the first drawback of the screwdriver. The cheaper the tool, the faster its battery will exhaust its charging cycles.
Here is the second drawback. And you must understand that the manufacturer saves just as much as you do, and there is nothing unusual about it. Buying a new battery in terms of costs is practically no different from buying a screwdriver, but there is a way out, and now we will look at options for converting a screwdriver from battery to mains power.
There are several ways to convert a screwdriver from a cordless one to a mains one:
- using a laptop charger;
- using a PC power supply;
- using a car battery;
- using a power supply from halogen lamps;
- using a Chinese 24V power supply board.
Network unit built into the battery
Work on modernizing the power supply must begin with the purchase of a ready-made unit with the appropriate dimensions and characteristics. The simplest solution is to go to the radio market and select a device that fits the parameters.
Then you need to carefully completely disconnect all parts from the body. Place the elements in the case from the screwdriver battery and secure them inside; if necessary, you need to lengthen the connections between the transformer and the control board. It is advisable to place these two main components with a gap to prevent overheating during operation under high load.
It wouldn’t hurt to attach a cooling radiator to the control chip. You can determine which parts will need cooling using a practical method. To do this, you need to work with a screwdriver for a while, then disconnect it from the network and touch the parts on the board. It will immediately become clear which element heats up more. We drill several holes in the block body for air intake.
If you have knowledge in the field of radio engineering and know how to work with a soldering iron, then you can make such a device yourself. Schematic diagrams of power supply devices can be found on many Internet sites. And, of course, you yourself can solve the problem of arranging the device according to your wishes.
Assembling a mains power supply for a screwdriver in a battery-powered housing
It is convenient to convert a screwdriver into a network one using the housing from its battery. In this case, the following is used as the internal filling:
- power supplies made in China with a voltage of 24 V;
- Self-assembled power supply unit;
- various ready-made power supplies.
Converting a Chinese block to 24 V
A Chinese-made power supply with an output voltage of 24 V (maximum current 9 A) will not be difficult to buy at places where radio components are sold. Most screwdrivers are designed to operate from 12 or 18 V. For this reason, it is necessary to reduce the output voltage of the Chinese product to the required value. This is not difficult to do, even with a shallow knowledge of radio and electrical engineering.
The power source is upgraded as follows:
- Solder a constant resistor R10 with a resistance of 2320 Ohms, which is responsible for the output voltage, using a soldering iron;
- in its place, an adjustable resistor with a maximum resistance of 10 kOhm is soldered in, having previously set this parameter to 2300 Ohm, so that the built-in protection does not work when the device is connected to the network;
- supply power to the converted unit;
- By rotating the trimmer resistance knob, the required value of the output voltage is set, monitoring its value using a multimeter.
To connect a multimeter, simply touch its probes to the corresponding contacts at the output of the product being converted. In this case, the switch of the measuring device must be set to the constant voltage range. If the power tool being upgraded is designed to operate from 12 V, then you should make sure that the current at a given voltage does not exceed the maximum value of 9 A. Otherwise, the created device will quickly fail due to overload.
Homemade built-in power supplies
To power the screwdriver from the mains, you can also assemble a homemade power supply (PS). To do this, you will need a 60 W electronic transformer, for example, Taschibra or Feron. There is no need to redo them. The final circuit of the power supply to be assembled is shown in the photograph below. It clearly shows all the parts with their markings, as well as the main parameters.
Transformer T1 will need to be made independently. To do this, do this:
- purchase a ferrite ring (HM2000), having dimensions of 28 * 16 * 9 mm;
- use a file to grind off the corners;
- wrap the ring with insulating tape.
All parts of the circuit are attached to an aluminum plate (3 mm thick), which will simultaneously perform a conductive function. Then the assembled IP is installed in the housing from the battery.
Visual control of the operation of the device will be carried out using the H1 LED lamp.
You can also take finished parts from an energy-saving lamp and other devices. But the schemes will then be different, for example, as in the photo below. To solder them, you will need some knowledge of radio engineering.
The diagram above corresponds to a power supply with a ballast lamp, a photograph of which in the assembly is presented below. In this case, the light bulb additionally performs the function of illumination.
Use when remaking ready-made blocks
Inside the old battery case you can put any power supply designed for 220 V, the main thing is that it has the appropriate dimensions and the required output voltage . Power supplies with the required characteristics are purchased at radio markets or in stores for radio amateurs. To install a purchased power supply for a screwdriver instead of a battery, proceed as follows.
- The purchased product is first disassembled.
- They remake it as needed, modernizing it to suit their own needs. If necessary, the connecting wires are extended and the transformer and microcircuit are placed separately. For better cooling of the board, it is equipped with a radiator.
- After this, the parts are mounted in a housing from the battery pack, in which holes are also made through which air will remove heat as it circulates.
All built-in parts inside the housing must be securely fixed.
Particular attention should be paid to insulating conductive parts among themselves - this will eliminate short circuits.
The degree of modernization of the purchased power supply unit in each individual unit depends on the compliance of its initial parameters with the required values for the power tool. In order not to make a mistake with the size of the purchased power source, take the battery case with you and try on the selected product according to it.
Self-powered screwdriver
Work with hand tools can also be done in a building where there is no electricity. In such cases, the device is connected to a car battery or to any other power device that has parameters suitable for the operation of a screwdriver.
To connect a car battery, you need to take wires with alligator clips, expose one end and solder directly to the contacts of the tool’s electric motor. The second end is attached to the battery terminals with a clamp, observing polarity.
The principle of connecting a portable battery is similar to a car device. Only the ends of the wires are equipped with copper clamp terminals suitable for fastening.
An electric tool lasts much longer than a cordless one. Therefore, you should not throw away the screwdriver if the batteries have exhausted their service life. A household man will be able to convert his power tool to mains power, thereby extending its life.
Source: tokar.guru
How to power a screwdriver while maintaining its autonomy
If the master works in a building that does not have electricity, and the batteries have already deteriorated, there are ways to power the screwdriver:
Replacing old elements
Attention! When replacing batteries, pay attention to the correct polarity of connecting the elements.
Open the battery housing.
You need to open the battery case
It is necessary to solder the new batteries together and assemble the battery
Attention! The converted battery should only be charged with a specially selected charger.
Types of battery cells
These devices use elements of different types and voltages, each of which has its own advantages and disadvantages.
The most common are nickel-cadmium (Ni – Cd) with a voltage of 1.2V.
Advantages:
- low price;
- stored in a discharged state.
Flaws:
- have a memory effect;
- high self-discharge;
- small capacity;
- small number of charge/discharge cycles.
More advanced nickel-metal hydride (Ni-MH) voltages are 1.2V.
Advantages:
- less memory effect and self-discharge;
- large capacity and number of charge/discharge cycles.
Flaws:
- higher price;
- do not tolerate low temperatures and storage in a discharged state.
The most advanced lithium-ion (Li-Ion) voltage 3.6V.
Advantages:
- no memory effect;
- very low self-discharge current;
- high specific capacity, allowing to reduce the weight and dimensions of the device;
- the number of charge/discharge cycles is many times higher than other types of batteries.
Flaws:
- high price;
- loss of capacity three years after manufacture.
