Using a drill as a screwdriver
Standard drill
used for drilling holes in a variety of materials - it can be wood, plastic and even metal. There are also grinding and cutting attachments for this tool.
There are several types of drills:
- Manual;
- Pneumatic;
- Electrical.
The principle of operation of the tool is to transmit rotation to a drill or other attachment, due to which it is possible to carry out various types of work - construction, plumbing, finishing, etc. “If I use a drill for such a large number of tasks, can I find other uses for it? " That's probably what many people might think. And the answer is yes, you can expand the list of jobs for this tool and add to it the screwing of screws.
How to use a drill as a screwdriver?
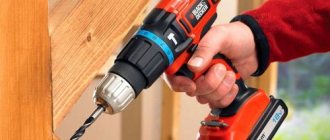
First of all, you need to select the appropriate tool model for your purposes and the type of screws/bolts - bits. They should be installed in place of the drill in the spindle chuck.
Further, if possible, it is recommended to reduce the rotational speed of the mechanism - this will make the work safer, as well as keep the tool and attachments in working condition - at low speeds they wear out less. Some models have speed controllers, while others can be adjusted manually by changing the mechanism or electrical circuit.
For experienced craftsmen, it will not be a serious problem to work with a drill as a screwdriver and at high speeds, but there is always a risk of damaging the bit or screw, cutting off the screw head, “screwing” the material through, etc.
It is also worth considering that drilling tools do not have a splitting clutch (it is responsible for preventing damage to the tool mechanism when the engine suddenly stops), so the necessary work should be carried out carefully. It is recommended to use stronger attachments than for a screwdriver.
How is a drill/driver different from a regular screwdriver?
A conventional screwdriver is intended exclusively for screwing/unscrewing screws, self-tapping screws and other fasteners. We have already written about the features of choosing cordless screwdrivers, so we will not repeat ourselves. We only note that such a power tool operates at low speed (although there are also high-speed models), but with high torque. Thanks to the high torque, you can unscrew even the most stubborn screws. As standard, Shuriks are equipped with cartridges for a bat.
- Exploitation
10 attachments that turn the screwdriver into a multifunctional device
A drill/driver has at least two speeds: one low for tightening and one high for drilling. If a device has several speeds, this does not mean that this is a drill/driver. Their main difference is the presence of a drilling mode. Drill-drivers are equipped with a chuck (quick-clamping or specialized) in which drills can be clamped. The characteristics also indicate the diameters of the holes that the device can drill in metal and wood.
On the body of the drill-driver there is a drilling mode designation, which is not present on a regular screwdriver. For example, with Metabo Power Maxx BS, modes are switched by a cuff, which is responsible for adjusting torque. Although such a device cannot drill large holes like a regular corded drill, it is still quite sufficient for solving simple home repair tasks.
Comparisons between screwdriver and drill
To begin with, it is worth understanding the distinctive features of these instruments, because although they both perform a rotational movement, their purposes are different.
The most important difference is the rotation speed of the working spindle - the rotation of a screwdriver is much slower than that of a drill. Also, it has no inertia - the tool stops at the same time when the mechanism is turned off. The spindle, when drilling, continues to rotate for some time after switching off.
A drill is a potentially more dangerous tool than a screwdriver, therefore, when working with it, special safety precautions must be observed - safety glasses, in addition to the usual attentiveness, accuracy and caution.
The choice of operating mode is another difference between the instruments under consideration. In addition to the main one, a drill also has an impact mode, while a screwdriver is regulated only by the spindle speed.
As can be seen from the comparison, the drill is less suitable for working with screws and bolts, however, it can be adapted for this task.
Universal drill Screwdriver
Screwdriver
A screwdriver can only be used for tightening screws, since it only has a hexagonal seat for bits. Although it should be said that there are also drills with a hexagonal fit, like bits, but usually they only come in small diameters, and they are not on sale everywhere.
Thus, based on this tool, we conclude that it can only be purchased for tightening self-tapping screws. At the same time, we remember that it is tied to the network, which means you won’t be able to work with it autonomously.
It is most convenient to use this unit in any assembly shop, where work on screwing in self-tapping screws or self-tapping screws is carried out at one specific workplace.
Work principles
You should always keep in mind that you are going to use the tool for purposes other than its intended purpose, and this comes with some difficulties and limitations.
Basic rules for safe and efficient use of a drill as a screwdriver:
- Follow safety requirements. Handle the tool with care.
- Do not tighten the screws all the way - this can lead to breakage of the tool, bit, or object being screwed. Experienced craftsmen advise to under-tighten the screws a little, and then finish them manually using a screwdriver.
- To securely attach the bit, it is recommended to use extended bits or a specialized bit holder.
- For wooden material, to avoid splitting the wood, it is recommended to first drill holes and only then tighten the screws.
Of course, it is better to use a screwdriver for such purposes, but a drill
will also cope with these types of work.
Drill
However, they lack any mechanism to automatically prevent the bat from falling off.
Often, when tightening a self-tapping screw with a drill, its head may be excessively sunk into the material, or the slots of the bit will rotate in the head, which can cause them to be torn off.
Therefore, here you have to rely only on your hands and head.
According to the drill, the verdict will be as follows. Buy it if you plan to mainly drill. But keep in mind that sometimes it can also be used as a screwdriver - after all, this is in any case more convenient than turning with a screwdriver.
Pros and cons of using a drill as a screwdriver
Despite the rather forced use of the tool in an area unusual for it, this solution also has some advantages:
- Thanks to an a priori higher number of revolutions and increased speed, the drill
copes with the tasks faster than a screwdriver; - Due to the greater force, it is possible to screw screws into harder and more rigid materials (some metals, etc.);
- The ability to use one tool for a whole range of diverse jobs.
There are also disadvantages:
- Drills, as a rule, are heavier and bulkier - it is not always possible to get into hard-to-reach places;
- Using them as a screwdriver
requires some skill; - The drill is not suitable for thin and fragile materials (plastic, drywall, boards less than 20 mm, etc.), as well as furniture;
- Special safety precautions are required - safety glasses, not tightening screws, avoiding impacts during work, etc.;
- Great wear of the tool (bits and attachments), as well as a significant risk of damage to the screws.
We can conclude that the drill can occasionally be used as a screwdriver, but you should not abuse it for such inappropriate use.
Minuses
One of the main disadvantages of hand drills is their massiveness, due to the specifics of the parts used. Provided that the latter are made of cast iron, the weight of the tool can reach 3 kg, creating certain difficulties for the performer during work and transportation. Another disadvantage of such drills is their large dimensions: as a rule, craftsmen do not consider it critical, however, some craftsmen refuse hand tools for this very reason.
Separately, it is worth mentioning the application of physical effort required by working with mechanical drills.
This circumstance leads to the fact that many performers prefer power tools. In addition, hand drills are significantly inferior to the latter in terms of productivity, and therefore are practically not used when performing large volumes of work.
Two-speed
The type of hand drill under consideration requires the presence of a multiplier - a mechanical device, which is also called an accelerator.
It consists of gears located on different axes in one housing, due to which the rotation speed changes.
In order to change the operating speed of such a drill, just install the handle on the other side. This action leads to an increase or decrease in the gear ratio, which naturally affects the performance of the tool used. There are also models of drills in which, to change the speed, a longitudinal displacement of the axis of rotation of the handle is provided, rather than the above-mentioned permutation.
Also, mechanical drills differ depending on the type of chuck used. Its design may include three or four cams - clamping elements that ensure reliable fixation of the rotating tool.
How to replace a screwdriver with a regular drill: 3 useful tips
Ingenuity helps you get out of difficult situations associated with a lack of tools. A drill can replace a screwdriver. Knowledge and compliance with safety rules is the first condition for working with this tool. Therefore, to the question “can a drill be made into a screwdriver?” there will be a positive answer. We’ll talk about the intricacies and secrets of the process in the article.
What is better: a drill or a screwdriver?
The operating principle of a drill and a screwdriver is similar. The devices differ from each other in that the first tool is equipped with a chuck rotation limiter when the resistance reaches its highest point. If you use a drill to tighten screws, it is important not to miss this moment. then the surface will not be damaged, and the corners of the bolt will not be smoothed out (this will significantly reduce the adhesion of the surfaces).
The drill is intended for drilling holes, and the screwdriver is for screwing in self-tapping screws, but they can be replaced with one another. There are attachments for the drill that turn it into a screwdriver. There are nozzles:
- simple;
- with limiter.
How to use a drill as a screwdriver?
The limiter prevents the screw from going too deeply into the surface. This effect is ensured by the restrictive rim present on the nozzle.
It is impossible to say which is preferable - a drill or a screwdriver - since the two tools perform different functions.
Using a drill as a screwdriver
If you do not have attachments (and the opportunity to purchase them), it is recommended to use the following strategy. The drill does not have a splitting coupling, which leads to unpleasant consequences. Using this tool as a screwdriver
Without the necessary attachment, it can result in:
- broken screw head;
- broken bits;
- drill burnout.
READ How to Disassemble a Hammer Drill
Do not tighten the screws or bolts with a drill all the way, but leave at least half a centimeter outside the surface. It is optimal to manually tighten the remainder of the screw into the surface. Yes, you will waste time, but you will keep the drill safe.
The drill can also be used for its intended purpose (drilling surfaces). Drill a hole in the surface of the material used, then carefully screw in the screw. This will be much faster than screwing in a screw by hand. In addition, you will definitely not damage the surface, creating a more delicate fastening without delamination of the material. Useful if you need to drive a screw into wood.
Is it possible to tighten screws with a drill? You can, but do not lose sight of one feature of the screwdriver. This is a kind of symbiosis of a Phillips screwdriver and a drill. A tool with speed control would be especially appropriate. The slower it works, the lower the risk of an unsuccessful result. If you have skill and good reaction, furniture assembly (and other construction work) will go even faster with the help of a drill.
Based on the information above, we can conclude that there are three ways to get a quality result when using a drill instead of a screwdriver
:
Use special nozzles with a limiting rim;
Do not screw the screws into the surface completely, making the last few turns by hand;
Drill the surface in advance, and then screw the bolts into the hole made.
Just always be careful and follow safety precautions when working with tools. Watch the video: How to use a drill instead
screwdriver?
Twisting wires
A screwdriver with a specific attachment is excellent for twisting the separated ends of wires. Usually twisting is done using pliers, but those who wish can use a screwdriver and use it for this purpose. The main thing is to perform this tricky procedure correctly.
How to use a drill?
To successfully solve problems using the described tool, it is enough to follow useful recommendations.
- If a contractor requires standard hole placement, he should pay attention to the location of the drill. During operation, it should be at right angles to the surface, without deviations in any direction. As for inclined holes, to obtain them you should position the drill at the required angle.
- When completing drilling, you need to reduce not only the rotation speed, but also the pressure - in order to avoid damage to the cutting tool. In addition, fulfilling this condition negates the likelihood of the master losing balance.
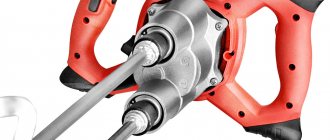
- To use a hand drill as a screwdriver, just fix a bit with a suitable tip in its chuck. The mixer is also attached there - in situations where the instrument in question performs the function of a mixer.
Upon completion of the work, the hand drill remains to be thoroughly cleaned of dust, shavings or sawdust.
Single speed
The classic hand drill, which belongs to this variety, assumes the presence of a pair of gears, the rotation of which sets the chuck in motion. Most often, such instruments are open - they do not involve the use of a protective casing.
The main advantage of this design is maximum ease of application of lubricants.
As for the location of the gears, the larger one is connected to the handle, and the smaller one is connected to the chuck. Another feature of such drills is the presence of a handle, thanks to which you can securely fix the tool while working.
Design and principle of operation
A screwdriver can be used in various fields of activity and for various actions, for example, in everyday life, during construction, assembling and disassembling furniture, in various workshops and where many fasteners are used. They can drill, make threads, tighten and unscrew fasteners. Let's get acquainted with the device and operating principle of such a mechanism.
All screwdrivers are divided into three types:
- operating from a regular network and called network;
- operating from a charged battery and called rechargeable;
- operating both from the mains and from the battery - a combined option.
All screwdrivers are very similar both in external and internal structure. They consist of such elements as:
- frame;
- cartridge;
- power button;
- rotation switch;
- speed controller;
- power lock button;
- tension regulator.
The body of a power tool consists of two parts and can be made of plastic or an alloy of various metals, but this is much less common.
Inside it are:
- electric motor;
- pay;
- capacitor;
- gearbox;
- coupling
The principle of operation of all screwdrivers is similar to each other - the electric motor is driven into rotation using the consumed electricity, which transmits force using a gearbox and shaft from the motor to the existing nozzle installed in the chuck, and the nozzle already carries out the process of drilling, screwing in or unscrewing fasteners. In corded screwdrivers, the motor uses an alternating mains voltage of 200 V, and in cordless screwdrivers, the motor uses a constant voltage from 3.5 V to 36 V.
Changing the attachment with a quick-release chuck:
- first you need to choose a drill for the work you plan to do, or a bit, taking into account the size of the head and the type of slot;
- the cartridge is untwisted counterclockwise;
- install the selected nozzle;
- By rotating the cartridge sleeve in a clockwise direction, the nozzle is clamped.
Changing the nozzle with a turnkey chuck:
- take the key and insert it into a special recess;
- unwind the cartridge;
- insert a new nozzle;
- rotate the key in the direction of movement clockwise, securing the nozzle.
How to prepare for work?
The first thing you will need to do in order to get started is to remove the screwdriver from the case or suitcase and check for visible damage, chips or cracks. If you notice that there is something wrong with the tool, then under no circumstances should you use it, as this may be unsafe. Be sure to make sure that the screwdriver
charged, or the screwdriver itself is connected to the network. When these conditions are met, the screwdriver is turned on at idle speed and the rotation of the nozzle and the threads on the fastener are checked for compliance. If all conditions are met, then you can safely begin work.
Be sure to select and secure the correct bit or drill depending on where and how you plan to work. We mentioned how to secure them above when we talked about changing the nozzle.
When using the device directly, you must also follow a number of simple rules and requirements.
Pay close attention to the screwdriver itself. There is a special scale on it, by rotating which you can adjust the power of the tool. When you turn the dial, set the mode you need, based on what kind of work you are currently doing.
Modes:
- twisting;
- unscrewing;
- blocking
Switching between these tool capabilities is quite easy and simple. You just need to hold the screwdriver by the handle located above the battery. Most often, the handle is covered with a material that is rubberized. That is why such a processed handle is safe to use and guarantees that the screwdriver will not fall out of your hand while working. For greater reliability, the instrument is fastened to the hand using a strap.
Where to start work
Fundamentally! During soldering, it is important to keep polarity under control; if it is not observed, then nothing terrible will happen, only the device will work in the other direction. Alas, using a switch this situation can be easily resolved.
The electronic cable is inserted into the battery from the outside, making a special hole in the structure of the required diameter. When you get tired of this, it’s important to make sure that the cable is firmly fixed in the structure of the battery case. For this purpose, at this time you need insulating tape, using which you should wrap the cable on both sides, thereby making a lock. Then we insert the battery housing into the screwdriver and use it for its intended purpose.
Can it be used as a drill?
As mentioned above, a screwdriver is mainly used for such things, to unscrew or tighten something. When using a screwdriver as a drill, carefully read the instructions to see if this option is provided in the manufacturer’s instructions.
If it is still possible to use a screwdriver as a drill in order to drill and make a hole, for example, in a wooden or plastic product, then it is recommended to place a small and even piece of wood under this or that object. This way your hole will be made better and will prevent cracks and chips from appearing.
If your work uses metal, then you need to follow some simple rules. Before you start drilling, the hole location must be tilted to prevent the drill from sliding on the metal. Select drilling mode and get to work. But here we must not forget that when drilling through metal, the drill may break. To prevent this, it is not recommended to press the tool too hard. If it happens that the drill gets stuck, then switch the screwdriver to the unscrewing mode and calmly unscrew the drill.
How to chop wood with a drill? Just!
It turns out that you can do this with a construction tool! Moreover, this kind of chopping of wood is no worse than the usual method, with an ax. This is what experienced householders say. What do you need to prepare for this? Except for the drill. almost nothing, except maybe a quick-release chuck.
READ How to check the lithium battery of a screwdriver
Having set a moderate number of revolutions (a large number of them will not speed up the process, but will lead to a lot of chips flying in all directions), we proceed to the most important thing:
- We install the log so that the cone is located directly in its center, perpendicular to the log. splitting will be quick and hassle-free.
- Carefully rotate it three times, first in one direction, then in the other.
Advice: since you will be chopping wood at low speeds, a low-power drill like the inexpensive Bort BSM-540 weighing 1.3 kilograms will suffice.
They say that the homemade device is ideal for apple firewood with a diameter of 10-12 cm, and is also used for hardwood firewood.
Use Cases
The correct use of a screwdriver is its use in accordance with the instructions or established documentation. According to these documents, the main area of use is the ability to directly screw in and unscrew various fasteners, as well as for drilling various holes.
READ Converting the DeWALT dc727 screwdriver to lithium batteries
Depending on the capabilities, one or another model can be used both in everyday life and in the professional sphere. Household screwdrivers are cheaper and have little power, while professional models have increased power, high performance and wider functionality for use.
Knitting reinforcement
A screwdriver can be used to knit reinforcement using steel wire. This is widespread in construction, when various reinforced concrete structures of houses and foundations are being erected. In order to knit, take a battery-powered or mains-powered tool that has a hook attachment.
PC power supply
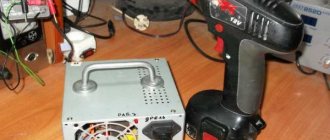
The power supply for the screwdriver is a PC unit, which is even easier to find than a new battery for the device. The advantage of a power supply from a PC is the fact that it is possible to obtain different current values at the output, which is considered very important.
The design of the PC power supply includes a cooler that ensures cooling of the transformer and its component parts, so we immediately note that this type of power supply is long-term, and in the next couple of years you will forget about dilemmas with a screwdriver.
Connecting a screwdriver to the network: recommendations
In cases where purchasing an expensive, powerful professional tool is unaffordable or not rational from a financial point of view, you can try converting a household screwdriver into a drill.
How to use a screwdriver correctly?
- Design and principle of operation
- How to prepare for work?
- Use Cases
- Twisting wires
- Knitting reinforcement
- Features of drilling concrete
- Can it be used as a drill
? - Helpful operating tips
Many craftsmen prefer to use a screwdriver instead
screwdrivers. It allows you to save time and get the job done quickly and efficiently. Let's get acquainted with the operating principles and design of this tool, find out the scope of its application and operating rules, and also give some useful tips.
Features of drilling concrete
As noted above, a screwdriver can be used in different areas and in different ways. Electric screwdrivers can be used to drill wood, concrete and many other materials. Carefully read the instructions for use of a particular model, as it is written there what materials it can be used for drilling.
Very powerful drills and screwdrivers are used for drilling concrete. Most often, such tools work in impact mode, but even with such a device, drilling a concrete wall is quite problematic. Therefore, for such cases it is better to use a special diamond-coated drill.
Hammer function
Drills and screwdrivers often have the function of a hammer drill. This means that the electrical device, in addition to rotational movement, is capable of creating impact force. A hammer drill is used to punch holes in hard materials (brick and concrete). But it should be taken into account that the impact function of the device is used only on brick or lightweight concrete. To drill a reinforced concrete wall, of course, it is better to use a hammer drill as a separate type of electrical appliance.
The picture below shows a cordless impact drill and screwdriver.
Is it possible to completely refuse to have a screwdriver if you have a hammer drill?
A hammer drill has many advantages over a screwdriver. However, this does not mean that you should abandon the impact drill. If you don’t have it at hand, then a hammer drill can very well become a replacement, but it all depends on the goals and objectives that you set for yourself.
It is also worth considering the type of material you plan to work with. For example, it is recommended to work with wood and metal only with a screwdriver. If the material is not super strong and hard, you can use it just fine. The cost of a drill is several times lower than that of a hammer drill, and this is also its advantage.
In other cases, you should turn to a hammer drill for help. After all, although a screwdriver is suitable for simple tasks, its power is not enough for more complex ones. However, you can also use a hammer drill to perform some light functions. If this does not violate the operating rules.
Drill-screwdriver device
The symbiosis of screwdrivers and drills is most often executed in the form of a pistol (see figure below).
The design of the unit is characterized by the following elements (the numbering corresponds to the figure).
, the second (high speed) switches the device to drilling mode.
What to look for when choosing drills/drivers?
Torque adjustment
This function allows you to adjust the torque to specific tasks. For example, screwing self-tapping screws into dense wood requires a high torque, while fastening drywall requires a low torque so as not to damage the material.
Note that torque adjustment is available in absolutely all drills and screwdrivers, since the drilling mode is actually set using the cuff. The difference in models can only be in the number of positions. If you have to work with a variety of materials of different densities, you should choose one with a large number of modes, which will make it possible to configure the device as accurately as possible. If you need a device and buy it for banal home repairs, you don’t have to pay attention to the quantity.
Impact mode
In drills and screwdrivers, the impact mode can have two types: drilling with impact and twisting with impact. When tightening, the impulse impact increases the force, and the self-tapping screw goes in faster and deeper, even if the material is very dense. In drilling mode, the impact increases the pressing force of the drill, so drilling metal and wood occurs faster. An indicative performance of the impact mode can be seen in the powerful model DeWALT DCD996P2 , which is capable of drilling holes with a diameter of 15 mm in metal, and in wood up to 55 mm.
True, the shock mode is not needed in all works. For example, it is used extremely rarely for furniture assembly, so carpenters will not need it. But it’s really useful for drilling interior walls.
Engine brake
Some devices have a mechanism that brakes the motor immediately after the power button is turned off. Thanks to this, the cartridge with the nozzle stops almost instantly and the device does not have to be kept suspended for a long time. It is especially important that heavy models weighing more than 2 kg have this function, since during long-term operation such “waiting” for the cartridge to stop can greatly tire the hand.
Safety clutch
A safety clutch is a mechanism that protects the motor from damage when the load suddenly increases, for example, as a result of a drill jamming in a workpiece. At such a critical load, the safety clutch disconnects the chuck shaft from the engine, thereby protecting it from damage.
The safety clutch is quite rare, and even then only in battery models. For example, it is in Bosch GSR 18V-60 , and it is reusable. Please note that some models have a safety clutch, but it is listed as "electronic engine protection" in the product specifications. If the reliability of the device and the durability of the engine are important to you, take a model with a safety clutch.
Brushless motor
It is also called a brushless motor. The main feature of such a motor is its higher efficiency compared to brush motors, that is, lower energy consumption with the same useful power. If for networked models power consumption is not so important, because there is always power, then for battery-powered models this is a significant indicator. Devices with a brushless motor consume less energy but deliver excellent power. A striking representative of brushless devices is the powerful German drill-driver AEG BSB 18CBL , which can drill not only metal and wood, but also concrete.
Another advantage of brushless motors is the absence of sparking, which is useful when working in fire hazardous areas. Not cheap models are equipped with brushless motors, so if you have a limited budget, it is better to take a closer look at models with a commutator motor.
Types of bits for a screwdriver: how to choose
To choose the right nozzles, you need to study their varieties. First determine the shank shape type and diameter. It ranges from 1/4 to 1 inch.
- basic;
- special;
- combined.
Types of main bits:
- splined. They differ in the width and thickness of the slot;
Spline bits of different widths and thicknesses
Types of special bits:
- tri wing or triangular;
Double pin have a notch
The drywall bit has a stop stop
Spring Lock Bit
Combination bits have two types of shank shapes or one, but of different sizes. For example, a splined shank and sprocket.
Example of a combination nozzle
Splined shank and sprocket
Determine the length of bit you need for the job. It ranges from 10 to 200 mm.
Depending on the shape of the shank, the nozzles have a certain marking:
- Sl (Slot) – splined;
- Ph (Philips) – cross-shaped universal;
- Pz (Poz An important characteristic is the grade of steel from which the bat is made. The nozzle may have a protective coating. The strength of the equipment depends on this. The main types of steel and coatings that should be given preference:
- Cr-v - chrome vanadium steel. The most common, with increased hardness;
- Cr-Mb - chromium-molybdenum steel. Less common. Very durable material;
- Ni - nickel coating. Increases resistance to corrosion;
- WC - tungsten carbide coating. Increases strength;
- Tin - titanium nitrite yellow coating. Increases strength.
Tin - coating for increased strength
Nozzles vary depending on the purpose:
- twisting and unscrewing;
- drilling;
- riveting;
- polishing;
- milling.
Considering all the parameters considered, you can easily select the necessary bits.
Method 1
You will need to purchase a special device for magnetizing and demagnetizing screwdrivers. Insert the bat there. A square window magnetizes, while a stepped window does the opposite.
Device for magnetization and demagnetization
Device for magnetization and demagnetization
Magnetization and hardening of attachments
A large number of nozzles are made in China from soft material. Therefore, they quickly lose their shape. A new bit doesn't last long. To extend its service life, the nozzle must be hardened. You will need: machine oil, a gas burner or gas stove, a small container for oil from any tin can, a piece of steel wire.
- Wrap the wire around the bat so that it does not fall out.
Bat wrapped in wire
The bat must be red hot
Black bat - hardened
A hardened bat will last longer than a regular one.
Nickel-cadmium (Ni-Cd)
This type of battery has a relatively low price, but is quite common in middle-class devices. Despite the entry of new types of batteries onto the market, this battery has been and continues to be popular.
The advantages of this type of battery:
- low price;
- tolerates low temperatures well during operation or storage;
- completely discharging the battery does not harm it, so the tool can be stored in a discharged state for a long period, after which (if properly charged) it restores its properties.
READ How to Drill a Bolt Through the Center with a Drill
The disadvantages of Ni-Cd batteries are quite noticeable.
- A battery capacity of 2 Ah is considered the maximum.
- Short service life. The highest quality batteries do not withstand 1000 cycles (charge-discharge).
- High degree of self-discharge. If the battery is fully charged, then after a while you will find that it is completely or partially discharged.
- “Memory effect” is the biggest disadvantage of these batteries. You cannot recharge the battery if it has not completely exhausted its resources. This is explained by the fact that when you try to charge the battery from a value other than zero, the value that remains in the battery will be perceived as “0”. Therefore, the battery capacity is reduced artificially. To prevent this from happening, before connecting the battery to the charger, it should be completely discharged. This fact causes inconvenience, since you have to waste time on the discharge procedure.
- Ni-Cd elements must be properly disposed of, otherwise they are harmful to the environment.
Safety precautions and selection rules
One of the key conditions that every owner of a hand drill should observe is the safe operation of this tool. The latter requires taking into account simple rules.
- Drilling a part can only be done after it is securely fixed. Ignoring this condition may result in damage to the item being processed or injury to the performer.
- Do not touch drills and attachments - both while the drill is running and after a short period of time has passed since its completion. This is explained by the fact that the processing of hard materials with a rapidly rotating cutting tool involves strong friction, the natural consequence of which is heating.
- After the drill is securely fixed, the performer should remove the key from the chuck.
- To prevent the cutting tool from becoming dull, it must be cooled periodically, taking breaks in work or applying a special suspension. In this way, you can not only extend the service life of the drill, but also make the holes more accurate.
READ How to Make a Hole in Tile Without a Drill
In addition, to avoid eye damage from chips and other small drilling debris, you must wear safety glasses.
To ensure that the purchased hand drill does not disappoint its owner, it must meet the following conditions:
- high quality manufacturing of all visible structural elements (if there are burrs, sharp edges and other defects, it is advisable to refuse to purchase the tool);
- comfortable handle shape (the presence of a protective coating is also welcome);
- smooth rotation of the cartridge;
- absence of extraneous noise during operation.
Special attention should be paid to the material of the handle, which can be wood or plastic.
Most often, experts prefer the first to the second, explaining this by the better wear resistance of this material.
As for the type of hand drill, the optimal solution is a two-speed tool with a large number of functions. This is especially true for performing complex work - tasks that are almost impossible to solve without changing the rotation speed.
Which is better to choose? drill or screwdriver for home: 3 selection criteria
Minor home renovations, nailing shelves and installing pictures require drilling, screwing or unscrewing. To do this job yourself and quickly, you need the right tool. For everyday needs, it is impractical to have many different tools, but there certainly should be one. All that remains is to make a purchasing decision: drill or screwdriver?
So what to choose: drill or screwdriver?
How often do you plan to work with the tool? Lightweight electric screwdrivers have much less powerful, lower voltage motors than most cordless drills. Therefore, they may not cope with the task if they screw long screws with a gap into hard wood. 18- and 20-volt cordless drills can handle almost any screwdriving task. Even a cheap drill is more powerful and durable than a corded screwdriver. Therefore, this toolkit is suitable for working with the hardest building materials. Drilling in walls, installing complex structures in places with electricity - all this can be done with a drill.
220 volt drill instead of a screwdriver. How to screw in a self-tapping screw with a drill.
Tip: A screwdriver with lower RPM has much better control. Therefore, if we are talking about irregular small jobs, then it is better to choose a screwdriver. It is also more suitable if the work consists solely of screwing in self-tapping screws, screws and screws.
Work in places without electricity. To make a hole or two, it is better to use a cordless screwdriver than a drill with a similar power supply. For example, the Bort BAB-10 screwdriver, which is powered by a battery, is more convenient and cheaper. drill for household use.
.
Comfort level when working. Cordless drills increase their power at the cost of added weight. Some professional cordless drills weigh up to 3 kg, which makes long-term use tiring. Less powerful household drills are lighter, but even they cannot compete in lightness with electric screwdrivers, which weigh less than half a kilo. If the heavy weight and presence of a wire interfere with the work of the drill, then it is better to purchase a cordless screwdriver. It works productively with wood, plastic, metal, and accurately screws fasteners.
The difference between a drill and a screwdriver
The tools drill, screw in screws, and punch holes in concrete, stone, and brick planes with equal success. But the existing differences in their mechanisms do not allow us to turn a blind eye to the features of the first and second home assistant. Take, for example, the ratchet of a screwdriver, which a drill lacks. The addition allows you to adjust the force with which screws, screws and self-tapping screws are screwed in. Comfortable? And how!
It is not easy to understand which is better, a drill or a screwdriver. It’s worth starting from what a particular tool is needed for. Corded drills and screwdrivers are faster, have greater power, weight and drilling diameter in different materials. Yes, they are more efficient in their work, but they are definitely not more convenient than a lightweight tool weighing 1.2 kg.
For greater practicality when working without a mains connection, use cordless tools. If you take cordless screwdrivers and compare them with drills, they will turn out to be more popular, cheaper and more widespread. Their "weak point". power. Networked drill
, judging by the impressive indicator of this parameter, works much more efficiently.
Universal drills and screwdrivers
In order not to think about your choice for a long time, make a “knight’s move”. The universal tool combines the functionality of both assistants, expanding the range and increasing the efficiency of work. In appearance, it looks more like a screwdriver, but when you turn on the ratchet, you turn on the jamming mode for the drill connection. and a drill appears in front of you. If you purchase an impact attachment, it will perform even more tasks.
Drills and screwdrivers are divided into mains-powered and battery-powered based on their power source.
Price difference
Cost also plays a big role when choosing the perfect tool for your home. Drills are not only practical and powerful, but also quite affordable. You can choose a particularly optimal option from the household assortment. Their initial cost is within the capabilities of every owner.
Tip: Tools powered by the mains are not as convenient to use (more weight, presence of wires), but they quickly cope with work on wood, metal and concrete.
Features of screwdrivers. working with self-tapping screws, screws and screws. They are not very suitable for drilling. Cordless models are convenient to use, but their power is enough for short and simple work. The price of such a tool is three times cheaper than its network counterpart of decent quality.
For small amounts of work, it is better to purchase a screwdriver. If you are renovating your home and often need to make holes in different materials and work with fasteners at the same time, then a drill is better. This tool is supported by its low cost with normal characteristics - everything you need for household purposes.
Tip: Any tool can be made better with special drills.
To decide what to buy – a drill or a screwdriver – answer the questions:
What kind of work are you going to do (do you need an impact drill or can you get by with something simpler). The more complex the task, the more powerful the tool is needed: a screwdriver is suitable for screwing, and for drilling in concrete. drill
.
How often do you plan to use the tool (often or occasionally). For minor, occasional work with screws and holes, you can use a screwdriver, but for regular work you need a more powerful tool. Long-term work with hard materials is possible with an impact drill and a universal drill-driver.
What will the working conditions be like (will there be access to power supplies). Drills and screwdrivers come in corded and corded versions. If you work on a site without electricity, then you need a cordless tool. It is important to remember that corded drills and screwdrivers are much more powerful.
As you can see, making a choice was not so difficult. The main thing is to ask the right questions and give clear answers to them! This video review will further help you assess the situation.
Sources:
https://www.moyo.ua/news/kak_zamenit_shurupovert_obychnoyi_drelyu_3_poleznyh_soveta.htmlhttps://stroy-podskazka.ru/shurupovert/kak-polzovatsya/https://schemy.ru/info/mozhno-li-ispolzovat-drel-v- kachestve-shurupoverta/https://www.moyo.ua/news/chto_luchshe_vybrat_-_drel_ili_shurupovert_dlya_doma_3_kriteriya_vybora.html
Converting a screwdriver to a network one
When the batteries do not hold a charge and have exhausted their life, and the screwdriver is still in good condition.
Connecting a car radio to a computer power supply involves several main steps:
- We are preparing the radio, the connector will have to be cut, because... There is no universal adapter for connecting to a computer power supply, so we strip the wires.
- The power supply has a larger number of different connectors; we will need the one to which the hard drive is connected. Four wires come to it, yellow, red, and two black (there is a photo of the connector below).
Now we connect the radio to our power supply, the connection diagram is as follows, we twist two wires from the radio, yellow and red (these are both pluses), and connect them to the yellow wire of our power supply, we have connected all the pluses, now we need to connect the black wire on the radio, and the black wire which fits into the power supply chip.
That's it, the power is connected to our radio, but the power supply refuses to turn on without the motherboard, now we will deceive it, take the connector that connects to the motherboard (this connector fits most wires, there is a photo of the connector below) we look for the green wire to turn on the unit you need to short-circuit it with any black wire. be done with a jumper. After this short circuit, our power supply will begin to supply electricity to the radio.
- If there is a switch in the block, you do not need to remove the jumper; just solder the black and green wires. The switch can be used to turn the power on or off.
- All that remains is to connect the speakers and enjoy your favorite music, the audio output of the radio has the following designations: - The wires of the left front speaker are white, marked FL. The negative has a black stripe. The wires of the right front speaker are gray, marked FR. The minus has a black stripe.
- Collecting all devices into a single network allows you to plug in a homemade speaker system into a 220V outlet and enjoy music. A homemade speaker system will provide clear, loud and high-quality sound without extra costs, and the control panel will ensure comfortable listening.
- Power from 300 W (more is possible, less is strictly prohibited).
- Must produce a minimum of 12 Amps at 12 volts.
- Be in working order.
-The left rear speaker wires are gray and marked RL. The minus has a black stripe.
-The wires of the right rear speaker are purple and marked RR. The minus has a black stripe. All speakers have two terminals, this is a plus and a minus. We connect the above wires to our speakers. If you use speakers, then to increase sound quality, you need to make a box for them (like a speaker).
If after reading it seems that the information is not enough, read the article “how to connect a radio in a car”
Choosing the right power supply
Almost any power supply is suitable for these purposes. You can use AT or ATX format power supply. The only difference between them is that when the AT is turned on, voltage appears on its channel immediately, while the ATX has a standby power supply of 5 Volts, which always works when connected to the mains. Therefore, in order for the required power voltage to appear on the output channels of the ATX power supply, the green and black wires must be additionally short-circuited. By connecting an additional jumper between the green and black wires, the power supply will wake up from sleep mode automatically after connecting to the network.
You can use old equipment that has been collecting dust on a shelf, or purchase used equipment. The main thing is that the power supply meets the following parameters:
You can find out the power characteristics and the ratio to current power from the table on the back panel of the power supply.
Connecting to the car radio power supply
You probably already know that the car radio also has sleep and operating modes, and as soon as the driver closes the electrical circuit by turning the ignition key, the car radio automatically switches from the “sleep” mode to the “active” mode.
It follows from this that if we connect the main wires of the car radio, black - minus (Ground) and yellow - plus (Battery), to which the voltage of the car’s on-board network is connected, to the corresponding terminals of the power supply, the car radio will not turn on, it will be in “sleeping” mode. mode.
In order to eliminate this misunderstanding, we will have to find the red wire marked “ACC”, which in the standard circuit is connected to the ignition switch, and connect it to the yellow wire of the car radio, after which the car radio will start immediately when voltage is applied to it.
This concludes the instructions on how to connect a car radio from a 220 network with your own hands. In conclusion, I would like to draw your attention to the fact that for the “home” version, car radios with a remote control are very convenient. Agree, in a car the remote control mostly lies idle, but at home it’s not very convenient to get up and go to the radio every time to change the track or adjust the volume. With the remote control, the process of listening to music will be much easier and more comfortable.
- Grigory Romanchuk
READ How to Test a Drill Without a Button
Creation
In order to make the task as easy as possible and not disassemble the transformer winding itself, we use the free space of the magnetic core area.
We wrap the free area of the magnetic circuit with insulating material and wind a piece of the wire of our choice onto it of any length. Let's say we got seven turns.
In order to calculate the number of turns and wire length required to reduce the voltage, we need to perform the following procedures:
- We assemble a circuit for switching on a transformer using a piece of wire wound around a magnetic conductor and measure the output voltage;
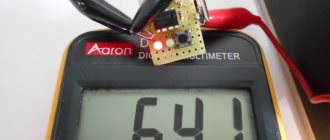
We take readings from seven turns of wire
- The multimeter gave a value of 2.9 volts. This means that we have 0.41 volts per turn of the secondary winding. From this ratio we obtain the number of turns required for an output of 12 volts: divide 12 by 0.41 and get 30 turns;
- We measure the length of the wire spent on the experimental seven turns, we get 126 centimeters. That is, there are 18 centimeters per turn (126 divided by 7), which means that for 30 turns we will need 540 centimeters of wire.
- Next, we wind this whole “thing” onto a magnetic circuit, assemble the circuit and check our calculations with a multimeter.
For aesthetics and convenience, we attach an additional block to the bracket and connect the leads to it.
Don’t flatter yourself, in addition to the work done, we will need to connect a diode bridge to the resulting device to rectify the current and remove its ripple (you can take the most common diodes - D226).
Then connect with the load, in series, a choke with high inductance (can be from a tube receiver or from a 402-watt LDS) and in parallel two capacitors K50-18 50 volts, 10,000 µF each.
As a result, the whole scheme should look something like this:
Advice! All of the components listed can be found in a discarded tube TV.
The diode bridge can be made from individual diodes...
...so in the form of a monolithic structure (assembly)...
How to connect a car radio to a 220 network, video
...which is preferable due to its low cost and compactness. The only drawback can be considered its complete non-repairability, since if one diode fails, you will have to change the entire monolith.
Next, we assemble the entire circuit, place the resulting structure in a pre-prepared case, connect the car radio with speakers and enjoy the music with friends. At the same time, as if by chance, he uttered the phrase “homemade music center” in a conversation with them)))
