Every office has such an indispensable device as a printer. Such equipment can be simple and perform only the main job - printing a text document on paper. But there may be more sophisticated devices that can do many other useful things, such as scanning and copying. Hewlett-Packard (HP) is the undisputed leader in the field of printing equipment production. It produces many smart machines that can independently signal their own problems. Multifunction devices have personal displays that display all the information. But this is often duplicated on the computer in the form of a message: “HP printer printing error.”
Fixing a printing error on an HP printer
Each method below has varying effectiveness and will be most appropriate in a particular situation. We will consider all the options in order, starting from the simplest and most effective, and you, following the instructions, will solve the problem. However, first we recommend paying attention to these tips:
- Restart your computer and reconnect your print device. It is advisable that the printer be turned off for at least one minute before the next connection.
- Check the cartridge. Sometimes the error appears when the ink tank has run out of ink. You can read about how to replace the cartridge in the article at the link below.
If the above tips do not help, proceed to the following methods to resolve “Print Error” when using HP peripherals.
Method 1: Check the printer
First of all, we recommend checking the display and configuration of the equipment in the “Devices and Printers” menu. You only need to do a few steps:
- Through the "Control Panel" menu and move to "Devices and Printers".
In addition, it is recommended to check the data transfer settings. Go to the "Printer Properties" menu.
Here you are interested in the “Ports” tab.
Check the box next to “Allow two-way communication” and don’t forget to apply the changes.
At the end of the process, it is recommended to restart the PC and reconnect the equipment so that all changes become active.
Method 2: Unlocking the printing procedure
Sometimes power surges or various system failures occur, as a result of which peripherals and PCs cease to perform certain functions normally. For such reasons, a printing error may occur. In this case, you should do the following:
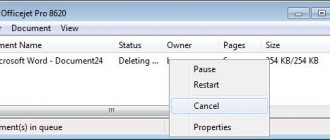
- Go to “Devices and Printers” again, where by right-clicking on the active hardware, select “View Print Queue”.
Right-click on the document and select “Cancel.” Repeat this with all files present. If the process is not canceled for some reason, we advise you to read the material at the link below in order to carry out this procedure using one of the other available methods.
Return to Control Panel.
In it, open the “Administration” category.
Here you are interested in the “Services” line.
Find “Print Manager” in the list and double-click on it.
In “Properties”, pay attention to the “General” tab, where you make sure that the startup type is “Automatic”, after which you should stop the service and apply the settings.
Close the window, launch My Computer, navigate to the following address:
Delete all files present in the folder.
All that remains is to turn off the HP product, disconnect it from the power supply, and let it stand for about a minute. After this, restart your PC, connect the equipment and repeat the printing process.
Method 3: Disable Windows Firewall
Sometimes Windows Defender blocks data sent from your computer to your device. This may be due to incorrect operation of the firewall or various system failures. We recommend temporarily disabling Windows Defender and trying to print again. Read more about deactivating this tool in our other material at the following links:
Read more: Disabling the firewall in Windows XP, Windows 7, Windows 8
Method 4: Switch user account
The problem in question sometimes occurs when an attempt to print is made from a different Windows user account from which the peripheral was added. The fact is that each profile has its own privileges and restrictions, which leads to this kind of problem. In this case, you need to try changing the user record, unless of course you have more than one added. Read more about how to do this in different versions of Windows in the articles below.
Read more: How to change user account in Windows 7, Windows 8, Windows 10
Method 5: Windows Recovery
It often happens that printing errors are associated with certain changes in the operating system. It is quite difficult to detect them on your own, but the state of the OS can be restored by rolling back all changes. This procedure is carried out using the built-in Windows component, and you will find detailed guidance on this topic in another material from our author.
Method 6: Reinstalling the driver
We put this method last because it requires the user to perform a large number of different manipulations, and is also quite complex for beginners. If none of the above instructions helped you, then all that remains is to reinstall the device driver. First you need to get rid of the old one. Read on to find out how to do this:
After completing the uninstallation procedure, use one of the peripheral software installation methods. There are a total of five available methods. Read more about each of them in our other article.
As you can see, there are quite a large number of methods for correcting HP printer printing errors, and each of them will be useful in different situations. We hope that the above instructions helped you to easily solve the problem that arose, and the company's product is functioning correctly again.
Thank the author and share the article on social networks.
Other Reasons for Printing Failures
In fact, there are many more error messages. But the reasons listed above are the main ones.
Software failure
There are times when the printer refuses to work due to a failure of the software necessary for the correct operation of the device. There is an easy solution to the problem. But the required program is no longer installed manually. It is necessary that the plug and play function is activated on the PC, which allows you to determine the configuration of devices connected to the computer and quickly find the software they need on the Internet .
Ink problems
It's not uncommon to see warnings about ink problems. So, in inkjet printers, for example, in the DeskJet 4615, the print head is often filled with ink and needs to be cleaned. The computer considers the head to be faulty and warns about this using the following code - 0xc6fd0813.
Paper jam
Even more often we receive messages about jammed paper. There may be several reasons:
- the paper does not meet the standard (thickness, size, density);
- roller contamination due to the use of low quality paint;
- foreign objects getting inside the device is the most common cause.
The elimination of these reasons is obvious: remove the chewed sheet and foreign objects (as described above), clean the roller of dirt and use paper of the appropriate standard.
Print queue failure
There are often cases when the printer refuses to print for no reason. Or it writes that there is not enough memory, although the document being printed is negligible. In addition to all this, for some reason it becomes impossible to cancel or delete the task. In this case, only resetting the print queue will help.
Important! If a document does not print after a power surge, simply canceling the print queue will not solve the problem. The hang of the operation in this case is due to corruption of the file that is created when the task is executed. A corrupted file will not allow the process to complete.
You can solve the problem like this:
- disconnect the printer from the network;
- Press the Win + R key combination to open the “Run” window and enter in the line – services.msc ;
- in the new window, look for the line “Print Spooler” and right-click on it (right-click on the mouse);
- in the pop-up menu select “Stop”;
- close the window and then go to the address: C:\Windows\System32\Spool\PRINTERS;
- delete all files in the folder;
- turn off the computer;
- turn on the printer and PC again;
- After waiting for the OS to load, we send the document for printing again.
How to fix if the printer says “print error”
One of the most common mistakes when working with a printer is that the documentation is prepared for printing, the device is connected, but there is no result. After numerous unsuccessful attempts to print the required document, the user may see the message “Failed to print.”
A review of the device does not yield any results; paper is loaded into the tray, but the printer stubbornly refuses to work. He can “spit out” a blank sheet or a sheet with smeared blots. What to do in such a situation?
What will we talk about:
Program malfunction
Various types of viewing and editing programs may cause problems or printing from them simply will not occur. To exclude this error from the list of possible ones, try printing a document or drawing from any other editor. For example, if the printer does not print in Excel, then try sending a print job from a text file.
Solving printing problems in Word. Ways to restore the printer to work with office programs.
Reasons why PDF documents do not print All quick solutions ranging from PC malfunctions to eliminating damage to the PDF file.
Check connection
If the printer writes “Print Error”, but previously it worked properly, then you should check the power connection, turn off the device and restart it. Inspect the power cords and make sure they are intact.
Check the paper tray; if there are not enough sheets, add more. If there is a lot of paper, try removing some, then put it back. Restart your computer and Canon printer. The actions did not produce results, try to figure out why the device is giving an error.
It is important! Most often, a printing error is the result of an incorrectly selected printer. If you purchase a budget model of the device, then be prepared for the fact that it will break at any moment. For daily use, it is worth purchasing a model from the mid-price category.
Selecting a printer
The first thing you should do when the “error” message appears is to check whether the device is selected correctly. To do this, do the following:
- In Control Panel, select the "Devices and Printers" section. A window will open showing all devices connected to the PC;
- We find the desired device, make sure that it has the “Connected” status;
- Hover your mouse over the Canon printer icon and right-click on it. In the menu that appears, select the line “Use as default”. A green checkmark will appear next to the device.
If the device is indicated in a pale color, it means that the computer does not see it.
Checking device properties
If the printer does not print and says “Print error”, in the “Devices” tab, go to the “Printers and Faxes” category. Find the desired device and right-click on it, select “Properties” from the menu that appears. A window will open, you need the “Data Exchange” section, click “Disable” and restart the device.
Another way: find the Canon printer icon, double-click on it and check the status. If you see "Work offline", change the setting by following these steps:
- Through the “Start” menu, go to the control panel, find the “Devices and Printers” section;
- In the window that opens, find the desired device, click on it and in the drop-down menu uncheck the box next to the line “Work offline”;
- Make sure the print queue is empty and reboot the device.
Driver Update
Drivers are an abbreviated name for special software that allows a computer or laptop to “communicate” with a printing device in their “language”. Sometimes the “firewood” itself can cause problems when the printer does not print. In such situations, it is recommended to completely reinstall them. To complete the process correctly, follow the instructions below:
- Open the Quick Launch window using the Windows + R key combination.
- In it, type the command “devmgmt.msc”.
- In the list, find the Imaging or Printing Devices branch. Expand and select your model.
- At the top, click the “Update Drivers” button.
- In the next window you can choose between two update options. We recommend doing it automatically, which is simpler and more understandable for the average user.
Checking wires
Often the cause of the error is a problem with the network cable. When purchasing a device, it comes with a standard wire that has a low transmission speed. Sometimes documentation is transferred between gadgets within sixty minutes. If you encounter a similar problem, then the Canon printer, after starting the PC, may print yesterday’s document.
To get rid of this problem, purchase a cord with ferrite rings. It is reliable, works stably and quickly transfers documents for printing, about four times faster than a standard cable. If these steps do not help solve the problem, you will most likely have to “deal with” the drivers.
Faulty connection wires
The first thing to do in this situation is to check the integrity of the connection cables. Despite all their reliability, over time they can lose their stability or simply fail. There are also frequent cases of mechanical damage during rearrangement of furniture or any other actions.
Two types of cords can be used to connect the printer. A more popular USB and ethernet wire, more commonly known as a patch cord. Essentially these are products made of plastic, plastic and thin metal. Therefore, cases of rubbing are not isolated. The most reliable test option would be to temporarily use similar cords from other equipment.
Reinstalling the driver
The cause of the device malfunction and the error that appears may be a driver failure. You can check their status in the following way:
- Go to the “Devices and Printers” menu through the control panel;
- Find the device you need and look at its icon; if it lights up green, it means the driver is working;
- If not, uninstall the driver and install it again.
To reinstall the printing program, use the disk that came with the machine. If it is not there, then download the driver on the Internet; it can be found on the manufacturer’s website.
Sometimes the printer “refuses” to print if the cartridge needs to be replaced. Many new modifications are equipped with a special chip that blocks the operation of the device when there is a small amount of paint.
In any case, before calling a specialist and paying for his services, try to figure out the cause of the problem yourself. Just don’t need to disassemble the device and take it apart into small parts, especially if you don’t have special skills. If the above steps do not help resolve the error, contact customer service.
Printing failure on HP printers
When printing is interrupted, the user rushes to check the power, but the reason may be much more serious. The most common problem is considered to be with the microprocessor, then the equipment is not able to process the signal. It may also be associated with the cartridge. In this case, the print head is completely checked.
ATTENTION! When a printing error occurs, it is recommended to pay attention to the inscription (shown on the display).
Common error codes:
- Breakdown 49.
- Error 60.
- Breakdown 79.
- Error E3.
- Failure E8.
Printer versions that most often suffer from malfunctions:
When there is a delay in printing, the main thing is not to panic and make the right decision.
How to resolve error E8
Using the m1132 printer as an example, the E8 error occurs frequently, and users are at a loss. The problem lies in the scanner and cannot be done without disassembling the entire structure.
When connecting the equipment to a personal computer, the message “used supply in use hp” appears on the screen, which means you must follow the instructions:
- The cover comes off.
- The carriage is removed.
- The screws are unscrewed.
- The scanner motor on an HP printer is disconnected.
- The dirt is being cleaned.
- The scanner is being replaced.
HP Laserjet M1132 mfp error E8 occurs for the following reasons:
- The printer is dirty.
- Problems with the firmware.
- Board failure.
If you replace the scanner, you will be able to correct the error, and then everything will work perfectly. During repairs, it is recommended to refrain from cleaning the cable, as this may lead to signal loss. Error E8 occurs even in devices of the latest series, and there difficulties most often arise with the firmware.
As for dirt, it accumulates on the gears. Error E8 is not critical in any case and can be fixed without contacting a service center. The only tools you need are a hex wrench for screws.
REFERENCE. A scanner error in an advanced form can lead to equipment malfunctioning and the cable burning out. For some users, the printer simply does not respond to signals.
Set the default printer
If you click on the “Print” button, and the job is sent successfully and without errors, but the printing process does not start even after a long period of time, then another printer may be selected as the main one. To fix this problem, you should first find out the exact name and model of your device. Such data can be indicated on the front of the printer itself, or on a sticker with additional information, or on the box of the device.
Next, follow these simple instructions:
- Open your computer's control panel.
- In the list, find the section with printers.
- Select yours from the list of models.
- Call up the context menu with the right mouse button.
- On the list about.
Also make sure that you are not configured to print to a file. Follow the link to learn how to check this and fix it.
Troubleshooting E3 code
Using the HP Laserjet 3380 printer as an example, we need to analyze the problem of installing a cartridge. When error E3 appears on the display, users assume that the equipment has simply run out of paint. In fact, the reason may be that the cartridge was installed incorrectly.
The first thing we look at is the mechanism; it is important to pay attention to the damper. Sometimes the problem is related to the lever that secures the element; it just needs to be adjusted a little. To get to the cartridges, of course, the cover is removed. If we look at the M125RA device, its element is located in the lower part of the case and you will have to spend some time to get to the pocket.
ATTENTION! When the lever returns to its old position, the error on the display will disappear immediately or after a while.
If the device subsequently refuses to work, you will have to think about how to take it to a service center. Alternatively, you can perform the diagnostics yourself, then the first thing you do is press the off button on the equipment. Next, it is important to disconnect the device from the network, check the condition of the surge protector under the cover, and wipe it with a dry cloth. When the printer is turned off or in sleep mode, the user is not in any danger.
Fixing network printer access errors
Quite often problems occur with network printers. As a rule, they are associated exclusively with incorrect settings of the network identification paths of the devices themselves.
When setting the necessary parameters, pay special attention to the correct entry of the printer's network address, its location, network name and port used. In addition, sometimes it is necessary to specify a source for installing drivers.
Troubleshooting Error 79
If the message 79 service error appears on the display, it is recommended not to rush to take the printer to a service center. Often the problem is associated with printing a damaged file. Using the HP 2605 as an example, error 79 means an attempt to open a document in the pdf extension. To understand the situation, the first step is to reboot the personal computer.
For HP printers, error 79 likes to return, hinting at the need for firmware. Experts solve the problem by resetting the settings. The HP 400 printer shows “Error 79” if the software is incompatible with the hardware. When printing does not start after resetting the settings, it is recommended to check for driver updates. "Error 79" HP 400 printer is shown when using pirated software. In such a situation, you also need to reinstall the system and check for new drivers.
If everything is done correctly, the message 79 service error will disappear from the display.
Checking OS and device settings
If you are faced with the fact that the device does not display any messages on the screen, and nothing happens when you send a file for printing, then before contacting the service center with the question: “what should I do, the printer has stopped printing, check the device’s connection settings, as well as the operating system systems.
To do this, the first step is to check whether the device is connected to the computer correctly and whether the operating system sees it.
To do this you should:
- open the task manager and find the required device;
- it must be in the list and match the name of your device;
- Opposite it there should be no indication of an erroneous connection, conflict or disconnection (yellow exclamation point or red cross).
Now you need to check that the settings of the device itself are correct.
If printing does not start, there may be several problems:
- the connection port is incorrectly specified;
- the address or name of the computer to which the network printer is connected has changed;
- the device that connects to the network (router, router, computer) does not work;
- the printer is incorrectly selected as the default device;
- In the device settings there is a ban on outputting a certain type of data.
To check this data, you need to go to the “Control Panel” and select “Devices and Printers”. Here you can change the default printing device (by right-clicking the menu and activating the corresponding checkbox). In the device properties, check whether the settings are correct.
If you cannot connect to a network device, it is better to seek help from the user of the remote computer or the network administrator.
Resetting errors on HP printers
For HP printers, error 49, or 60, 79, e3, e8 can be resolved in a clever way. The user has such a tool as a support service in their arsenal. The method is called “HP printer reset”.
Without any disassembly of the structure, it is recommended to perform the following actions directly during printing:
- Call menu.
- Print button.
- Call technical support.
- Sending a report.
When the printer is turned off or another error occurs, you may need to contact a service center. If the problem can be fixed by updating the program, this method will definitely help. For example, error 60 02 can only be resolved by service center specialists, and there is no point in experimenting. When resetting an HP printer, the main thing is to make sure that the latest drivers are installed and there is ink in the cartridge.
If a printer error persists for a long time, it is recommended to go through all the elements of the equipment and find out what the problem might be. It is not uncommon for the head to fly out on older version printers. After some time, the user will know all the vulnerabilities of the model. Even a minor mistake can require serious financial investments. Users, naturally, have no desire to pay for an expensive board or cable.
REFERENCE. If the document is not sent for printing, you should first make sure that the on button is lit.
Considering special cases, printers may show a problem with the network, this is error 1132. As a conclusion, it is worth noting that HP printers are reliable, however, like any equipment, it breaks down and measures have to be taken. If you do not want to delve into the intricacies of the equipment, it is recommended to contact a service center.
HP Printer Errors: Error Codes and Solutions
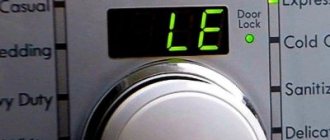
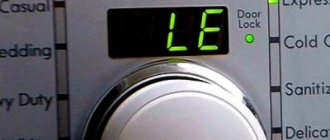
All kinds of problems can occur in the operation of any office equipment. The same applies to HP printers. Fortunately, all modern printing machines are computerized devices with their own software. It is thanks to this that if any malfunctions occur, the printer immediately “informs” this to the user in the form of an error code on the computer screen and/or on the built-in LCD display. Let's look at the most common HP printer errors and ways to solve them.
Paper Jam Errors
The following errors occur when paper jams and/or foreign objects are stuck inside the printer.
13.3.xx or CHECK INPUT/OUTPUT DEVICE
Here and below, the symbols “xx” in the error code should mean any set of letters or numbers. Regarding the errors themselves, they mean that paper is stuck in the printer, i.e. it has become jammed. The printer will report the same thing in case of mechanical failure of the paper feed roller. If everything is fine with the latter, then to solve the problem it is enough to remove the jammed paper from the printer. Troubleshooting platen problems may require disassembling the printer, repairing it, or completely replacing the part.
13.5.xx
This error also indicates a paper jam, specifically in the printer’s thermal block. This is one of the most important parts of laser devices and MFPs, without which the operation of the machine is not possible. There are also two ways to solve the problem - removing the jammed paper or repairing/replacing the thermal block.
13.6.xx
The error occurs for the same reason as in the previous case. The only difference is that the error indicates a paper jam not inside, but at the exit of the thermal block. The solution to the problem is the same as in the previous case.
13.9.xx
A more serious error, also associated with a paper jam. It indicates a malfunction in the functioning of the paper feed roller and/or fuser. In this case, you will have to check the operation of both parts. If the cause is a paper jam, simply remove it from the printer. Any hardware/mechanical problems are resolved by disassembling, diagnosing and repairing/replacing the feed roller and/or fuser.
13.20.xx (can also be displayed as 13.A)
This is a common error that occurs when one or more of the printer's electronic-mechanical components responsible for feeding paper fails. In addition to the feed roller and fuser block, the error may be caused by improper functioning of sensors, solenoids, motion conveyors and other parts. In most cases, the occurrence of this error indicates the need to diagnose and repair the printer as a whole.
Problems after refilling cartridges
Cartridges that are directly involved in the process of applying an image to paper often damage the printer themselves. It is possible to say for sure that consumables caused the error if the problem occurred immediately after refueling. If we are talking about a laser device, then first of all it is worth checking the build quality and the presence of contacts between its different parts. Simply take it apart and carefully put it back together.
Particular attention should be paid to the chips that have recently been included in cartridges of laser and inkjet models. It may need to be reset or completely replaced.
Inkjet inks are also characterized by air getting into the continuous ink supply system, if used. The print head nozzles may dry out, regardless of where it is installed (on a cartridge or as a separate part of the system). This occurs due to long downtime or active use of equipment without prevention.
Washing inkjet printer cartridges at home All quick ways to clean containers from contamination.
All options for cleaning the print head. Quick ways to clean and rinse the nozzles and nozzles of the printer.
Hardware faults
The following error codes indicate that there is a hardware problem with the printer.
20 or 21
One of these errors occurs when printing fails because the printer's built-in random access memory (RAM) is insufficient. This usually happens when the print queue is full, i.e. The printer has received too many print commands, but the device is technically unable to cope with the task. Solution - you need to clear the print queue on your computer (or on all computers if the printer is used over a local network).
Also, switching the “Page Protect” parameter (in the printer settings) from “On” to “Auto” can help resolve the error. Some HP printer models support the installation of additional RAM. Increasing RAM is especially recommended for printers used by many users over a local network.
22 EIO
This error occurs only on those HP printer models that are equipped with a modular MIO interface or a more advanced EIO interface. These interfaces are designed for connecting network interface cards, hard drives, etc. to the machine. Error 22 EIO can occur if the connected device is faulty, has incorrect settings, or is occupied by the MIO protocol by another device on the network. To solve the problem, you can simply try rebooting the printer and/or reconfiguring the local network settings.
22 PARALLEL I/O, 22 SERIAL I/O
Errors only occur if the printer is connected to the computer via an IEEE-1284 parallel port. The malfunction may be due to malfunctions or incompatibility of the installed driver with the printer being used.
The error may also mean physical damage to the cable or input/output errors (an unrecognized command was received, the computer is using the wrong port number to communicate with printers). The solution is to reinstall the driver or (if that doesn’t help) replace the cable.
40 BAD SERIAL TRANSSMISION, 40 EIO x BAD TRANSSMISION
Errors that occur due to various malfunctions of the printer’s network card. If the problem is not resolved by restarting the printer and/or reinstalling its driver, your only option is to replace the network card.
41.x, 51.x and 52.x
There are hardware malfunctions in the operation of the laser scanner. The occurrence of one of these errors indicates the need to repair or replace this part or one of its electronic components.
Occurs when there is a malfunction of the electronic board responsible for controlling the paper size. The error may also be due to incorrect settings for the paper size currently loaded in the tray. The solution is to try to set the correct size, which can be done from the printer's LCD display or from an application on the computer from which you are printing. If this does not help, you will have to repair/replace the board.
The occurrence of this error is associated with hardware malfunctions of the thermoblock. The simplest solution is to remove and install the thermoblock in its place. In other cases, this part will have to be repaired or replaced.
53.хх.хх and 62.х
Errors related to the printer's RAM. Here you can also try removing the RAM from the slot and installing it again. If this does not help, all that remains is to replace the faulty memory module. You can find out which RAM stick is not working by the number in the code “62.x”, where “x” is the number of the slot in which the non-working module is installed.
57.x FAN FAILURE
There are malfunctions in the operation of the built-in printer cooling fans (coolers), which can lead to overheating of the equipment. The solution is to clean the dust and lubricate the coolers with engine oil (if they do not rotate fast enough) or replace them.
Errors associated with problems with the tray lifting mechanism. There may be a foreign object stuck in the tray or the mechanism itself. In all other cases, repair of this part will be required.
Malfunction of the main motor of the printing machine. If restarting the printer does not help, the motor will need to be repaired or replaced.
The error is specific only to HP printer models equipped with a duplexer, a device that allows you to print on both sides of a sheet at the same time. Hardware problems with the duplex will also require repairs.
79.xxxx
These are common errors related to print machine data management. Problems with operation may be caused by the printer driver not functioning properly. Errors also occur when memory modules, network cards, USB ports, serial ports, or other electronic components malfunction. First you need to reinstall the driver, replace the USB or serial cable you are using. If it doesn’t help, you will have to seek the help of specialists.
HP printer hardware problems
There are a number of failures associated with one or more electronic and mechanical components of the device. The device requires the attention of an experienced installer.
E20 or E21 indicates that the mechanism for printing documentation does not have enough internal memory. This message may appear if there is a problem with the print queue or if a large amount of paper arrives in the queue. To resolve this, you need to clear the print queue on your PC. Increased RAM is necessary when the device serves many local network clients.
E10 - this message appears only on machines with a perfect E10 interface. This is possible when interface cards and hard drives are connected to the printing device. E10 comes out when the connected units are faulty. The problem is resolved after rebooting the system or reconfiguring the local network system.
E22 lights up when the printing unit is connected to computers via parallel ports of the IEEE-1284 type. Malfunctions are most often associated with interruptions or incompatibility of drivers with this model of printing device. This message means damaged cables or a broken I/O device, unrecognized commands, or inaccurate port numbers for network devices.
