A laser printer cartridge usually runs out at the most inopportune moment - you urgently need to print a document, and there is no money for a new cartridge (and new cartridges are very expensive, often half the cost of the printer). In this case, you should try to refill the cartridge - refilling Kolomenskaya metro cartridges. It will cost several times less, because you will only need to buy ink.
When to refuel
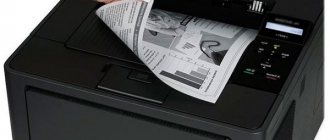
- Defects appeared during printing. Sometimes the cause of dark spots on the pages may be clogged nozzles or nozzles in the cartridge. Before charging the cartridge, first perform a program cleaning and then manually wash the print head. If the actions do not produce results, start refueling. If the printer is laser, you can lightly shake the cartridge to evenly distribute the powder (toner) inside.
Software cleaning for Canon printers.
Cleaning via Hewlett-Packard printer software. - The printer does not “see” the cartridge. A problem is indicated by a red or orange flashing light on the front panel of the printer. Additionally, a driver alert may pop up on the computer screen with different error codes or inscriptions.
- Insufficient dye level is detected by software. Supported on all models of printing devices. The function can be found in the print settings, go to the “Control Panel”, then the “Devices and Printers” section, find your model and go to properties. The ink level is also determined in the software (drivers) that come with the printer itself and are installed from the disk. For HP inkjet printers, the setup looks like this (see image below).
Chip/printer firmware, replacement, etc.
Further.
You won't be able to refill a cartridge yourself if it has a security chip installed on it - a complex electronic chip designed to complicate the life of refillers. Or rather, it’s not like that: you may be able to refill it, but don’t count on a favorable result - the printing machine has already “remembered” this cartridge the first time it was used, and did this precisely thanks to the chip. Accordingly, something needs to be done with this cunning, mischievous microboard, but only a specialized service center for the repair and maintenance of office equipment can handle such a task without any problems - Adamaster is ideal. So, the chip can either be removed and replaced with a new one, or reprogrammed in order to reset the counter for the number of pages produced - the indicator that the printer is guided by, classifying the refilled cartridge as empty. The third option is to reprogram (firmware) the printer/MFP, as a result of which the device will stop working. pay attention to the chip signals. If you don’t choose one of the above, you will plaintively complain to your beloved mother: the cartridge does not print after refilling! Well, have you still wanted to refill the cartridge yourself? Then let's continue
What consumables are used
- Ink. Liquid dye for inkjet printers. Has a water or pigment base. Pigment ones are of higher quality, resistant to light, do not fade, are not afraid of water, and the image is clearer.
- Toner. Powder material for laser printers. Made from petroleum waste. Less ink is consumed, low cost of printing one page of monochrome (black and white) printing. Thanks to electrostatics and rollers, the toner is transferred to the paper and fixed to it under high temperature. At the factory, the cartridge is refilled with original powder. To save money, the user can use less expensive compatible dyes when refilling.
Precautionary measures
As mentioned above, toner is very harmful to health. Do not allow it to get on your hands or into your respiratory tract. In this regard, it is recommended that you wear rubber gloves and a robe while refilling so that the toner does not get on your clothes.
Refueling should take place in a well-ventilated area. You should definitely wear goggles over your eyes, and a respirator or gauze mask over your nose and mouth. Alas, even a gas mask will not hold the toner powder, so you need to be careful when refilling and try not to spray it. But don’t worry or worry too much about your health. You won't blow it up just by refilling it.
Remember that toner should be stored under normal conditions and at normal temperatures. If moisture gets into it, it will cause the powder to “clump.” Cartridges cannot be refilled with this toner. If lumps appear, close the toner bottle and shake it.
Required tools and materials
- Means of protection. Rubber gloves are worn to protect the skin on your hands. A protective robe or just old clothes are put on over the clothes.
- Old newspapers or paper. They cover the surface on which refueling will be carried out.
- Refill material. To refill laser cartridges, you buy toner, and ink for inkjet cartridges.
- Cleaning products. You can remove ink residues with dry wipes or sponges dipped in washing liquid.
- Syringes. To refill all inkjet printer cartridges, you need one syringe for each color. A minimum of 4 syringes with thin needles with a volume of at least 5 ml is needed. Filling with one syringe is also possible, but after filling each color, you must very carefully rinse the syringe cavity, piston and needle.
- An awl, screwdriver or small-diameter drill. If necessary, use tools to expand the factory holes in the ink tank to fill in the dye.
Types of printers
Before you start refilling the printer, you need to get acquainted with the models of this device. These include:
- Jet;
- Laser.
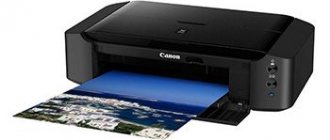
An inkjet printer is a budget model that is ideal for home use.
This equipment can be used to print photographs and plain text. The disadvantage of such models is the slow printing speed.
The main requirement in the refilling process is the quality of the ink. Most often, cartridges are built into the printer design. Refilling is carried out by introducing a small amount of liquid into the cavity of the container.
To do this, use a syringe with a thin needle. To prevent the ink from drying out prematurely, you must use the printer daily to print.
How to refill an HP ink cartridge
- Read the printer instructions. A paper version is included. And on the manufacturer’s website you can download an electronic version. Study the installation diagram of the carriage to remove the cartridge before refilling it yourself.
- Remove the cartridge and place it on a lined table.
- First you need to refill the black HP printer cartridge, then move on to the color ones.
- Remove the sticker from the body.
Some models have a round plastic bearing under the sticker; you need to press it with an awl. - If the hole through which the filling is made is too narrow, widen it with a knife, drill or other tool.
- Fill the syringe with paint.
- Insert the needle inward at a 45° angle one-third of the way up the body.
- Gradually squeeze the dye inward at a rate of no more than 1 ml/min.
- If ink starts to bleed through the top, pump it back into the syringe.
- Wipe the body with a sponge.
- Before refilling color cartridges, fill separate syringes with 2-3 ml of ink of all required colors.
- Look for the hole/color pattern on the body of the ink tank so you don't mix up the shade. The location can be found on the Internet by specifying the cartridge model in the search.
Sometimes there are as many as five holes in the cartridge, two each for yellow and blue. Only one of them is refueled . - Refill color cartridges in the same way as monochrome ones.
- In cartridges that have already been refilled, cover the holes with a sticker.
- Place the container in place in the carriage and check the print quality.
If, after gluing the label, ink begins to come out from the bottom, you need to pump out the ink.
Instructions for specific models.
How to refill an HP 122 cartridge
How to refill an HP 123 cartridge
Video
How to choose a toner
Here are some recommendations that will help you choose a truly high-quality toner. Firstly, pay attention to the cost - if it is too low, then this should lead to thoughts of a fake. Second rule: it is best to purchase compatible options from a trusted, well-known manufacturer, whose packaging itself should be beyond any criticism. For example, for a Samsung laser printer it is best to take Profiline, and for HP models (except HP - 436) Hi-black is perfect. The recognized leader is AQC (with American packaging).
HI-BLACK toner
You should pay attention to other points.
- Typically, on toner packaging, manufacturers list the brands of laser device models for which this color mixture can be used.
- For refilling, it is better to use the original brand from the manufacturer or a compatible good quality toner.
- You can select a cartridge that is suitable for your printer with a larger toner tank. The solution will reduce the cost of printing and save on refills in the future.
- For color laser printing, it is preferable to purchase consumables in a complete set in order to refill all powder reservoirs at the same time.
- You should pay attention to the quality of packaging and shelf life. If the product is stored incorrectly, the integrity of the packaging and deadlines are violated, there is a high probability of acquiring spoiled material.
A well-selected toner will guarantee high-quality printing and the ability to carry out up to 5 refills. Saving on price may not be the best service here.
how to choose a printer for your home in this article
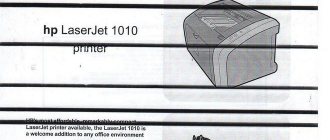
Refilling an HP laser printer
HP printers labeled "laserjet" use laser printing technology. You can charge them at home according to the diagram below.
IMPORTANT! The instructions describe the technology for disassembling and assembling the cartridge, which consists of many structural elements (metal pins, springs, various plastic parts, and others). Perhaps you do not have such a cartridge, then you are in luck, because disassembly and assembly will be even faster and easier.
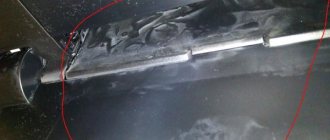
The filling principle is the same. The only difference is that some steps need to be skipped, which makes the work much easier. In short, you need to separate the part of the cartridge with the hopper from the part with unused toner. Next, remove the rotating elements: green (or blue) photo roller, magnetic drum and charge roller (corotron). Then unscrew the blade and pour out the waste toner. Clean all components with a clean, lint-free cloth. Pour powder paint into the desired compartment and assemble the entire structure in reverse order.
First we will provide a good video, below there is a text algorithm.
- Turn off the power with the button located on the case. Pull the cable out of the socket.
- Open the cover on the front or top of the case (depending on the printer).
- Take the cartridge by the handle and pull it towards you, pull it out.
- Remove the bolts holding the side cover.
- Remove the plastic.
- Remove the photo shaft by holding it by the outer white gears.
- Use a flat screwdriver to move the charge roller away from the wall and remove it.
- Divide the cartridge into two parts: a compartment with waste and fresh powder. To do this, press the metal pin from the inside with a screwdriver, and grab it from the outside with small pliers. The pins must be pulled out from both sides of the cartridge.
- Remove the spring located on the side.
Then, holding the cartridge with both hands, separate the parts from each other. - Empty the used toner from the waste bin and dispose of it. First remove the dosing blade from the container by removing the spring and unscrewing the two bolts.
- Wipe the blade with a clean napkin/rag. Brush use is prohibited.
- Reassemble the hopper by screwing the blade back into place.
- On the part of the cartridge that contains unspent powder, unscrew the plastic part and remove the cap. Shake the jar of powder well before filling. Unscrew the cap of the toner container, screw on the special nozzle (included in the kit or can be purchased separately). Refill with new toner.
- Close the hole tightly with the protective plug.
- Reassemble the cartridge in the reverse order, place it in the printer, turn on the device and try to print a sample.
When you insert the photo roller, carefully check with your hands that it rotates easily. If rotation is difficult, errors were probably made during assembly and something is preventing the drum from spinning normally.
IMPORTANT! If there is no compartment with a plug, then you will have to pour the toner into the slot behind the magnetic roller. To avoid spilling powder in unnecessary places, insert half of an A4 sheet into the slot and sprinkle it on it, having previously positioned the structure at an angle.
See the video for more details.
Step by step instructions
How to properly disassemble a cartridge:
1. After removing the toner cartridge from the laser printer, first open the side cover screw as shown below:
2. Now remove the side cover of the printer cartridge:
3: Once you have removed the outer cover, the next step is to remove the drum. Take it from the white part (gear) and pull it in the indicated direction.
4. This is what the laser cartridge will look like after removing the photo drum:
5. Now you need to disable the video as shown below:
6. Lightly press the rod with a sharp tool, and then slightly push it up and out to the left.
7. The next step is to separate the waste block and the ink block, which are connected together using pins. So you have to take out the pins that are on both sides.
8. After pushing the pin from the inside, it's time to pull it out from the outside, as you can see in the picture below.
9. After removing the pins on both sides, you need to remove the spring, as shown in the figure:
10. The next step is to separate the two main parts. One part is garbage and the other is called ink tank. Hold the toner as shown in the picture and pull both parts apart.
11. View of the waste ink part and a closer view of the spring that must be removed to open the waste ink container.
12. Remove the spring and then remove the plastic cover as shown in the picture:
13. Now remove the screws of the waste container to separate the cleaning blade, and then remove the ink that was collected in this part.
14. Now that you have managed to open it, you should clean the garbage collector and the cleaning blade part. The cleaning blade should be cleaned with a soft cloth rather than a brush, as the brush may scratch the blade.
15. Next you need to assemble part of the trash container. Install the cleaning blade first and then the plastic cover as shown in the picture:
16. Replace the plastic cover until it snaps into the slot/groove as shown:
17. Now install the spring back to its position as shown in the picture below.
18. Now, what you have done is that you have opened the waste ink container, cleaned it and then closed it. Now begins the main part, which is refilling the laser printer cartridge. So now take the other part where the ink is. Open it and fill it with ink, then close it and finally assemble the two parts that were separated earlier.
19. After removing the side cover, you can see the white plastic cover, you should remove it and fill in the toner powder for the cartridge:
20. Charging the cartridge. Remove the white plastic cap, you are now ready to refill the toner, but before doing so, remember to “shake the ink tank before use”. After removing the cap from the bottle, you can put on the plastic cap that you usually get with the bottle, or you can ask the seller for one.
21. Now it's time to fill and close the lid as shown below:
22. Now you need to combine two blocks i.e. waste container and ink block as shown below: Make sure to align them as shown in the directions given below:
23. The next step is to re-insert that you have connected on both sides.
24. Now after you have inserted the pins, it is time to insert the roller as shown below:
25. It's time to put the drum back in its position, i.e. to the drum retaining pin:
26. After reinstalling the drum, install the side cover.
27. Finally, reinsert the spring. Charging of the laser printer is complete.
I hope you can easily refill your laser printer toner by following the steps above.
About refillable cartridges (RESC)
Refill caps can be purchased for both inkjet and laser printers, and can be refilled multiple times yourself.
If the operating rules are followed, the SCP in inkjet color printers can be charged up to 10 times.
To prevent the dye from drying out on the foam sponge and hardening, you must not allow the printer to sit idle without ink in the cartridge. But even with ink inside, the printer cannot be left idle for a long time, otherwise the nozzles and nozzles may dry out.
SPDs for laser HP are practically eternal, but various parts can break. First of all, the photo shaft breaks, then the magnet. shaft, dosing blade (squeegee). To extend the life of the cartridge, you need to clean the waste hopper every time you refill.
What you need to know about refueling at home
Laser printers are refilled with a special powder called toner.
All printers have different toners. The manufacturer usually indicates on toner bottles a list of models for which a particular powder is intended.
The toner is chemically very dangerous, you should use it carefully.
It is important to know whether the cartridge has a special chip that blocks the operation of the device after the consumable has exhausted its resource. If yes, then it is better to take it to a gas station.
Checking the Print
To check the quality of the completed filling, you need to print a test page.
- Go to Start.
- Open "Devices and Printers".
- Select your printer from the list and right-click on it.
- Select "Printer Properties".
- Click "Test Print".
You can also go to “Maintenance” in the printer properties and select “Check Nozzles” to print a sample. This is how the quality of monochrome printing is checked. Valid for Canon models.
To check color images, you additionally need to use a selection of test pages to check brightness and color saturation. Test sheets are downloaded from the Internet.
5 / 5 ( 2 voices)
Features of printers that you can refill yourself
According to the principle of operation, office equipment for printing can be:
- matrix;
- jet;
- laser.
Dot matrix printers are rare today, because they print slowly, and the noise during their operation does not allow two nearby interlocutors to clearly hear each other.
The ease of use of more modern models has led to the fact that dot matrix printers have been forced out of the consumer market.
The operating principle of inkjet printing devices is practically no different from matrix ones. Only instead of tape, replaceable cartridges are used, inside of which there is a dye and a cylindrical device for printing the required image.
Thin jets of paint are dosed when the appropriate command is received. As a result, the required image is obtained or the document is printed. Cartridges are filled with powder or liquid dyes.
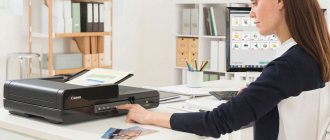
Among manufacturers of printing devices, Epson, HP, Canon, Lexmark and some others are especially popular. The cartridge of these printers is refilled with ink as it is used. To do this, pull it out, find the filling window and, using a syringe, fill in the dye. At the same time, be careful and do not allow spillage on other surfaces. An unpleasant moment will be the liquid overflowing into the cartridge. After this, you will need to wipe it thoroughly so that the paint does not get on other surfaces.
There are printer models equipped with a continuous ink supply system (CISS). Such printing devices are large in size, and due to the supply of liquid to the printing area, there is no need to maintain cartridges. When working with such equipment, monitor the level of dyes in special containers. As needed, the used colors are added.
Laser printers have a more complex printing technique and an electronic control system with built-in chips. If such a device fails, replace the cartridge or contact specialists who can restore the functionality of the equipment.
Instructions for refilling cartridge HP 12A (Q2612A), Canon FX-10, 703.
Instructions for refilling cartridge HP 12A (Q2612A), Canon FX-10, Canon 703.
For printers/mfp
Q2612A : HP LaserJet 1010/1012/1015/1018/1020/1022/1022n/1022nw/3015/3020/3030
/3050/3050z/3052/3055/M1005/M1319
Canon FX-10: Canon i-SENSYS MF4018, i-SENSYS MF4120, i-SENSYS MF4140, i-SENSYS MF4150, i-SENSYS MF4320d, i-SENSYS MF4330d, i-SENSYS MF4340d, i-SENSYS MF4350d, i-SENSYS MF4370dn , i-SENSYS MF4380dn, i-SENSYS MF4270, i-SENSYS MF4660PL, i-SENSYS MF4690PL, FAX-L100, FAX-L120, I-SENSYS FAX-L140, I-SENSYS FAX-L160
Canon 703: Canon i-SENSYS LBP2900, Canon i-SENSYS LBP2900B, Canon i-SENSYS LBP3000, Canon Laser Shot LBP2900, Canon Laser Shot LBP3000
HP LJ 12A and Canon FX-10, Canon 703 cartridges are analogous in design. (Canon FX-10 differs only in the guides on the side cover)
Which means that their refueling procedure is the same, so let’s look at it:
To begin, cut the cartridge:
The cartridge itself:
What to refill: HP 1200 or 2100 toner.
Turn it over.
We move aside and dismantle the Curtain.
And we see a spring that serves as a contact and a pressure regulator.
We remove it by picking it up with an awl and pulling it off as indicated in the photo.
On the other side, unscrew the screws and remove the cover.
We remove the drum.
We pry off the corotron. And we pull out
Underneath it, on both sides, we find a hole.
I use a curved awl and press out the pins. (it’s more convenient to use an awl, I just had a small screwdriver at hand)
We pull it out from the outside.
You can separate the parts of the cartridge.
In front of us is a waste bunker.
You can shake it out and vacuum it without removing the squeegee (through the hole indicated in yellow)
If you really want to, remove it by unscrewing the screws:
Let's gut the toner bin:
Unscrew the screw
Remove the cover (carefully, part of the magnet may break off)
If the cartridge has a plug, you can later pull it out and add toner.
We monitor the cleanliness of the magnet contacts (springs and contact pad on the side cover)
When reassembling, the axis of the magnet should coincide with the groove on the side cover.
We remove the magnet and clean the hopper of old toner.
Add new toner.
Note: The magnet loves cleanliness; if you wipe it with alcohol or acetone, the filling will improve (the print will become darker).
The cartridge is refilled. We reassemble in reverse order.
Attention:
When doing the reverse, we bring the two halves of the cartridge together, align the holes with each other, and hammer in the pins.
Align the spring.
Don't forget about the drum contact spring.
We hook it (to groove 1) and bring it with an awl to groove 2. And “throw it onto the groove”
Instructions “How to refill a cartridge” HP 12A (Q2612A), Canon FX-10, Canon 703
A little theory
Before refilling an inkjet printer cartridge, it would be nice to find out what a device of this type actually is. In its standard form, a cartridge of this type includes such components as a reservoir container intended for ink, a special chip and, in some models, a print head. The microcircuit is needed to control the head nozzles and take readings from the paint level meter.
The cartridge body usually has a sticker indicating the color or is painted to match the color of the ink for which it is intended. There are models where the cartridge body is made of transparent plastic. At the same time, on the top cover of the case there are usually special holes intended for refilling cartridges. Therefore, you can fill the cartridge through them. In addition, this part has holes necessary for air to escape and maintain the necessary pressure inside the ink container.
Inside the cartridge, as mentioned above, there are reservoirs. The black consumable has only one such reservoir, while the colored consumable has three, which are designed for ink colors such as magenta, cyan and yellow. This design is usually typical for budget models. The fact is that more expensive devices of this type, which are primarily intended for photo printing, have 4–8 tanks.
It should also be added that inside each cartridge container there is an absorbent material, in other words, a sponge, which is needed to hold the ink and distribute it evenly. But in some models, for example, for an HP inkjet printer, so-called air bags can be used instead of such a sponge.
Charging laser
HP printers that use laser printing are referred to as the “laserjet” series in their names. To charge the cartridge of such a printing device, follow these instructions:
- Turn off the power to the case, or better yet, unplug the cord from the outlet.
- Open the cover from the front or top, depending on the model.
- Pull the cartridge towards you and remove it.
- Divide it into two parts by unscrewing the side cover.
- In one part there will be a waste bin, and in the second there will be a part with a compartment for new toner.
- Used toner should be emptied and disposed of.
- To add a new portion of powder, you need to remove the plug from the hole to do this.
- Then we assemble the cartridge in reverse order.
Self-refilling a laser cartridge Detailed instructions for home use.