Subscribe to the newsletter
As the famous advertisement says, we spend too much time washing dishes. Or they could spend it on family, children, friends and, of course, on themselves. In this regard, the purchase and subsequent installation of a dishwasher, which will help us save time, is becoming increasingly important. So, as you may have guessed, today in our article we will talk about how to connect a dishwasher. We will tell you how to connect the dishwasher to the electrical network, water supply and drain.
Before we begin installing the dishwasher, we need to purchase
the following materials:
• three-core cable with a cross-section of 2.5 mm² (for example, VVG 3x2.5 produced by LLC); • 16 Ampere SCHUKO type socket with grounding contact; • polypropylene (PP) pipe PPR PN 20 with a diameter of 20 mm, used in cold and hot water supply systems; • water socket PPR 20 X ¾ with internal thread; • connector PPR 20 X ½ with union nut; • square PPR 90 degrees 20 mm; • ¾ inch HP/HP square; • sealing tape.
The number of pipes and fittings is calculated taking into account the distance of the dishwasher from the cold water distribution manifold.
Connecting the dishwasher to the electrical outlet
Please note that electrical installation work should only be carried out in full compliance with safety requirements.
In a pre-prepared groove, we lay a 3-core VVG cable to the installation box so that the end of the cable in it has a reserve length for reconnection.
It is recommended to install the socket at a height convenient for connection, and it should be placed to the right or left of the dishwasher. It is also important to note that it is recommended to connect the dishwasher through an RCD or automatic circuit breaker.
After laying and fixing the cable, we connect it in the panel in the following sequence:
• core with white insulation – lower terminal “2” of the difavtomat; • blue wire – lower terminal “N” of the difavtomat; • yellow-green core – free ground bus terminal
After laying the cable, we carry out finishing work and begin installing electrical accessories. Then we strip the cable in the installation box and connect the socket:
• conductors with white and blue insulation are connected to the outer terminals of the socket; • yellow-green conductor – with a central grounding terminal
Connecting the dishwasher to the water supply and drain
It should be noted that the connection of PP pipes must be made using the socket method. To do this, use a special apparatus for soldering (welding) polypropylene pipes.
First, we mark on the wall the place where the pipe will be laid from the distribution manifold to the place where the dishwasher is planned to be installed and prepare a groove of the required depth.
Then we screw a PPR connector with a union nut onto the free outlet of the distribution manifold. From it we measure a piece of pipe of the required length to the first corner, while leaving a margin of 15 mm for the connection on each side. We connect the pipe and fittings, controlling the position of the square. It should be directed towards the further movement of the pipe. We lay the pipe to the intended installation location of the water outlet. We make all connections as described above.
After connecting all the pipes along the marked area at the end of the pipe, we solder the water socket, fix it on the wall and seal the groove.
Screw the elbow HP/HP ¾ into the water socket using sealing tape. Then we screw a flexible dishwasher water supply hose onto it (supplied). We supply water and check for leaks.
Next, we connect the drain hose from the dishwasher to the sewer outlet through an adapter collar of the appropriate diameter. The diameter of the transition collar depends on the diameter of the sewer pipes.
Having completed all the construction and finishing work, we connect the dishwasher to an electrical outlet and install it in the opening prepared for it.
Thus, we installed the dishwasher, as well as its connection to the water supply, drain and electrical network. You can learn more about how to install a dishwasher and connect it to communications by watching our video.
Source: cable.ru
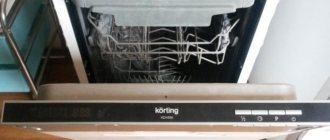
Dishwasher connection
Did you like the video? Subscribe to our channel!
As the famous advertisement says, we spend too much time washing dishes. Or they could spend it on family, children, friends and, of course, on themselves. In this regard, the purchase and subsequent installation of a dishwasher, which will help us save time, is becoming increasingly important. So, as you may have guessed, today in our article we will talk about how to connect a dishwasher. We will tell you how to connect the dishwasher to the electrical network, water supply and drain.
Before we begin installing the dishwasher, we need to purchase the following materials:
• three-core cable with a cross-section of 2.5 mm² (for example, VVG 3x2.5 produced by LLC); • 16 Ampere SCHUKO type socket with grounding contact; • polypropylene (PP) pipe PPR PN 20 with a diameter of 20 mm, used in cold and hot water supply systems; • water socket PPR 20 X ¾ with internal thread; • connector PPR 20 X ½ with union nut; • square PPR 90 degrees 20 mm; • ¾ inch HP/HP square; • sealing tape.
The number of pipes and fittings is calculated taking into account the distance of the dishwasher from the cold water distribution manifold.
Connecting the dishwasher to the electrical outlet
Please note that electrical installation work should only be carried out in full compliance with safety requirements.
In a pre-prepared groove, we lay a 3-core VVG cable to the installation box so that the end of the cable in it has a reserve length for reconnection.
It is recommended to install the socket at a height convenient for connection, and it should be placed to the right or left of the dishwasher. It is also important to note that it is recommended to connect the dishwasher through an RCD or automatic circuit breaker.
After laying and fixing the cable, we connect it in the panel in the following sequence:
• core with white insulation – lower terminal “2” of the difavtomat; • blue wire – lower terminal “N” of the difavtomat; • yellow-green core – free ground bus terminal
After laying the cable, we carry out finishing work and begin installing electrical accessories. Then we strip the cable in the installation box and connect the socket:
• conductors with white and blue insulation are connected to the outer terminals of the socket; • yellow-green conductor – with a central grounding terminal
Connecting the dishwasher to the water supply and drain
It should be noted that the connection of PP pipes must be made using the socket method. To do this, use a special apparatus for soldering (welding) polypropylene pipes.
First, we mark on the wall the place where the pipe will be laid from the distribution manifold to the place where the dishwasher is planned to be installed and prepare a groove of the required depth.
Then we screw a PPR connector with a union nut onto the free outlet of the distribution manifold. From it we measure a piece of pipe of the required length to the first corner, while leaving a margin of 15 mm for the connection on each side. We connect the pipe and fittings, controlling the position of the square. It should be directed towards the further movement of the pipe. We lay the pipe to the intended installation location of the water outlet. We make all connections as described above.
After connecting all the pipes along the marked area at the end of the pipe, we solder the water socket, fix it on the wall and seal the groove.
Screw the elbow HP/HP ¾ into the water socket using sealing tape. Then we screw a flexible dishwasher water supply hose onto it (supplied). We supply water and check for leaks.
Next, we connect the drain hose from the dishwasher to the sewer outlet through an adapter collar of the appropriate diameter. The diameter of the transition collar depends on the diameter of the sewer pipes.
Having completed all the construction and finishing work, we connect the dishwasher to an electrical outlet and install it in the opening prepared for it.
Thus, we installed the dishwasher, as well as its connection to the water supply, drain and electrical network. You can learn more about how to install a dishwasher and connect it to communications by watching our video.
How to connect a dishwasher to the mains
First of all, check the denomination. In other cases, connecting the Electrolux dishwasher to the mains voltage standard is allowed. The switch is located on the plug. If placed in the wrong position, the equipment will not work. The instructions do not say whether the dishwasher will break.
Always check the length of the cord on the manufacturer's or dealer's website; knowledge will help you choose a place to install the outlet. Don't place it low. A suitable height is half a meter from the floor, out of the reach of water and splashes from the sink. For compact models installed on a table, it is possible to use an outlet for a refrigerator or hob. It is worth assessing the throughput of the wire.
How to connect a dishwasher under the sink
If you think through the interior and buy compact appliances, then in a few square meters you can fit everything you need for a comfortable life, including a dishwasher. If it seems to you that there is no free space left in your small kitchen, look under the sink - is it possible to place the machine there? Actually, it’s possible, you just need a small built-in model. Let's see what's special about an under-sink dishwasher and what options manufacturers offer.
What kind of dishwashers are built under the sink?
Manufacturers are interested in growing sales, so they do not want customers to abandon dishwashers (hereinafter DMM) due to cramped kitchen space. A small unit can easily fit under the sink without taking up a single centimeter of free space. Miniature and narrow PMMs wash dishes just as well as their larger counterparts. Narrow and compact dishwashers differ from standard appliances only:
- Dimensions. Many consumers are interested in whether there are models with a width of 40 cm or even 30 cm. Why can’t the dishwasher be made so miniature? For equipment to perform its functions, its dimensions should not be less than necessary. Today, the optimal dimensions for compact cars are 55x50x44 cm.
- Capacity. Full-size machines can hold up to 14 sets of dishes, narrow ones - up to 10, compact - up to 6 sets. The last option is suitable for 1-2 people.
Most often, compact desktop-type units are used for installation - they are the easiest to hide in a cramped cabinet.
Pros and cons of compact dishwashers
By choosing small devices, you save on their cost, and they further save your resources.
- consume water and electricity sparingly;
- reasonable price - compact versions are much cheaper;
- equipped with all necessary functions;
- have a low noise level.
- limited capacity - up to 6 sets;
- It is problematic to wash large pots and pans - they either do not fit, or one item takes up the entire space of the chamber.
How to choose a PMM for washing?
Important parameters when choosing a built-in dishwasher:
- Sink width. As a rule, it is 55 cm. This means that the width of the device should be less than 55 cm.
- Cabinet height. It is necessary to measure the height from the floor to the sink to the nearest millimeter. Usually it is in the range of 80-85 cm. But due to the presence of a siphon and the deepening of the bowl, the actual value will be lower. If there is 30-40 cm between the bottom point of the siphon and the floor, placing the PMM under the washbasin will be impossible - not a single model will fit there. Before installing the dishwasher, you will have to completely dismantle the structure to change the configuration of the space.
You can place either a free-standing or partially built-in modification under the sink. But fully built-in devices are not so convenient for this purpose - they need a separate facade, so you have to remove the sink doors. The best option is custom-made furniture, then there will be no problems with installing the PMM.
Wiring for connecting a dishwasher
Three-core copper wire PVS3 is suitable for wiring household appliances. This is a tough and thick cord that easily holds its shape. Easily cut with pliers and peeled off the insulating layer. The specific gravity depends on the brand. The main thing is that PVA3 consists of three cores (the number is in the marking):
- two for phase (0 and 230 V);
- one for grounding.
Each core is braided with a fixed color: yellow, blue, white. We will find three types of cable PVS3 – U, T, UHL. The first option is intended for use outdoors at temperatures of – 40 – + 40 ºС; take note if the need to install electrical wiring outside the kitchen on the veranda looms on the horizon. Other versions are not suitable for outdoor use; they are used at temperatures of – 25 – +40 ºС. The maximum heating of PVA3 does not exceed +70 ºС.
The power of PVA3 depends on the cross-section of the cores:
- 0.75 mm 2 – 2.2 kW.
- 1 mm 2 – 2.64 kW.
- 1.5 mm 2 – 2.86 kW.
- 2.5 mm 2 – 4.18 kW.
- 4 mm 2 – 5.28 kW.
The operating voltage of the cord is 380 V, suitable for powering appliances from a 230 V outlet. If you plan to connect a countertop dishwasher in parallel with the refrigerator, you will need a thicker wire. Otherwise it simply won’t withstand the load. The same applies to microwaves and other equipment. If you are not sure what the electrics in your home can handle, contact a professional!
Extension cord is dangerous
It is not safe to use an extension cord in the kitchen: there is a risk of moisture getting in. You can forget about this if you constantly use it at work, in the living room, bedroom, corridor, balcony. Often it has to be used in the kitchen. However, it should be placed here with extreme caution, unless absolutely necessary. It is prohibited to place it in such a way as on a convenient sink stand. The sink is definitely not suitable for this. It is also not allowed to place it in a secluded, unsightly place under plastic water pipes. It can heat up when it breaks down and damage the pipes, opening the access of current to the water. It is strictly prohibited to place the extension cord under the tap, even the most reliable one, next to gas appliances (closer than half a meter).
Dishwasher socket
This must be a high-quality adapter without fail. When purchasing a housing, the thickness of the wire, the plug should be appreciated by the buyer. If the parts of the case are poorly fixed, the wire is thin, and the plug is made of rubber with obvious defects, it is wise to look for another option. And without knowing the names of trademarks, with a visual inspection you can form the correct opinion about the product being offered.
A dishwasher is a powerful household appliance that can operate unattended. Its installation is an important process that requires reading the instructions from the manufacturer. Most often, the manufacturer indicates that installation using an extension cord is possible. Another thing is that the extension cord wears out over time, increasing the likelihood of an accidental short circuit. In this regard, it is better to use it in extreme cases where the equipment can work autonomously. The dishwasher is usually connected to other appliances. They consume energy unevenly. The extension cord may not be able to withstand the load of several devices, and there will be no one nearby at that moment. Sometimes people go to the store leaving their equipment on. Thus, installing a dishwasher using an extension cord is still a risky undertaking.
Carrying device for connecting a dishwasher
The rules for connecting a dishwasher do not prohibit using a ready-made carrier by cutting off the plug and connecting it to the nearest outlet. The wire is nailed along the baseboard with soft clamps. Do not damage the insulation, otherwise there may be an electric shock when washing the floors.
Advantages of the method - the calculated throughput capacity has already been allocated for carrying; ask the seller for the value. The chance that the dishwasher will overload the network is reduced.
Pay close attention to network filters on personal computers that smooth out voltage ripples. They are inexpensive and suitable for our purposes. The throughput capacity is indicated. All that remains is to cut off the plug and connect the wire according to the rules. Grounding is available (although not always used).
We are dealing with water. For safety, use differential circuit breakers. This will protect household members from electric shock. The power of the machine is selected according to the technical specifications of the equipment. Without properly equipped grounding, the RCD does not function. In private households, provide a lightning rod, grounding branches and dig a circuit in the yard. The ability to weld metal corners for joining together assemblies will come in handy.
Grounding
In private homes, we do not recommend purchasing ungrounded appliances for your home. It’s easy to go out into the yard and make grounding for the dishwasher and other equipment yourself. You will need a scattering of metal corners and strips (for example, 40x4 mm). Without a welding machine, we cut the corners (for example, 40 - 45 mm with equal flanges) with a grinder or with hardworking hands into four pieces 2 meters long. A little longer or shorter is acceptable. The main thing is that the pieces are equal in pairs.
We take a drill and drill holes for the bolts to assemble a rectangular ground loop. The unpleasant things were left for later. Now that the connection to the Siemens dishwasher is half done, it’s easier to take up the shovel. Do not forget that the steel strip must be placed at one end on the contour using a bolt. A metal drill and patience will help. Now let's dig a hole. For example, do it near the wall of the house at a distance of 1 - 1.5 meters or a little further. The unpleasant thing is that the trench is dug in the shape of the ground loop. Ideally, the depth will be 2 – 2.5 meters, we believe that 1.5 meters will be enough.
The contour fits inside. In a good way, you need to cover it with anti-corrosion primer or special paint. To drain water, sand (compact) and gravel (it is permissible not to compact) are poured into the bottom of the pit. The upper part of the circuit should fit tightly to the ground to drain excess current. It is possible not to do drainage; if desired, repeat the operation from scratch after 4 years. We bring the grounding strip into the room, having first checked the resistance relative to the ground. Ideally, this is a fraction of an Ohm; in practice, it reaches 3–5 Ohms (bad). The resulting bus will allow you to connect a dishwasher and home equipment.
Let's calculate the grounding parameters; here we just provided a semi-industrial circuit suitable for home use. It's not scary to connect the dishwasher either. Take advantage of software products for calculations.
Connecting the dishwasher to the electrical outlet
Connecting the dishwasher can be done in just a few steps. Today, a dishwasher saves many women from routine work in the kitchen. Many women do not like to wash dishes and a dishwasher can solve this problem.
You can call a specialist to connect, but it is better to complete this process yourself. In this article we will tell you how to connect a dishwasher yourself.
How to connect a dishwasher with your own hands
A mandatory requirement for the kitchen of a modern apartment is the presence of a dishwasher. But before you can take advantage of all its benefits, the unit must be installed correctly. If you don’t involve a specialist, the lucky owner of the purchase will have to figure out how to connect the dishwasher with his own hands. The procedure is simple and is carried out in several stages:
- preparing the place where the device will be placed;
- preparing tools and necessary consumables;
- connection to sewerage and water supply;
- connecting to the mains without using an extension cord;
- performance check.
It should be remembered that the installation nuances depend on the design of the household appliance:
- free-standing;
- built-in;
- desktop
Preparing the site
When choosing a location, you need to take into account the design of the device. For a built-in device, a small reserve will be needed, which will be required for hanging the facade.
The space for a free-standing car is selected strictly according to its dimensions. The general requirements for the place where the device will be delivered are:
- unimpeded access to sewerage, water supply and electricity;
- drain at a distance of no more than 1.5 meters from the sewer to the dishwasher;
- the presence of a free outlet with grounding at a distance that allows you not to use an extension cord.
The location for a desktop machine is easier to determine. It does not require a permanent connection to the sewer. It is enough to choose a flat surface that ensures stability near the sink.
Set of tools and materials
In a well-equipped kitchen, where all the necessary communications are available, the unit can be installed using:
- electric drill;
- a set of screwdrivers (straight and curved);
- building level;
- adjustable wrench;
- scissors for cutting metal-plastic.
From the materials that will be needed for connecting to the sewerage system and other communications, you should prepare:
- a siphon with a fitting through which a drain will be organized;
- tee and shut-off valve for connecting to water;
- filters for deep cleaning, which prolongs the operation of the device, protecting it from dirt and rust;
- a hose that will be used as an extension cord if the standard tube is too short;
- socket and wire, if wiring is required;
- fumlent for sealing joints.
Tools and materials for connecting a dishwasher
First of all, you will need to prepare all the necessary tools to install it. You should also determine in advance what supplies will be used.
Here is a standard set of materials that will help to properly connect the dishwasher to the electrical network:
- Sewage siphon, which has two fittings.
- A small tee with a diameter of ¾.
- Stopcock ¾.
- Filter for deep cleaning.
- Grounded socket.
- Wire with suitable cross-section. The section must be able to withstand the load.
This was a list of materials to help you wire up your dishwasher.
Here is a list of tools that are needed to connect it:
- Drill.
- Curly screwdriver.
- Knife and scissors for cutting plastic pipes.
- Building level.
- Adjustable wrenches.
Installation location
It is necessary to designate in advance the place where the equipment will be located and where to install the outlet for the dishwasher. The best connection option is to install a separate, new electrical wiring line, rather than replacing an old outlet, for example. It is very convenient and rational. The load on the electrical network, insulating materials and conductors will be reduced due to proper current distribution. But if the wiring is in order, the socket is in doubt, then it is rational to replace it. Installing a dishwasher outlet will help reduce the risk of equipment damage when the plug is disconnected and more. All work must be carried out in accordance with the norms and rules of the PUE, GOST, SP.
The height at which the socket should be located
The dishwasher socket is located at a height of 10 to 50 cm from the floor. The floor is the surface on which flammable objects often end up. The floor and baseboard may be made of flammable materials. So the floor and the outlet must be separated by a certain distance.
It is advisable to place the outlet out of the reach of children. A height of 10 cm is safe from the point of view of the likelihood of the baseboard catching fire. However, this height will not prevent the child from pulling the cord. The socket for the built-in dishwasher, of course, can be located at the lower limit. This is good for built-in technology, but it's not all about it. Built-in appliances and a visible outlet are incompatible concepts. Built-in appliances imply the strict purpose of each outlet for one device. From this point of view, built-in technology loves counting. But not everyone will like it. If a height of 50 cm is selected, a small child will not be able to turn off the equipment.
It is desirable that all sockets of equipment of one group are located on the same line around the perimeter. The same height makes each room an element of a single space. Different will be an interesting touch. It is convenient to install sockets on the same line if there are hanging cabinets and more. Photos with this design make a very pleasant impression. The height of the dishwasher outlet is determined by the characteristics of the room and furniture, so the permissible values vary, and the number of possible options is large.
Much depends on the length of the equipment cord. The dishwasher does not involve replacing the power cord, but rather relocating the outlet. But there’s nothing wrong with that; of course, the dishwasher must have the necessary functions, and not a wire of the required length.
Distance from gas pipes
The socket must be installed at a distance of 50 cm from the gas pipes. The spark that jumps inside the socket is a phenomenon left behind a long time ago. If the electrical wiring is new, in accordance with all rules and regulations, there is nothing more to worry about. Modern materials help make housing safe, effectively protect against current and related threats, and reduce the level of emotional stress. And yet the risk of short circuiting and fire always remains. If the outlet is located at a sufficient distance from the gas pipeline, the consequences in case of an accident will be less.
Separate wire for powerful devices
It is advisable to install a separate power supply line if you have purchased a dishwasher. This will reduce the load. There are many powerful appliances in the kitchen that create voltage surges during operation. The dishwasher, perhaps, even dominates among them sometimes. It is advisable to install an additional circuit breaker on this separate 10-16 A electricity supply line.
A separate electricity supply line is normal in situations where it is a private house, for example, and the boiler is running, construction tools are being used, or a pump is connected. It is difficult to turn on a dishwasher, food processor, mixer, microwave oven, or refrigerator. Only wiring to each household appliance ensures safe operation of the equipment under such circumstances and conditions.
Modern wire for electrical wiring
According to the rules, the dishwasher must be connected to an outlet that is powered by a copper cable with a cross-section of 3x2.55 mm. Unlike aluminum conductor, which was previously used for wiring, copper conductor has more advantageous characteristics. Copper is more expensive than aluminum and has not been considered a rational choice for many years. However, those days are gone. Aluminum wire cannot be used to create electrical wiring today. A purchased dishwasher, boiler and any other equipment is a good reason to completely replace the electrical wiring.
The old electrical wiring with aluminum wires has not yet been replaced in some places. This is dangerous, of course, but the state does not intend to sponsor its widespread replacement, nor does the wire manufacturer. The undoubted advantage of copper wires is their insulating materials. So it’s worth following the rules - they make life easier, just like technology. And, of course, a mistake may be made in them. But finding it is not an easy task. The search will require time, practical experience, and skill.
It is advisable to ground the electrical wiring line and be sure to use a grounded outlet.
Choosing a location for installation
You should have thought through this step before purchasing this device. If you still haven’t decided on where to install it, then we recommend taking these nuances into account:
- The built-in dishwasher must match the size of the kitchen furniture. The kitchen set usually has a special place for its installation. If it is convenient for you, the dishwasher body can be placed in the closet.
- Remember that the distance to the sewer hole should not exceed 2 meters. If the sewer does not fit into the kitchen, then think about connecting the dishwasher in the bathroom.
- When choosing a location, keep in mind that there should be an outlet nearby. In this case, you will greatly simplify your work.
- If you purchased a countertop dishwasher, then you don’t need to think about the drainage system. You just need to fix the hose in the sink. There is no need for a siphon here either, since the water will drain away by gravity. Installing a dishwasher on a countertop is suitable for a small kitchen.
After determining the location for its installation, you can begin connecting the dishwasher to the sewer and electricity.
Dishwasher space
The type of machine body and, accordingly, the installation method should be selected based on the layout of the room. If a new appliance will be installed in an already equipped kitchen, it is more advisable to take freestanding appliances. In this case, it is not always logical to install a new furniture profile.
If the kitchen is being built from scratch along with the furniture, it is better to look at models of built-in machines . This way you can count on the most harmonious interior. In any case, there should be no objects in the installation area that could be damaged by water vapor escaping from the device during operation.
Standard fastenings are used . However, there are excellent models on sale that are designed for non-standard fasteners. In any case, you can see all these nuances in the furniture passport, incl. type of fastening and what machines it is suitable for. If the dishwasher you like is larger than the niche, you will have to look for another option; remodeling furniture is not an easy task even for a skilled craftsman.
Recommendations for placing kitchen appliances
Water connection
Here you will find a wiring diagram for the dishwasher. The connection of the water heater has a similar connection diagram from the central water supply. This stage is considered the most labor-intensive. First, you need to turn off the water supply.
Next you need to perform the following steps:
- Find the connection point for the flexible hose from the mixer to the metal pipe.
- Now you need to install a tee in this place.
- You need to screw a flexible hose from the mixer onto the tee.
- Connect the hose from the equipment itself to the tap.
If your dacha does not have running water, but you want to connect a dishwasher, you will need to install a special tank on the hill. For some models to fully operate, a pressure of 0.1 MPa will be sufficient. This pressure can easily be created by placing a tank of water at a height of 2 meters. As you can see, connecting a dishwasher yourself without running water is also not difficult.
We bring the drain
Connecting the dishwasher includes organizing the drainage. A drain siphon is best installed under your sink. In this case, unpleasant odors will not spread throughout the kitchen.
To connect, you need to connect your drain hose to the siphon. Remember that it must be tilted. At the point where the device is connected to the siphon, it is necessary to create a small bend. This will prevent water from coming out of the sink.
Connecting the dishwasher to the electrical outlet
Power to this device must be supplied to an electrical outlet. This outlet must be rated for 16 A.
The dishwasher has a fairly high power and that is why the wiring must withstand all the loads. To determine the required core diameter, it is best to use a cable cross-section calculation. Before connecting the washing machine, you also need to determine the cable cross-section. Even if you cannot carry out your own calculation, then you need to remember that the minimum cross-section should be 2 mm. Electricity to the outlet must be supplied from a distribution box.
Connecting a dishwasher without grounding is not allowed. This could put your life in danger. The dishwasher must not be connected to another electrical outlet. This can cause significant overload.
Final stage
We hope you understand how to connect your dishwasher to an electrical outlet. Now we will tell you about the final stage of connection. At the final stage, you need to level your device. Distortions should not be allowed, otherwise this may negatively affect the operation of the dishwasher.
After completing the installation work, you can start starting your device. First, you need to start the test mode of the device. To do this, run the dishwasher without dishes. Before applying voltage, check that all connections are correct.
Helpful installation tips
Here are some basic tips to help extend the life of your dishwasher:
- The drain hose must be connected directly to the siphon and not to the sink.
- The ground contact must not be connected to water or gas pipes. Grounding must come from the bus.
- The gap between the back wall of the dishwasher and the cabinet should be at least 5 cm.
- A carrier cannot be used. The dishwasher must only be connected through a separate outlet.
Source: vse-elektrichestvo.ru
Dishwasher socket
A dishwasher is a fairly powerful household appliance that requires compliance with installation and operation rules. Electrical safety is an important item in the list of these rules, so the outlet for the dishwasher must be correctly selected and installed.
Location of the electrical outlet for the PMM
To avoid short circuit or fire, place the socket:
- At a height of at least 50 cm from the baseboard.
- Away from pipes, sources of water and heat.
- To the right or left of the device.
- With free access so that the plug can be removed quickly and easily.
- When installing free-standing and built-in models, please note that the cord length is only 1.5 meters, and using extension cords and tees in the kitchen is inconvenient and dangerous. For a dishwasher built into a cabinet, you will need to make special holes for the cord, drain hoses, and water intake. Usually the kit comes with stencils to make it clear where to make the cuts.
- Do not connect the PMM to a socket for an electric stove.
Video on how to properly organize energy supply in the kitchen:
What type of socket is needed:
- Reliable case made of ceramic or carbolite, protecting internal elements.
- Availability of grounding.
- Moisture protection, backlight (optional).
- Copper wire, three-core with insulation, cross-section of at least 1.5 mm. Preferably 2.5 if you are going to connect a washing machine.
- Automatic circuit breaker for single-phase network 16A - installed in the panel, turns off the power supply in case of overload.
- Stabilizer - protects the network from voltage surges. Choose a device of a certain power. Power is calculated by summing all kitchen electrical appliances.
Electrical wiring installation
Installation of electrical communications is difficult to carry out without skills and experience, so if you are not familiar with this type of work, entrust the job to a professional. If you decide to do the wiring yourself, remember to follow safety rules.
- Decide where to install the socket to “draw a route” along which to lay the cable. Remember: the height from the floor is at least half a meter. This height of the socket is the safest.
- Prepare the place, arrange the cable, this can be done carefully using special cable channels so as not to drill into the walls. Which wire to choose is described above.
- Install the difavtomat in the electrical panel and connect the electrical wiring to it. Which machine to install depends on the load on the home electrical network, preferably at least 16A.
Dishwasher Cord Length
How to use existing connectors
You should know that the temperature conditions of the dishwashing process are set by heaters. Their power is measured in kilowatts, just like in a washing machine. This is at least two kilowatts. Power consumption is always indicated in the technical documentation. And in some models - right on the nameplate, in a visible place.
The socket used to connect the dishwasher to the network must be designed for these parameters. The location of the outlet is also important. It must be easily accessible for safe and quick removal and insertion of the plug, and located above the top edge of the kitchen furniture.
- If the outlet is located lower, closer to the floor, it should be easily accessible.
Typical dishwasher layout:
2 – zone of connection to the electrical network;
4 – drain into the sewer
Important connection details
In addition to the above, the electrical connection should not be located closer than half a meter to the kitchen sink. Water, and especially soap splashes, are not allowed to enter electrical connections. The dishwasher must use a socket with a grounding contact. If the outlet with the listed characteristics is ready, you can begin connecting the equipment. This requires a grounding-type plug that is compatible with your outlet. A 16 A connection is recommended.
- Never use an outlet located under a sink.
Even with a model from a well-known brand, an accident can occur due to non-compliance with operating rules. And if it's anything like what's shown below, an extension cord on the floor could be deadly.
You will also need a flexible wire with three stranded copper cores with a core diameter of 2.5 square meters. mm.
Electrical connection
To connect the dishwasher to a 220V network, you will not need many materials:
- three-core copper cable VVGnG-Ls 3*2.5mm2
- 16A socket “Schuko” type with grounding contact
- RCD or diffavtomat 16A with leakage current 30mA
A dishwasher (DMM) is not a particularly powerful consumer of electricity, such as a hob (from 7 kW and above). Its power usually does not exceed 2.0-2.5 kW.
Modern energy consumption models correspond to class “A” or “A+”. That is, in a year, approximately 220 kW will run on your meter.
Despite this, it is still advisable to connect the PMM at the repair stage to lay an independent cable line in a separate groove.
If your renovation has been completed a long time ago, and after purchasing the equipment you don’t feel like scratching the walls again and ruining the wallpaper, then you can make do with the existing outlet. Just be sure to make sure that it is protected by an RCD.
Connecting a dishwasher through a simple modular machine is extremely dangerous.
The socket should be placed at a convenient height - up to 90cm from the floor level.
At the same time, place it on the right or left side of the washing machine, but not behind it.
Please also take into account the fact that the total length of the cord with plug for this equipment rarely exceeds 1.0-1.5 m. Based on this, choose a place for the outlet so that you don’t have to use an extension cord later.
The outlet itself must, of course, be grounded. But not everyone has this same grounding. Especially in apartments in old high-rise buildings. Therefore, many people use regular ones, and everything seems to work fine. However, the level of protection will no longer be sufficient.
Roughly speaking, if there is a grounding contact and there is a current leak, then you will not even be able to turn on the RCD. The consequences of these leaks, even small ones, can be quite lethal.
With a simple socket, the shutdown will occur only at the moment when you touch the body, which is already energized.
And you will still feel this electric shock, at least at the initial moment.
Connection to water supply and sewerage
Connecting the dishwasher to the water supply can be done in two ways.
The first is when you are at the stage of construction or major renovation, and you can afford to lay separate pipes, trench walls, etc.
Automatic and socket for dishwasher
Connecting a dishwasher to electrical communications is a rather important task. Before you can simply plug a plug into an outlet, you need to prepare such an outlet. You also need to prepare and install a machine, a good wire, a moisture-resistant socket, and a voltage stabilizer. You may ask, why is all this needed? It may be enough to plug a tee into a regular outlet, and connect a refrigerator, dishwasher and microwave to it at once, but many people do this and nothing happens! We will examine this and other similar questions in the article.
Sewerage - making a drain
The equipment is connected to networks via hoses. Pipes should not be stretched, compressed, squeezed, or bent.
You can bring your car to the sewer using three methods:
- building a separate sewer line to the installation site;
- connection to the sink siphon;
- drain into the sink. I will say right away that this is the most inconvenient solution. You will have to constantly monitor the position of the hose and the reliability of the fastenings. Moreover, the pressure can cause the hose to jump off, causing a flood in the kitchen.
Dishwashers are equipped with a drain hose . Its length can vary, but as a rule it reaches one and a half meters. The hose is equipped with rubber cuffs at both ends, plus there is an elbow on one side. It is this that is connected to the drain of the device. There is a direct output at the other end. If the length is not enough, calmly replace it with another, longer one . But the diameter of the product must remain unchanged.
When connecting the dishwasher to the sewer, you must adhere to the following requirements:
- the hose should not touch the level of wastewater in the sewer pipes and siphon;
- the total route from the device to the drain point should not exceed three meters. There are manufacturers that allow the path to be extended up to 5 m, so check this point in the instruction manual;
- the hose is mounted in a zigzag pattern so that the top point of one wave is at least 80 cm, which is also specified in the instructions.
From this you can see that simply running a hose across the floor will not work . It is also undesirable to insert sewer pipes into the outlet at floor level or with a slight excess, since not all dishwashers are equipped with a check valve, which would prevent sewage from flowing back. Therefore, you should plan your route wisely to avoid such developments.
If there is no other option and you have to drain into the sink, you need to securely hold the hose in the sink for the duration of the wash cycle. To do this, it fits into a special holder and clings to the edge like a hook.
If you choose to connect to a siphon, you will need an additional fitting on the pipe. You can use ready-made solutions for connecting dishwashers, of which there are many on the market. Purchase those products that have a built-in check valve in the fitting nut . This is where a tool is needed.
This sewer connection method is implemented as follows:
- in the center of the grille in the drain hole we find and unscrew the screw;
- the old siphon is removed;
- remove the hose from the sewer pipe;
- a new siphon is installed, a connection is made to the sewer system, to the sink drain;
- Find an additional fitting on the siphon, unscrew the clamping nut, then you need to remove the O-ring;
- take the drainage hose of the machine, first of all put on the nut, then the o-ring;
- insert the hose into the siphon fitting and secure it with a nut;
- the hose is unfolded in such a way that a zigzag is formed from the device up to 80 cm, down to 50 cm, and then to the siphon.
Most dishwasher models have a special clip on the back of the housing to secure the hose, placed at just the right level. There is perhaps only one downside to such a drain - the drainage of waste water depends on the cleanliness of the siphon. Some users report increased noise from drainage .
The quietest kitchen appliances
The last option is to lay an additional sewer line to the installation site. This is the best solution for embedded, stationary solutions. With this method, almost silent drainage can be ensured.
Connection principles:
- at the point where the sink drain is connected, the elbow is replaced with a tee;
- a pipe is laid from the tee to the place where the dishwasher will be located;
- Along the entire route, the pipe is fixed to the wall in increments of 50-60 cm. Observe the mandatory slope of 3-4 mm for each meter of pipe;
- at the end, a pipe (30 cm long) and an elbow (90 degrees) are attached to the pipe. As a result, the exit should be raised half a meter above the floor level;
- a cuff is placed at the outlet to connect the drainage hose;
- The hose is connected to the dishwasher drain with an elbow and attached to a clip (it is located on the body);
- the last step is to lower the hose and insert it into the drain cuff.
Where to connect the dishwasher?
To begin with, let us once again voice the “truth”: if several large consumers are connected to the same outlet, an overload occurs, the wire will become very hot and may catch fire. Regarding the fact that “many people do this and nothing happens,” let’s say that in Russia every year thousands of fires occur, the cause of which is electrical wiring. And in most cases, the user himself is to blame for connecting too many consumers to an outlet or extension cord.
Dishwashers are large consumers that can create a significant load on the network. They need a good separate outlet. You cannot connect dishwashers to an outlet through an extension cord, just as you cannot connect a dishwasher to the same outlet along with other large consumers such as a kettle, microwave, refrigerator, washing machine, etc. Connecting several large consumers to one socket can only be allowed if this socket has been properly prepared in advance.
For your information! Preparation means installing the machine and laying high-quality electrical wiring with the design cross-section.
How to prepare for connecting a dishwasher? It is better to prepare a separate wire and socket for the dishwasher in advance, not only before purchasing the machine, but also before renovating the kitchen. After all, laying wires and tapping walls is quite a dirty job. Let's find out what you will need to connect your dishwasher to electricity.
Features of the selection of components
Before you organize a new outlet for your dishwasher, you need to purchase everything you need. We will need:
- suitable copper wire;
- machine;
- moisture resistant socket;
- Voltage regulator.
Any wire for connecting a dishwasher will not work. You need a three-core copper wire in PVC insulation with a cross-section of at least 1.5 mm. If you plan to connect another consumer to the outlet, then you need to take a wire with a cross-section of 2.5 mm, although of course you need to calculate the voltage of the second consumer and the dishwasher together. Electricians advise when organizing sockets to calculate the wiring cross-section with a margin, with the prospect of increasing the load, then there will be fewer problems in the future.
In addition to wiring, we will need a separate machine. The machine should be installed in the electrical panel; it will be needed in case of overload and will protect your home from fire. To connect a dishwasher, we need a single-pole circuit breaker for a single-phase 16A network.
Important! If you plan to connect several large consumers to the outlet, you will need a 20A circuit breaker.
Next, we need a special moisture-resistant socket. The body of such an outlet is perfectly protected from moisture penetration, so even if you accidentally splash water on it, nothing will happen. It is better not to install a regular outlet in the kitchen. In addition to wiring and sockets, you can purchase a voltage stabilizer. In our opinion, a voltage stabilizer is an absolutely necessary thing, especially in Russia, where power grids are always a problem.
A voltage stabilizer is a rather expensive part, so owners often neglect to install it, but in vain. A voltage stabilizer protects the electrical network from voltage drops or increases. One voltage drop can destroy all kitchen appliances in a second, including a dishwasher, so after saving 2000-7000 rubles, you can immediately lose 200,000 rubles, and maybe more, depending on how much your appliances will cost.
The voltage stabilizer is a special box with buttons and a sensor that displays information about the voltage in the electrical network on a special display. Any voltage stabilizer will not work either; you need to purchase a device with sufficient power.
In order to properly connect a dishwasher, you can, for example, purchase a Resanta brand voltage stabilizer, model RESANTA ASN-2000 N/1-C. If you need to connect other electrical appliances in addition to the dishwasher, calculate their total power. Modern stabilizers have several outputs for connecting several devices, the main thing is that the stabilizer itself pulls them.
If you are already registered, enter your login information!
Previous article Next article
Equipment power and wire cross-section
Hello!
I have heard about some difficulties that arise when choosing equipment and connecting it (which outlet is needed for an oven, hob or washing machine). In order for you to quickly and easily solve this, as good advice, I suggest you familiarize yourself with the tables presented below.
| Types of equipment | Included | What else is needed |
| Dependent set: el. panel, oven | terminals | cable supplied from the machine, with a margin of at least 1 meter (for connection to the terminals) |
| Email panel (independent) | terminals | cable supplied from the machine, with a margin of at least 1 meter (for connection to the terminals) |
| Email oven (independent) | cable, plug may not be included | euro socket |
| Gas panel | cable and plug for electric ignition | gas hose, euro socket |
| Gas oven | cable and plug for electric ignition | gas hose, euro socket |
| Washing machine | cable, plug, hoses about 1300mm. (drain, bay) | for connection to water, ¾ outlet or straight-through tap, Euro socket |
| Dishwasher | cable, plug, hoses about 1300mm. (drain, bay) | for connection to water, ¾ outlet or straight-through tap, Euro socket |
| Refrigerator, wine cabinet | cable, plug | euro socket |
| Hood | cable, plug may not be included | corrugated pipe (at least 1 meter) or PVC box, Euro socket |
| Coffee machine, steamer, microwave oven | cable, plug | euro socket |
Electrical connection at voltage 220V/380V
| Types of equipment | Maximum power consumption | Socket | Cable cross-section | Automatic + RCD⃰ in the panel | |
| Single-phase connection | Three-phase connection | ||||
| Dependent set: el. panel, oven | about 11 kW (9) | Calculated for the power consumption of the kit | 6mm² (PVA 3*6) (32-42) | 4mm² (PVA 5*4) (25)*3 | separate at least 25A (380V only) |
| Email panel (independent) | 6-15 kW (7) | Calculated for panel power consumption | up to 9 KW/4mm² 9-11 KW/6mm² 11-15KW/10mm² (PVA 4,6,10*3) | up to 15 kW/ 4mm² (PVS 4*5) | separate at least 25A |
| Email oven (independent) | about 3.5 – 6 kW | euro socket | 2.5mm² | not less than 16A | |
| Gas panel | euro socket | 1.5mm² | 16A | ||
| Gas oven | euro socket | 1.5mm² | 16A | ||
| Washing machine | 2.5 kW | euro socket | 2.5mm² | separate at least 16A | |
| Dishwasher | 2 kW | euro socket | 2.5mm² | separate at least 16A | |
| Refrigerator, wine cabinet | less than 1KW | euro socket | 1.5mm² | 16A | |
| Hood | less than 1KW | euro socket | 1.5mm² | 16A | |
| Coffee machine, steamer | up to 2 kW | euro socket | 1.5mm² | 16A | |
⃰ Residual current device
Electrical connection at voltage 220V/380V
| Types of equipment | Maximum power consumption | Socket | Cable cross-section | Automatic + RCD⃰ in the panel | |
| Single-phase connection | Three-phase connection | ||||
| Dependent set: el. panel, oven | about 9.5KW | Calculated for the power consumption of the kit | 6mm² (PVA 3*3-4) (32-42) | 4mm² (PVA 5*2.5-3) (25)*3 | separate at least 25A (380V only) |
| Email panel (independent) | 7-8 kW (7) | Calculated for panel power consumption | up to 8 kW/3.5-4mm² (PVS 3*3-4) | up to 15 kW/ 4mm² (PVS 5*2-2.5) | separate at least 25A |
| Email oven (independent) | about 2-3 kW | euro socket | 2-2.5mm² | not less than 16A | |
| Gas panel | euro socket | 0.75-1.5mm² | 16A | ||
| Gas oven | euro socket | 0.75-1.5mm² | 16A | ||
| Washing machine | 2.5-7(with drying) kW | euro socket | 1.5-2.5mm²(3-4mm²) | separate at least 16A-(32) | |
| Dishwasher | 2 kW | euro socket | 1.5-2.5mm² | separate at least 10-16A | |
| Refrigerator, wine cabinet | less than 1KW | euro socket | 1.5mm² | 16A | |
| Hood | less than 1KW | euro socket | 0.75-1.5mm² | 6-16A | |
| Coffee machine, steamer | up to 2 kW | euro socket | 1.5-2.5mm² | 16A | |
When choosing a wire, first of all you should pay attention to the rated voltage, which should not be less than in the network. Secondly, you should pay attention to the material of the cores. Copper wire has greater flexibility than aluminum wire and can be soldered. Aluminum wires must not be laid over combustible materials.
You should also pay attention to the cross-section of the conductors, which must correspond to the load in amperes. You can determine the current in amperes by dividing the power (in watts) of all connected devices by the voltage in the network. For example, the power of all devices is 4.5 kW, voltage 220 V, which is 24.5 amperes. Use the table to find the required cable cross-section. This will be a copper wire with a cross-section of 2 mm2 or an aluminum wire with a cross-section of 3 mm2. When choosing a wire of the cross-section you need, consider whether it will be easy to connect to electrical devices. The wire insulation must correspond to the installation conditions.
| Laid open | ||||||
| S | Copper conductors | Aluminum conductors | ||||
| mm2 | Current | Power, kWt | Current | Power, kWt | ||
| A | 220 V | 380 V | A | 220 V | 380 V | |
| 0,5 | 11 | 2,4 | ||||
| 0,75 | 15 | 3,3 | ||||
| 1 | 17 | 3,7 | 6,4 | |||
| 1,5 | 23 | 5 | 8,7 | |||
| 2 | 26 | 5,7 | 9,8 | 21 | 4,6 | 7,9 |
| 2,5 | 30 | 6,6 | 11 | 24 | 5,2 | 9,1 |
| 4 | 41 | 9 | 15 | 32 | 7 | 12 |
| 6 | 50 | 11 | 19 | 39 | 8,5 | 14 |
| 10 | 80 | 17 | 30 | 60 | 13 | 22 |
| 16 | 100 | 22 | 38 | 75 | 16 | 28 |
| 25 | 140 | 30 | 53 | 105 | 23 | 39 |
| 35 | 170 | 37 | 64 | 130 | 28 | 49 |
| Installed in a pipe | ||||||
| S | Copper conductors | Aluminum conductors | ||||
| mm2 | Current | Power, kWt | Current | Power, kWt | ||
| A | 220 V | 380 V | A | 220 V | 380 V | |
| 0,5 | ||||||
| 0,75 | ||||||
| 1 | 14 | 3 | 5,3 | |||
| 1,5 | 15 | 3,3 | 5,7 | |||
| 2 | 19 | 4,1 | 7,2 | 14 | 3 | 5,3 |
| 2,5 | 21 | 4,6 | 7,9 | 16 | 3,5 | 6 |
| 4 | 27 | 5,9 | 10 | 21 | 4,6 | 7,9 |
| 6 | 34 | 7,4 | 12 | 26 | 5,7 | 9,8 |
| 10 | 50 | 11 | 19 | 38 | 8,3 | 14 |
| 16 | 80 | 17 | 30 | 55 | 12 | 20 |
| 25 | 100 | 22 | 38 | 65 | 14 | 24 |
| 35 | 135 | 29 | 51 | 75 | 16 | 28 |
Wire markings.
The 1st letter characterizes the material of the conductor: aluminum - A, copper - the letter is omitted.
The 2nd letter means: P - wire.
The 3rd letter indicates the insulation material: B - polyvinyl chloride plastic compound shell, P - polyethylene shell, P - rubber shell, N - nairite shell. The brands of wires and cords may also contain letters that characterize other structural elements: O - braid, T - for installation in pipes, P - flat, F - folded metal sheath, G - increased flexibility, I - increased protective properties, P - braid made of cotton yarn, impregnated with an anti-rot compound, etc. For example: PV - copper wire with polyvinyl chloride insulation.
PV
Installation wires PV-1, PV-3, PV-4 are intended for supplying power to electrical devices and equipment, as well as for stationary installation of lighting electrical networks. PV-1 is produced with a single-wire conductive copper conductor, PV-3, PV-4 - with twisted conductors of copper wire. The wire cross-section is 0.5-10 mm2. The wires have painted PVC insulation. They are used in alternating current circuits with a rated voltage of no more than 450 V with a frequency of 400 Hz and in direct current circuits with voltages up to 1000 V. The operating temperature is limited to the range -50…+70 °C.
PVS
The PVS installation wire is intended for connecting electrical appliances and equipment. The number of cores can be 2, 3, 4 or 5. The conductive core made of soft copper wire has a cross-section of 0.75-2.5 mm2. Available with twisted conductors in PVC insulation and the same sheath.
It is used in electrical networks with a rated voltage not exceeding 380 V. The wire is designed for a maximum voltage of 4000 V, with a frequency of 50 Hz, applied for 1 minute. Operating temperature - in the range -40...+70 °C.
PUNP
The PUNP installation wire is intended for laying stationary lighting networks. The number of cores can be 2.3 or 4. The cores have a cross-section of 1.0-6.0 mm2. The conductor is made of soft copper wire and has plastic insulation in a PVC sheath. It is used in electrical networks with a rated voltage of no more than 250 V with a frequency of 50 Hz. The wire is rated for a maximum voltage of 1500 V at a frequency of 50 Hz for 1 minute.
VVG
Power cables of the VVG and VVGng brands are designed for transmitting electrical energy in stationary alternating current installations. The cores are made of soft copper wire. The number of cores can be 1-4. Cross-section of current-carrying conductors: 1.5-35.0 mm2. The cables are produced with an insulating sheath made of polyvinyl chloride (PVC) plastic. VVGng cables have reduced flammability. Used with a rated voltage of no more than 660 V and a frequency of 50 Hz.
NYM brand power cable is designed for industrial and domestic stationary installation indoors and outdoors. The cable wires have a single-wire copper core with a cross-section of 1.5-4.0 mm2, insulated with PVC plastic. The outer shell, which does not support combustion, is also made of light gray PVC plastic.
This seems to be the main thing that it is advisable to understand when choosing equipment and wires for them))
Previous article Next article