How to replace a bearing in an Atlant washing machine
Belarusian Atlant models occupy a worthy place among inexpensive washing machines. This is not to say that they break down more often than other brands. Their problems are typical, one of the most common is bearing wear. If you do not want to contact the service for repair help, then we will tell you how to replace a bearing in an Atlant washing machine with your own hands.
When is replacement necessary?
If during the washing cycle you hear a hum, knocks that intensify during centrifugation, then it is time to replace the bearing of the Atlant washing machine. A prolonged collision leads to equipment breakdown beyond repair.
You can replace the bearing yourself only in cars in which the tank is disassembled. If this condition cannot be met, you should contact a workshop. For repairs, it is advisable to use original oil seals and bearings purchased in specialized stores. They can also be ordered online, but for this it is important to know the model of the Atlant washing machine (45Y82, 50C102, 50C82) and the part number.
Bearing in the Atlant washing machine
How to determine if a bearing is damaged and replace it?
The main sign of wear is a humming noise when spinning. Squeaks and knocks are especially audible at high speeds. Open the hatch door, rotate the drum by hand, and rock it up and down. If play is visible and uneven rotation occurs, this indicates bearing wear.
Don't delay replacement. Following the moving parts, the drum shaft will begin to deteriorate, which will lead to the replacement of the cross. And this is an expensive repair.
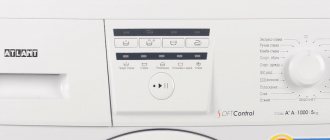
Everything in the Atlant washing machine is collapsible, so you can replace it yourself. It is enough to follow the step-by-step instructions.
What you will need for repair:
- Set of screwdrivers (phillips, flat).
- Open-end and socket wrenches.
- Hammer.
- Bolt or chisel.
- WD-40 liquid for unscrewing stuck fasteners.
- Lubrication.
- Repair kit.
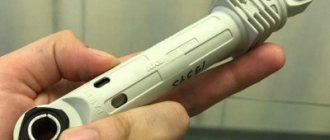
What bearings are in the Atlant washing machine? For example, element 6203+, 6204+oil seal 25*47*8/11.5 is suitable. It is advisable to buy original parts. You can find them in the online store or order directly from the supplier. If it doesn't work out, then Korean parts will do. They last longer than those produced in Russia.
Replacing a bearing in a washing machine with your own hands
Most types of washing machine repairs can be done yourself. But if cleaning the hoses is quite simple, replacing the bearing in a washing machine is very labor-intensive. However, even this type of repair can be done independently.
The main thing to remember is that each bearing has its own size, which must be strictly observed when searching for new spare parts.
We will tell you how to change the bearing in a washing machine with your own hands in order to extend the life of your household appliance without much expense.
Progress
To replace the bearing, you will have to completely remove the tank, disassemble it and get to the drum itself: the bearings are installed on it.
Symptoms of a problem
How to determine bearing failure at home? The first and main sign is increased noise during operation of the washing machine. Also, if you shake the drum by hand, you will notice play - the drum moves upward from the tank. And if you twist it by hand, it rotates unevenly.
At the first sign of a malfunction, you should immediately begin replacing the bearing in the Atlant washing machine. This is a breakdown that requires immediate repair.
Why is it dangerous to delay bearing repairs? When they are washed, the drum cross suffers, and uneven vibrations of the latter can damage the tank. As a result, repairs will cost many times more.
Assembly of the Atlant washing machine
Reassemble the washing machine in reverse order. But when installing the tank, the first step is to direct the shock absorber rods into their bodies, and then hang them on the springs. Connect the wiring based on your notes or photographs.
It is recommended to photograph the entire disassembly process, this will maximally ensure the correctness of the subsequent assembly of the unit.
If assembly is incorrect, especially incorrectly connecting wires, you may incur additional costs for damaged parts.
After assembling the product, you need to keep it without use for the period of time that the sealant manufacturer guarantees for it to completely harden. Then connect the device to all communications and do a test wash with a small amount of detergent.
This is done in order to remove possible dirt from the car and unpleasant odors resulting from the drying of the sealant.
If, after a test wash, no traces of moisture formed under the machine and it completed the program with an acceptable noise level, then replacing the bearing in the Atlant washing machine with your own hands was done at the proper level.
Preparatory work before repairing the Atlant machine
What tool will you need:
- screwdrivers: straight, slotted;
- keys: socket, wrench 12-19 mm;
- chisel, hammer;
- WD-40 product;
- replaceable bearings, as well as oil seals - buy taking into account the brand and model of SM;
- lubricant;
- sealant.
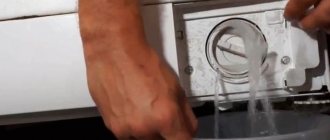
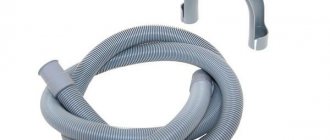
Unplug the washing machine. Turn off the water and prepare a container for draining. By unscrewing the inlet hose from the SM body, drain the remaining water, and do the same with the drain filter. It is located behind the hatch, at the bottom of the front panel. Open the hatch and unscrew the filter.
Having moved the washing machine away from the wall so that it is convenient to move, get to work.
List of required tools
Technically, any man who has certain tools and basic knowledge regarding the structure of an Atlant brand washing machine can replace the drum bearings.
Advantages of self-repair:
- saving money;
- receiving moral satisfaction from the work done;
- respect for family members.
Replacing a part in a washing machine
So, you have decided to repair the Atlant washing machine yourself. First of all, check if you have all the tools at hand:
- screwdriver (straight and slotted);
- socket and socket wrenches 12-19 mm;
- hammer and chisel;
- replaceable bearings (make sure they match the brands of Atlant washing machines - 45Y82, 50C102, 50C82);
- lubricant and sealant for anti-leak treatment.
Once you have completed collecting the necessary materials, you can begin the replacement process itself.
Bearing
Do-it-yourself bearing replacement
Having laid the tank on a flat surface, proceed to disassembly - Atlant has a collapsible tank, so there is no need to saw it.
Now you will learn how to change bearings correctly:
- Unscrew the bolts of the front counterweight and remove it.
- Pry up the inner clamp of the cuff, remove it and the rubber so as not to stain it during disassembly.
- Remove the screws holding the two halves of the tank. Remove the top.
- Turn the second part over.
- Remove the pulley. Try to unscrew the central bolt with a wrench - first fix the pulley so that it does not rotate.
- If the bolt does not budge, spray it with WD-40.
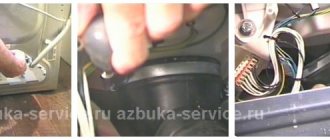
The drum comes out next. Gently hit the bushing with a hammer several times and pull the drum out.
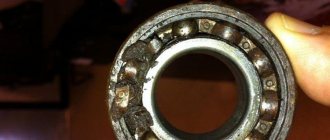
Using a chisel and hammer, knock out the inner and then the outer bearing. You need to hit carefully, evenly, only on the outer ring.
Clean the seat before replacing. You can apply WD-40 to soak off all the dirt.
Now you see what bearings are in the Atlant washing machine. If you have not purchased parts in advance, you can do this in the online store, indicating the make and model of the SMA.
Proceed with installation:
- Position the smaller bearing in the socket. To ensure it fits snugly in place, lightly tap the outer ring with a hammer.
- Do the same with the large bearing.
- Install the oil seal on top, lubricating it with grease.
You have completed the task. All that remains is to assemble the tank, and behind it the machine.
For reliability, lubricate the edges of the tank with sealant. Connect the halves and then bolt them together.
You already know how to assemble the washing machine: all steps must be repeated in reverse order. Run the program and check the new parts.
As you can see, even a beginner can change the bearing. The main thing is care and safety precautions. Follow the instructions and everything will work out. A video on the topic will help you:
Bearing replacement instructions
Now all that remains is to dismantle the old bearing and install a new one, it all looks like this:
- remove the front counterweight;
- unscrew the bolts that hold the front of the tank;
- turn the tank upside down, that is, with the pulley up, and unscrew the bolt in the center, then remove the pulley and belt;
- after which the drum can be safely removed from the tank, which is what we do;
- now, using chisels, knock out both bearings;
- After dismantling two bearings, the landing site for new parts must be thoroughly cleaned. This is exactly what WD-40 lubricant was needed for; when you remove all the dirt, wipe the area dry;
- Now carefully install both bearings, first the outer and then the inner, driving them in with light blows of a hammer;
- from the inside, install the oil seal after lubricating it. It will prevent water from entering the bearing itself.
The replacement is complete, all that remains is to reassemble everything in reverse order. However, before this, it is advisable to look at other parts of the main compartment of the washing machine, and make sure that they do not need to be changed or cleaned, such as the anti-scale heating element and other little things.
We told you about how to replace a bearing in an Atlant washing machine; this operation is not that complicated. However, if you do not want to repair the washing machine yourself, or are afraid of damaging something during the replacement, it is recommended to call specialists who will do everything quickly and efficiently.
See also:
- 7 best Gorenje washing machines according to customer reviews
- 7 best washing machines under 20,000 rubles according to customer reviews
- 8 best narrow washing machines according to customers
- 8 best BEKO washing machines according to customer reviews
- 10 best washing machines from Samsung
How to replace a bearing in an ATLANT washing machine?
Washing machines from the Belarusian manufacturer ATLANT have firmly established themselves in the market. It cannot be said about them that they fail more often than other units. All breakdowns are typical for this household appliance. More often than others, the problem of bearing wear occurs. If you want to fix this problem yourself, then in this article we will look at how to do it correctly.
Do it yourself: replacing a bearing in a washing machine
If the bearing in your washing machine is humming or has completely “crumbled,” then replacing it is simply necessary so that the machine can continue to function. The machine will not function efficiently if the bearing has failed. But it's not such a difficult job - take out the old one and install a new one. Indeed, you can handle everything yourself if you follow the instructions.
Content:
Before you begin the repair itself, prepare the necessary tools, as well as those spare parts with which the replacement will be carried out. And you really need a lot of tools. To ensure everything goes well, try to find everything on the list.
Before replacing a bearing in a washing machine, you need to read its instructions.
Necessary for repair:
- Metal simple hammer;
- Pliers;
- Screwdrivers – slotted and Phillips;
- Set of open-end wrenches;
- Metal rod;
- Silicone sealant;
- Waterproof bearing grease (sometimes lithol is also suitable).
It’s also good to have a camera on hand, or at least a camera on your mobile phone, in order to record the repair process. What follows what, how the replacement process went, for a beginner who makes repairs with his own hands, such a recording of the process will be useful. At least for the first time.
Spare parts for repair: how to replace a bearing on an automatic washing machine
The spare parts you will need are an oil seal and two bearings; you will have to buy them. In order not to buy a pig in a poke, it is easier to first disassemble the machine, get out the broken parts, then use the numbers to find originals or analogues of the parts. It’s good if you decide to replace old parts with original spare parts.
Calling a repairman and entrusting the job to a professional is the most convenient option, which guarantees you that all the work will be done correctly
You need to purchase bearings specifically for washing machines. This is a guarantee that the element in the design will not be foreign. As a rule, such bearings are of the closed type. It may be worth contacting a specialist store that sells parts for your brand of washing machines.
Disassembly: how to remove a bearing from a washing machine drum
When everything is ready, the tools are at hand and the spare parts have been purchased, you need to disassemble the car. It all starts with removing the top cover. To remove it, open the two screws that are located on the back wall of the machine. Then slide the cover back and lift it up. Place the removed cover aside for now. That is, doing it yourself is quite simple, as you can see.
To remove a bearing from a washing machine drum, you don’t need any special tools, except for a puller that carefully picks up the bearing race and removes it from the shaft
What to do next:
- Next you need to remove the upper instrument panel. Before unscrewing it, you must remove the powder tray. You need to pull it out, press a special plastic button, and pull the tray towards you. Set that aside too.
- To remove the dashboard itself, unscrew several screws - it all depends on the model of the machine, but definitely several of them are located in the area of the powder receptacle. Unscrew everything, remove the instrument panel.
- There is a control board installed on the panel, it is connected by wires, and they will not allow you to remove it entirely. And to remove it completely, remove all the chips with wires from the sockets, and then put the top panel aside too.
There is an option not to disconnect the wires at all, let them hang together with the panel, but for safety reasons this option is out of the norm. You may simply damage the wiring. Then the bottom panel is removed - use a screwdriver to press the latches that hold it in place.
Recommendations: how to change the bearing in an Atlant washing machine
Next you should remove the cuff. This is a rubber band, one end is put on the tank, the other on the front panel, and it is secured with a clamp. It needs to be removed. Find the perimeter of the elastic with your hand, feel for the small spring that connects the ends of the clamp. Pry this thing up with a flat-head screwdriver, and then pull it out together with the clamp. Then remove the front edge of the cuff and tuck it inside the tank.
It is easy to understand that it is the bearing that has broken and the washing machine needs to be repaired; just listen to the sound; if it is faulty, you will hear an unnatural knocking sound
Further self-disassembly proceeds as follows:
- Latch the car hatch, unscrew the bolts holding the panel, carefully remove it from the hook;
- Moving this part towards you, remove the wire to free the front wall - this will give access to other parts of the device;
- Then you need to disconnect the drain pipe; to do this, unscrew the clamp;
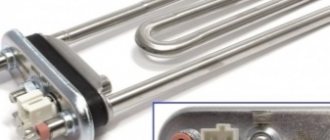
- Next, disconnect the heating element, remove the back wall, carefully disconnect the wires going to the heating element (the wiring is completely disconnected);
- Get rid of the counterweights, unscrew them, disconnect the water level sensor, disconnect the flavors;
- The tank is not heavy, it is easy to pull it out; you need to free the container from the springs on which it is supported;
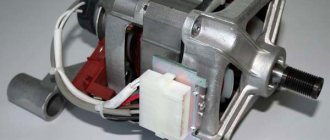
- Then you need to remove the belt, after which the engine is unscrewed.
Next comes such an important step as disassembling the tank. You need to separate the halves that make it up. On the back half you will see the drum itself. It must be disconnected very carefully.
Causes of failure
There may be several reasons for this failure.
- Overload during washing when the weight of wet items exceeds the permissible load weight. In this case, there is an excessive load on the bearing assembly, which, in turn, reduces its service life.
- Oil seal that allows water to pass through. If water gets into the bearing through the seal, severe corrosion will occur, which will destroy the structural part in question.
- The machine is not level. Many people are faced with the problem of the machine “running away” from its place while washing. This happens because it stands crooked. This causes an imbalance at high speeds, and excessive vibration of great force causes the machine to move out of its place. This vibration negatively affects the bearings, since it is through them that vibration movements from the drum are transferred to the housing.
Symptoms of a problem
No matter how high-quality your washing machine is, this does not mean that it will never break down and its mechanisms are not subject to wear and tear. Any equipment has its own service life or its individual components. Thus, washing machine bearings have a service life of 6-10 years. When the period expires or there is a need to replace them, it is necessary to replace them and thereby extend the service life of the device.
Malfunction of the bearings can occur much earlier than expected if the machine is subjected to severe operating conditions, as described above. If this did not happen, but the bearings still broke, in this case a factory defect cannot be ruled out.
Used parts can be heard during the spin cycle . They begin to hum, and when worn too much to creak. Such sounds indicate an urgent bearing replacement. In addition, you can check the drum for play. You just need to rock it up and down. The backlash will make clicking noises.
If these problems are identified, it is necessary to replace it as soon as possible . Otherwise, after the drum shaft breaks the bearing itself, it will begin to break its seat.
If it is not possible to repair the equipment yourself, then contact a specialist. Otherwise, you can get to the point where simply replacing the bearings will result in the need to replace the machine with a new one.
Preparing for replacement
First, you need to prepare a number of tools that should always be at hand when replacing a bearing, namely:
- hammer with a blunt chisel;
- screwdrivers, both types (flat and Phillips);
- 19 and 12 mm wrenches and socket wrenches, and a set of hex keys;
Among other things, you will also need consumables:
- bearing grease;
- rag;
- WD-40 lubricant;
- bearing seal;
- a new set of bearings (replacement parts must be original ones of the same model; you can find them in any company store or order them online).
Preparation for repair
To carry out repair work, you need to prepare all the necessary tools and new spare parts, this will reduce the repair time. You will need a simple set of tools, namely:
- Phillips and flat screwdriver;
- set of socket heads;
- set of open-end wrenches;
- hammer.
It’s good if at the time of repair you have the necessary bearing repair kit and oil seal.
You can purchase the necessary repair kit at a specialized store or at a service center for repairing household appliances. To do this, you need to know the exact model of your ATLANT washing machine so that the seller can find exactly the parts you need. You shouldn't try to save money on spare parts. There will not be a big difference in price between good and not so good bearings, but a product of dubious quality can lead you to the need for repeated repairs in the near future.
The bearing assembly carries a large load, so be sure to inspect it when choosing. It should not jam or spin tightly.
When everything is ready, you can begin to disassemble the device for repair. Before starting any manipulations with household electrical appliances, you must unplug them from the outlet.
- The first step is to remove the top cover. It is attached with 2 screws from the back and is removed from the machine by sliding it towards itself by 2-3 cm. After it comes out of the grooves, it can be removed.
- Next, we dismantle the hatch for detergents. Underneath there are screws securing the hopper that need to be unscrewed.
- Now you can remove the front panel.
- Having unscrewed the transverse struts , we remove them to the side.
- On the inside of the case on the right you need to remove the control unit , after first disconnecting the small hose from it.
- Next, you need to remove the top concrete weighting material . It is secured with a long bolt that goes right through the entire weighting material.
- Now you can completely detach the hopper and put it outside. To do this, you need to disconnect from it all the hoses that are fixed on self-clamping clamps.
- We dismantle the outer clamp on the hatch cuff and insert the sealing rubber into the inside of the housing.
- To continue work, you must remove the back panel of the machine.
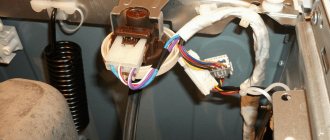
- The next disassembly step will be to disconnect the attached electronics, namely the heating element and temperature sensor. In order not to make a mistake with the connection during assembly, you need to mark the wires or photograph them.
- Now you can remove the engine itself, after first removing the drive belt. Removing the engine is not difficult - it is bolted on, and the wiring is assembled into a single terminal that can be simply unfastened.
- Next, you need to loosen the clamp securing the hose to the pump.
- It will be possible to unscrew the shock absorbers, but you don’t have to do this, since the rod itself will come out of the tank when you start to remove it.
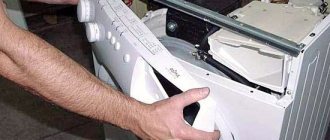
When everything necessary has been removed from the housing, it is necessary to check that the tank is held in the housing base only by the springs. Now you can completely remove it from the washing machine (in which the drum bearings are located) for further repairs.
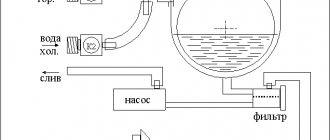
In the washing machine described, the tank consists of two halves, which can be disassembled and repaired. In order to disassemble the tank, you will need to unscrew 20 bolts located around the perimeter. Now we divide the tank into 2 parts. Manipulations will occur with the rear part, on which the bearings are located.
How to disassemble the Atlant washing machine
To disassemble the Atlant washing machine, you don’t need fancy tools, just ordinary screwdrivers, socket heads and a few other devices.
To quickly complete the entire procedure, it is advisable to purchase a new set of bearings and oil seal in advance.
The necessary parts can be purchased in specialized stores or services by telling the seller only the brand and model of your product. You should not save on new components, because you are already saving on DIY repairs and parts of dubious origin will lead you to this procedure again in the near future.
Bearings for washing machines carry a huge load and when choosing their quality, special attention is paid in production.
Repairs must begin by disconnecting the device from the outlet and other communications:
- Unscrew the top cover of the product and remove it from the body, moving it away from you a couple of centimeters (it is secured by 2 screws in the rear end part of the cover);
- Remove the powder tray and unscrew the screws securing the hopper under it;
- Next, dismantle the upper front panel;
- Unscrew and remove the spacer metal cross bars;
- We remove the electronic control unit from the inside of the case on the right, first disconnect the thin hose from it;
- Remove the top concrete weighting material;
- Disconnect the tray hopper from the hoses and remove it outside;
- We remove the outer clamp of the hatch cuff and tuck the elastic band inside the machine body;
- Remove the back cover of the washing machine;
- Disconnects the wires from the heating element and temperature sensor, rewrite the correctness for subsequent connection (it is better to take a photo);
- Unscrew the engine mounting bolts and remove it from its hinges;
- Loosen the hose clamp on the tank (hose to the pump);
- The shock absorbers can be unscrewed from both the tank and the body, but you don’t have to touch them at all (their rods will come out of the bodies themselves).
How to change?
After successfully disassembling the machine, we proceed directly to replacing the bearing. To do this, you will need to complete the following steps.
- Unscrew the pulley fixing bolt on the drum and remove it with a shaking motion.
- You will need to screw another one in place of the fixing bolt , and use a hammer to knock the drum shaft out of the bearing. After dismantling the drum, it is necessary to inspect the shaft and the brass bushing on it. The sleeve and shaft should not be damaged and should have a smooth, even shape. If one of these elements is damaged, the entire crosspiece will need to be replaced.
- Now remove the old oil seal from the hub with a screwdriver.
- Next you need to knock out the old bearing . You can use any tool for this. It is important not to damage the seat. If the impacts are made pointwise, then it is necessary to apply them crosswise - this will avoid distortion of the bearing race and damage to the seating area.
- After removing all worn elements, it is necessary to clean the hub and tank halves from dirt and foreign particles.
Before installing new bearings, it is necessary to lubricate all seats to facilitate driving of new parts.
Now we begin to install new mechanisms.
- The small bearing is installed first and with careful blows of a hammer on the outer race it is fixed in place. When installing a new bearing, only strike the outer race to avoid damaging the new part.
- Now it's the big one's turn . It installs in exactly the same way as the small one.
- We fill the oil seal with water-repellent grease and install it in its place . This can be done by hand without resorting to a tool.
- Now carefully (so as not to damage the oil seal) install the drum into the bearings, installing the pulley on the back side and tightening it all with a fixing bolt.
- Before assembling the tank, its half must be lubricated with a special sealant that can withstand high temperatures and aggressive environments.
Change the bearing on the Atlant washing machine
In Atlant washing machines, the tank has a collapsible design, which makes it easier to carry out repairs to replace the bearing in its hub. To disassemble it into two halves, you need to unscrew about two dozen bolts around its perimeter.
Then we simply separate the halves of the tank and put the front one aside, our further actions will be directed towards the rear part of the tank with the wheel bearings:
- Unscrew the bolt securing the drum pulley and remove the wheel by shaking;
- We screw a similar one in place of the bolt, and hit it with a hammer to knock the drum shaft out of the bearings. After removing the drum from the tank, we pay attention to the condition of its shaft and the brass bushing on it. The bushing must have a smooth, even surface; if the surface of the part is damaged, it is necessary to replace it or the entire drum cross;
- Then, using a minus screwdriver, remove the oil seal from the hub;
- Using a hammer and chisel (or a piece of thick-walled metal pipe), we knock out the old worn bearings from the hub. You need to knock them out by hitting them “crosswise” around the circumference of the inner race of the part, having previously lubricated the hub to facilitate the release of the bearing from the tank;
- Afterwards, it is necessary to clean the hub and the junction of the tank halves from foreign deposits and dirt.
Prevention measures
In order for the bearings in the ATLANT washing machine to serve for a long time, you need to follow some rules.
- Do not overload the drum. The instructions describe in detail what kind of laundry and how much maximum can be loaded into the machine.
- When washing, use high-quality detergents. This will reduce deposits inside the washing machine and extend its life.
- When installing the machine in its place using a level, try to align it as much as possible along all planes . This will avoid unnecessary vibration.
A video about replacing a bearing in an ATLANT washing machine is presented below.
Instructions for dismantling the tank
Now we will tell you how to replace bearings. In most Atlant washing machines, the tank compartment is removed through the top of the machine, which makes the task a little more difficult. The dismantling steps will be as follows:
- take out the powder hopper;
- disconnect the top cover of the washing machine from the fastenings;
- remove the front panel, carefully as there is a control panel there;
- Unscrew the counterweight plate from its mountings and remove it.
- unscrew the screws and remove the water supply hose along with the powder receiving compartment;
- Now you need to disconnect the pipes;
- remove the back cover and disconnect the hoses and all wiring from the heating element and the engine;
- remove the lower tank shock absorbers;
- carefully remove the control unit;
- remove all drain and supply hoses;
- remove the cuffs;
- grab the springs and pull the tank compartment up.