The more often you use your printing device, the faster you will encounter problems such as replacing an empty cartridge. The first signs that the cartridge is running out may appear even before the device refuses to print a document. Modern manufacturers are playing it safe, and technology offers to replace the consumable a little earlier than it is completely empty: as a rule, there is still a few percent of working ink in stock. This is done so that the replacement does not become a surprise and does not paralyze the work of the office. How to change a printer cartridge to continue printing bright, rich pages?
How to determine when a cartridge needs to be replaced
You can determine that the old cartridge is worn out and requires installation of a new element by the following signs when printing:
- The formation of white vertical or horizontal stripes on a leaf. In laser devices, you can lightly shake the consumable to temporarily solve the problem; in inkjet models, you need to change it immediately.
- Not all letters are printed, there are no words in full, the text on the edges of the sheet is not visible.
- The gray tone of the text is unclear.
- One of the shades is missing or the color rendering is incorrect and does not match the original.
- “Replace Toner” appears on the machine display. Typically, the function is available on more expensive models equipped with a special chip (although some manufacturers install the chip on all their products). The message appears in advance when there is still some dye left in the consumable.
Replacement Warning
Preparing to replace the cartridge: general tips
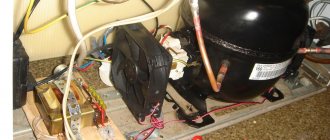
Each printer, whether laser or inkjet, has its own installation and fastening features for the ink tank. Before changing the cartridge in the printer, study the features of the equipment. Improper removal of the paint container can lead to failure of the entire device.
Here are general tips on how to change a printer cartridge:
- Do not use the printer without a cartridge. Replacement must be carried out immediately, especially in inkjet printers, otherwise the printing element may dry out, which will damage the entire device. Use “hot swap” - remove the used cartridge and immediately install a new one.
- Do not touch the electrical contacts, nozzles, image drum, or moving parts of the cartridge with your hands. You can damage not only consumables, but also the equipment as a whole.
- After installing a new cartridge, do not remove it unless necessary. Frequent removal may also cause the ink to dry out and cause printer failure.
- Consider the cartridge type. They can be chipped or unchipped. You cannot replace one with the other; compatibility problems may arise. Cartridges with a chip are found on more technologically advanced printing devices, while those without a chip are found on economical versions of office equipment. Chip cartridges have a set limit on the number of printed sheets. Once the limit is exceeded, the device will not print, even if there is still half of the ink left. For example, Samsung or Xerox printer models with a chip block the operation of the entire device when a toner replacement message appears. But the chip does not affect the operation of HP and Canon printers in any way, that is, the device will print for some time.
- Look at the markings. The marking allows you to select the appropriate cartridge, just rewrite it or take a photograph and order a new consumable with the same marking. Write down the name of the printer and cartridge, check with specialists or look on the Internet what type of cartridge is suitable for you, and whether you can replace the original with a compatible non-original cartridge.
- Remove jewelry from your hands and wear gloves to avoid getting dirty and to avoid injury.
These are the basic rules you should know when replacing an empty cartridge yourself.
Any printer is simply nowhere without ink, which runs out very, very quickly. In addition, each type of printer has its own characteristics in cartridge recharging.
The correct choice of a new “consumable”
The cartridge that comes with or “starter” in the printer. Initially filled at 30–50%. And also not all models allow it to be recharged.
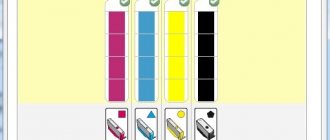
- To purchase something, first of all, you need to know how the future purchase looks visually. Laser and inkjet printer cartridges are fundamentally different. For the first option, this is a black plastic product 25-40 cm long and 7-20 cm wide.
For the second - small rectangular boxes, where the size of the longest side does not exceed more than 7-10 cm. - On the body of any cartridge you can find its number and brand. It can be indicated on labels or embossed on the plastic itself. When selecting a new substitute, you should clearly focus on these values. Before going to the store, be sure to mark it in your notebook or take a photo on your phone. You can also select a cartridge based on the make and model of the printer itself.
- Often the cost of original dyes can reach a third or even half the price of the printer itself (typical for inkjet technology). For laser lasers, branded consumables are also not within the “people's budget”. One way out of the situation would be to purchase substitutes produced by third-party companies. The quality of such goods may differ from the original and even more so from each other, depending on the price. Before purchasing, you should ask for reviews about the chosen option.
- The main characteristic of any cartridge is its resource. In other words, the ability to print a certain number of sheets per refill. This figure is indicated in its description, but with the expectation that the page will be filled with paint by 5%. In reality, this is not always the case. It may be more or less, but the average figures are 5%.
For devices that use ink, with the stated 120-140 sheets, you can actually make 90-100 black prints. For color shades, the numbers are even smaller - while the 50–60 indicated in the description, in reality it is 30–40. For a laser monochrome device, the average cartridge resource is about 1000–1500 pages.
What else do you need to know?
- Non-original cartridges may have a resource either less than the original or more. This characteristic must be found out and clarified directly from the seller in the store. Some products are of very high quality, last a long time and are not inferior in quality to “original” consumables.
- Increasingly, printers are equipped with chip cartridges, which automatically count printed sheets and ink or ink consumption. When purchasing a replacement part, you should make sure that it has a chip on it to ensure compatibility with your equipment.
- The use of substitutes during the warranty period may result in loss of warranty. Therefore, until the warranty period has expired, it is better to use the equipment manufacturer’s products.
Recommendations
As already mentioned, the model ranges of inkjet and laser printers and MFPs of different brands have their own characteristics. This applies not only to the design of equipment, but also to algorithms for replacing consumables. Before installing new cartridges, you should carefully review the relevant information.
It is important to remember that errors in removing the ink bottle or toner container can result in costly equipment repairs.
When replacing cartridges, you should consider important recommendations.
- Consumables should be replaced immediately after the ink or toner runs out. This is most important for inkjet printers, since there is a high probability of ink residues drying out in the print heads. We are talking about the so-called hot replacement, in which a new cartridge is replaced in place of an empty cartridge immediately after it is removed from the carriage.
- During all manipulations, it is necessary to avoid touching the moving parts of the cartridges, contacts, photodrums and nozzles.
- After installation, it is not recommended to remove the new consumable unless necessary.
- It is important to remember that there are chipped and non-chip models of ink and toner containers. However, they are not interchangeable. Cartridges equipped with a chip responsible for controlling ink volume are more expensive. As soon as the minimum mark is reached, the device will notify the user automatically. Thus, chips installed in printers and MFPs from Xerox and Samsung brands block the operation of all printing equipment in such situations. And representatives of the Canon and HP model ranges continue to function for some time.
- Particular attention should be paid to the correct choice of consumables . The best option would be to buy cartridges with the same markings.
In addition to all of the above, it is important to always remember safety rules. It should be noted once again that jewelry on the hands can cause injury. An equally important point is the chemical properties of refill materials (ink and toners). It is recommended to use gloves to protect exposed parts of the body from paint.
The following video demonstrates the process of replacing a cartridge in a printer.
Cartridge replacement steps
Each specific model of modern office equipment has its own design features. At the same time, the algorithm for replacing cartridges in printers and MFPs that print poorly looks standard. However, it is worth considering certain nuances at each of the provided stages.
All the necessary information is usually contained in the manufacturer's instructions, which are included with the delivery of the printing devices.
There are a number of differences in the process of replacing cartridges in inkjet and laser models of printers and multifunction devices. And they lie, first of all, in the design and functional features of these two types of equipment. Thus, inkjet printers use pigment ink supplied through nozzles. Laser cartridges are filled with powdered toner that melts under the action of laser beams. But regardless of the design features of the equipment, including carriages, replacing cartridges is carried out in three main stages. When performing all the operations provided for in the instructions, you will need to remove the non-working element, prepare a new one or a refilled one and install it in the printer.
Gaining access to the cartridge
The ink cans in an inkjet printer are located in a special compartment inside the device. This thing is called a “carriage”. To remove the cartridges, you first need to force it into the right place for this. Below are universal instructions for action.
- Plug in the equipment and start it with the button on the case.
- Remove all paper from the tray and close it.
- Open the back cover. Now you should wait a while until the carriage is in the right place for replacement.
- Leave the lid open.
If this option of getting paints does not end successfully, then you should clarify the list of replacement steps in the instructions for your model.
Also, as an option, but not recommended, you can unplug the power cord during testing (passes when turned on), when the carriage is not locked in the resting place. Use the method only if others do not help.
We take out the old one
As soon as office equipment informs the user that the supply of ink or toner has run out, it is necessary to restore its full functionality as quickly as possible. Naturally, this will require appropriate theoretical knowledge and practical skills. Inexperienced users are strongly recommended to study the instructions at the preparatory stage.
At the stage of removing the used cartridge, certain actions must be taken.
- From the very beginning, it is strongly recommended to remove all jewelry (bracelets and rings) from your hands, which minimizes the risk of injury.
- Disconnect equipment from the power supply.
- Remove the device cover. This operation will not cause any difficulties, since this structural element can be hooked onto a special tongue or recess. It is important to remember that the fuser of a laser printer may be hot, so you must be careful when removing the cover. Most often, cartridges are held in place by 2-4 clamps in the form of clips that will need to be folded down or snapped off.
- After freeing the cartridge from the latches, you should remove it by gently pulling the plastic casing. If it does not move from its seat, then you can rock it a little from side to side.
- As soon as you have managed to remove the paint reservoir, it must be placed on paper or oilcloth, since there may be ink or toner on it. In this situation, it is worth considering that the paint is difficult to wash off.
This scheme may have some differences for different models of printing devices. For example, in situations with inkjet MFPs, you will first need to open the scanner lid. When replacing the described design elements of laser devices, this item will be absent, since it will be enough to simply move the tray and remove the empty cartridge. Some difficulties may arise when dismantling the ribbon on dot matrix printers.
Preparing a new
After all the above manipulations are completed, you should pay attention to the new consumable.
First of all, you need to make sure that the purchased item is suitable for the equipment being serviced.
Experienced users recommend purchasing only original or compatible cartridges for specific models of office equipment. Today the market offers a fairly wide range of relevant products. In such a situation, problems with choosing cartridges, as a rule, do not arise. The new paint tank must be unpacked before installation. When removing the shockproof packaging, it is important to avoid any contact with the nozzles or drum. It is highly undesirable to touch these surfaces.
When preparing a new or serviced cartridge, care must be taken to protect the workplace, clothing and exposed parts of the body.
By the way, even new devices are not immune to ink leakage and toner spillage. The next step is to remove the safety tape protecting the contacts and nozzles. In situations with laser printers and MFPs, it is recommended to rotate the new cartridge several times before installing it, holding it in a horizontal position. This is done to distribute the toner evenly in the container.
Replacing the cartridge
Cartridges can be either original or non-original. Non-original ones are cheaper, but may not print as clearly as original ones, and they may break. You can also not buy cartridges, but refill old ones, it will be much cheaper. It all depends solely on your goals and budget.
Go to the store and show the written information about the cartridge or its photo to the seller. He will select what you need. If you understand such mechanisms, you can choose the type of cartridge you need by ordering it online so as not to waste time going to the store. Don't try to buy a cartridge yourself if you don't know which one you need. As a result, you will purchase a different type of cartridge that will not suit you and will only waste your money.
So, the cartridge is in your hands. Take it out of the box, but do not rush to remove it from the plastic packaging. The fact is that ink may remain in the toner, and this will affect the quality of the print. Take it in your hands and shake it a little.
This will distribute the toner evenly throughout the cartridge. Without doing this when printing, you may think that the cartridge is bad, when in fact there is nothing wrong with it. Now you can remove it from the plastic. Remove the protective film (colored tab) from the bottom. When performing this operation, try not to touch the print head itself. Small spots on it lead to significant deterioration of the print. Even if you touch it lightly, wipe it with a cloth.
The cartridge is ready. Now you can insert it into the printer. Place it in the cell and lock it in place. For a printer that has a retaining mechanism, make sure the cartridge is firmly seated. This will be indicated by a characteristic click when pressed.
Once you are sure that everything is in order, you can close the printer cover.
Perhaps a video instruction on how to change the cartridge will help you. This video shows the process of replacing a toner cartridge in an HP laser printer.
And in this video, replacing a cartridge in an HP inkjet printer.
Alignment
In some cases, the equipment may not perceive new cartridges correctly, for example, it may not correctly detect the color. In this case, alignment must be performed.
The procedure is as follows.
- The printing equipment must be connected to the PC, plugged into the network and started.
- Next you need to go to the “Control Panel”. You can find the corresponding section by clicking the “Start” button. You can also use the search bar on your computer.
- Find the section called "Devices and Printers." Having opened this category, you need to select the equipment model.
- Right-click on the model and select “Print Settings”.
- A tab called “Services” will open in front of the user.
- Find a feature called "Cartridge Alignment."
- The program will open instructions with which you can set up office equipment. After finishing the work, it is recommended to reconnect the equipment, start it up and use it for its intended purpose.
Print a test page
Printing test pages is required to evaluate the performance of the installed consumable and its quality. Defects (for example, white stripes or black spots) will be immediately noticeable on the sheet. This will allow you to determine the malfunction and replace the element with a suitable one before you begin direct use (for example, for printing photographs or documents).
Follow these steps:
- Connect the equipment to the PC (not all models have the ability to print a test page using the buttons on the case).
- Click "Start" on your computer desktop and go to "Toolbox" and then to "Devices and Printers." The name of the section may differ for different OS versions.
- Select the desired printer model and right-click on it.
- Open “Properties” and then go to the “General” tab.
- Click the Test Print button. If the printer is turned on and there is paper inside, a test page will begin printing.
- Wait until the sheet prints (sometimes it takes longer than when printing regular sheets).
Different printers have different formats and lists of items that appear on the test page. Usually this is text with different fonts and graphics. Color printer models use different colors so that you can evaluate the clarity of each shade.
The printing must be of high quality: clear lines without streaks or irregularities. Small defects can be corrected using software. To do this, on the “Maintenance” tab there are buttons for cleaning, checking nozzles, and aligning the head.
If these methods do not help, you can wash the inkjet printer head or cartridge. This work is best left to specialists. Consumables for laser devices may require the installation of a new photocell, drum or other components.
For some printers, you can create test pages using buttons on the body, which makes the procedure more comfortable.
Works with models: HP, Canon, Samsung
Single-component structures are a one-piece monoblock in which all parts and sections are located together (in one sealed housing).
In order to carry out a replacement, you should perform the following steps:
- Apply power to the device.
- Open the appliance door. Sometimes this requires pressing the reset key.
- Pull the cover towards you. These steps should release the cartridge.
- Pull the element at an angle towards you.
Not that hard, right? Difficulties can arise only in those models that have a locking function. You need to deal with them like this:
- Press the latch, sending it inside the housing.
- Open the stop mechanism.
- Press and hold the reset key, which is usually located on the side of the carriage.
Important! The case itself must be opened immediately before installation. Do not attempt to remove plastic packaging yourself.
- The powder inside the device may cake due to prolonged storage time. It is for this reason that it is recommended to shake the tank lightly about five times. It must be positioned in a horizontal plane.
- As you know, the print head is located at the bottom and is protected by a film with a color tag. The tag should be removed before installation, avoiding contact with components.
- Install the new component into the housing until you hear a characteristic click. If there is a thrust mechanism or locking mechanism, excessive force and sudden movements should be avoided. Please note that a correctly installed block moves smoothly along the guide components.
Important! Be sure to insert the new cartridge in the same position as the old one. Under no circumstances should the component being installed be turned upside down.
- After all the steps, you need to close the door and begin diagnosing the equipment. This process takes some time. After checking, you need to make a test print to ensure that the actions performed are correct.
Reinstallation specifics for different types of devices
The printer can be laser or inkjet. The subtleties of installation and the features of the cartridges depend on this (they differ in size and configuration). In the first version, the sheets absorb the composition; in the second, the pages are “baked.”
Technically, the procedure for replacing a cartridge in a laser and inkjet printer is approximately the same. Everything must be done carefully so as not to damage the element and equipment.
Laser printer
Laser equipment uses dye powder, which can spill out, so it is advisable to perform the procedure with gloves and discard the old cartridge immediately.
For some models (for example, Samsung equipment), when installing new consumables, you need to reset the toner counter or drum life.
Jet printer
Liquid paints are used for devices, so when removing an old element, you need to prepare a garbage bag or cover the table with paper so that the surfaces do not get dirty.
Cartridges in an inkjet color printer
For inkjet units, only individual ink tanks can be replaced, not the entire cartridge.
Some consumables for ink jets are disposable and cannot be refilled.
Checking the Print
To make sure that the cartridge is installed correctly and the device recognizes it, you need to print a test page - this can be done through the printer menu, from a computer, or using a special button for printing a test sheet, which is found in some models . It is especially important to carry out this procedure if analogue consumables were used for replacement, or ink was refilled. In color devices, such a page also helps to see the color gradation.
Features of replacement on different brands of printers
In some models, replacing consumables has its own characteristics:
- in the HPLaserJetProMFPM177fw and HPLaserJetcp1025colorpro samples, before replacing the ink, you must press the cartridge rotation button on the device and select the one that needs to be replaced, and you can open the compartment with consumables only after the indicator stops blinking and the noise subsides;
- in HPLaserJetP1102 and M1132 mfp there is a sealing tape in the toner cartridge, which must be removed before installation;
- Before replacing the MFPDeskJet 2520 and 2130 devices, you should insert A4 paper, since after installing the consumables, the device will immediately print an ink cartridge alignment page;
- in Canonmf3010 and Samsung M2070, getting to the toner is not so easy - first you need to lift the cover of the device (along with the scanner module), and then the inner cover of the toner compartment, but do not pull the cartridge sharply, even if it seems that it is stuck;
- Canon Pixma MG2440 and IP2700 use FINE cartridges, in which the print head is installed directly on the ink cartridge, so after removing the protective film, you should never touch it, and immediately after installation you must align the print head;
- in the Brother dcp 1510r model, the toner container and the photoconductor are combined into a single unit, which must be removed from the printer entirely and then removed and replaced with the toner cartridge.
Possible difficulties
Printers are available in black and white and color. The latter have only a few colors that are mixed to create different tones. The difficulty is due to the fact that if the colors are confused, the device will not correctly mix the colors when printing. During installation, pay attention to the colored sticker.
It must be on the cartridge and in the mounting socket of the printing equipment. It turns out that a block with a green sticker is placed where there is a sticker of the same color. If there are difficulties, for example, the device is not inserted all the way, it is possible that it fits on the wrong side.
How to refuel?
You can refill the HP printer cartridge yourself. This procedure has certain features that you must familiarize yourself with before starting work. Self-refilling is much more profitable than replacing old cartridges with new ones, especially when it comes to color equipment. Let's look at a diagram for refilling consumables for an inkjet printer.
To fill the cartridges you will need:
- suitable ink;
- empty paint containers or cartridges that need refilling;
- medical syringe, its optimal volume is from 5 to 10 millimeters;
- thick rubber gloves;
- napkins.
Having collected everything you need, you can start refueling.
- New cartridges should be placed on the table with the nozzles facing down. Find the protective sticker on them and remove it. There are 5 holes under it, but for work you only need one, the central one.
- The next step is to draw ink into the syringe. Make sure the paint is compatible with your equipment. When using new containers, you will need 5 milliliters of ink per container.
- The needle must be inserted carefully and strictly vertically so as not to break. You will feel some slight resistance during the process, this is completely normal. As soon as the needle hits the filter located at the bottom of the cartridge, you need to stop. Otherwise, this element may be damaged. Lift the needle up a little and continue inserting it.
- Now you can begin introducing the pigment. It is recommended to work slowly. As soon as the paint is poured from the syringe into the container, you can remove the needle from the cartridge.
- The holes on the printing element must be re-covered with a protective sticker.
- The refilled cartridge must be placed on a damp or thick dry cloth and left for about 10 minutes. The printing surface should be carefully wiped with a piece of soft cloth. This completes the work: the ink container can be inserted into the printer.
Excess ink in the cartridge can be removed using a syringe, carefully pumping out the ink. Before work, it is recommended to protect the table with old newspapers or film.
The process of refilling laser equipment cartridges is complex and hazardous to health, so it is highly not recommended to do it at home. To charge toner cartridges, you will need special equipment. It's better to contact specialists.
Required tools and materials
- Means of protection. Rubber gloves are worn to protect the skin on your hands. A protective robe or just old clothes are put on over the clothes.
- Old newspapers or paper. They cover the surface on which refueling will be carried out.
- Refill material. To refill laser cartridges, you buy toner, and ink for inkjet cartridges.
- Cleaning products. You can remove ink residues with dry wipes or sponges dipped in washing liquid.
- Syringes. To refill all inkjet printer cartridges, you need one syringe for each color. A minimum of 4 syringes with thin needles with a volume of at least 5 ml is needed. Filling with one syringe is also possible, but after filling each color, you must very carefully rinse the syringe cavity, piston and needle.
- An awl, screwdriver or small-diameter drill. If necessary, use tools to expand the factory holes in the ink tank to fill in the dye.
Possible problems
When replacing cartridges, the user may encounter some problems.
- If the printer indicates that the installed cartridge is empty, you need to make sure that it is securely placed in the tray. Open the printer device and check.
- Reinstalling the driver will help solve the problem when the computer does not see or recognize office equipment. If there have been no updates for a long time, it is recommended to reinstall the software.
- If streaks appear on the paper while printing, the cartridges may have leaked. The reason may also be clogged nozzles. In this case, you will have to take the equipment to a service center.
Find out the manufacturer and model of the printer
Before changing the cartridge, you need to find out what model of printer you have and what cartridges are suitable for it. As mentioned above, different cartridges are suitable for different printers. Write down the manufacturer and model of your printer.
Usually the name is on the device itself (see picture above). If the printer model is not listed on the front of the device, there is always information on the back of the printer's technical data label. Otherwise, you can see detailed information in the instruction book.
Also, if the printer is already installed on your computer or laptop, then you can click “Start” - “Devices and Printers” and look there for the name of the installed printer.
Now that we know the model, you can enter the phrase “printer cartridge, printer model” into the Yandex search and find which cartridge suits you. But it’s better to see it by looking at it with your own eyes.
Precautionary measures
Before removing the cartridge, remember:
- Do not touch the nozzles or electrical contacts on the ink bottle as they may be damaged;
- When the container cannot be pulled out, avoid using force. Insert the tank back and try to remove it again;
- do not start printing until you replace the ink;
- Do not take out the paint tank unless necessary. Close the lid that leads to the cartridge compartment to prevent debris from getting in there and the ink not to dry out.