As a result of operating errors, natural wear and tear of parts or manufacturing defects, the drum in the Indesit washing machine fails.
Rotting of the walls and destruction of the bushing seat are the reasons for urgent replacement of the drum.
It is possible to repair a washing machine without the participation of unauthorized persons, with your own hands. The main thing is to carefully study all the intricacies of the process in advance and prepare the necessary tools.
We will tell you in the article how to remove the drum from the Indesit washing machine.
What tools will you need?
To ensure that the work of dismantling the drum from the Indesit washing machine goes quickly, it is worth preparing a full set of necessary tools in advance.
The master's work case includes:
hacksaw for metal;- pliers;
- open-end wrenches;
- slotted and Phillips screwdrivers;
- socket wrenches;
- marker;
- hammer;
- pincers, awl;
- silicone sealant.
WD-40 lubricant will make it easier to unscrew soured elements.
Preparation
Before you start work, you need to prepare. Choose a bright and airy area where you can disassemble the unit and place the dismantled parts. A space of 2 x 2 m will be enough. To avoid staining the floors, cover them with rags or newspapers in advance.
Please note that disassembling standard models of Indesit washing machines (for example, WISL 82, WISL 83, WISL 102, WISL 103, WISL 105 and IWSC 5105) may require several hours, and during the removal of the tank you will need help.
The next step is preparing the tool and related materials. To disassemble and repair the machine you will need:
- a set of screwdrivers (a flat screwdriver, several Phillips heads of different lengths and a screwdriver with a set of bits - hexagons and asterisks);
- open-end wrenches (8*10, 17*19);
- set of socket wrenches;
- pliers for self-clamping clamps;
- pliers;
- side cutters;
- long bent pliers;
- hacksaw;
- multimeter;
- markers of different colors (to mark terminals);
- hammer (in case of replacing bearings);
- wooden blocks;
- WD-40 lubricant;
- silicone sealant;
- lubricant for hinge elements;
- a few rags.
You may not need all of the tools listed, but it's best to have them all at hand.
Since after repair and replacement of parts the machine will need to be put back together, it is better to immediately record all stages of dismantling using photos or videos. Then the reverse assembly process will be easy and error-free.
To disassemble and repair the machine you will need a set of tools
All that remains is to prepare the washing machine itself for disassembly. Follow these steps:
- disconnect the machine from the power supply, water supply and sewerage;
- remove the drain filter and drain the remaining water;
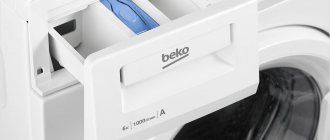
- remove and put away the detergent tray;
- move the machine to the work site.
How to prepare an Indesit machine for disassembly?
One of the stages of the drum dismantling process is preparing the Indesit washing machine.
What should be done:
- Disconnect the washing machine from the power supply, water supply and sewerage.
- Unscrew the drain filter and drain the remaining water (remove the panel located under the loading hatch, place a water container, unscrew the filter plug).
- Remove the tray for detergents (you need to press the special tab - the latch located inside the powder receptacle).
- Move the washing machine away from the wall and place the appliance on a stable, level surface.
The process of dismantling and replacing the drum in a washing machine takes a lot of time. To make the work go faster, if possible, it is better to move the machine for repair from the bathroom to the garage or other utility room, where no one will interfere with the process, and the tools and parts from the washing machine can be laid out in an order convenient for the master.
Price issue
One of the most common malfunctions encountered by employees of washing machine repair service centers is wear of bearing units. This set of parts, which ensures rotation of the drum, experiences the greatest load due to high centrifugal speeds, so it wears out faster than other parts of the apparatus.
The bearing assembly is located just in the washing machine tank, on the drum cover. To replace bearings, in the vast majority of cases, almost complete disassembly of the device is required.
It should be noted that not every Indesit machine model has a collapsible tank; very often it is made fused with the drum.
In such cases, specialized centers do not even undertake disassembly, but offer a complete replacement of the old tank with a new one, which can result in an amount equal to 2/3 of the price of a new car.
Meanwhile, there are unofficial appliance repair centers that can offer you sawing and gluing of a plastic washing machine tub. Of course, such repairs will be much cheaper than replacing the drum, but the technicians will immediately warn you that they do not provide any guarantees for the proper operation of the machine after repair. What to do in this case is up to you to decide. You can try to carry out such “handicraft” repairs yourself and absolutely free. In this article we will look in detail at how to disassemble different models of Indesit washing machine tanks, and what tools will be required for this.
How to get to the drum?
To get to the drum of the Indesit washing machine, you need to carry out a series of sequential actions:
Remove the top housing cover. To do this, unscrew the fixing bolts located on the rear wall of the washing machine body. The cover is slightly moved back, lifted up and removed from the body.- Unscrew all the bolts securing the panel on the back wall of the washing machine. Carefully turning the pulley, remove the drive belt (the parts are located behind the back panel of the washing machine).
- Disconnect the wiring cables that are attached directly to the drum. The work is carried out extremely carefully, since the cables are often clamped with plastic clamps, which are very easy to damage.
- Remove the heating element. The heating elements are located under the tank. First of all, disconnect the wiring, then loosen the central nut, push the bolt inward, pry up the heating element with a screwdriver and remove it from the socket. When reassembling, the rubber seal on the heating element must be replaced. Otherwise, there is a high risk of leakage.
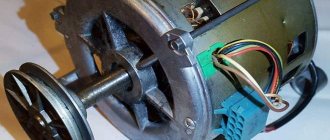
- Remove the engine. To do this, disconnect the wiring step by step, unscrew the mounting bolts, gently rock the motor, and remove it from the housing.
- Remove the counterweight (located in the upper part of the washing machine body). For this work, a hexagon is used to unscrew the fixing bolts. During dismantling, the counterweight must be supported by hand. An insufficiently secured, heavy part may break off and damage other elements of the washing machine.
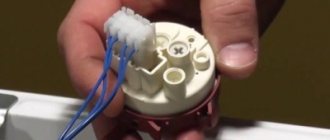
- Disconnect the wires and hoses from the water level sensor (the element is located on the side panel and looks like a tablet).
- Loosen the clamp holding the cuff, pull it back and push it inside.
- Remove the powder receptacle from the housing.
- Carefully lay the washing machine on its side and remove the AquaStop sensor. To do this, unscrew the drain filter fasteners, disconnect the pump wires, unclench the clamps and remove the drain hose pipe. The pump is removed along with the cochlea. At the same time, unscrew the shock absorber bolts.
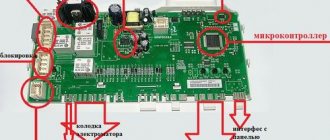
- Remove the UBL (hatch locking system). To do this, having installed the washing machine in its original position, unscrew the two UBL bolts and disconnect the wiring. Additionally, the control module is dismantled. To do this, unscrew the fastening bolts and press the locking latch. The control module is not removed from the wires, but is carefully placed on the outside of the housing.
During the process of disassembling the washing machine, it would be a good idea to take video or photographs. This will help to avoid errors in reassembling the household appliance.
The video will show you how to disassemble the Indesit machine:
Step-by-step instruction
When the tools, work area and washing machine are prepared, you can proceed directly to disassembly.
Step 1. First of all, you need to remove the top panel of the machine (cover) . At the back of the unit, in the upper corners, there are two self-tapping screws - we unscrew them with a Phillips screwdriver. Then we slide the lid towards ourselves, lift it up and remove it.
Disassembling the Indesit washing machine begins with removing the top panel
Step 2. Next, you need to remove the service hatch cover from the rear panel of the machine (the hatch is located in the center of the rear wall). To do this, unscrew 6 screws going in a circle, remove the cover and gain access to a number of parts of the unit.
Drum washing machine design
Step 3. Then you should remove the belt mounted on the pulley . Holding the belt with one hand, we turn the pulley with the other until the belt “jumps” off it.
Inspect the rear wall of the tank, located directly behind the pulley: if there are rusty marks or traces of oil on it, the bearings and seals are most likely damaged. A complete disassembly of the unit and replacement of parts will be required.
Step 4. Now you need to remove the wires from the contacts of the heating element and the temperature sensor. Unscrew the central nut and remove the heating element. It can be left in the tank, but then you will need to be careful when disassembling it so as not to damage the protruding contacts.
Step 5. Then you need to remove the engine . To do this, disconnect the wires, take a wrench and a 10 mm socket (or a similar socket wrench) and unscrew the bolts that secure the engine. We remove the motor and put it aside.
Automatic washing machine diagram
Step 6. Next you will need to remove the upper counterweight (balance stone). It is secured above the top wall of the tank with 3 bolts that need to be unscrewed. We pull off the counterweight and carefully move it to the side. We act carefully so as not to drop the part on our feet.
Loose counterweight mounts are one of the reasons why the machine vibrates and bounces during the washing process.
Step 7. The tank is almost empty, there are little things left. Now you need to remove the control panel . First, we unscrew the fasteners located near the niche for the powder receptacle, then the screw from the left front corner of the case. Afterwards, carefully pull the panel up and remove it from the latches (do not pull it too sharply so as not to damage the wires). Next, disconnect the wires going to the intake valve and set the panel aside (it may hang on the remaining wires).
Electrical diagram of Indesit washing machines
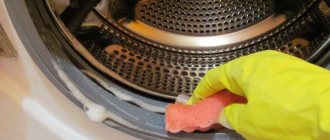
Step 8. The next step is to remove the hatch cuff . It is secured with a special clamp, which must be carefully removed without piercing the rubber. To do this, we hook the cuff clamp with a flat screwdriver and go around in a circle to find the fastener. We unscrew the fastening, remove the clamp and tuck the cuff deeper into the unit body.
Handle the cuff as carefully as possible to avoid damaging it
Step 9. Now it's time to remove the inlet valve and powder receptacle. We move to the back of the car, unscrew the screw where the inlet valve attaches to the car, and pull out the valve along with the tray niche. It is also necessary to disconnect the powder receiver pipe, which leads to the niche below and is held on by a clamp.
Step 10. All that remains is to disconnect the water level sensor . Disconnect the wires and remove the sensor from the plastic mount. We act carefully so as not to damage the parts.
Electrical diagram of the control unit of the Indesit washing machine
The main stages of disassembly are completed, now you need to carefully place the machine on its left side to gain access to the drain pipe and stands (they will interfere with removing the tank). We dismantle the pan, remove the two clamps and remove the pipe . Using a socket wrench (10 mm), unscrew the screws and dismantle the racks . We return the car to its original position.
Now we’ll find out how to disassemble the drum of an Indesit washing machine. Let us immediately clarify that the tank (inside which the drum is located) in cars of this brand is non-separable (soldered). Why do Indesit and other manufacturers use this technology? This simplifies and reduces the cost of production; in addition, it is a marketing ploy: if the bearing unit wears out, the consumer will have to replace the entire tank or buy a new unit, since replacing this part is comparable to the cost of a new machine. However, craftsmen are finding ways to solve this problem. Let's talk about this in more detail.
Disassembling the tank
To change the bearings, you will have to cut the tank with a hacksaw . After replacing the parts, the halves of the sawn tank can be glued together with silicone sealant and bolted together. Repairs will take a lot of time and effort: cutting can take several hours, and besides, the work is quite painstaking. Be prepared for this.
Get someone's help to remove the tank as it is heavy and difficult to remove alone. You need to pull the tank off the springs and carefully lift it up, pulling it out of its body.
Place the tank vertically so that the factory seam is on top. Arm yourself with a hacksaw for metal (with a small tooth section) and start sawing exactly along the seam. Try to do everything as carefully as possible.
After sawing the tank, remove the front half (it can be removed immediately). The back half will remain on the drum shaft along with the bearings. Now you need to dismantle this half of the tank:
- unscrew the nut holding the pulley and remove the pulley from the shaft;
- select a bolt of suitable diameter and screw it into the thread (not the one that was removed from the machine);
- lean a wooden block against the bolt;
- arm yourself with a hammer and hit the bolt through the block. You need to hit it hard enough so that the half comes off the shaft.
After dismantling the half, you will be left with a drum with a shaft on which bearings and seals are mounted. You can remove them yourself using a car puller, or you can take the drum to a car repair shop and ask a mechanic to remove the bearings for a small fee.
When you get rid of the old parts, you can easily press new bearings and seals onto the shaft, fasten the tank with silicone sealant and tighten it with bolts (holes are drilled in the halves, the joints are coated with sealant and the screws are tightened). Further assembly of the machine must be carried out in the reverse order of dismantling.
For more accurate information, watch the video, which describes in detail the process of sawing and restoring a soldered tank.
In conclusion, a few words about top-loading machines. To disassemble the Indesit top loading machine, you first need to unscrew the side panels. The motor, pump, and water level sensor should then be removed using the same tools and techniques as for front-loading units. Next, you will need to disconnect the terminals and contacts, remove the clamps and pull off the drive belt. Then you need to lift the top cover and remove the dispenser (it is attached with latches), dismantle the cover by removing its fasteners (including those located under the rubber band) and pull out the plastic strip. Then you should unscrew the screws connecting the upper part to the body and lift it; remove the control panel, disconnect the module contacts and pull it out. All that remains is to dismantle the shock absorbers, remove the counterweight and pull out the tank.
Now you know how to disassemble an Indesit washing machine. We hope that our article will be useful to you.
How to get the part?
In order to remove the tank from the washing machine body, you will need the help of a friend. Picking up the element from both sides, the tank is removed from the springs and pulled out through the top of the housing.
After the tank is removed, the most crucial moment comes - dismantling the drum. If the tank is collapsible, then everything is simple:
- unscrew the fixing elements, open the tank into two parts;
- unscrew the nut holding the pulley (it is convenient to use a hex key of the star type);
- remove the pulley from the shaft;
- We screw a bolt of suitable diameter into the thread, leaning a wooden block against it, and give several strong blows with a hammer until the drum with the shaft comes out of the tank.
If the bolt securing the pulley is soured, WD-40 will help to unscrew it. The soured metal is treated with an aerosol, left for several minutes, after which the process of removing the drum begins.
Replacing the heating element in an Indesit washing machine
The washing machine does not heat the water. Quite a common diagnosis. It is necessary to change the heating element. We call the technician, he confirms: the heating element needs to be replaced. Since visits and diagnostics are now free in many companies, we tell the technician that we’ll think about it and try to replace it ourselves. We are looking for a heating element for an Indesit machine. There is little risk here: if it doesn’t work out, we call a specialist and pay for the work; in any case, we will have to buy a heating element.
1. Check if the machine is disconnected from the network. All work must be carried out only by “pulling the plug from the socket.”
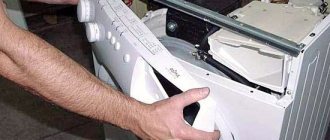
2. First you need to remove the back cover.
First you need to remove the back cover
To do this, you will need to unscrew the 4 screws (self-tapping screws) that secure the cover.
Unscrew the screws
Now remove the cover.
Remove the cover
The heating element is located at the bottom of the tank.
The heating element is located at the bottom of the tank
4. Disconnect all terminals from the heating element. In order not to confuse the position of the terminals, when connecting a new heating element, take a photograph of how the old heating element was connected before disconnecting the terminals.
Disconnect all terminals from the heating element
5. Unscrew the nut, which is located in the center. But not completely.
Unscrew the nut located in the center
6. Press the screw inward.
Press the screw in
7. Now you can remove the heating element; to do this, you need to pry it off with a slotted screwdriver.
Replacing an element
Once the drum is removed, you can begin installing the new part.
Algorithm of actions:
Using a metal rod, gently tapping, we knock out the bearings from the outside and inside of the tank.- We clean the shaft and seat from debris and dirt.
- Lubricate the seat and insert new bearings. To do this, they are carefully tapped along the outer edge through an insulating washer made of getinax (preserves parts from damage). We drive the bearing all the way (until the characteristic dull sound of the bearing hitting the side of the tank).
- Just like on the outside, we install bearings on the inside of the tank. Additionally, a new oil seal (pre-lubricated with silicone) is inserted on the inside above the bearing.
- We insert the new drum into the tank. The rod should fit into the bearing.
- We put the pulley ring on and secure it with a screw.
After installing the new drum, the two halves of the tank are connected (the edges are pre-lubricated with sealant) and tightened with fixing bolts and nuts.
Purpose of fasteners
If for other household appliances a branded cardboard box and a foam frame are enough for safe transportation, then with washing machines everything is more complicated. Inside each washing machine there is a tank and a drum, which are literally suspended. They are held in place only by a pair of screws and special springs, which, thanks to shock absorption, do not restrict the movement of the motor shaft during operation of the machine. In simple words, it is the dampers that soften the speed picked up by the engine, suppressing vibration due to centrifugal force.
But the suspended drum creates certain difficulties when moving the machine over long distances. The fact is that without reliable fixation, the tank will “jump” during sudden movements, and shock absorbers will not save it from impacts and further mechanical damage. Shipping bolts securely fasten the internal moving elements, preventing them from coming into contact with other parts. Therefore, transportation becomes easy and safe for the unit.
Shipping bolts secure the tank during transport, protecting it from vibration, shock and damage.
The bolts used for Indesit transportation look standard. These are long screws consisting of three parts: a metal “spiral”, a rubber intermediate ring and a plastic insert-tip. The only difference is the size of the fasteners, which are made individually for each model.
Reassembly and inspection
The reverse assembly process follows the following algorithm:
- we mount the tank in its original place (suspended on springs);
- install shock absorbers (for this work it is convenient to place the machine on its side);
- connect the drain hose;
- we connect the wiring to the heating element and the engine (it is convenient to carry out the work when the machine is positioned vertically);
- install the drum cuff and secure it with a clamp;
- connect the water intake, control panel;
- install a counterweight;
- fix the lid of the washing machine;
- We connect the washing machine to the sewer.
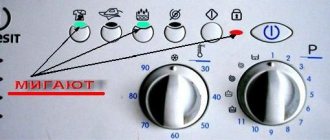
You can check the operation of a repaired washing machine only during the washing process. The machine is plugged in, select the required program on the control panel, and press the “start” button.
What if you run the machine with bolts?
It is prohibited to use the washing machine with the bolts not removed. The fact is that these fasteners fix the drum in a stationary state, which will inevitably lead to disastrous consequences when the engine is turned on. First, the shock absorbers will suffer, then the bearings will take the blow, and then the drum itself and the elements surrounding it will be damaged. The longer this “cycle” lasts, the less chance of “survival” the washer has.
Unfortunately, many people forget about the bolts and start washing with them. In this case, the machine begins to signal a problem as follows:
- during washing, rinsing, and especially during spinning, it begins to vibrate strongly;
- vibration turns into “jumping” around the room;
- The shaking is accompanied by noise and a strong roar.
Washing with the transport bolts not removed is not considered a warranty case!
If the machine, despite the fixed drum, was turned on, you should immediately, forcibly, end the cycle. Afterwards, be sure to call a specialist from the service center to your home and ask to evaluate the condition of the internal parts of the washing machine. The technician will give an expert opinion and, if necessary, carry out the required repairs.
Possible difficulties when removing the tank and ways to eliminate them
A welded, non-separable tank is a problem that can only be discovered after the washing machine has been disassembled piece by piece. Cutting the tank along the soldering line with a hacksaw will help eliminate the difficulties.
Algorithm of actions:
Carefully inspect the plastic tank and mark a cutting line along the factory weld seam.- Holes are drilled along the marked line (steps of 4-5 cm).
- Use a hacksaw to cut the tank.
- Remove the wheel securing the drum with the plastic body.
- Remove the drum.
After installing the new drum, the plastic body of the non-separable tank is connected (the edges are pre-coated with sealant) and fixed with bolts and nuts (the connection points are drilled in advance).
During the process, the hacksaw must be kept as level as possible . The slightest misalignment in any direction increases the risk of leaks of the assembled tank in the future.
It is not recommended to cut the tank with a hacksaw (it leaves a rough, sloppy cut). It is forbidden to use an angle grinder (there is a high risk of damage to the part).
Removing the screws: instructions
So, the car was delivered to the apartment. Of course, you want to connect the unit and start washing as soon as possible, but it’s better not to rush. First, let the washer “rest” at room temperature for several hours. Next, we remove the factory stickers and set up free access to communications, electricity, water supply and sewerage. We deal with transportation bolts only after all the manipulations described above.
The clamps are removed using a special key, which is usually included with any Indesit model. If it is not there, then we find a 12mm head or pliers. Next we proceed like this.
- Loosen the screws by unscrewing them by 3.5-4 cm.
- We push the bolt inside the housing until it rests on a hard surface (on average, a recess of 2-2.5 cm is enough).
- Without touching the screws themselves, remove the rubber gaskets and the plastic tip.
- We close the vacated holes with special plastic “plugs”, which are included with Indesit washing machines. The main thing is to press on the lids until you hear a characteristic click.
The machine is supplied with a special key for removing transport bolts and plastic plugs.
But do not rush to throw away the removed shipping fasteners. It is better to pack them and store them along with the instructions and other documentation. They will come in handy the next time you transport the car, if it is sold or moved. Do not forget that it is strongly not recommended to transport machine guns without bolts.