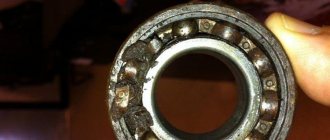
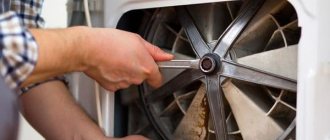
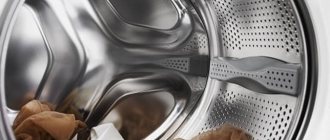
When the bearings come out of alignment, the drum rotates with difficulty, stops, and may even jam. The automatic washing machine practically stops washing, let alone squeezing. In case of such a breakdown, repairs cannot be delayed. If the bearing seat breaks, you will have to replace the drum. A faulty bearing will cause the spider, pulley or motor to fail. You can replace the drum bearing yourself or contact a service center.
Causes of wear
The washing machine drum should rotate freely inside the tub. This rotation is ensured by serviceable bearings.
Causes of wear may result from:
- natural wear of the oil seal, which after 5-7 years of operation begins to harden, deform and, as a result, allow water to pass through, causing corrosion of the bearings,
- prolonged use of the washing machine as a whole and, as a result, wear of all parts,
- improper operation (the washing machine must be operated correctly and periodically treated with special descaling agents).
Number of parts on different machines
It is not difficult to determine the number of bearings on a washing machine. The surest way is to look at the factory instructions. The included user manual will be suitable for a specific washing machine, as well as for any machine from this manufacturer. You can also consult with sellers in household appliance stores or service center technicians.
The number and size of bearings are indicated in the factory instructions.
When counting bearings, you should focus on the manufacturer of washing equipment. A brief overview of the most popular brands will help with the calculations.
As a rule, the number of bearings is specified when the unit needs to be replaced. It is worth understanding that most often the cause of failure lies in a damaged oil seal - an elastic band that protects the clip from moisture and friction. If the seal is leaky or torn, then water penetrates the crosspiece, washes out the lubricant and damages the system. In any case, it is necessary to change the parts as soon as possible, otherwise the drum and tank will suffer, which will increase the cost of repairs several times.
Diagnosis of failure
Rumble and hum when the drum rotates in the washing mode, breakdown of the spin mode and rapid wear of the drive belt indicate a faulty bearings.
You can verify this by carefully inspecting the washing machine.
To do this, you need to open the door, grab the top of the drum with your fingers, try to swing it and determine whether there is play in the drum mount. And then spin the drum from the inside with your fingers, listen and try to catch extraneous noise.
If there is play, but there is no extraneous noise, this means that these parts have begun to deteriorate, but replacing them can be delayed for several months.
If there is play, and there are also characteristic noises (grinding, hum, rumble), but the drum rotates freely and does not stop, you need to change the bearings as soon as possible.
If the drum moves with a terrible grinding noise and even stops, it is generally dangerous to use this washing machine and requires urgent repairs.
Part characteristics
The bearing system in automatic machines with horizontal and vertical loading is one of the most important working units. It is located depending on the model of the unit - in the back or side of the drum in the cross. The assembly consists of bearings of varying sizes (2 pieces). One of them, a large one, takes on the main load and is located near the drum itself. Today, in models such as LG or Samsung you can find reinforced double-row bearing units (mono bearings) that can withstand heavy loads.
Samsung washing machine bearings
Important parts are divided according to the material from which they are made:
The second option is in great demand, since most users distrust plastic bearings. In reality, everything turns out to be completely different. It is plastic parts that last much longer than their metal counterparts. Consisting of two layers - an inner metal and an outer plastic, they can not fail for quite a long period of time. Such bearings are equipped with expensive models of direct drive machines such as Bosch, Samsung, LG and Indesit.
Washing machine bearings
What bearings are in Indesit machines?
For each model, spare parts are selected in accordance with the design features. You can find out which bearing specifically is in a particular washing machine from the Operating Instructions, or by removing old spare parts from a disassembled machine. When replacing parts, you must strictly follow the original size and choose identical parts.
The following bearings are usually installed in Indesit washing machines:
- 203,
- 204,
- 205,
- VA2V 633667.
How to choose a bearing
To replace a worn-out part, the main question will be how to find out what bearing number is needed for a specific SMA model.
It is not possible to buy a universal spare part, since the size range of units is very large. Even one manufacturer of washing machines can have up to a dozen different sizes.
There are three options here:
The third option is the most reliable, since the removed element can be used as a sample for selecting a spare part similar to it.
You can choose the right option based on what size range the SMA manufacturer prefers to use:
This list is for informational purposes only, since the manufacturer may make changes to the configuration at its discretion. Therefore, we recommend choosing the size based on the specific SMA model.
Which brand of bearings is preferable to use? The following manufacturers are considered the most reliable:
Before buying a new part, remember that the entire assembly must be replaced, preferably together with the rubber seal. After all, if the oil seal is not replaced with a new one, there is a risk that the repair will be a waste of your time and money.
Well, for those who decided to replace the bearing assembly themselves, we recommend watching this video:
Source
Necessary tools for repair
In order to disassemble the washing machine and change the bearings, you will need:
- large pliers with rubberized handles,
- pliers with a narrow, elongated working part,
- set of wrenches,
- screwdrivers (Phillips and regular flathead),
- a screwdriver with replaceable bits (star bits must be included in the kit),
- round pliers,
- chisel,
- hammers (rubber and regular),
- if the tank is not dismountable, you need a tool for cutting the tank (grinder, hacksaw or jigsaw),
- It is advisable to have specialized pullers that will simplify the process of removing bearings (if they are not available, you can use auto tools or improvised mechanical devices).
Also, for disassembly and further assembly you will need consumables: WD-40, silicone sealant, special waterproof glue and clamps for fastening wires of different diameters.
The result of the work on changing bearings
The washing unit is set to normal operation, the process without any additional noise. The cost savings are shown below.
| No. | Name of components | price, rub. |
| 1 | Internal bearing | 60,00 |
| 2 | External bearing | 90,00 |
| 3 | stuffing box | 200,00 |
| Total | 350,00 |
As a result, replacing the bearings required only 350 rubles from the family budget.
Phased renovation
To replace the bearing in an Indesit washing machine, you will need a tool and a general understanding of the operating principles of household appliances. The complexity of disassembling the machine is determined by the design of the tank. In new Indesit models, the tank is non-dismountable, plastic; in older models, the iron tank is disassembled. A non-separable tank will have to be sawed and then glued.
Disassembling the washing machine
For those who decide to change the bearing on an Indesit washing machine on their own, it is recommended to photograph the disassembly process while working in order to later assemble and connect the machine correctly.
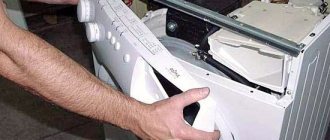
First, the washing machine is prepared for repair work. It is disconnected from the power supply, water and sewerage, the remaining water is drained, moved to the work site and the detergent dispenser is pulled out.
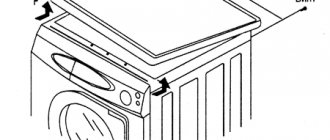
Then you need to remove the cover of the washing machine by unscrewing the screws on the back of the case, as well as the cover of the service hatch on the rear wall, which is also held on by screws.
Next, opening the machine door, remove the outer clamp of the cuff, separate the cuff from the outer part of the body and tuck it inside.
The top of the tank must be emptied. To do this, the dispenser hopper and pipes are removed, and the counterweight is disconnected (if it is located on top). The terminals are removed from the control unit.
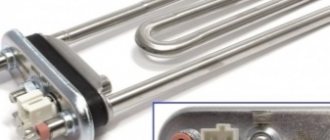
At the bottom of the machine, remove the contacts from the heating element and temperature sensor from the tank. After this, remove the clamp from the tank, and then disconnect all the wires that are attached to the tank. Then the wire belt is removed, the motor and heating element are disconnected and removed.
The tank is pulled out and placed on a horizontal surface for further work.
Removing the Drum
If the tank is collapsible, then you need to remove the pulley from it (it is attached to one bolt) and recess the shaft inside the tank. Now you can remove the top part from the tank and take out the drum.
If the tank is not dismountable, it will have to be cut along the outer edge or along the seam. Then the tank is turned over, the pulley is removed and the shaft is pressed in likewise.
The drum is removed, and access to the oil seal and bearing appears in the tank.
Removing old bearings and seals
Before dismantling the oil seal and bearings, it is recommended to clean their visible parts from dirt mechanically (this will make them easier to remove). The bearing is carefully knocked out with a blunt chisel and hammer, distributing blows around the entire circumference so that it comes out straight. All actions should be carried out very carefully so as not to damage the tank.
The bearing most often flies out at the same time as the seal. Or the oil seal is taken out separately after the bearings.
Replacement with new parts
Before installing new bearings and an oil seal, it is necessary to wash the shaft, clean it from dirt and treat the places where they are attached with lubricant (for example, Litol-24), select bearings and an oil seal of the required size, identical to those used previously.
First, the outer bearing is installed. It is hammered along the outer edge of the part. Next, the internal bearing is installed in the same way. It is recessed relative to the inner surface of the tank. An oil seal is placed on top of it, which is generously lubricated with grease.
The drum is mounted in the tank in its original place.
The quality of the repair work can be checked by unscrewing the drum in the tank with your fingers. If nothing interferes with the movement of the drum and there are no extraneous sounds, then the bearings are installed correctly.
Reassembly
First, the tank is assembled (or glued together). Then a pipe is installed (its fastening can be sealed with sealant), a cuff, a heating element and a temperature sensor. The tank is placed back into the housing. It is recommended to clean and rinse all removable rubber parts before assembly. Assembly is carried out in reverse order.
How to replace
Parts must be replaced immediately after their malfunction is discovered. From what has been written above, it becomes clear that many manufacturers use elements of similar sizes.
However, in order not to be mistaken with the exact parameters and to purchase exactly what is needed, it is recommended to go shopping for a new part, taking the failed element with you. A marking with a number is usually placed on the outside of the bearing.
Having purchased the necessary spare parts - bearings and oil seal, you can get to work. People who know how to handle tools can carry out the replacement themselves. To do this, you must first remove the drum of the machine. Split drums consist of 2 parts, which are connected by mounting bolts. One-piece - they are separated by walking along the weld seam with something sharp.
The removed drum with the main bearing remaining on the shaft
Further repairs by Atlanta or Zanussi are carried out in the following general order:
Replacement features for top-loading models
In top-loading machines, the drum is mounted on two axle shafts. Therefore, such machines have two sets of bearings that must be replaced at the same time. After disassembling the machine, they first change the bearing on the side where there is no pulley, then on the opposite side. When disassembling, the direction of the thread should be taken into account. As a rule, it is different on opposite axes.
Armed with the necessary tools and theoretical knowledge, you can independently remove the bearing from the drum of the Indesit washing machine, select an identical one and install it back. It is useful to photograph the disassembly process. This will help with assembly.
Possible difficulties
If the model of the Indesit washing machine is outdated, then during the repair process a problem may arise in the form of a non-removable tank .
To remove the drum from it, the walls must be cut with a hacksaw. The tool is set level (cutting at an angle ensures that the tank will leak in the future), after which the cutting begins.
First, the locations of future fastenings are marked on the surface of the tank so that upon completion of the repair, the two halves can be bolted together.
Hoses
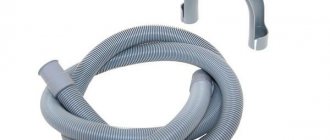
There are 2 hoses connected to the washing machine: inlet and drain.
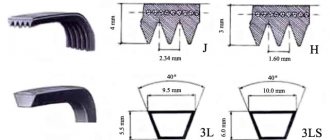
The hoses differ in their type and design: the inlet hose is more designed for the high water pressure present in the water supply system and is used to supply liquid to the tank;
The drain hose has a larger diameter than the drain hose and is used to drain water from the unit’s tank.
To prevent these problems from occurring, it is necessary, first of all, to use the water supply hose correctly. But if malfunctions nevertheless arise in any of the hoses, then the part with the defect must be replaced
It is very important to correctly connect the hoses to the washing machine.
Of course, in case of serious damage to the washing machine, it is better to invite a specialist. But not everyone realizes that most faults in household appliances can be fixed on their own and at the same time saving a significant amount that would have to be paid after the repair. After all, it includes the cost of calling a technician, the cost of the work performed, and the inflated price of the part being replaced. If you decide to repair your washing machine yourself, then all the parts for this purpose can be purchased by visiting the spare parts store https://easyfix.com.ua/.
Individual approach to repair work of various models
Of the variety of repair work performed on washing machines, replacing bearings is recognized as one of the most labor-intensive operations. Various types of technology require a personal approach and the use of a competent algorithm. For each specific case there is an individual solution.
Often it is necessary to subject a washing unit to full qualified disassembly. The tank and drum are removed from the structure frame. This operation is required for models equipped with plastic tanks.
Separately, it is worth highlighting washing machines whose tanks cannot be disassembled. In such models, it is possible to change the bearing only by cutting the tank and then connecting its components using a blowtorch. Such a procedure is possible and feasible only by highly qualified professionals.
One last operating tip. To extend the trouble-free service life of your home assistant, you need to install it level and periodically monitor its position. Vibration during operation contributes to displacement from the original installation site.
How not to make mistakes when buying?
But experts recommend not to rush into the purchase and to first “open” the drum. In this case, you can take out the old bearings and find out the exact diameter using the markings stamped on the surface. If it was not possible to determine the dimensions, then we take the clips with us to a store or service center, and ask the consultant to select an analogue according to the sample.
The size and number of bearings in a washing machine depends on the manufacturer and model. To avoid mistakes, study the instructions or contact specialists.
Share your opinion - leave a comment
