Thanks to the adequate ratio of quality and cost, Candy brand washing machines have found many fans among our consumers.
But, as we know, there is no perfection in the world: wonderful Italian devices sometimes break down.
Fortunately, the majority of faults can be repaired and it is quite possible that you can cope with the problem yourself after reading this article. So, Kandy – washing machine: do-it-yourself repair.
Basic problems and DIY repairs
If your Kandy washing machine has problems, you can try to repair it yourself. Of all the numerous elements that make up a washing machine, probably only the frame and decorative trim cannot break. All the rest, with one probability or another, may fail.
Here are the problems that have to be solved most often:
- The machine cannot be turned on.
- The water in the tank remains cold.
- Luke doesn't want to open up.
- Water does not fill well or does not drain.
- Increased vibration and unusual noise are observed when the machine is operating.
The self-diagnosis function is a great help for the repairman.
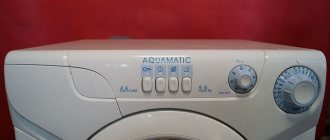
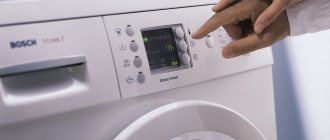
If something goes wrong, the built-in controller itself determines the malfunction and reports it in some way. If there is a display, such as in the ActivaSmart model, an alphanumeric code is displayed on it. Owners of cars without a display (Aquamatic model) can guess the nature of the malfunction by the number of LED flashes on the control panel.
For amateur repairs, you will need the simplest tools - wrenches, screwdrivers, pliers, etc.
You can find out the condition of the electrical part using a multimeter and a phase indicator screwdriver.
A special tool has to be used only when replacing bearings - they are pressed into place, so a puller will be needed.
Before dismantling a particular unit, we strongly recommend that you take a photograph of the wires connected to it so that there are no connection problems during assembly.
Well, now let's see how you can return this useful device to working condition.
Helpful tips for repairs
If you decide to repair your washing machine at home, but do not have enough experience in this matter, then any photo or video will be a good assistant during disassembly and reassembly. She will tell you how to put everything back together in reverse order.
It is best to purchase spare parts in specialized stores, where experienced sellers, knowing the brand of the washing machine, can accurately select the spare part you need.
See below for details of repairs.
Candy won't turn on
In this regard, the repair instructions contain the following recommendations:
- Unplug the power cord from the socket, reinsert it, and try again to start the device.
- If the machine does not turn on again, check the functionality of this outlet using some other known working electrical appliance.
- The most common reason for such a failure is oxidation or burnout of the contacts on the power button. This element is checked using a special tester and, if necessary, replaced with a new one.
The cause of the “strike” may also be a faulty control module (the indicator flashes 14, 15 or 18 times in a row). To repair or replace it, you must contact a workshop.
Disassembling the tank
The tank reservoir itself is non-separable. Such tanks are manufactured so that during operation the tank does not lose its tightness. When the washing machine is operating, temperature changes occur and the fastenings often become loose.
Before disassembling the tank, you should carefully inspect the external parts and look for a seam in them. Parallel to the seam, we will need to drill holes to fasten the halves of the tank, because we will need to assemble the tank later. We make holes using a drill and a drill.
It is necessary to drill 15-20 holes along the seam. After this, you can cut the seam. After cutting, you can easily get inside the tank. You can cut the seam with a special hacksaw for metal. The procedure will take a long time. It is not allowed to make a cut of more than 5 cm. Otherwise, the walls of the tank will become unusable.
Once the sawing is completed, the tank will become a collapsible product. You will get two parts - front and back. The front part is an irregularly shaped plastic element with a hatch in the center. We won't need it for now, so we can put it aside. In the rear part we have all the main elements - the drum and the rotation mechanism. It should be removed. You need to turn the rear part over so that the drum hatch is on the bottom. Now you can start disassembling the shaft.
The first step is to carefully unscrew the screw located in the center. You need to attach a metal rod in the form of a small chisel and strike it with a hammer. Now you need to take a screwdriver and tighten the screw. The shaft must be removed using three pieces of wood (one small and two large). Large blocks will be used to support the tank. A small beam is placed on top of the tank in part of the rod. You need to hit a small block with a hammer.
The part can be easily damaged, so you should combine the power of the blows (first a light blow, then a heavy one).
As a result, the drum will be separated from the tank. It is allowed not to remove the bearings if they are working properly; perhaps the problem is not in them, but in the tank itself. It is checked first.
Sometimes owners need to change the oil seal or bearing. To do this, use a metal rod and hit it with a hammer along the edges of the body. It is not allowed to strike from only one side. Even if one bearing is broken, both will have to be replaced.
- Share your opinion - leave a comment
Kandi doesn't heat the water
The reason that the washing machine has become “cool” in its duties is, in most cases, a breakdown of the heating element (error code “E05” or the indicator flashes 16 times every 5 seconds).
It can simply burn out from the exhaustion of its resource, like a light bulb, or it can “die out” prematurely - due to a thick layer of scale.
The heater is manipulated in the following order:
- After unscrewing the corresponding screws, remove the back wall.
- Find the heater shank sticking out from the bottom of the tank (two wires are connected to it).
- Determine the resistance of the heating element using a multimeter. If it is good, the device will show 20 - 30 Ohms, if it is burned out - “infinity”.
- If the heating element is faulty, unscrew the nut holding it (between the contacts) and carefully remove it from the tank. If it gets stuck, gently hit it a couple of times with a rubberized hammer (or a regular one - on the attached wooden block).
- Before installing a new heating element, the inner surface of the tank around the hole must be cleared of scale.
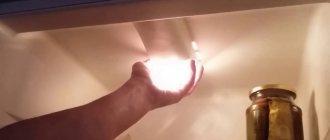
To make sure that the heating element is working, just turn on the machine for heating and look at the electric meter - the rotation speed of the disk or the blinking frequency of the indicator should increase sharply.
A less common reason is failure of the temperature sensor (E05 or 5 blinks). To check, first measure its resistance at room temperature, then after heating with hot water. For a non-working element, the resistance will remain constant.
Indesit washing machines have become widespread due to their affordable cost. The unit is of high quality, but any equipment is not immune from breakdowns. Indesit washing machine - faults and do-it-yourself repairs.
We will consider the main problems associated with connecting a washing machine here.
If there is not enough space in the bathroom, then the washing machine has to be installed in the kitchen. In this topic https://aquacomm.ru/cancliz/mnogokvartirnyie-doma/santehnika/kak-podklyuchit-stiralnuyu-mashinku-na-kuhne.html you will find tips on connecting the device for beginners and experienced ones.
Candy motor repair
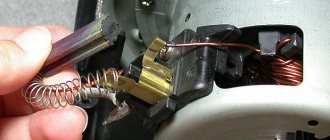
Checking the brushes. To do this, we put the car on its side and we have access to the engine.
Using a multimeter, we measure the integrity of the brush and commutator circuit. To do this, set the tester to resistance measurement mode and measure the resistance between the brushes. If they are pressed against the collector, which means they are working, then the tester will show zero resistance, but if they are not pressed against the collector (thus they are faulty), the tester will show one.
We see that the tester shows 1, which means the circuit is broken, the motor brushes need to be replaced.
We put the car on its legs, remove the back wall, to do this we unscrew the screws around the perimeter of the back wall.
Now we have full access to the motor, as you can see in the photo below, I have already removed the belt.
Since the wall has been removed, let’s not be lazy and check whether the heating element is working properly. The machine is not new and it is quite possible that the heating element is also faulty, and the client does not pay attention to the fact that there is no water heating and the laundry has become worse to wash.
We remove the terminals, take a multimeter and measure the resistance at the ends of the heating element, it should be about 30 ohms.
We see that the ten is also faulty, it also needs to be replaced. In this article I will not describe this process; you can read about it in detail in another article here.
Remove the motor power connector.
Next, unscrew the engine mounting nut and remove it from the tank.
The brushes are located at the rear of the unit in plastic cases opposite each other and are screwed to the case with screws.
Unscrew the screws and remove them.
The graphite brushes are very worn.
The next photo shows how worn the old one is compared to the new one.
The material of the brushes is graphite, over time it wears off and the brush stops pressing against the commutator, as a result of which the integrity of the circuit is disrupted. With such a defect, the machine does not generate an error.
We install new brushes, but we also need to eliminate the wear on the commutator, which was formed due to friction between the brush and the commutator.
We will sand the collector with sandpaper. You can grind manually or using a motor connected to an electrical network.
In the first case, press the skin tightly to the surface with one hand and rotate the motor shaft with the other hand.
I will polish on a mains-powered engine. This option requires great care and caution; if you are not confident in your abilities, then polish by hand, or seek help from a washing machine repairman.
The engine is connected according to the following diagram:
- the motor connector has six pins, of which 2 pins are from the hall sensor, 2 from brushes, 2 from windings;
- one brush and one winding with each other ;
- connect the power cord with a plug to the other pair;
- We place the unit on a flat surface and plug in the plug into a 220 V network, take care of your hands.
The engine is running, its shaft is rotating, now we take the sandpaper and gently but firmly press it against the surface of the commutator.
Polishing happens very quickly. The result is in the photo below.
We install the engine in place, assemble and check the machine. I wish you success in the repair.
Source
The door on the washing machine does not open
If the hatch locking device breaks down, error code E01 is displayed or the indicator flashes 1 time. The cause of the failure lies in the electronics, so it is better to invite a specialist.
If its appearance is not expected in the near future, you can open the lock yourself. This will become possible if you remove the front cover from the de-energized machine and tilt it back slightly.
It happens that the lock itself requires replacement. To dismantle it, you first need to carefully remove the hatch seal by prying up the clamp holding it with a screwdriver. After this, two screws securing the lock will become accessible.
Let's remove the parts that prevent the drum from being removed
When performing repairs, it is important to follow safety precautions. Before starting work, be sure to turn off the power to the washing machine and turn off the water supply tap. Having done this, you can begin further manipulations.
Next, you need to drain the remaining fluid from the system. To do this, prepare a low container, place it under the machine, and unscrew the garbage filter. Water will flow into the basin. The removed filter element must be washed, dried and set aside.
When disconnecting elements, take photographs of the connection diagram of the wiring, sensors and components; this will help in the future to accurately assemble the automatic machine.
To remove the drum of a Candy washing machine:
- disconnect the “top” of the housing. Unscrew the bolts holding the panel, then slightly push the cover back and pull it up. Place the element aside;
- Unscrew the screws securing the rear panel of the case. Remove the wall;
- remove the drive belt;
Rusty smudges on the back surface of the tank indicate a breakdown of the bearing assembly.
- Disconnect the wiring from the washing machine tank. Specifically, the contacts of the heating element and thermostat;
- loosen the central nut of the heating element. Using “rocking” movements, remove the heater from the socket;
- unscrew the bolts securing the engine of the automatic machine;
- remove the counterweight. The block is located on top and is easy to see immediately after removing the cover. Please note that it weighs quite a lot. To disconnect the element, you will need a hexagon. Unscrew the fasteners holding the part and remove the weighting material from the body;
- Disconnect the wiring and hose from the water level sensor. Then carefully remove the pressure switch from the machine;
- get the powder receptacle;
- loosen the hose clamps connected to the detergent cuvette, remove them and remove the dispenser “hopper” from the body;
- Place the washing machine on its right side. If there is no bottom pan, that’s good; if there is a bottom, you will have to remove it by unscrewing the fastening bolts;
- Unscrew the screws located on different sides of the drain filter. Next, push the snail, in which the filter element is located, into the housing;
- disconnect the chip with wires from the drain pump;
- loosen the clamps and unhook all the tubes from the pump;
- remove the drain pump from the automatic machine;
- pull the engine out of the housing. Grab the motor, move it back slightly and pull it down;
- disconnect the shock-absorbing elements supporting the washing machine tank from below.
This way, all parts that interfere with removing the drum will be removed. Next, all that remains is to take out the tank and start sawing it to gain access to the “centrifuge”. We'll tell you what actions to take at the next stage of work.
Other breakdowns
If the machine cannot get rid of waste water (error “E03” or 3 flashes), the problem is most likely a clogged filter. The pump could also break down. Do the following:
- With the front lower panel removed, locate the drain filter on the left side of the machine.
- Place a container under the machine, unscrew the filter and free it from accumulated dirt.
- Also inspect the tank pipe to which the filter is attached. It often becomes clogged with silty deposits, which must be carefully removed with a screwdriver.
- After turning on the machine, run it in drain mode and look at the pump impeller (it can be seen through the hole in the filter plug). If the pump is working properly, it will rotate. It happens that the impeller rotates, but the operation of the pump is accompanied by a strong hum, and when the impeller rocks from side to side in a direction perpendicular to the axis (the machine, of course, must be turned off), you can feel that it is very loose. In this case, the impeller may jam from time to time, which is the cause of drainage problems. Such a pump needs to be replaced, for which you will have to remove the back wall.
It will also be useful to clean the inlet filter, for which you need to disconnect the inlet hose. It also often becomes clogged with sand and rust, as a result of which water begins to flow into the machine very slowly (error “E02” or 2 blinks).
Washing machine filter
The reason for the lack of normal drainage can also be a malfunction of the level sensor, also called a pressure switch (located under the top cover). If the tube attached to it becomes clogged with dirt, the sensor will not be able to function. After removing the dirt, you can check the operation of the pressure switch by blowing into the tube. A working device should respond with a click.
If the machine starts to make a loud noise, one of the bearings most likely needs to be replaced. To do this, you need to remove the tank, which in Candy machines is done through the top. In some models, the tank is solid and to replace the bearings it needs to be sawed and then welded. This can only be done correctly in a workshop. At home, replacing bearings is only possible for machines with a holding tank. To get to it, you need to remove the panels - top and back.
It is also better to dismantle the front panel so as not to accidentally scratch it when removing the tank.
Before you remove the tank, you need to do the following:
- disconnect all the hoses connected to it (the clamps are opened with pliers);
- remove the powder distribution hopper;
- unscrew the counterweight;
- remove the belt from the drum pulley;
- disconnect the wires from the heating element;
- after unscrewing the bolts and disconnecting the wires, remove the engine (slides out along the guides);
- remove the hatch by unscrewing the screws located under the sealing collar (the clamp securing the cuff is pryed off with a screwdriver).
Having disassembled the tank into two parts, remove the pulley from the drum shaft, and then carefully knock the shaft out of the bearing. You cannot hit the shaft directly - you need to place a wooden block. Next, you need to use careful, uniform blows around the perimeter to knock the bearing out of the tank.
The new bearing is installed in place using a simple device consisting of a pressure washer, a threaded rod and a pair of nuts. One nut is screwed onto the rod from one side - it will put pressure on the pressure washer that presses the bearing. The second nut is screwed onto the rod on the other side (rests against the tank) - it must be rotated slowly.
In small apartments, residents prefer to save time on everything as much as possible. Let's look at how to choose a compact washing machine under the bathroom sink and how to install it.
This information will help you decide on the choice of kitchen faucet. Characteristics of devices by manufacturer, material and mechanics.
Troubleshooting tips for common problems
All washing machines, regardless of brand or manufacturer, have certain problems that will appear at some point. Let's look at the most common faults.
- The machine does not turn on. If this happens, then first of all you need to check the power sources (plug and socket) - perhaps the fault lies in them. If everything is fine with them, but the machine still does not turn on, then gently ring the power button. Perhaps the contacts on it have oxidized.
- The water does not heat up. This malfunction may not be noticed immediately, unlike the previous one. As a rule, it is noticed due to indirect signs: if the quality of the wash has deteriorated, and sometimes an error may appear during self-diagnosis. If such a problem arises, do not rush to change the heating element. The cause of the problem may also be the electronic module. To find out, you first need to ring the heating element. To do this, you will have to remove the back panel to get to the contacts of the heater itself. Before measuring, you must disconnect the wires from it.
- A working heating element will show a resistance in the region of 20-30 ohms. If this is the case, then you need to check the electronic module. If the device shows 1, this means that the heater has burned out and requires replacement.
- At the end of the wash the door does not open. There can be 2 reasons for such a malfunction: either the lock has failed, or there is water left in the tank and therefore the door will not open. In the first case, you need to press the car door and insert a cord into the hole. When dragging it around the perimeter, you need to pull both ends so that it presses on the hook. After the door opens, remove the sealing collar and through the resulting space you can change the door lock without global disassembly.
- In the second option, you will have to use the emergency drain of water. As a rule, after this the door opens, and to prevent this from happening again, you will have to eliminate the cause of the problem. Most often it is a clogged drain filter.
- When the spin mode starts to work poorly , this may indicate that there are problems with the motor, but first you need to check the brush. Most often, this is what causes this problem.
Preventive measures
Failure to turn on the Kandy washing machine makes it impossible to do laundry. To prevent this problem from arising, you need to remember the following preventive measures:
The washing machine must be connected through a separate socket with output to the machine.- If power surges often occur in your home, it is advisable to get a voltage stabilizer and connect the washing machine through it.
This will protect the device from burning out individual elements and extend the service life of the equipment.
- Press the power button of the machine smoothly, without using force.
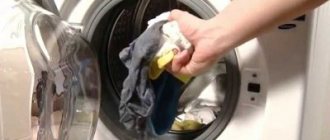
- You need to put things into the drum carefully so that they do not get caught in the door and interfere with the operation of the lock.
- You need to close the hatch door without using force, without slamming it.
- The washing machine should be located in a room with good ventilation. This will prevent oxidation of contacts and the development of corrosion.
- The washing machine must be protected from the pranks of children and pets, as well as rodent attacks in the private sector.
Required tools and spare parts
For repairs, you will need a minimum set of tools, which can be found in almost any garage and, of course, new spare parts that need to be installed in place of the old ones. Depending on the problem, you will need a specific tool - to replace the pump you will need screwdrivers and pliers, to replace the belt - only a screwdriver. There is a different tool for every situation.
Let us denote a complete set of equipment with which you can disassemble and repair the entire washing machine:
What parts of the Candy washing machine break most often?
The Kandy washing machine has a complex structure; it consists of many parts. Most often, the main components that bear the main load fail . We are talking about a belt, a crosspiece, an electric heater, a hatch handle and more.
heating element
The heating element is the heating element of the washing machine. It comes into operation every time there is a wash in warm or hot water. The part is located under the drum.
Causes of failure and ways to eliminate them:
Voltage fluctuations in the network that lead to failure in electronics. You can deal with the problem by rebooting the device.- Hard water, which causes salt deposits on the electric heater. If the part is not burnt out, you can try to descale it and put it back in place.
- Oxides on contacts. They need to be cleaned.
- Damage associated with active and prolonged use of the machine. In this case, the heating element will have to be replaced.
Error codes indicating a breakdown of the heating element are 5, E5, E05, Err5, Error 5, or the same letters, but with the number 14, 16 or 22. Read more here.
Control board
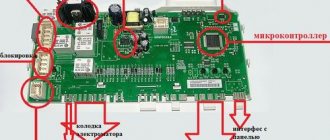
The control board is the intelligence of the Kandy washing machine; it is responsible for executing all programs. The part is represented by a microcircuit, which is located in the upper part of the case .
The control board is susceptible to moisture and voltage surges. These reasons most often lead to the fact that either individual elements and tracks burn out, or a failure occurs in the firmware.
There are various signs indicating a board failure. The machine may not turn on at all, or will not execute one or more programs, jump from mode to mode, etc. Error codes – 14, E14, Err14, Error 14, or any other errors associated with performing a certain action.
The repair comes down to diagnosing the board, replacing burnt-out capacitors or triacs , and soldering the tracks. Sometimes flashing the memory and reprogramming the device is required. If the damage is serious, the board is replaced.
Water level sensor
A pressure switch is necessary so that the device can assess the degree of filling of the drum with water and perform further actions. If it breaks, the machine does not start the wash, the tank overflows or remains half empty.
Reasons for failure of the pressure switch:
- voltage surges leading to burning of wires;
- blockages in the pressure pipe;
- natural wear and tear.
To deal with the breakdown, you need to remove the part and check it for blockages. You should also eliminate minor damage, clean the contacts, and restart the machine. If these measures are ineffective, the pressure switch must be replaced.
Error code indicating a breakdown of the water level sensor is 2, E2, Err02, Error 2 or 20, E20, Err20, Error 20.
Cross
The cross is responsible for rotating the drum during washing . The part is subject to enormous loads, so over time it can break or bend.
A malfunction of the crosspiece is indicated by extraneous sounds that appear during washing and spinning. It may be rustling, knocking, grinding.
The only option to repair a broken or bent part is to replace it. There is no separate error code for a broken crosspiece. It is the same as the one that indicates bearing wear - 7, E7, E07, Err7, Error 7.
Causes of crosspiece failure:
- malfunction of the device,
- drum overload,
- bearing wear,
- hard water.
Belt
Without a belt, it is impossible to rotate the drum, since it is the belt that transmits the energy of the engine. If the belt falls off or breaks, a hum will be heard and the appliance will continue washing or spinning. However, the drum will remain in place.
Causes of failure and ways to eliminate them:
- The belt has stretched due to constant overload. It needs to be replaced.
- The belt falls off due to wear of the oil seal and bearings, or due to a burst crosspiece. There is no need to change it, you need to fix the main damage.
- The belt broke due to improper use of the device. Repair is not possible, replacement is required.
There are no error codes for belt breaks. A message may appear indicating that the bearings or motor are damaged. To diagnose the problem, just unscrew the case.
Hatch handle
The hatch handle serves for its safe and convenient opening. It is made of durable plastic, which is difficult to break. However, with the application of force, this is possible.
If a part is broken, it cannot be repaired . You'll have to buy a new pen. To perform the replacement, the door must be removed.
Possible error codes are 1, E1, E01, Err 1, Error 1. Although in most cases, no additional prompts are needed.
Pump or pump
The pump or pump is responsible for pumping water out of the drum and discharging it into the drain pipe . The part is located at the bottom of the device; you can access it after completely disassembling the washing machine.
The most common cause of failure is debris that gets into the part. Foreign objects either simply block the operation of the pump, or cause the impeller to break, or disable the motor, which is subject to excessive loads.
If the pump breaks down, the water will not drain or will leave the drum more slowly than usual. In this case, a code will appear on the screen - 3, E3, E03, Err3, Error 3, or similar letters, but with the number 20.
To eliminate the malfunction, the device must be disassembled, the pump removed and inspected. If a blockage is detected, the pump should be cleaned. A breakdown of the impeller or motor requires replacement of the part.
Engine
The motor is one of the main components of the Kandy washing machine. It is this that is the source of energy that sets the drum in motion. The most common reasons for its failure are short circuits . They can occur in the rotor and stater windings due to voltage surges, overloading of the washing machine, and even improper installation.
The main sign of a motor malfunction is the termination of any program. After diagnosing the breakdown, repairs are carried out. Most often, a complete engine replacement is required. Possible error codes are 8, E8, E08, Err 8, Error 8 or similar letter designations, but with the numbers 9 or 10.
Brushes
Brushes are necessary to transfer voltage from the stator to the rotor. They are made of graphite, so they wear out over time.
Worn brushes in Kandy washing machines are indicated by weak spin. If they are worn down too much, the drum will not rotate at all , since the motor will not have enough power. Sometimes sparks are visible under the machine.
There are no specific reasons leading to brush abrasion. This is a natural process that accelerates with active use of the device. The brushes cannot be repaired and must be replaced. Error codes indicating brush wear are 8, E8, E08, Err8, Error 8.
Bearing
The bearings allow the drum to rotate smoothly and silently . Its breakdown is indicated by loud sounds in the form of roaring and grinding. They intensify during spinning. If the bearings fail completely, the drum stops rotating.
The causes of failure are excessive loads on the elements, for example, when the machine is overfilled with laundry. An additional risk factor is moisture ingress. You need to understand that over time, even the best quality bearings break down. They cannot be repaired; the part must be replaced. Error codes indicating bearing failure are 7, E7, E07, Err7, Error 7. Details are in this article.
Shock absorbers
Shock absorbers or dampers are designed to dampen vibrations of the tank during spinning and washing. They work in conjunction with springs. Damage to the shock absorbers is indicated by strong vibrations and knocking noises during spinning. In this case, the device itself can “jump” and move from its place.
Reasons for their failure:
- drum overload,
- spin at high speeds,
- placing the device on an uneven surface,
- resource development.
Repair of shock absorbers is impossible; they must be replaced. There are no error codes indicating damage to the shock absorbers. To make a diagnosis, you will have to focus on external signs.
Read about repair and replacement of shock absorbers here.
Cuff
The elastic band located around the circumference of the hatch is a cuff. It helps the door close tightly and prevents leaks.
The most common reason for damage to its integrity is the carelessness of the owner of the washing machine, who leaves sharp objects in his pockets. It is they who cut the seal during the washing process.
The main sign of cuff damage is leakage . If the gap is minimal, you can seal it and turn the elastic band over so that the hole is on top. If there is significant damage to the integrity of the rubber band, it will have to be replaced. There is no error code, but in this case diagnosis is not difficult.
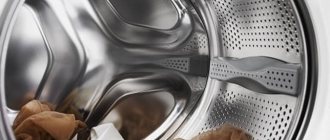
Drum
If the drum breaks down, it may stop rotating, when it moves, extraneous noise appears, and water begins to stagnate in it. Sometimes it begins to leak due to a hole, or becomes deformed. The main cause of the malfunction is violation of operating rules. Repair comes down to replacing a part. Error codes indicating problems with the drum are 10, E10, Err 10, Error 10.