How to Use Blender for Beginners
Next we'll look at how to use Blender for beginners. This instruction will not teach you how to model, but you will understand the basics of working with the program. But first we need to look at the interface of the main window.
Main program window
The main window can be divided into several conditional areas that you will use. Here they are:
- Main menu of the program;
- View switching menu;
- Left navigation bar;
- Toolbar on the right;
- Main work area;
- Time line below.
All of these areas have been highlighted in the screenshot. By default, the work area displays a 3D figure - a cube. Next we will look at the main actions that can be done with it.
Navigation Basics
The program is very easy to operate, here are the basic navigation techniques:
- To change the viewing angle, hold down the middle mouse button and move it;
- To move up and down or back and forth, hold down the Shift button and the middle mouse button, then move it;
- To change the scale, use the scroll wheel;
- To select an object, right-click on it, or right-click outside the object to deselect;
- To select multiple objects, hold down the Shift button while selecting;
- Press A to select all objects and again to deselect, the selected objects will be highlighted in yellow.
Operating modes
The 3D modeling program Blender can work in several modes:
- mode - allows you to select objects, move them, rotate them, and move them as you need;
- Edit mode - allows you to change the vertices of an object, its lines and planes, you can change the mesh in this mode.
- Sculpt mode – 3D mesh editing mode;
- Drawing mode (Vertex Paint mode) - allows you to change the colors of shapes;
- Texture Paint mode - allows you to paint textures;
- Weight Paint mode – allows you to change the thickness of surfaces;
- Grid mode (Particle mode) - convenient for working with particle systems.
Tab or menu to switch between these modes
In this article we will use only the first two modes, they are the main ones.
Changing objects
Blender 3D modeling starts with changing objects. Notice the arrows that appear next to an object when you select it. These are directional arrows, and they point to the edges of the coordinate system. The red arrow represents the X axis, the green arrow represents the Y axis, and the blue arrow represents the Z axis. These arrows allow you to move objects more precisely.
You can move an object in several ways:
- Just drag it with the right mouse button;
- Press G and drag the object to the desired location;
- Click on one of the arrows and move the object along it.
Rotating objects is also very easy. All you have to do is select the object and press the R button. If you want to rotate the object around a specific axis, press R and then one of the X, Y, Z keys. These correspond to the coordinate axes.
To scale, use the S button. Again, to scale along one of the axes, press X, Y or Z.
Creating Objects
Working in Blender doesn't involve creating multiple objects in the main area. First, notice where the 3D cursor is. This is where the object will be inserted. By default it is located at the origin, but you can move it anywhere by simply left-clicking.
Then open the Add at the bottom of the screen and select the type of objects you want, such as shapes (Mesh), and then the shape itself. After adding it, it will appear near the cursor. This way you can add any object.
Editing objects
In editing mode, you can change the sizes and characteristics of objects. You can select individual parts of objects: vertices, lines, and planes. What you need to select can be indicated on the panel:
Further work is similar to dragging objects. Select the desired part with the right button and drag it where you need it. Also in edit mode you can select multiple vertices and merge them together. To do this, select the desired vertices using “Shift” , then press “W” and select the “Merge” menu item.
You can also extrude parts of an object in Edit mode. To do this, select a face, vertex, or plane, then press "E" and drag it to the desired location.
You can often cut an object to drag it to another location or expand it. To do this, press Ctrl+R and select the desired part simply by moving the mouse, then this part will be marked and you can do whatever you need with it.
Modifiers
Modifiers allow you to change the characteristics of your figure according to certain algorithms. To use modifiers, return to object mode, then select the key icon in the right panel:
Next, click “Add Modifier” and select the desired modifier. You can experiment with them. Most often you will have to use "subdivision surface". It allows you to smooth out the corners of the surface. All modifier parameters will be located in the right panel. Using the “View” you can adjust the rounding force:
Saving the result
To save the result of your work, open the “File” and select the “Save” :
Then you need to select a save location and click "Save blender file" . The work will be saved in Blender format and you can continue editing it. But if you need a regular image, select “Export” “File” , then select the format of the desired image:
Our instructions on how to use Blender 3d for dummies are coming to an end.
Using Master Modifiers to Manipulate Mesh Objects
Before we start changing the shapes of mesh objects, we should have a good grasp of creating, moving, rotating, and scaling basic mesh objects. Three main modification methods are used in Blender (in Object Mode):
- button "G" - move or grab (grab) an object
- button “S”—change the size (scale) of an object
- button “R” - rotate the object
If you want to use these modifications with precise parameters (for example, rotate an object along the X by 90 degrees or change the size to an exact value of units), you can use the “Number Window” (Transformation Properties), which is called up by pressing the “N” .
If you want to move an object along a specific axis (X, Y, Z), enter the motion command "G" and move the object towards the axis you need. Hold down the mouse wheel (don't spin it, just press it like a button). This will restrict the object's movement along a specific axis. When moving objects, you can also use the X, Y, Z keys.
conclusions
In this article we looked at how to use Blender 3d to model various shapes and objects. Of course, you have not become a professional, but now you know what the Blender modeling program is capable of and how to use it.
Related posts:
- Installing Gimp on Ubuntu
July 9, 2015
- How to use Gimp 2
January 2, 2017
- How to use Inkscape
March 21, 2017
- How to use Krita
April 2, 2017
Video for Blender 3D
Blender 3D Tutorials for Beginners
A useful, interesting course consisting of 28 video lessons with a total duration of 6 hours 30 minutes. During this time, the author will talk in detail about the program interface and teach you how to create 3D models of varying complexity.
Where to study to become a 3D artist
From the course you will learn how to take 3D photography and learn how to work with camera tracking. The clarity of the video format greatly facilitates the learning process and quickly transforms beginners into confident users. {banner_lesson} Lesson 1 – Interface Overview Lesson 2 – Interface Customization Lesson 3 – Creating a Simple Object Lesson 4 – Modeling a Vase Lesson 5 – Creating Rings Lesson 6 – Creating Rings (Materials, Lighting, Post-Processing) Lesson 7 – Creating a Box World Lesson 8 – World of Boxes (Post-Processing, Materials, Lighting) Lesson 9 – Modeling the Stool Lesson 10 – Modeling the Stool (Texture, Lighting, Rendering)
Using a Stand Blender
This device is a holistic type design. A special feature is that the bowl, where the products are beaten, and the engine are directly connected (for more details about the internal parts, see the article on the structure of a stationary blender). Therefore, the requirements for the instructions for use are as follows:
- Before chopping, you should cut the food into small cubes and only then load it into the bowl.
- After turning on the device, you must remember that the lid of the bowl where the grinding takes place is blocked and it can only be opened at the end of the processing process.
- Do not place hot foods into the appliance bowl. This leads to the fact that it turns yellow very quickly and loses its transparency. After this, it will be difficult to observe the cooking process.
- It is strictly forbidden to load the blender bowl to the very top, while also trying to compact the contents. Also, you should not place small quantities of products in it, the volume of which does not even reach the minimum mark indicated on the container. This can lead to failure of the power unit.
- It is recommended to use a bowl that will allow the grinding process to be carried out efficiently. For example, for two or three people, a one-liter container will be enough.
Using an immersion blender
This variety is ideal for daily use. It is suitable for making omelettes, pancake mixes, sauces, pates and much more. Let's look at the rules for using a hand blender:
- Balance of modes. Most models have a “Pipe” mode (maximum speed). Manufacturers recommend gradually moving from minimum to maximum speed.
- Large products must first be cut.
- Do not grind hard foods. Also, when processing berries and fruits, you should remove the seeds to prevent the blender from breaking.
- Do not grind foods that are too hot or too cold.
Precautionary measures
Make sure that no liquid gets into the motor.
Wash the nozzles and bowls exclusively with mild detergents, and use regular sponges, not hard brushes. In the case of a stationary blender, washing the stand is strictly prohibited. Caring for it consists only of regularly cleaning the surface with wet wipes. The panel will need to be unplugged. Do not overload the device motor. You need to take breaks while working, especially if you are grinding a decent amount of food. At the same time, they will need to be peeled and seeds removed, if any. You also need to remember that an insufficient amount of food in more often also leads to overheating of the engine!
By following all the rules and recommendations, using a blender will become an ordinary and pleasant experience for you, and you will always delight your family with delicious and healthy dishes!
Instructions for use
Recommendations for using a blender will depend on the model you purchased: immersion or stationary, and we will talk about them below.
Immersion blender
The submersible model has compact dimensions and can easily fit in any kitchen cabinet.
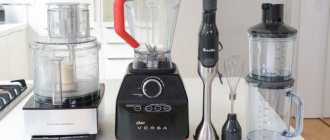
The kit often comes with many attachments, and according to this characteristic, the blender can be compared to food processors. This blender can be used in almost all containers, be it a cup, pan, deep plate or plastic bowl. To prepare a dish, you will need to place the food in any deep container, install a suitable attachment on the device and get to work. We immerse the blender in the selected bowl, beat, grind or mix our ingredients. Most often, manufacturers equip models with two speed modes, but there are additional options that allow you to cook even faster. The main thing is not to overdo it with their use, so that the device does not overheat during operation. After finishing cooking, you will need to unplug the blender, remove the attachment you are using and rinse it under running water.
Stationary blender
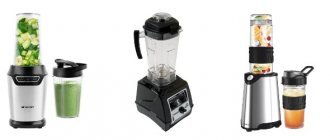
Stationary models are presented in the form of a stand with a motor and a control panel, on top of which bowls are installed.
You can easily use them to make minced meat, Korean carrots, chop nuts and herbs, and prepare various sauces, purees, cocktails and other drinks. And some models also allow you to crush coffee beans or ice for refreshing cocktails. To prepare, you just need to fill the bowl with food, close the lid, turn on the device and wait until it does all the work. By the way, on some models there is a special hole in the lid that allows you to add products during operation. This is true if you are preparing minced meat, pancake dough, cream or sauce from several ingredients.
If you are chopping large products (carrots, apples, etc.), then first cut them into 5-6 parts so that the blender blades do not become dull and the device does not overheat during operation. And if you need to prepare puree from hard root vegetables, then it would be a good idea to add a couple of spoons of cream and broth, which will not only make the grinding process easier, but will also give your dish a piquant flavor note.
Stationary
The second type is a stationary blender. You need to prepare a place for it in the kitchen in advance. It also sets a strict number of ingredients that can be processed at one time. The advantages include the fact that the user does not have to hold it in his hands while working. The stationary blender does everything itself.
Another advantage is the tightly closed lid, which prevents liquids from splashing during cooking. It’s quite convenient to use it to prepare all kinds of sauces, cocktails, and smoothies. It is also used to prepare baby food.
Popular attachments for hand blenders
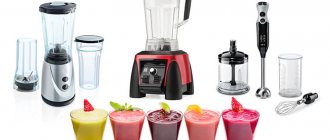
Many blender manufacturers often offer to choose the most suitable blender package. These include: Philips; Vitec; Scarlett. Each nozzle has its own purpose. Let's look at the most popular and common:
- Immersion nozzle. This attachment is basic and is included with any blender. It is ideal for making cream soups, purees, smoothies and cocktails and more. This nozzle allows you to mix various liquids and other products.
- Chopper. This attachment allows you to grind nuts, herbs, fruits and other products. Also ideal for preparing minced meat.
- For mashed potatoes. This type of attachment is suitable for products with a high starch content and allows you to achieve the ideal consistency.
- Whisk. Another basic nozzle. Its main task is to create air masses. Ideal for making mousses and beating eggs.
- Splitting knife. This attachment is an essential attribute for cocktail lovers. Because it is great for crushing ice.
- For perfect cubes. To use this attachment, you need a food processor bowl. This attachment allows you to reduce the time spent preparing salads and other dishes that require perfect cubes!
Thus, there are a huge number of types of blender attachments. Therefore, before purchasing a miracle kitchen assistant, you should decide which dishes you cook most often.
