The summer season is a conservation time for every housewife, during which it is necessary to prepare a large amount of supplies for the winter. To do this, you need not only to select and prepare the necessary products, but also to prepare jars in which they will be stored all winter. Most housewives sterilize jars over burning steam - this process is very labor-intensive, and quite unpleasant in the summer heat. To ensure that sterilization does not take much time, you can use a microwave; the entire process of preparing the jars will only take a couple of minutes.
Pros and cons of sterilizing jars in the microwave
Preparing jars for oven canning has both pros and cons.
pros
- This method is very fast compared to the conventional method. You will only need 5-6 minutes to sterilize, unlike the traditional method, where you will need to pour water into the pan, place the jars in it, wait for the water to boil and only then will they be prepared.
- You can prepare jars for preservation not only one at a time, but several at once, if they are small in volume.
- This method will help to avoid excess humidity in the kitchen, as with traditional sterilization, the water boils away in the pan and all the steam remains on the walls and windows.
Minuses
- to prepare for canning, a large jar (three-liter), you can prepare only one at a time.
- Iron lids cannot be sterilized in an oven, so they will have to be processed separately.
Cap sterilization options
yandex.ru/images
How to sterilize lids in boiling water
The most common method of sterilization. The water heats up to 10 degrees, so it kills almost all dangerous microorganisms. This method is suitable for all lids. The most important thing is to time it, otherwise the material will deteriorate. The main advantage of the method under consideration is the possibility of use in field conditions.
To process, follow several steps:
- Fill the container with cold water.
- Cover to heat quickly.
- Once the boil begins, put the lids on.
- Time 7-12 minutes after boiling.
After temperature treatment, remove the lids from the water. Since the liquid is very hot, it is recommended to use a suitable kitchen utensil such as a slotted spoon, ladle or tongs. Otherwise, you risk getting severely burned. The preparation of products is done immediately after sterilization of the lids. For convenience, use a multicooker-pressure cooker - it will help save time due to the high pressure achieved in the bowl.
It is recommended to set the time to 3 or 4 minutes.
Each multicooker has a timer - it will turn off the heating after the specified time has passed.
How to steam sterilize lids
If you want to steam treat, take a container of a suitable size for this. Fill the dishes so that the distance between the water and the surface to be treated is about 1 or 3 centimeters. Place the container on the stove and wait for the liquid to boil. After this, install the steamer insert and place the lids evenly. Cover the container to increase internal pressure. Typically, processing takes about a quarter of an hour.
The exact time varies depending on the amount of water that is inside the container. Having a steamer makes sterilization much easier. To do this, fill the bowl of the device with the required amount of water (up to the line) and select the rice cooking mode. Then place the lids at a slight angle in the cooking compartment.
It is recommended to close the workpieces immediately after processing the lids. The considered method is not suitable for plastic products; they can be deformed due to high temperature.
Calcination in the oven
You can bake the lids in the oven. For this you will need a baking sheet. Distribute the products evenly over its surface.
Then place the baking sheet inside the oven and set the temperature knob to the highest setting. Check for about a quarter of an hour after reaching the required temperature. Once processing is complete, remove the pan.
Please note that the described method is only suitable for metal (screw) products.
If you sterilize seaming or plastic lids in the oven, they will become unusable due to excessive heat. As for glass lids, they must be made of tempered glass that can withstand high temperatures. Manufacturers indicate this on the product packaging. Be sure to read the specifications before heat treatment, otherwise the lids may burst.
Preparing for sterilization
Sterilization is considered one of the important stages of canning that should not be skipped. The fact that you have carefully checked the jars and washed and rinsed them well does not provide a 100% guarantee that the food in it will not ferment or spoil. No matter how well you wash the jars, microbes may still remain on them, which can later enter the human body along with the food and not only cause poisoning, but also lead to death. For example, botulinum toxin can be stored and develop in canned foods, even in a space without air.
Preparing the container means that you need to carefully check whether there are any cracks in the containers, since the jars may explode during the sterilization process, and then thoroughly wash and rinse under running water.
Types of covers
yandex.ru/images
- Glass . These products can be used several times. They are installed on the jar using a clamp.
- Threaded . Suitable only for cans with notched necks. To install, you must screw the product.
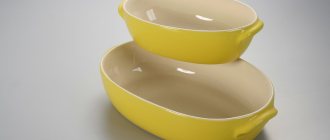
- Seaming . Housewives use these products most often. There are several options for such covers. The most common ones are gray. They are low cost and lack additional coverage. Due to the lack of a protective layer, such products quickly rust, and therefore are not suitable for workpieces with a high content of acetic acid. Cans begin to depressurize after holes appear due to corrosion. It is best to buy yellow sealing caps coated with a special varnish. They are highly resistant to a variety of chemicals, including acetic acid. This means that the products are stored much longer.
- Plastic . Suitable for glass jars. Place on the neck of the vessel after pre-treatment with boiling water. Under the influence of high temperature, the material begins to expand. This circumstance makes it easy to put the lid on the jar. After cooling, the product tightly wraps around the neck. The container becomes sealed.
Note! All types of lids require different heat treatment methods.
Sterilizing jars using steam
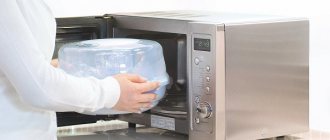
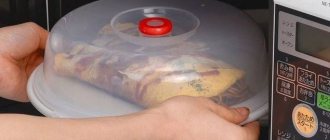
As soon as the containers are washed, you need to pour some water into them, fill the jar with water 2 centimeters from the bottom. For sterilization, it is better to take filtered water, since it will not leave limescale during the processing process. Then put all the jars in the microwave, do not cover them with lids under any circumstances, and then turn on the microwave oven for 3 minutes for half-liter jars, and for three-liter jars it will take 5 minutes.
In order to understand whether the jars have been sterilized or not, you can look through the glass of your microwave; as soon as the water boils, the entire sterilization process will take 2-3 minutes; while the water boils, steam will be released, which will disinfect all containers.
After sterilization, take a dry towel or oven mitts and remove the containers. It is important to know that the towel or potholder should never be wet, as this will lead to a temperature difference and the glass will burst. After you take out the jars, you need to drain the excess liquid from them and fill them with food for preservation.
How to sterilize jars at home
Summer is the time to start making canned food from products given by nature - tomatoes, cucumbers, berries, fruits, and for this you should prepare containers. For the whole procedure to be successful, you need to know how to properly sterilize jars in a microwave oven. Before you begin, it is important to understand how the dishes are processed. To sterilize jars, you can use two options:
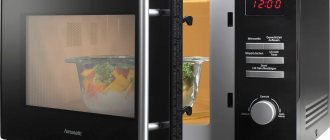
- Using water. In this case, liquid is poured inside, which, when heated, turns into steam, treating the walls and sterilizing them. An analogy can be drawn with cleaning the neck of a teapot with water. The main difference is that in the microwave the process is much faster and easier.
- Dry. With this method, a container of water is placed together with an empty container; the liquid does not come into direct contact with the walls of the cans. This method can be called combined, because the walls are simultaneously exposed to microwave rays and steam from a separate container.
Preparing jars
Before sterilizing jars in the microwave, they must be prepared for the procedure. Their integrity and the quality of the final product depend on this. Before sending them to the microwave oven:
- Check for chips and cracks, as these may cause the jar to burst. Do not use cracked dishes.
- Wash the container well, use soda, scented detergents should not be used, plain drinking water is better. Dry well to keep jars clean.
- The lids must be sterilized separately in the pan, because metal elements cannot be placed in the microwave.
How long to sterilize jars
The main point in the procedure for sterilizing jars in the microwave is time. The period of time must be strictly maintained so that they do not burst or crack. The procedure is as follows:
- Pour 10-15 mm of liquid onto the bottom.
- Set the oven mode to 700-800 W.
- Set the timer for 2-3 minutes.
During this time, steam will begin to release from the water, which will kill all harmful elements. If your microwave is small and you need to sterilize 3-liter containers, you should pour about a glass of water and place the container on its side. Then everything happens according to the same principle as with half-liter or liter jars. With the dry processing method, water must be poured into a separate container and placed next to the container for the same time.
Advantages of the method
Anyone who is interested in the question of how to sterilize jars in the microwave does this because it greatly simplifies the preparation process when canning food. This method has the following advantages:
- the processing time is much shorter than with conventional boiling;
- a favorable microclimate is maintained in the kitchen;
- double impact on microorganisms (steam and oven waves).
Dry processing
Many housewives also sterilize glassware without water. To do this, you need to put them in the microwave dry, but be sure to place a glass of water in there. Half the volume of water is poured into the glass, since if there is less water, it will not be enough, and more will lead to overflowing of water during processing. After everything you need has been placed in the oven, it needs to be turned on for 5 minutes. The evaporation of water from a glass can also serve as a guide. After sterilization is complete, all you have to do is remove the dry containers from the oven.
Preparing empty glass jars
Before calcining containers, they must be properly prepared, namely:
- The jar should not have cracks or chips. During processing, such a jar may burst. Therefore, carefully inspect the container for visible defects.
- Wash glass jars well using a metal sponge and baking soda. You should avoid using chemical dishwashing detergents. The jar must be dry.
- Boil tin lids in a separate vessel.
Sterilization together with workpieces
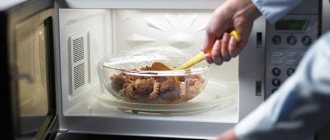
This method is the most popular among many, as it saves a lot of time. To do this, prepare the jars, fill them with the necessary products for preservation, add a little water and put the filled dishes in the microwave for 6 minutes, but do not close the jars with lids. After sterilization, all that remains is to take out the jars with the preparations, pour brine into them and roll up the previously sterilized lids.
Preparatory stage
Before sterilizing jars in the microwave, the dishes must undergo the following preparation steps:
- Containers are checked for cracks and chips. It is not allowed to use jars with cracks in microwave ovens, as they will burst when heated.
- Jars, even if they have been stored clean, are washed in running water using odorless detergents. Remains of detergent are washed off with running water.
- The dishes are wiped dry with kitchen waffle or paper towels.
You can wash jars using dishwashing detergent or baking soda.
Simultaneous sterilization of jars and lids in a microwave oven is impossible. When preparing to can, metal lids should be sterilized separately. To do this, use a small saucepan of boiling water. Water is boiled on the stove, the required number of lids is placed in it. It is recommended to always add one extra cap in case of a broken rubber band or bent edge. After a few minutes of boiling, the lids are removed from the boiling water.
Cans must be intact - without cracks or chips
Before sterilization, jars must be washed and dried.