Precautions when working at home
There are many ways to eliminate dents on kitchen appliances , however, if you have never repaired metal surfaces before, the existing problem can only be aggravated by damaging the thin steel of the case with careless action.
ADVICE! If a dent has formed on the door of a household appliance, you should not dismantle it to fix the problem, since these actions can lead to a violation of the tightness of the appliance part.
In addition, some methods of correcting the defect may be unsafe for your health. Therefore, before starting work, carefully study the precautions to prevent damage to the device and deterioration of health:
- the use of a method that involves using a rubber hammer and trowel to remove a dent requires extreme care, attentiveness and strict adherence to process technology;
- the temperature of solid carbon dioxide is about 80 ⁰C below zero, so when starting to work with it, be sure to wear thick gloves on your hands. Otherwise you will get severe frostbite.
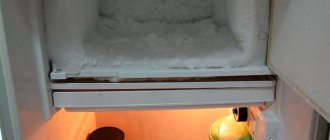
ATTENTION! Another dangerous property of dry ice is that if you use it in a poorly ventilated room, the concentration of carbon dioxide in the air sharply increases, as a result of which loss of consciousness is possible. Prolonged inhalation of evaporating carbon dioxide increases the risk of respiratory arrest and death.
When using the method of eliminating a defect from a refrigerator with dry ice, be sure to open the windows and do not close them for some time after the repair.
Have you removed dents from your refrigerator before?
Not really
What not to do when removing dents and scratches on a refrigerator
When correcting defects, the main task is not to harm or worsen the situation. Forbidden:
- use abrasives, hard sponges and brushes;
- use a hammer and brute force;
- eliminate damage by directing force against the metal structure of the body;
- get down to business without practicing on a piece of ordinary metal.
It is not recommended to disassemble the device to troubleshoot the problem. In particular, you should not remove the door. If you install the element back even with a slight distortion, the seal will be broken and the refrigerator will stop working correctly.
Getting rid of damage using a suction cup
Most car owners know that using a pneumatic straightening suction cup can quickly eliminate small and large damage to the car body without first removing the paint layer.
This tool is also suitable for removing dents from the surface of a household appliance:
- clean any existing dirt, degrease the damaged area of the refrigerator;
- attach the suction cup to the defect so that the edges of the tool fit tightly to the metal surface;
- pump out the air from the internal cavity (the space between the suction cup and the outside of the refrigerator);
- After removing the air and ensuring reliable adhesion of the device to the electrical device, proceed to remove the dent: slowly pull the suction cup handle in the desired direction, pulling the metal to the required level;
- blow air, thereby disconnecting the tool from the surface of the kitchen appliance.
If you don’t have a professional vacuum device, try removing a small dent using an ordinary plunger.
ATTENTION! The use of a suction cup is only permissible if the paintwork of the refrigerator is not damaged.
Another convenient way to correct unevenness is to use a mini-lifter to remove dents on the car body .
The tool consists of a centrally located pin for the suction cup fungus and two rubber feet, which allow the device to be securely fixed to the surface and eliminate the risk of damage to the paintwork.
Using the tool you can remove dents up to 8.5 cm in size:
- clean from dirt, degrease the damaged surface, wipe it dry;
- select a fungus piston that is suitable in shape and size for the problem area;
- Apply hot glue to the piston, place the fungus on the defect, wait for the composition to crystallize (30-50 seconds);
- place the rubberized feet of the tool so that the central pin is located exactly above the glued piston, and insert the mushroom mount into the minilift adapter;
- Press the handles of the tool several times, repeat the movements until the dent is completely leveled. Remove the fungus using hot melt adhesive remover.
IMPORTANT! It is strictly forbidden to remove adhesive residues with sandpaper, a knife or other sharp objects.
Useful information: how to clean the drainage hole in the refrigerator.
How much does it cost to remove a dent on a refrigerator?
The price of the work does not depend on the device model. Removing dents on an Atlant refrigerator will cost the same as working on an LG appliance. Moscow craftsmen who respond to home repairs ask for work from 1,200 rubles, provided that the work is carried out without painting.
It is more profitable and safer to contact a specialized service. Workers also visit your home, an agreement is concluded with the customer, and a guarantee is in effect. The cost of service work starts from 900 rubles.
Removing dents on a refrigerator yourself at home is a labor-intensive process that requires extreme care. If you correctly implement the proposed instructions, the device can be restored to its attractive appearance. It is not always possible to remove the defect completely. For greater efficiency, methods can be combined.
Using a trowel and rubber hammer
This method is suitable if the area of the surface defect is significant. To work, you will need a rubber hammer and a trowel - a spatula for plastering or working with tiles:
- degrease the problem area on the refrigerator;
- turn on the hair dryer and warm up the dent. Make sure that the temperature applied to the damaged surface is not too high. Otherwise, there is a risk of damaging the paint layer.
- turn off the hair dryer, place the trowel on the unevenness so that the spatula completely covers the defect;
- Lightly tap the entire surface of the trowel with a rubber mallet;
- As a result of the manipulations, the dent will straighten.
IMPORTANT! It is unacceptable to use a metal hammer instead of a rubber one to implement this method. Movements during the process of tapping the tool on the trowel should be leisurely and light.
What not to do
You need to understand the type of damage. If the paint layer is not damaged, then there is no need to rush. The metal at the defect site is in a state of tension and it is possible that it will return to its original position. Simply heat the surface slightly and the dent should disappear.
If enough time has passed and the dent does not disappear, then you cannot resort to the following actions:
- Apply an iron hammer to the dent area. The coating will suffer even more, and the paint will become cracked;
- Disassemble the unit door. The refrigerator may lose its seal and the shape of the door may change. Loss of tightness will cause the compressor to start operating in a different mode and fail;
- The presence of a minor defect only affects the appearance. If the dent is small and it is not critical, then it is better not to touch it, so as not to damage the refrigerator by careless action. In the production of modern refrigerator models, thin metal is used, which is quite easy to damage;
The following recommendations will help eliminate minor defects. Larger and deeper dents should be left to professionals.
Applying the effect of thermal expansion
The method is based on the property of all physical bodies to expand under the influence of high temperature . Contraction of the metal surface after heating can help straighten the resulting dent on its own:
- clean the problem area from contaminants and degrease it;
- take a hair dryer. If you don’t have a tool, a household device designed for drying hair will do;
- turn on the device, direct the hot air stream to the damaged area of the refrigerator;
- Apply the hairdryer to the defect for 30-60 seconds. The temperature of the appliance should be average to eliminate the risk of damaging the integrity of the seal located between the internal and external walls of the refrigerator;
- Turn off the hair dryer, fill a spray bottle with cold water and spray it onto the hot surface.
REFERENCE! If the method does not bring a positive result after the first procedure, repeat all steps 2-3 more times.
Step-by-step instructions on how to defrost a Bosch refrigerator are provided here.
How to remove a refrigerator door
Refrigerator upper chamber door
Most units are two-chamber. Their compartments are located one above the other. In this case, they start from the upper chamber. If the device is single-chamber, everything is done in the same way, only for one door.
- Sequencing
- We close the door. We take tape and use it to attach it to the body in several places. This way the sash will not fall during dismantling.
- Unscrew the top hinge fastening. If it is located in plain sight, nothing else needs to be done. In some models it is covered with a decorative strip. You will need to first remove it, then unscrew the fasteners. We remove the loop.
- Unscrew the fasteners on the handle. We take out the bolts and remove the element.
- Remove the tape. Remove the door, lifting it slightly to remove it from the middle hinge. It is located at the bottom of the sash. Unscrew the bolts of the fastening element and dismantle it.
It remains to prepare the mounting holes on the opposite side. Using a flat screwdriver, carefully pry up the plastic plugs and remove them from the grooves. You can immediately rearrange them into the vacated slots or do this after you finish rehanging the door. It is advisable to put all removed fasteners and hinges in a separate box or drawer so as not to lose a single element.
Refrigerator lower chamber door
To do this, we perform several operations sequentially.
- We secure the sash with tape so as not to drop it during dismantling.
- We remove the caps from the hinge fasteners on top. Unscrew the bolts. Some varieties have a middle loop. It is common for the lower and upper door leaves. In this case, it is simply untwisted.
- Remove the tape. We slightly lift the sash to remove it from the fasteners, and remove it from the socket. Set the canvas aside.
- We dismantle the hinge mechanism, unscrew and remove the pins and bushings. We rearrange the plugs into the vacated holes and remove them from the sockets on the opposite side.
We carefully fold all dismantled components and fasteners so as not to lose anything.
How to remove with a hairdryer and dry ice on a stainless steel device?
To work you will need a hair dryer and granulated dry ice:
- thoroughly wipe the surface with a damp sponge, then degrease and dry it with a paper towel;
- heat the dent with a hairdryer (set to low or medium temperature) for a minute;
- Place ice granules in the center of a small piece of suede fabric, fold the corners of the material to form a bag;
- turn off the hair dryer, apply ice to the defect and rub the entire perimeter of the damaged area in a circular motion.
If necessary, repeat all steps from the beginning.
Important Tips
When using any of the above methods, basic precautions should be taken.
- Be sure to ventilate the room not only after work, but also during the process of straightening the dent. When using dry ice, it is important not to touch the pieces with bare hands - this can lead to injury and frostbite. Wear thick gloves to protect against contact with ice.
- A dent in the door makes you want to hit it from the other side. Under no circumstances do this or disassemble the door yourself. This will cause problems with the cooling and sealing of the refrigerator.
- Do not use a regular metal hammer as a hammer. It can not only damage the varnish coating, which cannot be fixed on its own, but also provoke new damage.
- If the dent is small, you can simply decorate it using special stickers or magnets. You can place a family photo or a notebook with reminders.
Using our tips, you will return your refrigerator to its original appearance and be able to decorate its surface.
Correcting a defect using compressed air
A can of compressed air (liquid carbon dioxide) is designed to effectively clean dust from your computer and its components.
This product can also eliminate defects on the surface of the refrigerator:
- remove dirt from the problem area, degrease;
- warm the dent with a hairdryer (2-3 minutes), turn off the device;
- put on thick rubber gloves;
- turn the can upside down and spray its contents onto the surface; Continue the process of treating the defect until the dent is covered with frost.
As a result of exposure to a sharp temperature change, the dent will straighten out . After removing the damage, clean the refrigerator from any remaining product with a soft cloth.
REFERENCE! The method using compressed air can be repeated 2-3 more times if the first procedure does not bring results.
Minilifter (vacuum suction cup)
There are several models of this device on the market. Allows you to eliminate defects without subsequent painting. Easily aligns and locks in the desired position. Rubber supports prevent sliding on the surface of the refrigerator.
Minilifter
To activate it, you need to heat up the hot-melt adhesive and place it on the glue piston. Then a piston is installed on the device itself and the screw is adjusted. You need to level out the dent gradually, moving your handles. After removal, wipe the surface with alcohol or glue remover.
DIY dent decoration
If the defect in kitchen appliances is of significant size and depth, or the paintwork of the appliance is damaged, the dent must be filled with putty to prevent rusting of the metal elements of the appliance.
Putty to the rescue
Removing a dent using putty involves several stages:
- grinding a surface area;
- removal of dust deposits;
- degreasing of metal coating;
- applying an anti-corrosion primer mixture;
- puttying;
- final surface grinding.
Work order:
- to grind dents of significant size, you will need a grinding machine; if the damage is small, sand the top layer of the coating (to the metal) manually using sandpaper with P80 abrasiveness - this grit value of the device is the most optimal, since it allows you to eliminate subsequent shrinkage of the putty mass;
- removing dust with a slightly dampened cloth is a mandatory step, which must be performed both before starting work and after sanding the putty;
- To degrease the surface of the refrigerator, prepare acetone or medical alcohol. Soak a cotton pad in the preparation and thoroughly wipe the cleaned surface;
- Apply a primer mixture to the dent (you can use a composition intended for repairing automobile bodies), wait until it dries;
- Prepare the putty for the procedure according to the instructions included with it. It is desirable that the composition used is also intended for body work;
- Place a small amount of the mixture on a rubber spatula and work it into the dent. If the defect has a significant depth, do not try to fill the concave area with putty at one time: make 3-4 layers, applying each subsequent one after the previous one has set;
- After the composition has hardened, sand the surface with fine-abrasive sandpaper.
Did our advice help you?
Not really
ATTENTION! Removing defects from a refrigerator by puttying has a drawback: the area treated with the mixture differs in color from the rest of the surface, and, in most cases, the device will have to be repainted - partially or completely.
Other decorative products
- Small defects can be easily hidden behind beautiful decorative magnets.
- On the surface of the refrigerator, you can create an abstract geometric composition from strips of colored tape or decorate the household device with an intricate pattern.
- If you know how to draw, buy acrylic paints, a thin brush and try your hand at artistic painting. Before applying the drawing, degrease the surface and use a simple pencil to make a light preliminary sketch of the future image, then start working with paints.
- Napkins for decoupage: choose a suitable product, separate the top layer with the applied pattern and glue the image with any water-soluble glue (for example, PVA). To ensure that the design retains the brightness of its colors for a long time, cover it with several layers of special varnish.
- The easiest and cheapest way to hide dents on the device body is with decorative stickers. Before gluing the image, be sure to degrease the surface of the refrigerator.
What not to do
As experts advise, first I carefully examined the damaged surface. The paint was intact, no chips were found. Therefore, I decided to wait a little - metal has the property of “playing”, so the surface can take on its previous appearance. Apparently this was not my case.
What I didn't do:
- I refused to disassemble the door. Firstly, I am not a repair specialist, so I would hardly put it back together the way it was. Secondly, there is a risk of breaking the seal of the sash.
- I didn’t try to straighten it with a hammer, although that was the first thought that came to mind. But this can damage the door even more - chip off the paint, add new dents.
- I gave up the idea of correcting the defect by covering up the dent. Buying a primer is not a problem, but achieving the perfect color combination is quite difficult. But repainting the entire refrigerator was not part of my plans.
Remember! Dents do not affect the functionality of the equipment in any way. Therefore, if they are not too much of an eyesore, then it is better to leave them as they are. In addition, modern units are made of sheets of thin metal, so careless movement can aggravate the situation.
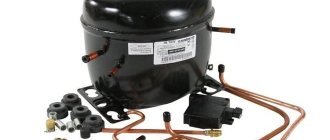
Types of compressors in refrigerators
Most often, piston-based compressors with bypass valves are used in everyday life, drawing in gas during discharge through one valve and pushing it out after compression through another. A conventional compressor, with a crank converting the rotation of the motor shaft into piston movement, is called a manifold compressor. Such units are installed on budget models. They are noisy and get very hot due to the large number of moving parts in the compressor.
Linear compressors have a compression chamber with a piston. The crankshaft is excluded from the system. The piston operates directly from the solenoid, converting alternating current into mechanical energy of the piston movement. Models in the mid-price segment are equipped with linear motors. The energy efficiency of compressors is higher; they belong to class A. Starting and stopping equipment according to the instructions of the thermostat is less noisy.
Inverter compressors are equipment for continuous operation with variable output to maintain the mode in the chambers. Quiet operation, high efficiency, and reliability of the entire system are a consequence of installing an electronic converter in a brushless motor. The incoming current with a frequency of 50 Hz is rectified and converted into alternating current of the desired frequency. This provides variable rotation speed. High cost and dependence on stable parameters on the power line are obstacles to introducing new products into all models.
All motor-compressors have a complex structure, hermetically pressed into the housing. Internal failures lead to replacement of the entire assembly. External components include a starting and temperature relay, frame mounting, and gaskets.
Repair or replace the compressor with a new one?
Replacement of the compressor must be justified - this is a matter of competent diagnostics. You won’t be able to check the compressor with your own hands and replace it with full compliance with the technology, but you can damage the unit’s tubes, release all the refrigerant, or upset the balancing of the unit.
Due to overload, the internal winding of the motor will begin to heat up, which will not withstand this operating mode for a long time. If it is not stopped by the overheating emergency relay, the winding will burn out. It can be changed, although this is a labor-intensive operation.
The experience of service center specialists suggests that repairs involving the replacement of a compressor are more reliable than attempts to restore an old, already worn-out unit. But if its individual parts wear out, for example, rings, sealing gaskets, individual parts of the motor, repair is still possible. Let the technician figure out the reasons for the breakdown, and he will offer you ways to solve the problem.
Step-by-step process for changing the door position
Before you hang the refrigerator door with your own hands, you should unplug it from the mains.
.
Then you need to remove all products from the shelves located on the inside of the door, and various magnets from the outside. Work carefully, trying not to scratch glossy surfaces.
Step 1 - remove the top door
The vast majority of refrigerators are two-compartment, with a freezer located above/below the main compartment. Therefore, it is better to start rehanging from the top door.
You need to attach the door to the body with tape so that it does not fall during disassembly. This must be done in several places.
As a rule, the door is attached to the body using hinges that are screwed with two bolts.
They need to be removed first, after first removing the plastic plugs from similar holes on the opposite side of the door, where we are going to screw the removed hinge.
There are two bolts on the top hinge that need to be removed with a wrench. Hinges may look different for different refrigerator models.
The plugs should be removed carefully so as not to scratch the surface, using a flat-head screwdriver. If decorative panels are screwed onto the front part, they can be removed using a Phillips screwdriver.
Some models of modern refrigerators are designed in such a way that to dismantle the door, in order to gain access to the top hinge, you must remove the top cover of the device.
We dismantle it and put it aside. It is better to put all removed parts in a separate container.
.
It is necessary to first dismantle the panel to get to the main fastening parts. The shape and size of fasteners differ between equipment from different manufacturers.
Unscrew the bolts of the upper hinge and remove the hinge. Then you should remove the top handle, having first removed the decorative plugs. If the handle is not bolted, then there is no need to touch it; its design already includes the possibility of reinstalling the door.
Once all the screws are removed with a wrench and the hinges are removed, you can remove the tape and remove the top door by lifting it up to separate it from the middle hinge. We put the removed door aside.
We rearrange the previously removed plugs to the opposite side into the empty slots. For greater convenience, they can not be removed before dismantling, but rearranged with the door removed.
Step 2 - remove the bottom door
Let's move on to the next stage: we repeat all the steps with adhesive tape - we attach the bottom door to the body. Using a wrench, remove the middle hinge, first removing the spacer from the pin.
This is what the middle hinge looks like on the doors of most models of two-chamber refrigerators. But there are models in which there are two middle hinges for the upper and lower doors
Then you can remove the tape and, slightly lifting the door from the lower pin, remove it and also set it aside.
We remove the plugs from the holes in the middle part of the refrigerator for subsequent installation of the dismantled middle hinge and rearrange them into the resulting holes.
Now all we have to do is dismantle the bottom hinge, which remains after removing the door on the refrigerator body.
This is done using a wrench or screwdriver. The fastening pins and bushings are removed, and the screws securing the lower hinge are unscrewed.
Then the part is removed, and plugs from the opposite side of the body are transferred to the place of the formed holes.
That's it, the disassembly stage is completed, it's time to directly transfer all the dismantled parts to the other side in a mirror order.
Step 3 - transfer the loops to the opposite side
All sets of removed fasteners should be transferred without any replacements, because installation problems may arise when rearranging interchangeable hinge elements.
Incorrectly installed doors do not close well and hang, since the hinges are worn out and should not be disturbed.
The procedure for moving the door is as follows. First of all, we install the bottom loop that was removed last in the opposite place. Screw the bolts using a wrench or screwdriver. Install the lower pin and gasket.
Rearranging the bottom hinge on the refrigerator door is not always easy - some models may lack one or two necessary holes on the bottom opposite side
Then you should carefully install the lower door with the handle previously moved to the opposite side onto the pin and secure it with tape.
A little trick - instead of using tape, the craftsmen suggest simply tilting the refrigerator body back a little, then the door will hold tighter and not move out of place.
Then install the top refrigerator door onto the middle hinge pin in the same manner. Don't forget about insurance - secure the door with tape or tilt the refrigerator slightly back.
The last hinge to be installed in the rehanging process is the top hinge, then all that remains is to install the top decorative panel, of course, if your refrigerator has one
Next, install the top hinge pin into the sleeve on the top door, align the holes and secure the part with bolts using a wrench or screwdriver. That's it, the new door is ready. All that remains is to check it for leaks.
This is easy to do - you need to open the doors one by one and, placing a small strip of paper against the body, slam them so that the paper is sandwiched between the door and the rubber seal.
It is imperative to check the installed doors for leaks, because after re-hanging the refrigerator door, it may require additional adjustment
There are two-chamber refrigerators with separate fastenings, that is, their doors are installed on separate hinges, and not on a common middle hinge.
Reinstalling the doors of such devices will also not be a big hassle. Dismantling is carried out in the same order, only instead of one fastening in the middle there are two for each sash.
You can even rehang only one door, leaving the second in the same position. Sometimes this is more comfortable, especially if there is little space in the kitchen and the furniture arrangement is not very convenient.
You can play with such an innovative move very stylishly, especially in the built-in version of the kitchen.
If your refrigerator is single-chamber, then the work becomes a little more complicated due to the presence of decorative panels on many models.
Before removing the door, you must first remove the top panel to gain access to the hinge mount hidden underneath.
After the top hinge is removed, the same must be done with the bottom panel and hinge. Although this operation is more labor-intensive, it is generally uncomplicated.
Sometimes, to dismantle the door of a single-chamber refrigerator, you need to remove the top cover, and if there is a display on the front panel, then this must be done
You should take into account the fact that not all refrigerator models are ideally designed for self-hanging the door.
For example, in the Atlant
The top mount can be moved to the left without any problems, but the hole for one bolt is missing in the lower left corner.
Therefore, you will either need to purchase a left-handed hinge for the lower part, or drill the required hole yourself.
Reasons why the door does not close tightly
There are several points that could lead to the refrigerator door breaking and not closing:
The refrigerator door is sagging . Visually this can be understood by the following signs:
- severe sagging of the door;
- when the rubber base of the door does not stick well to the body and comes off easily, and a sheet of paper placed between the body and the rubber easily falls out.
To fix this problem, you will need to remove the protective cover from the hinges and pull the refrigerator door up to its original level.
Changing the structure of the rubber base of the door . Due to frequent and prolonged use, rubber is deformed, and therefore the tightness of the structure is compromised. You can return the rubber part to its previous state using boiling water or hot air (hairdryer).
Loosening fasteners . When the fasteners are deformed or worn, the door's misalignment is visually determined. You can fix this yourself by tightening the fasteners or buy identical ones and install them.
Identifying and self-correcting seal faults
Local identification and correction of breakdowns associated with the refrigerator door, which can be easily eliminated yourself, can be identified in several ways. Firstly, during a visual inspection, when the refrigerator door does not adhere well and then opens easily or sag significantly, you will need to carefully remove the protective cover from the hinges (if there is one) and tighten the door to the required level. It is quite possible that the gap that appears is due to the sagging of the refrigerator door.
Secondly, if a loose fit is due to deformation of the rubber seal, because Since the material loses its elasticity over time, it can be returned to its previous state by heating. To do this, you will need to use a heating device (industrial or household hairdryer) or a thin stream of boiling water from a kettle to heat (pour) the deformed area of the seal, and while it is elastic, give it its original shape by placing a spacer (a piece of rubber, paper or dense foam) under the heated area. .
Attention! When fixing (heating) a deformed rubber seal on the refrigerator door with your own hands, you must follow the rules of personal protection, i.e. use gloves and place a rag on the floor to prevent hot water from flooding the room. In this case, the rag will need to be periodically squeezed out of excess water into a bucket, and then the waste water can be drained into the sewer. It is recommended to give the “elastic band” its original shape using gentle hand movements. When adjusting the seal, be careful not to burn your hands.
Thirdly, before adjusting the refrigerator door and trying to restore the damaged seal, you will need to pull out its edge with a thin screwdriver and consider the method of fastening. It can be on bolts, glue, special clamps or in slots (grooves). Replacing the seal on the body (or door) of the refrigerator in whole or in part is carried out by measuring the old element and gluing a new one in place to magnetic strips prepared in advance, which are inserted into the cavity of the gasket profile. If you don’t have a native seal, you can try to order and buy a universal one.
Such repairs to a worn or damaged rubber seal are most often carried out only if it is installed on an Atlant, Minsk or Oka refrigerator.
Other problems, in addition to replacing the rubber seal when a small one is required, is the door creaking or reinstalling it. You can eliminate the appearance of a squeak in the following way:
- Identify the hinge (or several hinges) that squeaks when opening/closing the refrigerator door.
- Eliminate the defect with a drop of machine oil by placing it in the door hinges (under no circumstances use vegetable oil, i.e. edible oil, for these purposes).
Thus, simply adjust the hinges by lifting them (as far as free movement allows) and dripping a few drops of oil onto the axle in order to get rid of the unpleasant creaking sound.
Another, no less difficult job of self-repairing a refrigerator is adjusting the door when it is reinstalled or sagging, which is done using plastic shims. Depending on the amount of door subsidence, you will need to purchase 2-4 such washers.
In order to adjust the refrigerator door with your own hands when it is sagging, you need to carefully remove the door by unscrewing the refrigerator panel and removing its fasteners at the top. Then you will need to place adjusting washers (1-2 pieces) on the bottom bracket pin and adjust the door horizontally. Next, all that remains is to “put” the refrigerator door in place, checking it for any distortions and cracks, as well as for the tight fit of the rubber band to the body (or door) and the operation of the light switch in the refrigerator.
Before you start repairing the refrigerator door yourself, it is strongly recommended not to load the refrigerator door with food from the inside.
If a break in the mounting hole is detected, the door will simply need to be moved to the opposite side, where it is intact. Similarly, adjust the door for distortions (see description above) using adjusting plastic washers. If the hole breaks in two places and it is impossible to hang the door, a plate will need to be strengthened onto the damaged surface using “cold welding.” Then prepare a hole of the appropriate size for the bracket axis and hook the door into its original place.
In most cases, the question of how to rehang the refrigerator door arises when a kitchen remodel is required and the appliances need to be moved to a new location.
If the position of the refrigerator does not allow the door to open properly, it becomes necessary to move it in the opposite direction for greater convenience.
Sometimes such a need arises if one of the owners is left-handed, and he wants to install everything in the kitchen according to his wishes.
This is also done if the refrigerator door does not close well due to the rubber seal on the handle side being worn out. In this case, the door does not fit tightly to the body, and the device loses its tightness.
Sometimes you have to change the entire seal, but in most cases it will be better to simply rehang the refrigerator door, because this does not require financial costs
It’s not difficult to check this - just cover the refrigerator by pressing a piece of plain paper against the door, and then pull the sheet.
If it slides out easily, then the gap between the housing and the seal is large enough. This means that the seal is broken, and you should either change the entire perimeter seal or rehang the door.
In some refrigerator models this can be done without much difficulty, because there are already holes for handles and hinges on the opposite side of the door.
Before starting this work, we advise you to make sure that these spare holes are available in your refrigerator.
If you do not find them, then you will not be able to re-hang the refrigerator door yourself - the factory design of the device does not provide for this, you should not even try!
Of course, some owners can drill the necessary holes themselves if there are none, but it is still better to use the services of a professional technician, especially if your refrigerator is equipped with a display or an opening sensor
Some stores include the door rehanging service in the warranty package, so it is advisable to contact their service center.
If the warranty period of your refrigerator has expired and its factory assembly provides for the possibility of re-hanging the door yourself, then doing this yourself will not be difficult at all, just follow the safety rules.
Dismantling and “dialing” contacts
The instructions apply to the most common linear compresses in home refrigerators. It is necessary to have an electrical tester with the ability to measure resistance. Without it, the whole idea is completely meaningless. You will also need a blowtorch.
For dismantling you need:
- Use wire cutters to cut through all the tubes connecting the compressor (at the bottom of the refrigerator, black, shaped a bit like a ball) with other elements. A rapid release of explosive freon will begin. It is necessary to securely close the stove burners, avoid using electrical appliances and open as many windows as possible.2. After a few minutes, you can continue working: separate the remaining pipes using a torch, while the remaining refrigerant escaping will burn out. It's no longer dangerous. Then the compressor is removed from the base; to do this, unscrew several bolts.3. To open access to the necessary contacts, you need to disconnect the starting relay connected to the compressor using a screwdriver (three pins, similar to those that stick out from a regular electrical plug, are what you need).4. Using a tester, the resistance is measured on two contacts according to the “each to each” principle. The readings should differ from zero; for a new device their sum is approximately 40 ohms.
There are three possible cases of damage to the motor windings inside the device:
- break;
- breakdown on the capacitor;
- short circuit between each other.
The tester will show zero or huge resistance. One way or another, any of the listed options is a clear reason to replace the compressor.
- During installation, instead of old tubes, you need to insert new ones into the compressor, accurately and accurately connect them with the rest of the system, and then solder them with a torch. You will need to “adjust” the length using wire cutters.
Repairing a refrigerator yourself is not an easy task. Perhaps, having gone through all the “circles of hell”, a person who decides to do this will gain invaluable experience and even, perhaps, a new profession or at least a hobby - repairing household appliances with his own hands, which in itself is wonderful. Well, all that remains is to wish you good luck.
From this video you will learn how to determine the condition of the refrigerator compressor using a tester:
OUR SITE RECOMMENDS:
Bluetooth transmitter for car
15.12.20190
Contents1 There are several types of headsets:1.1 What are its functions:1.1.1 ...
Bork grill for steaks
15.12.20190
Appliances for real gourmets The Bork collection includes…
Posts on the VK wall about life
15.12.20190
It’s a shame and very painful, do I really deserve this((...
Information technology what is it
15.12.20190
Contents1 General information2 Modern interpretation3 UNESCO approach4 Functionality...
The last notes
How to recover Instagram page without email
15.12.2019 0
How to restore a VK page without a last name
15.12.2019 0
How to restore a VK page if the number is lost
15.12.2019 0
How to restore a column in Excel
15.12.2019 0