A washing machine, like any other electrical equipment, is susceptible to breakdowns due to wear and tear of parts. Many can be repaired independently, but you need to know how the washing unit is disassembled depending on the brand.
This article tells you how to disassemble washing machines from different manufacturers, including the most popular Samsung, Indesit, Ariston, and also what tools are needed for this.
Preparing for disassembly
To make the process of disassembling the washing machine go as quickly as possible, you need to prepare the following set of tools in advance:
- wrenches;
- slotted and Phillips screwdrivers (a good option is screwdrivers with a magnetized tip that holds very small fasteners);
- pliers (when working with household appliances, it is better to choose a tool with rubberized lining on the handles);
- WD-40 liquid (an irreplaceable assistant in situations where it is necessary to unscrew scale-covered and rust-covered bolts).
In addition to tools, you should always have rags and a basin at hand (necessary for collecting the remaining water in the tank, drain hose).
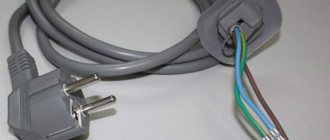
Having prepared the necessary tools, household appliances are disconnected from the water supply, sewerage, electricity, and placed in an open, free space so that nothing interferes with the disassembly process.
Prepare thoroughly
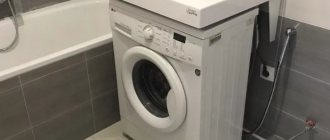
Considering the fact that a washing machine is a fairly large device and there are a lot of parts in it, space will be required to disassemble it. It is better not to do such work in a small bathroom. Use the help of a friend and take the equipment to a larger room, or better yet, take the machine to the garage (in the warm season) or to a heated workshop. Before “touching” the washing machine, perform a number of necessary actions:
- turn off the power to the machine;
- completely remove any remaining water from the bowels of the machine (through a filter, dispenser, hoses);
- collect the necessary tools.
When disassembling the machine, you will have to remove a fairly large number of large parts. Fold them in such a way that nothing gets mixed up on one side, and so that everything is at hand on the other. It is better to place fasteners and other small parts in pre-prepared containers (plastic containers, jars, etc.). Prepare a piece of thick wire bent in the shape of the English letter “S”. You will hook it onto the right wall of the case after removing the top cover. You will get a hook on which you can conveniently hang the control panel (so as not to disconnect the wiring from it).
Do-it-yourself repairs usually involve a number of difficulties. In order not to confuse anything, it is better for a novice master to pick up a camera and photograph each stage of the work.
To accomplish this, you don’t need any unique tools. Find in your own drawer: screwdrivers (slotted and Phillips), pliers, a hacksaw, a set of sockets or open-end wrenches of different sizes, hammers with metal and rubber strikers. WD-40 spray in case you have to deal with rusted fasteners. It is also worth preparing a good cloth that does not leave lint. When everything is ready, you can start working.
Washing machine malfunctions
The most common malfunctions of Electrolux washing machines are:
- Water heating does not work.
- The Electrolux machine does not fill with water.
- The drain does not function.
- The rinse program does not run.
- Spin does not work.
- No powder is collected.
- The equipment does not turn on.
- Knocks out the machine gun.
These are the most common faults; in fact, there are many more of them. To solve some of them, for example, to replace a pressure switch, only partial disassembly of the device is necessary. Others will require more serious work to eliminate. So, to replace the bearings, in addition to the housing, it is necessary to disassemble the tank.
Search table for spare parts for Electrolux washing machines
Call a specialist
Your suggestions
Send photo by email
ATTENTION! The table is for informational purposes only and is not the final authority in choosing spare parts. The manufacturer may change the characteristics of the product. Some washing machine models may have different sets of bearings and seals. Spare parts tables for different models of other washing machines are here.
| MODEL | STUFFING BOX | BEARING | BELT | heating element | VALVE | WATER PUMP |
| Electrolux EW 643 F | 22x40x8/11.5 | 6203-6203 | 1287 H7 | 3406142 | Askoll 40W | |
| Electrolux EWT 811 | 1287 H8 | |||||
| Electrolux EW 813 F | 1287 H7 | |||||
| Electrolux EW 821 T | 1294693005 + 1294694003 | 1294693005 + 1294694003 | 815662 | Askoll 40W | ||
| Electrolux EWT 832 | 53188955271 + 53188955289 | 53188955271 + 53188955289 | ||||
| Electrolux EWT 805 | plastic support 30Х46.8Х8.7/13 | 6204-6204 | 1200 J5 | |||
| Electrolux EW 914 S | 40x60x10 | VA2V 30X60X37 | 1195 J6 | Heating element 1500 W | ||
| Electrolux EW 920 S | 40x60x8/10.5 (internal 40.2x55x5) | VA2V 30X60X37 | 1282 J6 | Heating element 1500 W | Askoll 40W | |
| Electrolux EW 925 | 35x62x10/12 | 6205-6206 | ||||
| Electrolux EW 952 S | 40,2×60/105×8/15,5 | VA2V 30X60X37 | 1280J6 | |||
| Electrolux EW 962 S | 40,2×60/105×8/15,5 | VA2V 30X60X37 | 3406142 | 1Wx180 | Askoll 40W | |
| Electrolux EW 1010 F | 35x62x10 | 6204-6205 | Heating element 1950 W | 1Wx180 | ||
| Electrolux EWT 1011 | 1200 J5 | Askoll 40W | ||||
| Electrolux EWS 1020 | 35x62x10 | 6205-6206 | 1282 J6 | Heating element 1950 W with hole | 2Wx180 | Askoll 30W |
| Electrolux EW 1022 T | 1200J6 | |||||
| Electrolux EW 1044 S | 40x60x8/10.5 (internal 40.2x55x5) | VA2V 30X60X37 | 1282 J6 | 3406142 | ||
| Electrolux EW 1062 S | 40,2×60/105×8/15,5 | Heating element 1950 W | 1Wx180 | Askoll 40W | ||
| Electrolux EW 1063 S | 40x60x10 | 1280J6 | 3406142 | |||
| Electrolux EW 1067 F | 35x62x11/12.5 | 6205-6206 | ||||
| Electrolux EW 1075 F | 40x60x10 / 35x62x11/12.5 | 6205-6206/ VA2V 30X60X37 | 1282 J6 | |||
| Electrolux EW 1165 F | 48×68/110×13 | VA2V 30X60X37 | 1196J5 | |||
| Electrolux EW 1235 T | 1200J6 | |||||
| Electrolux EW 1237 T | 1200J6 | |||||
| Electrolux EW 1257 F | 40.2×72/80×8/13.5 | 6206-6207 | ||||
| Electrolux EW 1270 F | ||||||
| Electrolux EW 1277 F | 35x62x10/12 | 6205-6206 | ||||
| Electrolux EWF 1286 | 35x62x10 | |||||
| Electrolux EW 1649 | 47x80x11/13.5 | 6306-6307 | ||||
| Electrolux EW 1675 F | 47x72x11.5/14 | 6206-6207 | 1200J6 | |||
| Electrolux EWC 1050 | 22x40x8/11.5 | 6203-6205 | 1127J4 | 2Wx180 | Askoll 40W | |
| Electrolux EWF 1030 | 35x62x10/12 | 6205-6206 | ||||
| Electrolux EWF 1090 | 30x52x10/12 | 6204-6205 | ||||
| Electrolux EWT 10420W | plastic support | 6203-6203 | Askoll 40W | |||
| Electrolux EWF 8040 | 30x52x10/12 | 6204-6205 | ||||
| Electrolux EWF 1030 | ||||||
| Electrolux EWF 1222 | 35x62x10/12.5 | 6205-6206 | Askoll 40W | |||
| Electrolux EWF 1486 | 40.2x72x10/13.5 | 6206-6207 | ||||
| Electrolux EWF 12040W | 35x62x10/12 | 6205-6206 | ||||
| Electrolux EWF 12270 | ||||||
| Electrolux EWS 800 | 0x60x10 | VA2V 30X60X37 | Heating element 1950 W with hole | 2Wx180 | Askoll 30W | |
| Electrolux EWS 800 | 35x62x10 | 6205-6206 | 1287 H8 | Heating element 1900 W with sensor | ||
| Electrolux EWS 8000W | ||||||
| Electrolux EWS 8010W | ||||||
| Electrolux EWS 8012W | ||||||
| Electrolux EWS 1046 | 40x60x8/10.5 (internal 40.2x55x5) | VA2V 30X60X37 | 1280J6 | 3406142 | Askoll 40W | |
| Electrolux EWS 1046 | 40x60x10 | 1282 J6 | Heating element 1950 W with hole | 2Wx180 | ||
| Electrolux EWS 1046 | 30x52x10/12 | 6204-6205 | 1260 5P | |||
| Electrolux EWT 825 | plastic support | 6204-6204 | ||||
| Electrolux FE 1014 N | 40x60x8/10.5 | VA2V 30X60X37 | ||||
| Electrolux WH 4555 T | 40.2×72/80×13 | 6206-6207 | 1200J6 | |||
| Electrolux WDJ 1233 | 40.2x72x10/13.5 | |||||
| Electrolux EWS 12470 W | 35x62x10 | 6205-6206 | 1195 J6 | Heating element 1900 W with sensor | Askoll 40W | |
| Electrolux EW 1259W | 1195 J6 | 3Wx180 | ||||
| Electrolux EWC 1350 | 30x52x10/12 | 6203-6205 | 1047 J4 | 2Wx180 | ||
| Electrolux EWS 10010W | 30x52x10/12 | 6204-6205 | 1260 5P | Heating element 1900 W with sensor | 2Wx180 | Askoll 30W |
| Electrolux EWS 10012W | ||||||
| Electrolux EWS 10012W 914902201 00 | 30x62x10/12 | 6205-6206 | ||||
| Electrolux EWF 10020W | 30x52x10/12 | 6204-6205 | 1260 5P | Heating element 1900 W with sensor | 2Wx180 | Askoll 30W |
| Electrolux EWF 10240W | 35x62x10 | 6205-6206 | ||||
| Electrolux EWG 12740W | 40.2x72x10/13.5 | 6206-6207 | 1195 J6 | Askoll 40W | ||
| Electrolux EWI 1235 | 40.2x72x10/13.5 | |||||
| Electrolux WS 10400W | 35x62x10 | 6205-6206 | 1260 5P | Askoll 30W | ||
| Electrolux EWS 10410W | 35x62x10 | |||||
| Electrolux EWS 10412W | 30x52x10/12 | 6204-6205 | ||||
| Electrolux EWS 10412W | 35x62x11/12.5 30x52x10/12 | 6205-6206 | ||||
| Electrolux EWS 10612W | 30x52x10/12 | 6204-6205 | ||||
| Electrolux EWS 10712W | ||||||
| Electrolux EWS 11600W | ||||||
| Electrolux EWW126410W | 35x62x11/12.5 | 6205-6206 | ||||
| Electrolux EWX 12540W | 40.2x72x10/13.5 | 6206-6207 | 1195 J6 | Heating element 1900 W with sensor | ||
| Electrolux EWS 12612W | 35x62x10 | 6205-6206 | 2Wx180 | Askoll 30W | ||
| Electrolux EWS 12712W | 2Wx180 | Askoll 30W | ||||
| Electrolux EWW 16781W | 47x80x11/13.5 | 6306-6307 | 1184J6 | |||
| Electrolux EWS 1105 | 40x60x10 | VA2V 30X60X37 |
Write a letter
Electrolux washing machine diagram
Understanding what the main elements of a washing machine look like and where they are located will help you quickly diagnose and repair household appliances.
So: all elements of the internal structure are hidden behind the metal panels of the case (front, rear, side) and the lid. To extend the life of the washing machine in conditions of high humidity, the panels are coated with a special protective enamel.
Depending on the location of the hatch, there are Electrolux washing machines with vertical loading (laundry is loaded by opening the lid) and front loading (the hatch is located on the front panel).
Internal organization
(a certain set of parts and mechanisms that ensure uninterrupted, high-quality operation of the washing machine) includes:
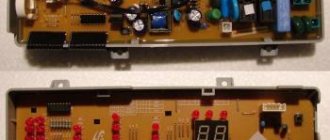
- The control module is one of the main elements that controls and controls the functioning of all mechanisms of the washing machine.
- The control panel helps you select the desired program, start or pause the washing process.
- Pressure switch and inlet valve (provide control of the process of water intake into the tank).
- The motor is the driving force that ensures the rotation of the drum.
- Tach sensor (controls the rotation speed of the drum).
- A tubular electric heater (TEH) is located in the lower part of the washing machine body, under the tank, and heats the water to a set temperature.
- Thermistor (built into the heating element, determines the degree of water heating).
- Damper and springs are elements that reduce vibration of the washing machine drum during the washing, rinsing or spinning process.
- Heavy concrete or plastic blocks are counterweights (they help dampen the vibration that occurs during operation of the washing machine).
- The rubber seal around the hatch is a cuff (ensures the door fits as tightly as possible and prevents water from leaking).
- Hatch blocking device (protects the washing machine from leaks).
- The drain pump, filter, and pipes are the main elements of the system for draining waste water from the drum.
On the rear panel there are: power cord, drain and inlet hoses.
Preparation
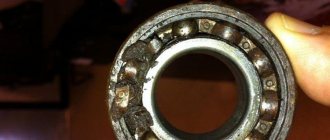
When the bearing fails, noise occurs when the laundry is spun. And with every wash the noise gets louder. Therefore, it is better not to delay the replacement. Operating the machine with a half-broken bearing will lead to damage to the shaft or its seat. Also, if the oil seal is worn out, grease gets inside the tank and the laundry becomes dirty.
If the shaft is abraded, it will need to be processed using special equipment, and if restoration is impossible, then buy a cross. Even in Moscow it is quite difficult to buy it for a washing machine of a certain brand. They are usually delivered to order with a waiting period of 2 weeks to 2 months.
Set of pliers.
To perform a complex of works you need a set of tools:
- slotted screwdriver;
- Phillips screwdriver;
- set of socket heads (8, 10, 13, 17);
- ratchet, two extensions and cardan;
- pliers, round nose pliers, wire cutters, clamp pullers;
- hammer, chisel or drift, knife;
- plumbing silicone and a gun.
Knife, ratchet and adapters
More necessary tools.
This is the minimum kit with which you can change the drum bearings of a Zanussi washing machine. In case of complications, you will need a grinder.
In addition, you need a special lubricant for the MMA oil seals and a thread locker (must be blue). A flashlight will be very useful in your work.
This model has undergone repairs.
Causes of breakdowns
In most cases, the washing machine itself signals that its operation is incorrect or there are some problems. It does this by displaying certain codes, each of which means a particular problem. But not all problems and malfunctions can be displayed using symbolic commands on the display. A number of them can be easily identified by external signs.
- The RCD constantly trips and the machine does not start. In this case, the reasons for this may be a short circuit of the heating element or motor, or there is a breakdown on the housing.
- The washing machine makes a lot of noise during use . Most likely, some object is stuck between the tub and the drum, or the laundry is bunched up on one side. Another reason may be bearing wear.
- The device does not heat water . This may be caused by a problem with the heating element, temperature sensor, or control triac.
- Inability to close the hatch door. Usually the cause of this is either wear on the tongue, or a breakdown of the handle, or the device that is responsible for blocking the hatch.
- The device simply does not turn on. The reason for this may be a breakdown of the socket, start key, or control unit.
- The washing machine does not fill with water. The filter, intake system or hose needs to be cleaned. The intake valve may have failed.
- The equipment does not drain water . This is usually the result of a blockage in the drain pipe, hose or pump. Another reason for this may be the combustion of pump windings.
- The drum does not spin and the machine does not spin out the laundry when washing. In this case, either the motor is faulty, or the motor brushes are worn out, or the drive belt has fallen off the pulley.
If we talk about top-loading washing machine models, their main “disease” is the wear of the drum supports. Replacing them is similar in complexity to installing a bearing, and you cannot do without disassembling the device. In this case, the following breakdowns occur frequently:
- rubbing the hatch cuff , which causes water to enter the electronic lock, causing it to break;
- corrosion of the top cover due to the specific nature of the water supply through the top, which requires a complete replacement of the top cover.
In general, as you can see, there are plenty of reasons for various types of breakdowns due to the rather complicated design of the washing machine.
Potential problems and breakdowns
In order not to make unnecessary efforts, it is advisable to observe the equipment and understand what exactly is the deterioration in performance. If the overall quality of the wash has dropped, an uncharacteristic noise appears during the spin cycle, and the laundry remains wet after the spin procedure, the problem most likely should be looked for in the pump.
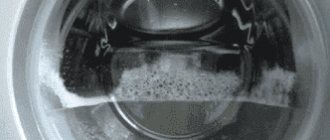
The same unpleasant phenomena are caused by clogged communication hoses. It is better to approach all these components from the front of the unit or from below. If foam comes out of the machine during operation, you need to stop washing, set the “Drain without spin” program and wait until the device completes all the necessary actions and opens the door.
Then you should remove the laundry, manually clear the foam from the inside and start the wash again without spinning. If this is not done, foam will penetrate into the engine or onto the control board, and repairing these components will cost the owners a substantial amount.
The reason for the appearance of abundant foam in the washing machine may not be a breakdown or malfunction of the unit itself, but the use of hand washing powder (it does not contain defoamers) or a significant excess of the standard dose of detergent
If the device does not gain temperature and does not warm up the water, it is most likely that the working heating element has failed. Its location is indicated in the accompanying technical documentation. It is usually located at the rear, but in some models, depending on the manufacturer and internal design features, it may be located in the front.
It may have built up scale as a result of using hard water and will need to be cleaned. Or, if the element burns out, you will need to replace it with a new heating element. The replacement process is described in detail in our recommended article.
If the machine takes a long time to wash, you should look for a fault in the electronics. It would be a good idea to check the functionality of the water temperature sensor and other controls. The same problem can occur due to an incorrectly placed drain hose.
A pressure switch or pump is responsible for uniform and rapid drainage of liquid from the washing container. Slowly pouring water clearly indicates that these elements have lost their functionality due to breakdown or operational wear.
To repair them or replace them with new ones, you will have to dismantle the side wall and penetrate into the upper part located behind the rear panel.
When failures occur in the drum or bearings, you will have to completely disassemble the device, identify the problem, carry out repairs, and then assemble the machine and start it up. If washing proceeds as usual, then operation can be continued.
This is just a short list of the main breakdowns identified in the machines. It is relevant for all household washing equipment, regardless of the brand and design features of each individual device.
Problems with electronics and software control are more complex problems and require professional intervention. To eliminate breakdowns of this level, regardless of whether the equipment is still under warranty or not, it is better to contact a specialized service center.
The certified technicians working there will carry out diagnostics, quickly identify the source of the malfunction and repair the damaged electronic unit or replace it with a new one.
How to prepare for disassembly
De-energize the device
Never disassemble the washing machine with the power on. This will harm the machine and, first of all, its owner.
Turn off the water supply
Turn off the water supply to the machine, as well as the drain hose leading from the water valve to the sewer. And drain off the remaining water.
Get these tools ready
- service hook;
- wrenches with a diameter of 8, 9, 19;
- flat-head screwdriver;
- Phillips head screwdriver;
- wire cutters or pliers needed for clamping clamps;
- construction nippers;
- pliers with insulated handles;
- curved pliers (somewhat similar to tongs).
Record the disassembly sequence
We recommend recording or filming the disassembly process; this will save a lot of time in the future when you start putting the washer back together.
Preparing to disassemble the washing machine
To disassemble the Electrolux washing machine, you need to prepare the tools, and then disconnect the equipment from communications and electricity and move it to free space for more convenient work.
When disassembling, you should record every action on camera, especially removing the wiring. This will help you avoid making mistakes during assembly and prevent more serious equipment breakdowns that require expensive repairs.
If you need to purchase new parts, it is better to stay with original or similar ones, but not inferior in quality. The selection and purchase of parts should be carried out strictly in accordance with the model and brand of the Electrolux washing machine.
How to replace bearings in an Electrolux washing machine
You can replace the bearing in an Electrolux washing machine with your own hands: for this you will need a small set of tools and the desire to carry out repairs without calling a technician. The work ahead will be painstaking, since the SM will have to be completely disassembled.
After reading the article, you will understand the sequence of actions, after which you will be able to cope with the task.
What indicates a bearing failure in an Electrolux machine?
How can you tell if the bearing is worn out without disassembling the car? When in good condition, the washing machine operates almost silently. The first signs of wear are noise and hum during operation. Each time the vibration and grinding will increase - and you will not hear anything except the hum of the equipment.
A characteristic sign of a problem is drum play. If you shake it with your hand, it noticeably moves upward from the tank.
Bearing failure is a serious failure. However, replacing a part is much more profitable than buying a new car, so after studying the sequence, proceed to action.
How to choose the right bearing for a washing machine? Remove the old part and take a sample to the store. The seller will select the necessary parts for you.
What tools will you need?
For self-repair you will need:
- Screwdrivers (phillips, flat).
- Pliers.
- Rubber hammer.
- Socket heads.
- Bit.
- WD-40 product.
- Sealant or sealant.
Have you collected the necessary tools? Now unplug the machine and turn off the water supply tap. Disconnect the hoses going to the CM, drain the remaining water.
Before changing the bearing in an Electrolux machine, you need to move it away from the wall, providing a place to work.
Algorithm of actions
For each type of Electrolux washing machine (depending on the loading method), a specific parsing algorithm is prescribed.
Horizontal loading household appliance
The body of a front-loading washing machine consists of two halves (back and front, connected by fasteners along the side line).
Taking into account this design feature, the Electrolux washing machine is disassembled as follows:
- We find two screws located on the back wall of the case and unscrew them. We slightly push the cover towards the back wall, lift it and remove it from the body.
- On the left and right side panels, unscrew the two screws that secure the rear panel.
- At the bottom of the rear panel, unscrew the two fasteners.
- On the sides, after opening the plugs, unscrew the fixing bolts.
- Unclench and lift the plastic holders that secure the panel in the upper part of the case.
- Remove the back panel.
- Inside the powder receptacle we find a plastic tab, press it, and carefully pull the dispenser out of the washing machine body.
- We unscrew the fastening bolts and remove the hatch door along with the hinge.
- Carefully prying up the clamp spring with a slotted screwdriver, pull the metal ring off the cuff. We put the rubber seal inside the drum.
- We unscrew the screws located on the left side of the control panel, carefully use a screwdriver to open the latches on the top and sides of the panel, without disconnecting the wiring, remove the control unit.
- We unscrew the screws located around the hatch lock, under the control panel and around the drain filter, and remove the front panel from the body.
- Hold the pulley with one hand and remove the drive belt with the other.
- We unscrew the fasteners holding the motor, disconnect the terminals of the power wires, move the motor slightly toward itself, and remove the mechanism from the housing.
- Disconnect the wires from the drain pump, unscrew the fasteners, carefully turning clockwise, and remove the pump from the housing.
- We disconnect the wiring from the heating element, unscrew the central bolt (located between the contacts) and, using gentle rocking movements, remove the heating element from its seat.
- Having unscrewed the central bolts, we dismantle the counterweights.
- Using pliers, pull out the pin holding the shock absorbers and remove the paired elements from the bottom of the tank and the body of the washing machine.
- In the upper part of the housing, we disconnect the powder receiver pipes, the wiring of the filling valve, the springs, after first disconnecting the tube, we dismantle the pressure switch.
- Carefully lifting it, remove the tank from the springs and remove it from the housing.
At this stage, the analysis of the Electrolux front-loading washing machine is completed.
From vertical
Algorithm of actions:
Carefully prying the latches on the right and left sides, lift the control panel, disconnect the wiring from the board connectors, and remove the panel from the case.
Before you disconnect any wires, you need to take a photo of their connection diagram.- Disconnect the wires, unscrew the fasteners, and remove the electronic board.
- Having previously disconnected the pipes and wiring, we dismantle the fill valve.
- Having unscrewed the fixing elements located on the rear panel and one at the bottom of the front panel, we dismantle the side walls of the case.
- From the opened space we pull out the engine, drain pump and water level sensor (all elements are located under the tank). To do this, unscrew the fasteners, remove the wiring, and pull the mechanisms out of the housing.
- We block the pulley wheel with a wooden block. Carefully remove the drive belt.
- Raise the top panel (cover), take out the powder receptacle (fixed with latches).
- Unscrew the bolts holding the cover.
- We pull back the rubber cuff, under which we have access to the screws that secure the plastic strip. They also need to be unscrewed. Remove the top panel.
- We unscrew the hardware holding the shaft, close the tank doors, and remove the tank from the housing.
At this stage, the disassembly of a top-loading washing machine can be considered complete.
Vibration and centrifugal force compensators
To prevent washing machines with both top and horizontal loading from “jumping” during washing and spinning, special compensators are provided in the design. With their help, outgoing vibrations from the engine spin up to maximum speeds are dampened. The fact is that when the drum rotates, centrifugal force appears, which, without a shock absorption system and counterweights, will destroy the machine from the inside.
The following components help the washing machine maintain a stable position:
- dampers - spring struts that fix the bottom of the tank to the bottom of the body;
- springs on which the tank is suspended from above;
- counterweights are concrete blocks that weigh down the machine and maintain the desired balance.
These elements are designed to protect the washing machine from centrifugal force. However, if used incorrectly or for a long time, they can fail: shock absorbers wear out, springs stretch, and counterweights crack or become loose. In this case, it is necessary to tighten the fasteners or replace damaged parts.
How to put it back?
In fact, reassembling the washing machine after complete disassembly is very simple. You need to do everything the same as during analysis, only in reverse order.
The main rule of high-quality reassembly is that there is no need to rush! In a hurry, you can forget about installing any (even very small) part. Haste often leads to mistakes that require you to disassemble the washing machine again.
At each stage of reassembly, it is necessary to check the notes, photos or videos that were made during the disassembly of household appliances.
Tips: how to disassemble the motor from a washing machine
The “heart” of any mechanism is its motor, and if it malfunctions, then uninterrupted operation of the device is almost impossible. The same is true with washing machines. The motor is responsible for rotating the drum, rinsing and spinning. It can be removed and disassembled quite simply and this will not be a problem for those who have minimal knowledge of how household appliances work.
There are two types of motors for washing machines:
- Collector;
- Asynchronous with one phase.
Before you begin the analysis, you should understand what type is present in this machine. Let's say this is a collector. To remove it, you need to remove the back cover and disconnect the straps. Then unscrew the bolts holding it.
The motor is very easy to remove from the washing machine.
You must remember to remove the electrical terminals from the motor to disconnect the motor from power.
If the engine is clamped by the tank, then the latter needs to be lifted slightly, which will allow you to easily reach the engine. If the back cover does not allow access to the motor, you can remove one of the sides.
Tools for disassembling the device
Unlike other manufacturers, Electrolux provides the ability to replace parts. To get to the inside of the device, you need to unscrew several screws or bolts. Some parts are secured with clamps.
To troubleshoot problems, you will need a standard set of tools that almost every owner has:
- flat and Phillips screwdrivers for different thread diameters;
- ticks.
However, to disassemble some models, you may need other tools. We recommend that you have:
- wrenches;
- round nose pliers;
- chisels;
- hammer;
- stationery knife;
- universal key;
Be sure to read the device instructions before starting work.
Most Electrolux washing machines have similar design features. But to avoid mistakes, we recommend that you carefully study the manufacturer’s recommendations, paying special attention to the type of engine. Inverter-type motors are connected directly to the drum, while commutator-type motors are connected by a belt and pulley. Next, evaluate where the heating element, pump and pipe are located.
What difficulties might arise?
The main difficulty that arises in the process of disassembling a washing machine is soured, rust-covered fasteners and mechanism components.
As a rule, it is very difficult (almost impossible) to unscrew or dismantle such parts the first time.
A special product will help solve the problem - WD-40 . It is enough to treat the soured element, wait from five to thirty minutes (the length of the wait depends on the density of limescale or rust), and then, with a little effort, unscrew the desired element.
Washing machine repair in any area of St. Petersburg and the region
The master repairs household washing machines and makes house calls in the following areas:
|
|
I will quickly come to work in your area. I travel outside the ring road up to 80 km by individual agreement, and fix the breakdown in one visit.
Unscrewing the pulley bolt
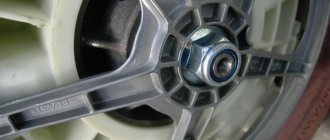
washing machine pulley bolt The drum needs to be dismantled not only if a foreign object gets in, but also to replace the bearings. Different car models may have different tanks, but the algorithm for disassembling is approximately the same. First you will need to remove the pulley.
The pulley is attached to the drum shaft with a special bolt or nut right in the middle. The pulley twists in a counterclockwise motion, and it is better to place some object, for example, a block of wood, to avoid twisting.
Unscrewing the washing machine pulley bolt
Unscrewing a bolt is a rather difficult task, because it is reinforced with a compound specially poured into the hole that prevents it from unwinding during vibration. What to do if you can’t unscrew the bolt the first time? You can use a gas burner to heat it up. The metal will heat up, move, and require less effort to remove. Before using a gas burner, be sure to read the safety instructions, because working with it requires certain skills.