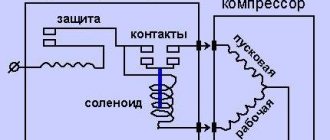
The vast majority of Stinol refrigerators use temperature regulators from Ranco. Also sometimes Danfoss (Denmark) and Orlex (Russia, Orel) devices were (are) used, but their share, compared to Ranco, is insignificant. Ranco K59 thermostats are designed for use in refrigerators equipped with a weeping evaporator. The temperature-sensitive element of these devices (a piece of capillary tube) must be in reliable contact with the surface of the weeping evaporator, otherwise unstable operation of the thermostat is possible. Depending on the surface temperature of the weeping evaporator, the thermostat turns on or off the compressor of the refrigeration unit. To connect to the electrical wiring of the refrigerator, there are three terminals on the thermostat housing (not counting the grounding terminals), marked with the numbers “3”, “6” and “4”. The diagram shows that contacts “3” and “4” of the thermostat are used to control the compressor. The state of these device contacts (closed/open) depends on the surface temperature of the weeping evaporator and the operating logic of the thermostat. When you turn the regulator knob counterclockwise until it clicks (off mode), the device opens contacts “3” and “6”, completely turning off the power to the refrigerator. In any other position of the regulator knob (“on” mode), these contacts are always closed. Contacts “3” and “4” open when the temperature of the surface of the weeping evaporator drops below the operating (shutdown) threshold of the thermostat. By rotating the adjustment knob of the device, the user can change (within limits predetermined by the manufacturer) the operating (switching off) threshold of the thermostat. Contacts “3” and “4” close when the temperature of the surface of the weeping evaporator rises above the operating (switching on) threshold of the thermostat. The response threshold (switching on) of devices of the Ranco K59 family does not depend on the position of the regulator knob; it is adjusted to a certain value (depending on the modification of the device) at the factory during the manufacture of the thermostat.
Refrigerator Features
The freezer compartment of the Stinol refrigerator is made of polystyrene. The space between the compartments is filled with polyurethane foam for thermal insulation. The capillary pipeline is used as a throttling device, which makes the refrigerator sensitive to changes in humidity and air pollution.
All Stinol refrigerators are divided into evaporative and compressor types. They work as follows: the device uses a substance called refrigerant for cooling - this is a liquid that evaporates at room temperature.
The operation process of the refrigerator is as follows: freon (refrigerant) vapor is constantly supplied to the radiator, which is located at the back of the refrigerator. The freon then condenses in the radiator, where it releases heat, after which it enters the capillary tube, from where the freon is injected into the evaporator, and then the process is repeated again.
A refrigerator can have either one or two compressors, depending on the model. The compressor is a steel coil, which is fixed with metal plates. The presence of several compressors allows you to separately configure the operation of each compartment of the refrigerator.
Refrigerators have two types of evaporators:
- static, located on shelves;
- “NoFrost” system, which is located in a special compartment.
An important element for stable operation of the refrigerator is the electrical system. It consists of the following elements:
- thermostat, needed to maintain a given temperature level;
- thermal protection;
- electric motor;
- start relay.
This system has the following operating principle:
- When voltage is applied, the current moves from the thermostat to the forced defrosting button, then to the thermal protection, then to the starting relay and from it to the motor winding. The current supplied to it produces a voltage higher than required, this is because the start relay only trips and closes its contacts at that voltage level.
- After this, the relay transfers current to the starting winding, and the engine begins to rotate. The motor runs and the refrigerator starts to freeze. When the temperature reaches the set level, the thermostat turns on. It opens the contacts, stopping the flow of current to the compressor, causing it to stop. Operation resumes as soon as the temperature reaches the required level.
- In case the motor overheats, there is a thermal protection relay. When the temperature becomes too high, a special part on the relay - a bimetallic plate - bends and opens the contacts, so that the cooled element then comes back and closes the contacts again.
The principle of operation of the refrigerator
All refrigeration equipment operates on a similar principle, performing two main tasks: concentrating cold in the inside of the device and removing the generated thermal energy outside. In modern equipment, freon is most often used, a popular type of refrigerant.
Freon includes fluorine, chlorine and ethane. This refrigerant has a unique quality: it changes from a liquid to a gaseous state when the pressure within the system fluctuates. The cooling procedure is as follows.
- The compressor draws the refrigerant inside.
- The piston pushes it through the tubes.
- During the heat transfer process, the refrigerant begins to condense.
- Freon becomes liquid.
- Moisture is absorbed by the sorbent, turning into gas.
- Next, the refrigerant enters the capillary tube.
- The pressure drops along with the temperature of the gas.
- Passing through the evaporator, freon changes its properties.
- The refrigerant in a gaseous state again enters the compressor.
On sale you can find models with two compressors - one for the main chamber, the other for the freezer. On the one hand, the efficiency and quality of cooling increases noticeably, but on the other, maintenance and repair of equipment becomes more complicated. The refrigerator can also be equipped with a drip system or NoFrost technology.
Compression models are the most common solutions on the refrigeration market. Here, the movement of freon is organized by changing pressure. But there are other types of refrigeration systems:
- adsorption;
- steam ejector;
- thermoelectric.
Adsorption technology uses ammonia as a refrigerant. The obvious disadvantages of such devices are problematic maintenance and unsafe substances. Systems of this type were used in old equipment that has already been discontinued.
In steam ejector refrigerators, water runs through the tubes, and the ejector plays the role of a pump. The system is stable, safe and environmentally friendly, but consumes a lot of electricity and liquid to raise the temperature.
Thermoelectric models operate on the principle of the Peltier effect: heat absorption through two conductors and current. The system is reliable, durable, but very expensive, as is its maintenance.
Operating principle of the refrigerator start relay
The control type mechanism, which controls the operation of the cooling equipment, is small in size and located in close proximity to the compressor. There are two types of relays:
- launchers;
- Start-protective.
The latter variety comes in two types:
- Current . It turns on when the electric current reaches a certain value. The motor consumes this electricity, and if it overheats, the relay cuts off the power. When the motor cools down to a certain temperature, the trigger turns it on again.
- Current-thermal . The starting relay is triggered by thermal indicators and electric current values. A running motor consumes electricity passing through the coil, which heats up slightly without affecting the biometric plate.
Starting relays come in several types, but there are two main functions:
- starting the starting winding;
- stopping the supply of electric current at increased engine speed.
Based on the principle of operation, devices are distinguished:
- tablet (posistor);
- induction
A posistor, a type of thermal resistor, together with a capacitor located between the buses of the working and starting windings, are the main parts of the tablet. The last part of the design provides a phase shift that turns on the refrigerator compressor motor.
The maximum electric current flows through the winding, heating the posistor and increasing its resistance. Electricity keeps a type of thermal resistor warm while the compressor is running.
The tablets include:
- RT;
- RCT;
- P3R;
- RP3P2;
- 6SP;
- A.E.G.
The main working part of the induction relay is a solenoid, the coil of which is connected to the working winding of the compressor motor. Electric current at its maximum value passes through the coil, creating a strong magnetic field. The attractive force of the latter attracts the current-conducting contact, completing the circuit.
A set of required rotor speeds becomes a signal to reduce the current strength, which reduces the impact of the magnetic field. This allows the core to restore its original position by opening the contacts. A prerequisite for the operation of the induction relay is a strictly horizontal location of the part inside the refrigerator.
Compressor electrical system design
The main element of the refrigerator is the engine. It is necessary to organize the circulation of the refrigerant, and in our case, freon, through the pipes. In addition to the unit itself, the system contains the following elements:
- start relay;
- thermostat responsible for a specific temperature level;
- protective relay to prevent engine overheating.
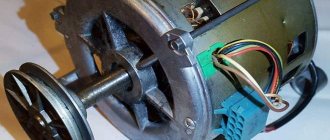
The engine includes a rotor and starter. The design of the latter consists of several copper coils. Whereas the rotor is more like a regular steel shaft working in tandem with the engine's piston system.
When the unit is turned on, electromagnetic induction is formed in the coils, which serves as a source of torque. Next, the rotor begins to rotate due to centrifugal force, and at the same time the piston moves.
The principle of operation of the refrigerator
All refrigeration equipment operates on a similar principle, performing two main tasks: concentrating cold in the inside of the device and removing the generated thermal energy outside. In modern equipment, freon is most often used, a popular type of refrigerant.
Freon includes fluorine, chlorine and ethane. This refrigerant has a unique quality: it changes from a liquid to a gaseous state when the pressure within the system fluctuates. The cooling procedure is as follows.
- The compressor draws the refrigerant inside.
- The piston pushes it through the tubes.
- During the heat transfer process, the refrigerant begins to condense.
- Freon becomes liquid.
- Moisture is absorbed by the sorbent, turning into gas.
- Next, the refrigerant enters the capillary tube.
- The pressure drops along with the temperature of the gas.
- Passing through the evaporator, freon changes its properties.
- The refrigerant in a gaseous state again enters the compressor.
On sale you can find models with two compressors - one for the main chamber, the other for the freezer. On the one hand, the efficiency and quality of cooling increases noticeably, but on the other, maintenance and repair of equipment becomes more complicated. The refrigerator can also be equipped with a drip system or NoFrost technology.
Compression models are the most common solutions on the refrigeration market. Here, the movement of freon is organized by changing pressure. But there are other types of refrigeration systems:
- adsorption;
- steam ejector;
- thermoelectric.
Adsorption technology uses ammonia as a refrigerant. The obvious disadvantages of such devices are problematic maintenance and unsafe substances. Systems of this type were used in old equipment that has already been discontinued.
In steam ejector refrigerators, water runs through the tubes, and the ejector plays the role of a pump. The system is stable, safe and environmentally friendly, but consumes a lot of electricity and liquid to raise the temperature.
Thermoelectric models operate on the principle of the Peltier effect: heat absorption through two conductors and current. The system is reliable, durable, but very expensive, as is its maintenance.
How to check the functionality of the start relay?
You can suspect a malfunction of an important part of the refrigeration equipment if the following non-standard reactions occur:
- the temperature inside the chambers is higher than normal;
- the equipment does not turn on;
- quick shutdown of the electric motor in working condition.
Before you start checking the start relay, you should make sure that it is the problem. To do this, disconnect the contacts from it and connect the compressor directly. The stable operation of this part of the refrigerator confirms the suspicions. If the compressor does not turn on when the electricity is turned on, then the problem is there.
Check the functionality of the relay according to the following scheme:
- Visual inspection of the location . The part is in the correct, strictly vertical position, there is no inclination or displacement.
- Using the tester . All contacts are probed with a measuring device. The absence of indicators is the result of oxidation and contamination of contacting units. Sandpaper all wires.
- Internal inspection . This procedure involves removing the device and opening it.
- The absence of the above violations requires checking the voltage supply. This is done with an ohmmeter or multimeter.
Relay troubleshooting and troubleshooting
There are two ways to determine that the relay is broken:
- Remove the terminals from the trigger mechanism and connect them directly to the electric motor. If the engine runs stably, it turns off stably after 10-20 minutes.
- Connecting the operating relay. If with it the refrigerator starts and stops the engine reliably, then the problem is in the starter mechanism.
Mechanisms with moving parts, contact groups, heating elements are characterized by a standard set of breakdowns:
Contact group jamming
Typical fault signals of this type:
- the electric motor does not turn on at all when the current is connected;
- the engine runs for 10 minutes and turns off;
- non-stop operation of the motor.
A few seconds after the electricity is supplied, the thermal protection is triggered, and the starting relay turns off the current supply. The damage is corrected by restoring the mobility of the rod. The causes of failure are also wear of the part, mechanical damage to the mechanism as a whole or its parts.
Burning, oxidation of contacts
This type of malfunction is detected by disconnecting the relay contacts and connecting the electric motor directly. The stable operation of the latter indicates its serviceability.
You can check the condition of the starting relay with a tester - between the contacts the indicator is zero, indicating the absence of breakdowns. Exceeding the value indicates the need to replace the device. First, you can try to clean the contacts with sandpaper and smooth out the spots.
Heating element burnout
If the compressor does not turn on, the cause may be an open circuit. Attempts to independently correct the breakdown will lead to failure; a complete replacement of the trigger mechanism is required.
Failure of the biometric plate, loss of its main properties
The malfunction is accompanied by the opening of the contact group when the spiral reaches a certain temperature. Short-term switching on and off of the compressor indicates a breakdown of the biometric plate. The only way to fix this is by replacing the relay.
Calling contacts
Malfunctions of the trigger mechanism are detected with a multimeter by ringing three sections:
- Using a measuring device, check the input and output to the working winding for the presence of a break, oxidation of the open contacts, return of the protective mechanism to its original position;
- break of the zero section due to mechanical impact on the circuit;
- Use a multimeter to check the input and output to the starting winding for a break in the current-carrying wire, lack of contact, or open circuit.
Checking the posistor on and off
The part should be checked in a hot and cold state. 2-3 minutes is enough for the posistor to completely cool down. In this state, it must be probed with a millimeter. Absence of indicators or a high value indicates a malfunction of the element. When hot, the posistor displays certain data, which depends on the type of part.
Thermal relay (defrost sensor) for refrigerator Stinol/Indesit 851160
Delivery in Moscow to an apartment (weight up to 3 kg) - 275 rubles. The cost of delivery of large-sized parts is 500 rubles (tanks, drums). Delivery from Monday to Saturday.
Tanks and large parts are delivered to the entrance; lifting is discussed separately. Couriers work until late.
Delivery in the Moscow region from the Moscow Ring Road to 10 km - 500 rubles. Where there is no public transport, minibuses are paid separately. You can also take the part further from Moscow for an additional fee. Delivery from Monday to Saturday.
Pickup from the department in Elektrostal.
Please call in advance for availability. The courier arrives every day; if a part is needed, it is better to order it before 12:00-1:00 pm on the same day and pick it up the next day after 10:00 am. The manager always warns you when the part arrives at the store.
Address: Elektrostal, Mira street, 27 B, shopping center Mir, 2nd floor. Large parts - tanks, forecastles can only be picked up from Staraya Kupavna.
Working hours: Monday - Saturday from 10:00 to 18:00, closed on Sundays. tel., 8 (968)812-15-45.
Pickup from the department in Staraya Kupavna .
Address Staraya Kupavna Komsomolsky proezd, 9 a.
Working hours: Monday - Saturday from 10:00 to 18:00, closed on Sundays. tel.. Alexey. Discounts for masters.
Shipping costs greatly depend on the weight of the package, so please keep this in mind when ordering the part. Sending orders by Russian Post, orders are sent both 1st class and simple parcels.
Delivery costs vary from 270 rubles and above. We offer inexpensive delivery when sent by 1st class!!!
It all depends on the weight of the parcel and the range of the region. The manager can calculate delivery for you.
1. We send parcels with 100% prepayment. We will issue an invoice to you by email.
After sending the parcel, we send you the tracks (parcel numbers) by email.
We also send parcels by EMS Mail, only with 100% prepayment.
Attention, all orders sent via tk sdek are sent with 100% prepayment. We issue an invoice by email. Sending every day on weekdays.
We send parcels through the logistics company Sdek throughout Russia, where there are pick-up points. Addresses of points can be found on the website www.Cdek.ru. If when you order, your city is not in the cart, but you know that it exists, you can call us or write the address in the comments in the order, we will add your city to the list of cities to order.
Their average delivery speed is, of course, much higher than that of Russian Post. The cost of delivery within Russia varies from 250 rubles (weight up to 2 kg) and depends on the distance and weight of the parcel.
Delivery of the order in the Moscow region delivery is 240 rubles (parcel weight up to 2 kg). Travel time is 1-2 days.
Delivery of the order in Moscow is 200 rubles (parcel weight up to 2 kg). Travel time is 1-2 days.
Large parcels are all calculated separately according to the program. You can write to us or call us and we will calculate everything.
We can also send your order to any transport company you specify. Delivery to the t/k and delivery to the warehouse of the order is 450 rubles (parcel weight up to 5 kg).
We ship glass hatches for washing machines without lathing.
We also send parcels via t/k Sdek to other countries: Belarus, Kazakhstan, Armenia, Georgia, Uzbekistan, Tajikistan and so on. Orders are sent only with 100% prepayment.
DIY relay replacement
Symbolic identifiers of the feed-through contacts will help you correctly connect the new starting device. If there are none, then when unscrewing the wires, it is recommended to mark them, otherwise it is easy to mix up the contacts, which will lead to breakdown of a working mechanism.
Refrigerators Nord, Stinol, Ariston, Indesit have similar designs, so replacement is carried out according to the same scheme:
- disconnect the device from the power supply, after which it is recommended to wait until the device is completely de-energized;
- unscrew the fasteners securing the water supply hose and move it to the side to avoid damage;
- Unscrew the fasteners of the rear panel, remove the protective plate of the rear panel of the refrigerator;
- press out the latches, rivets or unscrew the screws holding the trigger mechanism to the compressor;
- carefully pull out the part, maintaining spatial orientation;
- disconnect the wiring from the start relay, mark each contact to avoid confusion when installing a new device;
- loosen the clamp by lightly pressing, disconnect the connector;
- clean the contacts of the wires and connector with a soft cloth moistened with alcohol;
- move the starting capacitor from the old to the new relay;
- connect the cleaned connector to the space provided for it;
- fix the relay on the capacitor in a strictly vertical position;
- Tighten the wiring using pliers and check the reliability of the connection;
- secure the relay with screws, latches, rivets;
- put the back panel in place, screw it on;
- put the water supply hose in place and secure it;
- Connect the refrigerator to the electrical network and check operation.
Replacing the starting relay of Atlant, Minsk refrigerators is carried out according to a different scheme, since they have similar designs:
- disconnect the refrigeration device from the electrical network, wait a while for complete de-energization;
- remove the back panel of the refrigerator;
- remove the wire clamp that secures the trigger mechanism;
- disconnect the contacts, inspect them and, if necessary, sand them with sandpaper;
- mark the wires to avoid mixing them up when connecting a new device;
- Unscrew the fasteners, if they are rusty, pry them off with a screwdriver or lubricate them with oil;
- slightly press the wire clamp to remove the device;
- move the starting capacitor from the old to the new relay by simple rearrangement;
- install the mechanism in place, monitor strict horizontality and verticality;
- connect the wires according to the markings, securely screwing each patch;
- Throw on a wire clamp and secure;
- put the back panel in place, tighten the screws;
- Connect the refrigerator to the electrical network and check operation.
Modern types of cooling equipment have similar designs, but there are still differences that must be taken into account before starting independent repairs. Experts recommend reading the manufacturer's instructions before opening the equipment in an attempt to fix the problem.
Replacing the start relay of a Liebherr refrigerator:
- disconnect the refrigeration device from the electrical network, wait until the power is completely off;
- Unscrew the fasteners, move the rear protective panel;
- remove the plastic cover and inspect the mechanism;
- Clean the contacts with sandpaper;
- check the serviceability of the return spring;
- unscrew the fasteners securing the start relay;
- replace the device with a working one, having first checked it;
- put the device in place of the old one;
- secure with fasteners;
- return the back wall to its place, tighten the screws.
How to remove the start relay
An important part of the refrigerator does not break often, but replacing or repairing it requires certain knowledge, a set of tools, and protective equipment. The design of the starting relay is simple, so a couple of assemblies and disassemblies of the mechanism will allow you to acquire sufficient skill, understanding of what is happening, and experience.
To remove the start relay, you must follow the diagram:
- disconnect the refrigerator from the electrical network, wait until the power is turned off;
- unscrew the fasteners securing the protective cover and move it to the side;
- disconnect the contacts by unscrewing, when soldering with metal parts, pry them up with a flat screwdriver;
- remove the latch screws holding the relay;
- remove the trigger mechanism.
How to connect the start relay
Self-installation of a new mechanism must be combined with a certain level of knowledge, otherwise you should call a specialist. If the refrigerator arrived without a start relay and there was no visual inspection of its correct location, it is recommended that you read the manufacturer’s instructions.
The starting relay connection diagram is standard:
- disconnect the electrical appliance from the network;
- wait a few minutes for the equipment to completely de-energize;
- unfasten the water supply hose from the back wall and move it away so as not to accidentally damage it;
- Unscrew the fasteners securing the protective panel and put them aside;
- remove the old start relay; if it is not there, find the location on the compressor;
- connect the connector to the new device;
- insert into place;
- connect the wires according to the markings;
- secure the trigger mechanism with screws and latches;
- put the back panel in place, screw it on;
- attach the water supply hose, secure;
- plug into the electrical network for testing.
Professionals recommend using protective gloves to prevent hand injuries. Independently connecting modern types of starting relays can cause a number of difficulties that are not always possible to correct on your own.
The start relay is an important part of the refrigerator that starts the electric motor and protects the equipment from breakdowns. Failure of an element leads to the appearance of uncharacteristic noise and equipment not turning on. You can identify the malfunction, carry out repairs, and replace it yourself, but in the absence of certain knowledge, it is better to turn to specialists.
Diagnosis of starting relay faults
Despite the fact that the manufacturer does everything possible for the long-term operation of Stimol refrigerators, over time they still fail. The starting (thermal) relay often suffers. There are many reasons for this, and only diagnostics will help identify them. It should be carried out independently only if you have experience in such work. If it is not available, you must contact a professional technician.
Diagnosis is carried out as follows:
- Inspect all the main elements (contacts, rod, coil with core, mount with compressor) to determine the location of the damage. Problems with the operation of the start relay can occur due to exposure to moisture, high temperatures and mechanical damage.
- Check all joints and fastenings of the automatic system.
- They measure the temperature in strategically important places (the back wall of the Stinol refrigeration unit, the freezer).
- The power value is recorded.
The data obtained becomes the basis for determining the exact cause. Identifying a defective part is the first step in solving the problem. A competent approach allows you to quickly return the Stinol refrigerator to operating mode. If this is not possible, then all that remains is to replace the damaged start-up relay of the Stinol refrigerator with a new one.
Error codes for Stinol refrigerators (Stinol)
Code Malfunction
| E00 | Malfunction of the temperature sensor of the main refrigerating chamber. |
| E01, E10, E11 | Temperature exceeding 50C in the chamber. |
| E04, E40, E44 | Low temperature in the chamber after a two-hour break in compressor operation. |
| E05 | Insufficient evaporator temperature after an hour of heater operation. |
| E06, E07 | Indicates a problem with the heater control circuit during defrost mode. |
Frequent problems with Stinol refrigerators
The entire model line of refrigeration units is distinguished by reliability, functionality and high build quality. However, they, like kitchen appliances from other brands, are not immune to various breakdowns. Let's look at typical faults typical for the Stinol line.
Cabinet breakdowns
If the cabinet is faulty, a thin layer of frost will accumulate on the static evaporator. As a result, a significant amount of liquid accumulates in the condensate container.
Defects in this state of the refrigerator are explained by a violation of the seal of the chamber due to:
- rupture or loose seal;
- deformation of the refrigeration unit structure;
- the presence of gaps between the rubber door seals and the surfaces of the freezer.
Possible problems with the sealing rubber can be repaired using a hair dryer with a power of 1-1.5 kW. To do this, you need to heat the rubber seal in the contact area with a hot jet. Then stretch it so that the shape of the part changes. After manipulation, the door must be closed. The refrigerator can be used after the seal has cooled down. If the protective layer is torn, it should be replaced.
Poor seal seal
Malfunctions of electrical circuit and automation elements
Very frequent breakdowns occur with automation devices and electrical circuit components. These include:
- faulty starting or thermal relay;
- breakdown of the compressor, fan and other components;
- reducing the insulation resistance of the electrical circuit;
- malfunction of the thermal fuse or defrost heater in equipment with the No Frost system;
- defect of freezer, timer;
- breakdown of the evaporator pan heater;
- clogging of the drainage system with small particles.
Troubleshooting automation in a Stinol refrigerator consists of identifying the defective element, repairing it, and if it is impossible to repair the breakdown, replacing the part with a new spare part.
Problems with refrigerant
If the volume of refrigerant is too high when filling the device, then the temperature in the freezer remains less than -180C, the refrigerator compartment is cold, and the return pipe becomes covered with condensate or a layer of frost. To normalize the operating process of the device, after a two-hour run-in, the dose of freon is adjusted.
In the event that the filling dosage, on the contrary, is underestimated, the refrigerator is warm and the temperature is reduced by more than -250C. In this case, frost may partially form on the rear wall. Just as in the previous case, it is necessary to dose the lack of refrigerant to normal.
If a refrigerant leak occurs, oily spots appear in these places. The solution to this problem is to fill the unit with refrigerant or replace the assembly component with a new part.
Warning! Freon vapor is a poisonous gas, so it is taken from the refrigerator into special cold receivers. After any work with refrigerant, the room is ventilated for at least 15 minutes.
Signs of problems with the refrigerator and possible malfunctions
There are several typical breakdowns of Stinol units, which manifest themselves according to certain signs. In the table we look at the main problems with refrigerators of this brand and how they manifest themselves:
| Sign | Possible defect |
| The device does not turn on | faulty electrical plug or power cord; breakage of compressor windings; The thermostat or start-protection relay does not function; open circuit of the thermal fuse; timer jamming in defrosting mode; contact failure occurred in the electrical circuit connection due to oxidation |
| After a short period of operation the unit switches off | break in the starting winding of the electric motor; The bimetallic plate of the protective relay or the starting relay coil do not function |
| The device freezes slightly | The temperature regulator does not work; the rubber seal has lost its elasticity and shape; the compressor has reduced performance; the capillary pipeline or filter-dryer is clogged; the integrity of the electrical circuits is compromised |
| The refrigerator is too cold | the fast freeze button is stuck; The thermostat knob is not adjusted |
| The freezer freezes, but the second chamber does not | there is a refrigerant (freon) leak; the system has depressurized |
| It's warm inside the freezer (refrigerator without NoFrost system) | The motor-compressor for the freezer broke down |
| Moisture collects at the bottom of the device | violation of the tube position; clogging of the outlet tube with small particles |
| It’s warm inside the freezer (appliances with the No Frost system) | NoFrost automatic defrosting system defect |
Let's look at the most common faults of some models
- Two-chamber refrigeration appliance Stinol 102. The device has two compressors with a unique NoFrost freezer defrosting system. The front panel is equipped with two thermostats. A special feature of the model is the circulation of air between the freezer and the evaporator fins due to the electric fan. Frequent equipment breakdowns include a malfunction of the thermal relay (in the TN1 or TN2 circuit). To verify that the part is faulty, you need to remove the wires from contacts numbered 3, 4 and connect them with a jumper. If after the manipulation the compressor starts, there is a breakdown in the relay. It may be that the equipment does not cool when the compressor is running and the condenser is cold. In this case, there may be a freon leak.
- Stinol 103. A typical problem with refrigeration units of this model is the failure of the temperature controller. This is due to the technical characteristics of thermoelements, which are designed for a five-year service life. Due to this defect, the temperature in two chambers may be elevated, as a result of which the unit will behave unstably. Over time, the connections of the electrical circuit may be damaged due to oxidation or burning of contacts, various breaks and other breakdowns. If the starting or thermal relay fails, the compressor does not turn on.
- Stinol 110 is the most common model. The refrigerators consist of a spacious refrigerator compartment and a small freezer, which is equipped with the NoFrost system. Typical breakdowns of this unit are no different from those of the 102nd model. The thermostat T1 and timer TIM-0 may be faulty.
Compressor electrical system design
The main element of the refrigerator is the engine. It is necessary to organize the circulation of the refrigerant, and in our case, freon, through the pipes. In addition to the unit itself, the system contains the following elements:
- start relay;
- thermostat responsible for a specific temperature level;
- protective relay to prevent engine overheating.
The engine includes a rotor and starter. The design of the latter consists of several copper coils. Whereas the rotor is more like a regular steel shaft working in tandem with the engine's piston system.
When the unit is turned on, electromagnetic induction is formed in the coils, which serves as a source of torque. Next, the rotor begins to rotate due to centrifugal force, and at the same time the piston moves.
In modern models, the engine is located inside the compressor, which minimizes the likelihood of spontaneous refrigerant leakage. The system in its original form is subject to strong vibration. To reduce it, a special metal suspension on springs is provided.
On new models, the latter are fixed inside the case, while on old ones - outside. The first option is more practical and allows you to dampen vibration noticeably more effectively. But in the event of a suspension failure, organizing repairs is much more difficult.
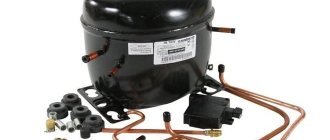
Refrigerator compressor Stinol
The motor will operate until the required temperature is established in the chambers, after which the thermostat is connected. It opens the contacts and current stops flowing to the motor. The compressor also stops working. When the temperature rises, the thermostat contacts will close again and the cycle will continue.
In models of the mid-price and budget categories, the thermostat quite often fails. The element does not have the most complex design and costs a penny, so it is much more practical not to repair it, but to buy a new one.
Troubleshooting refrigerators Stinol
Before you start repairing it yourself, you should make sure that it is within your power, otherwise it is better to contact a specialist. If you decide to do the repairs yourself, and you’ve decided what’s broken, then you can get started.
Compressor and suspension repair
It is better not to touch the compressor itself without the necessary knowledge and equipment, since during self-repair, dust and moisture from the air enter the compressor, which is why it will eventually have to be replaced anyway.
But you can repair the compressor suspension yourself. Its deformation can lead to improper operation of the compressor. First of all, you need to make sure that the elasticity of the installation legs is not less than 8-10 mm. If the dimensions are smaller, then the shock absorbers need to be replaced.
When replacing them, it is necessary to securely fasten the compressor due to its heavy weight, as it can break the cooling circuit tube. To do this, it is recommended to use garters made of cloth or felt. Synthetics or foam should not be used because they may stick together or become brittle.
If it is necessary to replace freon in the compressor, then it is better to call a specialist. When pumping freon along with it, dust may get into the compressor, which will lead to breakdown. In addition, it is dangerous - pumping freon involves using the compressor while running wet.
Therefore, it is better to invite a specialist.
Deformation of the seal on the refrigerator doors
To do this, you will need a regular hair dryer. Using hot air from a hair dryer, the seal is heated at the point of deformation, then you need to stretch it so that the shape changes and close the refrigerator doors. Then you need to wait until the seal cools down. If the seal is torn, it needs to be replaced.
Repairing a leaking refrigerator with a drip system
You need to find a bowl in which the condensation collects. To do this, you need to disconnect the refrigerator from the power supply and turn the back wall towards you. The bowl is a white container that can be found on the motor housing. There should be a black tube directed into it - a pipe. You need to make sure that it does not jump out of the bowl. Then inspect the inside of the refrigerator; if the drain hole is clogged, it must be cleaned.
If the cause of the leak is a compressor failure, then you should contact a specialist.
How to adjust the thermostat
There are two types of thermostats: electronic and thermomechanical.
Electronic thermostats are a group of detectors and thermistors connected to a control board and are used in electronically controlled appliances. Repairing such thermostats can only be done by a person with a certified electrician.
Repairing a thermomechanical thermostat yourself is also not easy, and it is considered unsuitable for repair. The fact is that the heat tube is glued to the evaporator, the seam is filled with sealant, and the whole thing is covered with a casing. Therefore, without special knowledge and tools, it is quite difficult to disassemble it. And violating the position of the thermotube threatens serious damage. All you can do yourself is to work with the thermostat without removing it from the refrigerator. Thus, you can clean the contacts, check the operation of the bump screw and inspect or replace the transfer spring.
Fuser, fan and timer in refrigerators with a “No Frost” evaporation system
The main difference between such refrigerators is that they have a blowing system that dries out excess moisture to prevent the formation of frost.
Fans, timers and fusers often break down in refrigerators of this type.
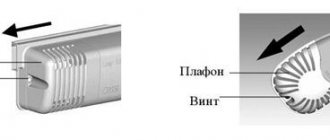
There are two types of fans: open and closed - this depends on the model.
You can check this from the freezer. If the fan is closed and equipped with an electromechanical timer, then you can repair it yourself. First, remove the cover, then you need to inspect the fan. Sometimes dirt accumulates in the impeller. If this is not the case, then you need to try to turn it, and if it does not turn, then you will have to disassemble the entire assembly. To do this, you need to find a fastening plug, often covered with a branded sticker. Under the plug is either a steel or plastic washer. The plastic one is removed with needles, but for the steel one you will need tools. There are two more Teflon washers under the washer - they also need to be removed. Afterwards, the rotor and impeller are removed, cleaned and lubricated. It is recommended to use low-temperature compounds so that they do not thicken during operation. Once you're done with this device, you can assemble it and check how it works.
If this does not help, then you need to check the filter - the device that is needed to turn on the fan. To check this, you need to connect the fan to the narrow terminals of the filter, and apply current to the wide ones. If the fan does not work, then the filter is broken. All that remains is to replace it.
But if the filter works normally, then the problem is in the timer and fuser.
You can find them next to the evaporator. To check the fuser, you need to remove it from the connectors and check it with a tester. If the tester does not show zero voltage, then the fuser is sent for replacement.
Next, the procedure is carried out with the device disconnected from power. All parts are assembled and put in place, and the thermal sockets are closed with a jumper. After this, the device turns on. If it works on a short cycle, then the thermal heater is not working well and needs to be changed. It is important that the test is no longer than 3-4 seconds, but if the timer does not work at all, then it is broken. The timer can only be replaced by a master.
If it comes to open components with electronic control, then only a master can help, and it’s better not to go there yourself.
Replacement using the example of a Stinol refrigerator
For Stinol refrigerators, relay failure is a fairly common occurrence, especially after five to seven years of operation.
Most often, the bellows tube fails here, since this is the option provided by the manufacturer of this element. The Stinol-101 model has only one compressor, but the Stinol-103 has two: separately for the refrigeration and freezer compartments.
The automation of different models is slightly different, which is reflected in the corresponding electrical diagrams, but otherwise these refrigerators are very similar, so it makes sense to consider the procedure for repairing them at the same time.
To understand that the Stinol refrigerator needs repair or replacement of the thermostat, you need to pay attention to the following signs:
- the compressor runs non-stop and does not respond when the regulator is set to OFF;
- when moving the adjustment knob to the OFF mark, there is no characteristic click;
- the temperature in the refrigerator chambers noticeably exceeds the parameters set during adjustment.
The Stinol-103 refrigeration chamber uses a K-59 thermal relay; it is easy to check the markings, they are indicated on the body. To remove the adjustment knobs, you need to use a thin awl. You just need to pry them up and remove them. The Stinol-101 model has only one adjustment knob, while the Stinol-103 has two, one for each compressor.
After the handle is removed, you need to remove the decorative trim, which has six protrusions. This is a fragile item and must be handled with care to avoid damaging it. There are nuts under the cover that need to be unscrewed. After this, you need to unscrew the screws that secure the control panel.
It is best to remove the screws holding the refrigerator door hinge last. To avoid possible damage, the door must be held. Now you can lift the panel and remove the door from its hinges.
The next step is to remove the top cover of the refrigerator.
The necessary fasteners are located on the rear side. They are unscrewed and the cover is removed. This will give you free access to the thermostat.
First you need to disconnect the relay contact connectors, after which you can remove the element from the refrigerator control panel.
At this stage, you need to remember or write down the color coding of the individual wires. To remove a worn capillary tube, remove the plastic cover.
Now you need to unscrew the fixing screw and remove the lighting unit. The tube is removed through the hole provided for this purpose.
The new element is installed in such a way that the uninsulated area in its lower part is securely hidden under the overlay. The hole is closed with a plastic plug to restore the seal of the chamber.
Typically the capillary tube protrudes beyond the thermostat. It must be carefully placed under the top lid of the refrigerator; there is enough space there.
Now you need to reassemble the thermostat and the refrigerator: connect all the necessary connections, install and secure the refrigerator lid, and hang the door.
And again, screwing the door hinge fasteners is done last, when other similar screws are already installed.
To check the condition of the Stinol refrigerator thermostat at home, you can use simple diagnostics. Contacts 3 and 4 of such a device should remain closed at room temperature.
If, after connecting them with a jumper, the compressor turns on, the thermal relay is faulty and needs to be replaced. If the thermostat settings are lost, they can be corrected by turning the adjusting screws, but this should be done in a service center that has the necessary equipment.
An equally important functional unit in the design of the refrigerator is the starting relay, the device, purpose and repair methods of which will be introduced in our recommended article.
Checking the Thermostat
The temperature controller often fails. This is due to the fact that the thermostat of the German company Ranko, which was installed in the refrigerator, has a short working life - approximately 5-6 years. If the temperature controller in the refrigerator is not working, the compressor will not start. To exclude other breakdowns, it is necessary to check the serviceability of this part.
At home, it is difficult to check whether the device is working or not. However, there are 2 ways to determine the operating status.
- The regulator contacts numbered 3 and 4 (in the diagram of the 103rd model they are designated as TH 1 or TH 2) must be closed. Thanks to this, the integrity of the electrical circuit and the supply of mains voltage to the compressor input (in the CO 1 or CO 2 circuit) are maintained. It is necessary to determine whether the supply voltage is supplied to the regulator contacts. If it is not there, then the integrity of the entire circuit from the electrical outlet is checked; if there is, the power is turned off and the contacts are dialed. If they break, the part must be replaced.
- You can also short-circuit the thermostat input contacts. If the compressor starts working, the regulator is faulty. Otherwise, the breakdown did not occur to him. The malfunction is also determined by ear: when the thermostat switch is mechanically turned, a click occurs. If it is not there, then there is a high probability of a spare part malfunction.
Any malfunction of a refrigeration unit whose service life is more than 10-15 years requires a thorough inspection by a specialist. Repair of Stinol refrigerators most often involves replacing a worn-out part. If you have experience in electrical installation work, you can replace the spare part yourself. But when breakdowns occur too often, you should think about purchasing a more modern version of the refrigeration appliance.
Sources
- https://vash-holodilnik.ru/remont/remont-xolodilnika-stinol-svoimi-rukami.html
- https://tehnika.expert/dlya-kuxni/xolodilnik/stinol-neispravnosti.html
- https://holodilnik1.ru/holodilnoe-oborudovanie/stinol/
- https://vash-holodilnik.ru/ustrojstvo/puskovoe-rele-xolodilnika.html
- https://balashiha.bytholod.com/brands/remont-holodilnikov-stinol.html
- https://balashiha.remontgis.ru/%D1%80%D0%B5%D0%BC%D0%BE%D0%BD%D1%82-%D1%85%D0%BE%D0%BB%D0% BE%D0%B4%D0%B8%D0%BB%D1%8C%D0%BD%D0%B8%D0%BA%D0%BE%D0%B2/stinol
Design features and operating principle
The thermostat or thermostat is one of the main elements without which normal operation of the refrigerator is impossible. It records the readings of temperature sensors in the refrigerator and freezer compartments and sends a signal to the compressor start relay.
In accordance with these signals, the compressor turns on if the chamber is not cold enough and turns off when the temperature reaches a set level. Technically, the thermostat is a relay, at one end of which there is a sealed tube filled with freon.
On the other side there are contacts, the opening and connection of which sends a signal to the compressor. The end of the tube with freon, also called a capillary tube, is fixed to the evaporator.
The refrigerant placed inside reacts sensitively to heating and cooling. When the temperature decreases or increases, the pressure level inside the tube changes, causing the relay contacts to connect or open.
The movement of the contacts is controlled by a small spring. It is used to set the temperature level that should be inside the refrigerator compartment. A temperature adjustment knob is attached to the spring. Turning this knob changes the tension of the spring.
As a result, more or less force must be applied to close and open the contacts. This affects the level of pressure in the capillary tube at which the contacts are triggered.
This regulates the degree of cooling of the air in the refrigerator. When using an electronic regulator, this process is carried out slightly differently, but the principle remains approximately the same: the desired temperature level is set based on the actual indicators recorded by the capillary tube.
But such models use an electronic control module that can simultaneously manage data from several sensors. It is not always possible to repair or replace such a thermostat at home. Handling complex electronics requires knowledge and special equipment.
Typically, the thermostat is installed inside or outside the refrigerator compartment. Before starting repairs, it will not hurt to study the structure of the refrigerator and the technical data sheet of the device. There may be a lot of useful information on the design of a specific thermostat model, as well as its location.
Usually the thermostat is located next to the handle for setting the temperature. The internal arrangement is typical for relatively old models. Inside the camera, the element is usually enclosed in a plastic protective housing.