Samsung vacuum cleaners are a widely used brand of high quality. But any equipment tends to break down, and then it becomes necessary to contact a service center. It is quite possible to repair a Samsung vacuum cleaner yourself, unless, of course, we are talking about serious breakdowns that only a specialist can fix.
How a vacuum cleaner works: mechanics and electrical
The basis of any vacuum cleaner is the air pump (or fan). The engine is equipped with an impeller, which, while rotating, absorbs the air flow with blades and, after compression, sharply releases it out. The lines are located in the housing, as well as at the beginning and end of the air pump. Suction lines operate under low pressure, and pressure lines operate under high pressure. Air circulates in the housing, which is discharged during engine operation. Along with the air flow, dust particles are drawn into the hose with a nozzle and fall into the dust collection container. The dust settles there, and the air blows its small particles back out. In order to prevent the return of the smallest dust particles, modern models of vacuum cleaners are equipped with filters.
Important!
Conventional vacuum cleaners (Samsung 1600 W and others) are intended for household use. They cannot be used to remove construction debris and dust from concrete.
The fan impeller is driven by a commutator-type electric motor. The alternating current indicator for such a mechanism is 220 V. Thyristor regulators are installed in high-power household units. With their help, you can limit the dust suction force and carry out gentle cleaning of the room. The electronic functions of the vacuum cleaner are controlled by a board located inside the housing.
Vacuum cleaner diagram
Any vacuum cleaner has the following basic devices:
- dust collector full indicator;
- automatic engine shutdown when the dust bin is full;
- electric motor power regulator;
- automatic cord winding;
- waste compaction;
- regulation of air flow.
In addition, newer models have special filters that collect all the debris.
To ensure that the engine runs smoothly, the equipment is equipped with an interference suppression system, the chokes of which smooth out high-frequency network ripples. The existing capacitor also contributes to smooth operation of the engine.
Any vacuum cleaner has a special compartment in which, if not needed, about three meters of network cable is hidden.
More expensive models are equipped with an electronic control system, touch-sensitive power regulator and engine operating mode switch.
The figures show typical diagrams for turning off the vacuum cleaner.
Most vacuum cleaner models have standard electrical circuits
Simple connection diagrams
Poor air intake
It happens that the vacuum cleaner works well, but does not suck in much air. There may be several reasons for this:
- incorrectly selected power. If your Samsung vacuum cleaner has a power regulator, then it is worth checking whether it is set to minimum power;
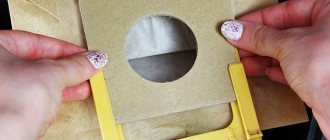
- maximum filled bag for collecting garbage and dust. If the bag is full, it must be replaced. First, disconnect the vacuum cleaner from the electrical network. Then carefully remove the lid to gain access to the bag. If its neck is not equipped with a self-closing valve, then cover it and only then remove the bag from the Samsung vacuum cleaner and get rid of it or empty it of debris. It is not recommended to turn on the vacuum cleaner without a dust bag.
- hose clogged with debris. To check the hose for clogging, you need to disconnect it and inspect it. If there is a noticeable blockage in it, you can clear it by removing the nozzle and straightening the hose, after turning on the vacuum cleaner. Full draft can help clear jams;
- clogged air duct. It is necessary to check the hose connection socket in front of the canister model of the vacuum cleaner or under the cover of the vertical model. After unplugging your Samsung vacuum cleaner, disconnect the pipe and remove debris, if any. It is also worth checking the air duct from the alkaline roller to the back of the roller compartment;
- air leakage from the system. Check the tightness of the connection between the hose and the device body. If everything is normal, then disconnect the hose and examine for small cracks in the corrugation. It is also worth inspecting all the seals and if there are any that have lost their shape, they must be replaced.
Poor suction does not always indicate a serious breakdown.
Distinguishing cleaning vacuum cleaners
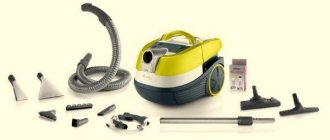
Washing device
With the help of modern devices, you can perform not only dry cleaning, but also wet cleaning. The washing unit additionally includes:
- containers for detergents and water;
- pump - delivers the solution to the cleaning site;
- suction tube for automatic liquid supply.
A type of washing vacuum cleaner is a device that cleans surfaces with steam. It has a steam generator. If you turn on the steam generation function, you do not need to use chemicals for cleaning.
Attention! A washing vacuum cleaner is indispensable for allergy sufferers and families with a very small child or dog.
What types of vacuum cleaners are there?
Robot vacuum cleaner
Classification of household vacuum cleaners for the home:
- dry cleaning;
- detergents;
- with aquafilter;
- built-in;
- robot vacuum cleaners;
- steam cleaners.
The main difference between them is the type of cleaning, which can be dry and wet. To clean a small apartment, they usually use devices with a dry cleaning function.
For a large house or spacious living area, washing devices are more suitable.
Lubricating a part without heating the lubricant
If the selected grease cannot be heated, a non-heated lubrication method is recommended. To do this, you will need an empty tube, previously cleaned inside of foreign substances. The diameter of the tube should correspond to the outer diameter of the bearing; if necessary, it can be cut to the appropriate size.
The plastic material used for lubrication is placed in an empty tube. The bearing is installed inside the filled container. The part to be lubricated is clamped with a clamp, and the contents of the tube are squeezed out using manual force. Thus, the part is completely lubricated (Fig. 7).
Rice. 7 Lubricated bearing
Non-replaceable dust collector
An installed dry dust collector rarely fails; only disposable filters are considered a disadvantage. To make the bag, propylene or silicone fiber is used, the regeneration of which is not provided.
The filled dust container is thrown away and a new one is installed in its place. It is not recommended to sew an old bag to the neck of the vacuum cleaner after cleaning it from dust or washing it. In such cases, due to the increased formation of microdust, the thin and HEPA filters will become clogged, which will lead to motor failure. When disassembling, you need to check especially carefully the connection of the hose to the nozzles of the pipe in order to detect a leak.
What to check first
Some of the problems that caused the device to fail can be fixed by owners themselves, without the help of specialists.
Is the socket working?
First of all, check that the outlet is working properly:
- Plug in another household appliance and see if it works. It is best to turn on a small lamp or table lamp - if the socket is working, the lamp will immediately light up.
- Try plugging the vacuum cleaner into a different outlet and see if it works there.
Is the bag too full?
Quite often, the vacuum cleaner does not turn on because the garbage container is full. When the dust bin is completely clogged, air passes through it more heavily and the suction power decreases. The load on the electric motor increases, and eventually it will overheat, shut down, or fail.
Modern models are equipped with an indicator that signals when the bag is full. If there is no such “red light”, listen to the sound of the engine: when it is working for wear, you can hear an increasing hum. Often the unit starts to “stink”.
If the bag is not overfilled in time, the engine will overheat. Electronics or a thermal relay can track this moment and turn off the engine itself - then just empty the bag and let the car cool down. If there are no sensors, the motor will burn out and the equipment will have to be repaired.
Have large objects gotten into the hose?
Debris stuck in the hose will lead to a drop in suction power, and as a result, overheating and engine failure. Usually the culprit is large objects (rags, children's toys) that got inside the sleeve or telescopic tube and could not move into the dust collector. But sometimes small objects also get stuck - for example, a toothpick stands across the channel, catches other debris and forms a plug.
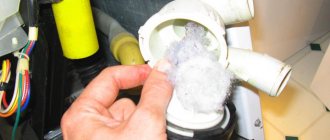
Is the engine protection filter dirty?
The motor protection filter, located immediately behind the garbage bag, is subject to regular contamination. Small dust particles seep through the dust collector and settle on the filter: as a result, the passage of air becomes difficult and the engine heats up again.
Is the cable or plug broken?
The cable of the vacuum cleaner is constantly in motion during cleaning - the cable clings to corners, gets under furniture, and the unit itself often runs over it. All this negatively affects the integrity of the cable.
- Check the cable. Sometimes the damage can be determined by torn insulation, but often the metal strands are damaged internally, and the insulation does not cause suspicion. Open the case and find the place where the cord connects to the electrical board. Plug the cable into the outlet, take a multimeter and measure the voltage at the connection point. If there is no current, the problem is either the cable or the plug.
- Replace the plug or its parts. If the plug is removable, open it and look for burnt contacts or other defects. Simply cut off the permanent plug from the wire and replace it with a new one.
If the other plug does not give a positive result, then the final cause is in the cord - replace the whole thing.
How long did the equipment work?
If the vacuum cleaner stalls, check how long the equipment was running before. It is possible that after a long cleaning it simply overheated, and the electronics turned off the motor to cool it down. Wait a while (at least 20-30 minutes) and your assistant will be ready to work again.
Is there a burning smell?
If during cleaning you smell a burning smell, then most likely the armature or stator winding has burned out. In this case, you cannot do without qualified repairs - you will have to replace the burnt part, and in some cases the entire engine.
Sometimes they suggest rewinding the armature and stator windings; we recommend looking at the economic feasibility. Most often, a new assembled module will be cheaper.
Serious damage to Samsung vacuum cleaners
Repairing serious defects usually requires the intervention of certified technicians. However, here too some of the faults can be repaired yourself. For example, the owner can easily replace a damaged power switch himself.
No. 1 - power button and power cable
A faulty power switch prevents the device from being turned on, or the operating mode is not locked when turned on. In the first case, the reaction when the button is activated is zero.
In the second case, the vacuum cleaner starts when the button is pressed, but immediately turns off when the user releases the button.
The functionality of the power switch can be easily checked with a tester - an electromechanical device. A non-working button does not create contact between the terminals in any position.
A non-latching button creates contact only in the pressed position. By connecting the tester probes to the button terminals, you can check the functionality of all positions.
Along with the network switching, the power cable of the vacuum cleaner may also be faulty. The power cord is checked with the same tester.
Checking the power cord also involves testing the power outlets that the owner uses when turning on the vacuum cleaner.
No. 2 - air suction power regulator
Many Samsung models are equipped with a suction power control module. Essentially, this module is a regulator of the rotation speed of the electric motor shaft installed inside the vacuum cleaner. The module is an electronic circuit (relatively simple) based on thyristors.
A module malfunction—usually a thyristor failure—results in either the inability to start the vacuum cleaner or a complete inability to regulate the performance of the device. In any case, it is necessary to disassemble the vacuum cleaner, remove the control module and replace failed components.
Here it is quite problematic to work with your own hands without certain skills, for example, the ability to distinguish a resistor from a capacitor or the ability to hold a soldering iron in your hands. However, if desired, these qualities of an electronics engineer are not difficult to master.
No. 3 - electric motor of a household vacuum cleaner
A complex malfunction, of course, is considered to be the failure of the electric motor of the vacuum cleaner. As a rule, the designs of modern household appliances produced under the Samsung brand use axial-type motors with a rotation speed of up to 20,000 rpm.
Rotation at such a high frequency is accompanied by significant loads on the support bearings. Therefore, one of the common malfunctions of Samsung vacuum cleaners is defective bearings. This is usually accompanied by increased operating noise of the device, sometimes very loud.
The job of replacing vacuum cleaner bearings with your own hands is difficult, but quite doable. However, initially you will have to disassemble the entire contents of the structure of the harvesting equipment in order to get to the motor.
Of course, during the process of disassembling the vacuum cleaner, it is recommended to record the sequence of installation of parts, writing it down on paper, or you can take pictures with a smartphone.
On a dismantled engine, you will need to remove the contact brushes and impeller casing. This process is relatively simple.
Contact brushes are usually secured with one screw and can be easily removed from their mounting niches. On the impeller casing (outer half), you need to carefully bend the four rolling points and, using some force, pull off the casing.
The most difficult process is unscrewing the nut that secures the impeller to the motor shaft.
Craftsmen with experience in repairing vacuum cleaners use different methods for these purposes:
- clamp the engine manifold with wooden blocks;
- wrap an insulated wire around the collector;
- cut a groove along the end of the shaft.
As a result, the impeller can be removed. Next - a “matter of technology” - the shaft is removed by traction force, and the defective bearings are replaced. Then reassemble in reverse order.
Electrical defects in motors - breakage, winding short circuit between turns, commutator burnout - are relatively rare phenomena, but they also occur. In such cases, the electric motor is usually replaced with a different (new) copy.
User manual
When using a vacuum cleaner, you must follow electrical and fire safety rules. Strict adherence to them will ensure reliable operation of the device and increase its service life.
- The vacuum cleaner should be operated in a dry, ventilated area at room temperature.
- Before turning on the vacuum cleaner, you must visually check that there is no leakage of liquid from inside the housing, that the electrical outlet and plug are working properly, and that the connecting cord is intact.
- After transportation from a store at subzero temperatures or after long-term storage in an unheated loggia or on a balcony in winter, it is necessary to keep the vacuum cleaner in the room for at least 6-8 hours before turning it on to dry the condensation drops on the body and current-carrying parts and parts.
- Do not use the vacuum cleaner during power surges or frequent power outages.
- It is prohibited to use non-standard power cords and fuses, or to add aromatic oils, eau de toilette, herbal decoctions, deodorants, or aggressive chemical liquids to the water in the humidifier compartment.
- Do not turn on the vacuum cleaner if there is paper dust, wood shavings, fine silicate or abrasive dust, explosive, corrosive and highly active gases and liquids (gasoline, solvents, acetone, dichloroethane, high oxygen content) in the air.
- It is strictly forbidden to turn on the vacuum cleaner after a strong blow to the body or a fall from a great height.
- If a crackling sound, a burning smell, or smoke appears during operation, you must immediately turn off the vacuum cleaner and contact a service workshop.
- It is strictly forbidden to fix the problem yourself.
You can learn how the Krausen separating vacuum cleaner works by watching the video below.
If the vacuum cleaner does not turn on
The first thing you need to do is make sure that the voltage is reaching the control board
. To do this, remove the casing, the plastic panel with the power and cord rewind buttons and see the control board in front of you. It traces along the power cord coming from the winding unit which terminals it goes to. We turn it on and measure the voltage at these terminals - if there is voltage, then everything is in order with the cord.
Next, we check the operation of the network power button (indicated by number 1 in the figure). When the network is disconnected, its contacts are called in the on and off state - if switching occurs, we move on. You need to check the triac
(indicated in the figure - 3) - for this, with the network turned on, we check the voltage at the terminals going to the motor - if present, this chain is in order, and if not, there is a high probability of damage to the triac, and it does not pass current through itself. These triacs can be easily found on any radio market and cost about $0.5.
Control board
If voltage still arrives to the engine, but it does not work, the first thing we do is check the thermal protection
y - a device is attached to the motor housing in a special holder that controls the temperature of the housing - if its value reaches the normal limit, the thermal protection interrupts the power supply circuit. If you ring the protection and make sure that everything is in order with it, then the problem is in the engine.
First of all, check the brushes
– when they wear out, the circuit between the stator winding and the rotor may disappear. The brushes must fit snugly to the rotor and have a margin along the stroke. Next, we use a tester to check the entire chain (stator winding - brush - rotor - brush - stator winding) with the vacuum cleaner turned off and the terminals from the control board removed - and we see that there is a break in it. Yes, exactly a break, because if all the previous stages have shown the integrity of the circuit and voltage is supplied to the motor, but it does not work, although the brushes are in order, this is a clear winding break. This is the most unpleasant moment, since the engine is not dismountable, and it is not easy to get inside - only small slots at the top of the housing. I’ll say right away that the cost of a new one is about $25. But sometimes you still get lucky, and you can eliminate the break - you need to check everything through the holes in the housing where the ends of the windings are secured to the incoming terminals and brushes. The fastenings there are made in the form of a “dovetail” - the wire is inserted into a slot in a metal plate. As a result of constant vibrations, it can break in this place and break the chain. This is exactly what happened in my case. You can try to tighten the wire and fasten it again, but sometimes this is impossible - you have to solder another piece of a couple of centimeters. It is inconvenient to solder through a small slot, but it is possible - as a result, the vacuum cleaner will work again.
How the vacuum cleaner works
The operating principle of the vacuum cleaner is quite simple. By and large, a vacuum cleaner consists of three main components. This is an electric motor, pump and filter. The work consists of an electric motor using a pump to create a vacuum of air under the vacuum cleaner brush. Due to this, dust and dirt are sucked into the vacuum cleaner, and then the air is cleaned of them by a filter. That's all, actually. The various types of vacuum cleaners that currently exist are just variations on this theme. They may use different types of filters, different pumps, but the essence remains the same. The most important element of a vacuum cleaner is its filter. Without effective filtration, the vacuum cleaner will simply lift dust from the floor and throw it back into the air. By modern standards, retaining even 99% of dust does not provide the required level of air purity, since the remaining 1% of dust contains bacteria, viruses and allergens. Therefore, a high-quality level of filtration is considered to be the retention of 99.95% of dust or particles of no more than 0.3 microns. In order to achieve this indicator, several stages of air purification are used. Often, buyers of vacuum cleaners are “bought” by the power, which manufacturers indicate in large letters on the packaging. But, it is necessary to distinguish between the power of the electric motor and the suction power. These are not the same thing, although they are interconnected with each other. The power indicated on the packages is usually the peak power that the engine can produce. But he can work on it for a limited time. And operating the vacuum cleaner in this mode is a direct path to damage to the unit. The suction power is 2-3 times less than the engine power. Why? Yes, because the engine power is dissipated to implement other functions of the vacuum cleaner, and no one has canceled the banal efficiency. We shouldn’t forget about this. So, if your box indicates a power of 1500 W, then it’s good if the suction power is 500 W.
Preparatory stage of disassembling the Samsung vacuum cleaner
You can notice the problem if you have been using the equipment for some time. You know what sound is typical of your Samsung and the smallest changes in it or in the operation of the device will be noticeable to you.
The breakdown of many parts will lead to financial problems.
A broken motor in a vacuum cleaner is noticeable by: intermittent sounds, throws out dust, smells burnt. If it is not possible to give it to a specialist, then disassembling a Samsung 1800 w vacuum cleaner with your own hands, videos and photos will be assistants.
What tools will you need?
Need to clean the dust bag or replace it? No special equipment or skills are needed. They are needed in cases of problems with the motor, wires, and board elements. They will be:
- file;
- awl;
- pliers;
- sandpaper;
- vice;
- construction knife;
- spare connectors and wiring.
Use tools to disassemble the vacuum cleaner.
In cases of replacing small parts you won’t have to spend a lot
But to replace a large and expensive component, you can pay attention to an alternative. With the condition of good material from which it is made
How to remove a bearing
Regardless of the vacuum cleaner model, any DIY repair should begin by unplugging the equipment from the outlet and removing the housing. The process for removing the case will differ depending on the specific model of household appliance.
Before making repairs yourself, it is important to sketch on a piece of paper a diagram of the location of all the spare parts and wires in the vacuum cleaner; this diagram will later tell you how to accurately and easily assemble the device to its original state. Actions taken to replace the bearing yourself:
Actions taken to replace the bearing yourself:
- Removing filters
- Disconnecting electrical wires
- Unscrewing the plastic motor housing
- Removing the motor from the housing
- Engine disassembly
The filter must be removed as it restricts access to the motor. All the screws on the case are unscrewed, including the countersunk ones. We carefully check all additional latches and screws to avoid breaking the case during removal. If you forcefully pull the housing, which is attached by at least one latch, it may burst.
All electrical wiring is dismantled; there are special connectors for its fastening. The motor housing is unscrewed from the frame, the electric motor is removed from its housing. There are vacuum cleaner models where the engine is located on puzzles made of rubber material or is screwed to the general body of the device, which greatly facilitates the disassembly process. Next is necessary.
Is it possible to fix a vacuum cleaner yourself?
Most of the models of household cleaning appliances from the Korean company are represented by designs that are relatively simple in technical terms. Accordingly, in most cases, repairing such products is also quite simple.
Obviously, the complexity of repair work is completely related to a specific unit or part. Thus, fixing a small break in a corrugated hose is much easier than replacing a broken electric motor bearing.
It is cost-effective to repair Samsung household appliances - vacuum cleaners. However, some individual repair cases require skills and the ability to hold a screwdriver, soldering iron and other tools in order to completely disassemble the device
Let's look at common malfunctions of Korean-made household vacuum cleaners and possible ways to eliminate such defects at home.
It is logical to note: with all due respect to service workshops, the amount of payment for repairs in the service often approaches the cost of a new vacuum cleaner.
Types of vacuum cleaners | Engine of progress
September 26, 2010
Now all vacuum cleaners are divided into several types, all of them differ in the design of the device and even in the principle of dust filtration.
Vacuum cleaners with bag
The simplest and most familiar type of vacuum cleaner, dust knocked out by a brush from the carpet surface or collected from the floor is sucked through a hose and ends up in a bag, which is also a filter. As a rule, to retain residual dust, another filter is placed behind the bag, which must be washed occasionally.
HEPA vacuum cleaners
Vacuum cleaner with HEPA filter (High Efficiency Particulate Air or High Efficiency Particulate Absorbing) High efficiency particle filter. Such vacuum cleaners have a much greater ability to retain dust than conventional bag vacuum cleaners.
In general, HEPA filters are fine sedum filters and they are usually used at the outlet of a vacuum cleaner, to retain the smallest particles that have already been filtered through a bag or other filters.
They were invented to filter air contaminated by radioactive dust from the US nuclear program. Used in nuclear industry enterprises.
The filter is an accordion-folded fibrous material and a housing-frame holding the filter assembly.
The effectiveness of such filters is assessed by the number of particles up to 0.06 microns in size per liter of air. Divided into classes
| Class | Particle count (0.06 micron/liter) |
| HEPA 10 | 50 000 |
| HEPA 11 | 5 000 |
| HEPA 12 | 500 |
| HEPA 13 | 50 |
| HEPA 14 | 5 |
Vacuum cleaners with such a filter are often used in homes where there are people suffering from allergies and asthma.
Vacuum cleaners with water filter
As stated in the previous article, water filter vacuum cleaners were invented in 1860
year by inventor Daniel Hess. However, even today these are high-tech devices. The operating principle of these vacuum cleaners is as follows:
During suction, the air flow is directed into a chamber with water, where it passes through it directly. Large dust particles, wool and other heavy particles are wetted by water and remain in it.
The separator is a hollow cylinder with blades, rotating at a speed of 25 thousand revolutions per minute, and creates a fine suspension of water and tiny dust particles, which under such conditions are wetted by tiny drops of water and settle on the walls of the separator.
The air leaves the separator almost clean thanks to the special shape of the blades. The efficiency of air purification using a separator reaches 99.9991%. Igonda, instead of a separator, such vacuum cleaners use a HEPA filter.
Vortex or cyclone vacuum cleaners
Dyson vacuum cleaner
They are also called bagless vacuum cleaners. The principle of operation is based on centrifugal force, which acts on the body the more, the greater its mass. The vortex vacuum cleaner is equipped with several cylindrical separator chambers, tapering downward.
The air flow, along with the sucked-in dust, flies at high speed into the upper (wide) part of the cylinders.
Heavy particles (in this case, dust) are immediately pushed towards the walls of the cylinder and begin to rub against them in a vortex, gradually losing their kinetic energy and settling lower and lower.
The air exits from the top of the cylinder and is directed to the next separation level. After passing through all (two or three) stages of purification, it passes through a HEPA fine filter, after which it goes outside.
The first bagless cyclone vacuum cleaner, the CMS 1000, was patented by Amway in 1959. Filter Queen and Regina companies produced cyclone vacuum cleaners back in 1928. Modern cyclonic vacuum cleaners were developed by designer James Dyson in 1985. Dyson based his idea on the operating principle of industrial cyclotron separators.
Washing vacuum cleaners
And the principle of such vacuum cleaners is simple. During cleaning, washing liquid or plain water is supplied to the nozzle. Through the nozzles on the brush, water is distributed throughout the working area, wets the dust particles, and excess water is sucked back and supplied to another reservoir of the vacuum cleaner, specifically for waste water.
Built-in vacuum cleaners
3 – vacuum cleaner sockets, 4 – discharge to the street, 6 – the vacuum cleaner itself in the basement
Built-in vacuum cleaners are perhaps the most radical way to get rid of dust in the house in principle. Such vacuum cleaners are usually used in small hotels or in homes that have been pre-designed with such a system in mind. Externally, the built-in vacuum cleaner looks like a power outlet.
Having opened the sealed hatch, you need to insert into it a hose with a metal cylinder that closes the contacts of the low-voltage network and the unit standing in the utility room will begin its work. Because
All other air ducts will be closed with lids at this moment; the vacuum cleaner will have enough power to pump the entire pipeline.
Main parts of the vacuum cleaner
To determine our breakdown, let's look at how various elements of equipment work.
Filters
They are the ones who bear the brunt of waste processing. First of all, check them: excess debris impairs suction, leads to shutdown during cleaning or even burnout.
Cleaning the filter is easy - rinse it with water and let it dry without placing it on the battery or blowing it with a hairdryer.
Hose
“Clogs” may form in the hose from socks, rags, hair, pet hair, or simply a large amount of dust. If debris has already accumulated, remove it carefully so as not to damage the inside walls of the hose.
Perhaps there are no “plugs”, but the problem is a hole or crack. The problem can be solved using improvised methods:
- wrap the lesion with construction tape;
- make a patch from a thin elastic band or an overlay from silicone.
Brush
The brush collects large debris and lifts the carpet pile for more effective dust removal. Over time, it becomes clogged and stops picking up dust. It is quite easy to clean a standard brush from tangled hair, threads, wool, for example, after 2-3 cleaning cycles.
A turbo brush consists of a roller coated with plastic bristles: the roller rotates and collects debris with the bristles. Without timely cleaning, the turbo brush will clog just as quickly as a regular brush.
Cord and wire
The cord may be broken, torn, or disconnected from the control board, causing no power to flow to the motor. It needs to be replaced and the new connection must be tightly insulated.
The wire retracting mechanism may break, then the equipment will not wind the cable inside the case. What to do with this is in the instructions below.
Engine
Engine repair and diagnostics are the work of a professional. Don't even try to fix something if you don't understand electrical engineering.
Control boards
Just like with the motor, do not try to re-solder the board without knowing its operating principle and repair rules. It could turn out even worse.
Operating principle of a robot vacuum cleaner
When the operating mode is activated, the robot vacuum cleaner begins to move across the floor. As a result of the motor operation, the side brushes collect and direct dust and debris to the turbo brush. The turbo brush moves all dirt and dust to the suction port. The air flow carries dirt and dust particles to the filter device.
Then dust and dirt fall into a container specially designed for this purpose.
In models with a wet operating mode, a microfiber cloth provides wet cleaning of surfaces and floors.
A UV lamp (if included) disinfects the cleaned surface.
The navigation system ensures smooth movement of the vacuum cleaner throughout the workspace.
The operating principle of the navigation system depends on its type. The following options are available:
- Laser navigation system;
- Navigation using internal sensors;
- Navigation using external sensors;
- Using a camera.
Based on the foregoing, we can conclude that the operating principle of different models of vacuum cleaners is similar. The differences lie only in the technical characteristics of the devices and their purpose.
Distinctive features of different types of vacuum cleaners
There are many types of this cleaning equipment available. They have different functionality, power, filtration principle, nozzles. Each type has its own advantages and disadvantages, which largely depend on the principle of operation.
With aqua filter
Vacuum cleaner with aqua filter
The air sucked in by the vacuum cleaner interacts with the water in the container, which leads to dust settling, and the purified air masses flow further.
In equipment with the classical principle of operation, debris is retained in the dust collector, which reduces the quality of cleaning. In models with an aqua filter, the power remains at the same level.
Advantages:
- no need to replace the dust collector. Instead there is a water filter;
- additional air humidification;
- improving the quality of cleaning;
- even if a lot of dust has accumulated in the tank, the unit will continue to work at full capacity.
The disadvantage of the devices is that the water tank weighs a lot, increasing the overall weight of the equipment. And after each cleaning, it is necessary to drain the water, clean and dry the container.
When choosing a vacuum cleaner with an aqua filter, look at the volume of the tank. Usually this is 1.2 - 5 liters, but 3 liters is enough to clean four rooms. The power of such models is reduced in order to prevent water from getting into the electric motor. Devices with an aquafilter weigh an average of 7 kg.
Vortex type
Vortex type vacuum cleaner
They are also called cyclone vacuum cleaners, which, although they appeared relatively recently, have proven themselves to be the best, which is why they are produced by almost all manufacturers of household appliances.
The working principle is simple: the air sucked in along with the dust is supplied to the waste collection container not directly, but moving in a spiral.
Advantages:
- There is no dust collector in the design, so there is no need to rinse the container after each cleaning;
- the power remains stable, regardless of how full the tank is;
- the vortices that suck in air are almost silent.
Vortex models do not have the ability to set the suction power. The cleaning device is not designed to “fight” fluff, hair or fur. And if a large object gets into the garbage container, it will scratch against the walls of the container, making characteristic sounds.
Cyclone vacuum cleaners have different filtration systems. The deep cleaning filter copes with large particles of debris, and fine ones with small ones. Expensive models have several filters at once.
Standard equipment includes three-level filtration:
- rough cleaning is a filter-dust collector that looks like a glass;
- a filter element in front of the motor, protecting it from contamination;
- fine cleaning – ensures the purity of the exhaust air.
For wet cleaning
Wet vacuum cleaner
They are also called washing vacuum cleaners. The advantage of the units is that they are able to remove stubborn dirt. According to the principle of operation, they are more complex than models designed for dry cleaning.
The design includes a water tank into which cleaning agents are added in the form of liquid or powder.
During cleaning, a soap solution is applied to the contaminated surface, so the brush more effectively removes dirt, which, along with air flows, enters the vacuum cleaner. Already in the housing, water and debris accumulate in a separate tank.
Robot vacuum cleaners
Robot vacuum cleaner
This is a technique that can perform wet and dry cleaning without human assistance. The design contains sensors that allow the device to move around the room. This vacuum cleaner will bypass obstacles on its own.
There are brushes on its side edges, so it cleans not only the floor, but also baseboards and furniture legs. The downside of these high-tech models is their high price.
Advantages:
- autonomy (orients himself in space);
- mobility;
- low noise level;
- the user sets the program according to which the unit operates.
Robot vacuum cleaners do not operate from the mains, but from a rechargeable battery, the capacity of which determines the operating time without recharging.
As a rule, these are improved models that have additional options: aromatization, a UV lamp (disinfects the air), Internet connection, and so on.
Basic Troubleshooting
The vacuum cleaner may not work for several reasons:
- fuse blown;
- break in the network cable;
- switch malfunction.
Methods for eliminating various breakdowns are presented in the table.
| Malfunction | Diagnosis and elimination |
| There was a wire break | To check this malfunction you will need a tester. With its help, you can ring the wires and determine the exact location of the break. Next, this malfunction must be eliminated using a soldering iron. Before you start searching for a break, you need to make sure that the temperature sensor in the device has not tripped and has not forcibly de-energized the motor. This happens when the vacuum cleaner is running for a long time. In this case, no repairs will be required. Once the vacuum cleaner has cooled down, operation will be restored immediately. |
| After being plugged in, the device vibrates or strange sounds are heard | This often indicates that there is a problem with the bearings. The presence of sharp sounds in the bearing assembly indicates the exhaustion of its resource. These parts must be thoroughly lubricated or replaced with new ones. |
| The power cord is not tightened | Any vacuum cleaner has a special compartment in which there is a wire up to 3 m long. If it does not tighten, then the problem is in the spring. You need to inspect the winding drum. The spring may be loose or too tight. If everything is fine with it, then you will have to remove the drum and unwind or wind the wire around it. This is how the tension force of the drum is adjusted |
| The vacuum cleaner ceases to perform its main function. Dust is not sucked in | It is necessary to remove and inspect the filters. If they become clogged with dust, they must be thoroughly cleaned. If cleaning does not produce results, the filters must be replaced with new ones. Before replacing, you need to turn on the device without filters and make sure that the suction power remains at the proper level. It should be borne in mind that some models allow you to adjust the suction power. If it is not strong enough, then you will have to inspect the impeller. It may be completely clogged with small debris. Sometimes the tightness of the hoses is broken, most often in the places where they are attached to the nozzles. It is also worth checking the condition of the brushes and commutator. Failed brushes need to be replaced, and the commutator should be cleaned with fine sandpaper. |
Location of filters in the vacuum cleaner (1, 2, 3)
When diagnosing, you also need to check the operation of the pressure roller. Vacuum cleaners are not immune to motor speed control problems. In this case, the problem lies in the incorrect functioning of the electronic control unit.
Types of breakdowns and ways to fix them
The complexity of the repair depends on the type of fault.
| Types of malfunctions, the elimination of which does not require disassembling the vacuum cleaner | Possible cause of malfunction | Troubleshooting methods |
| Cracks in plastic parts | Shock loads, long service life | Plastic is restored by pressure welding or gluing using polyurethane PU-2, epoxy compounds K-153 and VK-9 |
| Cracks or dents in the steel frame | Shock loads | Elimination is carried out by editing from the inside, which should be done from the middle of the dent and gradually moving towards its edges. You can use gas welding and use it to eliminate cracks. This process consists of cleaning the problem area with compressed air, degreasing with gasoline, and sealing after complete drying. For soldering, it is best to use solder with flux or POS-61 with F38N flux. After sealing is completed, the work area must be degreased, primed and dried. |
| Breakage of plastic clutches and gear teeth | Long service life, high loads | Worn gears and clutch can be replaced or you can try to restore them by spraying plastic powder. |
| The vacuum cleaner does not work or operates intermittently | Damage to the plug or insulation of the connecting cord, its breakage, or failure of the switch | A broken contact in the plug can be replaced independently as follows:
To check the integrity of the connecting cord, you need to unscrew the bolts of the back cover and, after removing it, unscrew the central screw on the automatic cord retracting panel. The drum is removed, the cord is removed, and the coil spring assembly is separated. Now you need to remove the damaged cord and solder a new one to the slip rings, not forgetting to first pass it through the window insert on the back cover. All parts are installed in place and the cord retracting mechanism is checked. If the switch breaks, it must be disassembled by first disconnecting the live wires. The switch should be repaired or replaced with a new one before installation. |
| The connecting cord is not fixed | Mechanism supports are damaged | The drum, coil spring of the lever with bushing, brake roller, lever are removed after removing the back cover. After replacing the necessary parts, everything is installed in place. |
| The connecting cord does not extend | Spring Drive Problems | Once the drum is removed, the coil spring assembly is separated and replaced with a new one. |
| Problems with the drum spring assembly | Damage to the spring on the mounting axis | The drum is removed and disassembled, the spiral spring is repaired or replaced with a new one |
| Damage to the cover and wheels | Damage to the back cover and wheels | The back cover is removed, the drum and both wheels are removed and replaced with new ones. |
| Malfunctions, decreased suction power | Corrosion of connecting cord contacts | After removing the back cover, the contacts are protected using #20 sandpaper. The drum contact rings are cleaned in the same way. |
| The mechanism does not turn on or constantly turns off | Current fluctuations, breaker failure | After removing the back cover, unscrew the diaphragm and remove it from the body. Next, remove the centering spring |
| When the vacuum cleaner is shaken, it makes a knocking sound | Damage to contacts, terminal block | The back wall and diaphragm are unscrewed, after which the insulating sleeve is removed from the block, the contacts and mounting wires are removed, which, if necessary, are replaced with new ones. |
| The equipment doesn't work | Unit failure | After removing all the children under the back cover, try to restore reliable contact in the connections, replace the damaged wires with new ones. If the capacitor is broken, it must be replaced with a new one. |
| Reduced suction capacity | Problems with contacts in the brush-commutator unit, broken brush spring | Check the brush and brush holder springs and eliminate any detected defects. Wipe the brush holder windows with technical alcohol. To clean the brushes, use #25 sandpaper. |
| Insufficient vacuum | Unit misalignment or shock absorber wear | Defective parts must be replaced |
| Reduced suction capacity | Depressurization of connections, clogged hose or filter | Check the tightness of all parts of the vacuum cleaner. If necessary, replace the fine filter. After removing the engine, check that the turbine nut is securely fastened. If necessary, clean the hose and filter |
| Dust indicator does not work | The piston is stuck or the spring is broken | After removing the cassette with a paper dust container, dust filter, and decorative grille located under the front cover, unscrew the screw for the dust container full indicator. All damaged parts must be replaced, after which all parts must be replaced. |
| Poor absorption | Hose problems | Check the hose for integrity and tightness, seal cuts, remove blockages, if necessary, replace the O-ring |
| Front support wear | Careless handling | Replacing a deformed front support |
| Problems with the operation of the electric motor | Broken wire | Replacing a wire or toggle switch |
| Malfunctions that require disassembling the vacuum cleaner | ||
| The vacuum cleaner rattles during operation | The moving disks rotate, touching the moving parts | Repair or replacement of defective disks is required. |
| The vacuum cleaner doesn't work | There is no contact in the armature and stator windings | The armature and stator require repair or replacement. |
| Motor heating with loss of suction function | An interturn short circuit has occurred in the armature winding | Sections of the armature winding may have short-circuited turns. Anchor needs repair |
| The current strength is close to the short circuit value | The armature or stator winding is shortened | It is necessary to check the resistance of the armature or stator windings and, if necessary, insulate them. |
| The appearance of a burning smell | Perhaps the armature or stator winding is on fire | Replacement or repair of stator or armature |
| Sincere in the brush-collector unit | Collector short circuit | Repair of the commutator, checking for a break in the armature winding |
| Reduced vacuum and unstable operation of equipment | Problems with brush holders | Cleaning or replacing brush holders, cleaning the commutator |
| Vibration, grinding, noise | Ball bearing problem | Replacing ball bearings |
| Dents on the body | Careless handling | Decorative finishing after removing the insides of the vacuum cleaner |
The most common problems that arise when using a vacuum cleaner
Depending on the problem that arose with the operation of the Samsung vacuum cleaner, the types of work required to eliminate it are determined, and this can be done with your own hands. The most common problems are:
- the device does not turn on;
- loss of suction power;
- loud noise during operation;
- foreign smell.
Small debris is not collected
Sometimes during operation, even with good suction, the vacuum cleaner does not collect debris well enough. There may be several reasons for this:
- incorrect position of the roller. Check that the brush roll height is set correctly by selecting the appropriate option for the cleaning surface;
- brush wear. The length of the bristles is checked by placing them across the slot in the bottom plate of the ruler and turning the roller. If the roller pile does not touch the ruler, then the roller requires replacement;
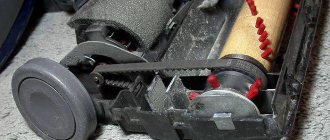
- the belt is torn. When replacing the belt, it is important to consider the model of the vacuum cleaner. Pre-disconnect the vacuum cleaner and disconnect the base panel, freeing access to the brush roller. To get the roller out, you need to pry it off from both sides. The belt is tensioned onto the motor shaft and slides onto the groove of the roller. Using the roller, the belt is tensioned and the roller is installed in its place. After installation, the roller should rotate freely, which should be ensured before closing the lid;
- The roller bearings are jammed. You can make sure that this does not happen by removing the brush roller and unscrewing the end caps. At each end, check the bearings for threads, hair, or other debris. If there are any, they should be carefully removed.
Unpleasant odor during operation of the vacuum cleaner
The smell of burnt rubber can cause the belt to slip. You need to check the belt tension, and if it is too weak, install a new one. If an unpleasant odor appears when using a Samsung vacuum cleaner, this is a signal that you should immediately replace the garbage bag and filters. To prevent this from happening, make sure the bag is full and put special fresheners inside before fixing it.
Engine speed is not regulated
Often the cause of a breakdown may be a triac through which voltage begins to pass without any control. The cause of this breakdown may be a failure of the triac or loss of contact with the board of one of the legs of this element.
To make sure that the speed controller is working properly, you need to lightly press down on its handle. Also, the cause of the malfunction may be a broken contact in the regulator, as a result of which its slider ceases to contact the pad.
The vacuum cleaner does not turn on
Sometimes it happens that the vacuum cleaner does not turn on. Everything is fine with it, but when turned on the device does not work. The malfunction is most likely related to the electrical supply. The socket, cord or plug is broken. All elements of the circuit should be thoroughly inspected. Most often, the breakdown can be seen near the plug.
As a result of the fact that the vacuum cleaner's power cord is mobile, it is very vulnerable, and kinks often form on it during operation. If the vacuum cleaner works, but its speed is not regulated, then this is also a problem. This is observed in the event of a contact loss, which is easily eliminated by replacing the slide resistor or triac.
Check power cord
Cord problems
There are cases that when you press the corresponding button, the cord does not tighten inward, or, on the contrary, tightening occurs during operation of the mechanism. In this case, the problem may be associated with a breakdown of the winding drum, on which the spring may have burst, weakened, or, on the contrary, become too tense.
Solving this problem is very simple. It is enough to inspect the pressure roller or, after removing the drum, adjust the drum tension to the required level.
Loud noise and vibration
It happens that during normal operation of the vacuum cleaner there is strong noise and vibration. Problems that you can fix yourself can be caused by:
- damaged fan. It is observed only in outdated vertical models. It is better to entrust the fan replacement to a specialist;
- worn roller bearings. The cause of a rattling sound during operation may be excessively worn bearings. To replace them, you need to take the roller and unscrew one of its end caps, and then remove the metal shaft from it. Holding the shaft with pliers, unscrew the next cap. Replace boots, gaskets and bearings.
There are times when when you turn on the vacuum cleaner, the plugs on the meter are knocked out. The cause of this phenomenon may be a failed control board or a motor defect. When it comes to a washing vacuum cleaner, you need to pay attention to the pump that supplies water to the hose.
Smoke, fire, short circuit
If you notice the appearance of smoke, a fire, or the plugs are knocked out while the vacuum cleaner is operating, this may indicate a short circuit inside the unit itself. This often happens when using models not intended for this purpose for cleaning water. In this case, you will have to disassemble the vacuum cleaner and thoroughly dry all its parts. If you don’t want to disassemble, then be prepared that the assembled equipment will take about a month to dry, which is due to the fact that the internal elements are hidden deep without air access.
If the short circuit occurs without the participation of moisture, then most likely the reason lies in the collector unit, which could have become clogged with graphite dust. In this case, you just need to clean the collector.
The cause of smoke may be the destruction of engine bearings or an air pump. This will be indicated by the changed sound of the vacuum cleaner during operation. You will clearly hear a characteristic whistle, gradually developing into a grinding sound. In this case, there is a high probability of engine jamming. Replacing damaged bearings on your own is not easy, so we advise you to entrust this procedure to specialists.
The vacuum cleaner works intermittently and there is sparking in the collector
The sparking of the vacuum cleaner indicates wear on the carbon brushes, which reduces the force of the springs pressing them to the collector. If this kind of thing happens often, it threatens constant overheating and rapid wear of the collector.
But not all sparks are so scary; lightly glowing sparks along the very edge of the brush are quite acceptable and should not cause much concern. Worn brushes should be replaced immediately to avoid more serious damage.
If the brushes are in normal condition, but sparking of the commutator is still observed, then there may be several reasons for this:
- interturn washout in the armature winding;
- interturn washout in the stator winding;
- too much load on the engine.
If you suspect such breakdowns, you should contact a service center for help.
We repair the engine
Well, the last thing that could happen is engine failure. This malfunction can be determined by touching the case with your hand - it gets very hot, which means something is wrong. In addition to the fact that the motor gets very hot and overheats, it can also suddenly turn off. Don’t know what is the reason if the vacuum cleaner does not suck and turns off? Read on to find out why the traction disappeared and what needs to be done to repair it!
First you need to remove the decorative protection of the case and use a multimeter to ring all sections of the circuit. Typically, equipment does not work due to a blown fuse. If this is indeed the case, replace it with a new one with exactly the same parameters. If the winding on one of the coils breaks, it is better to go and choose a new vacuum cleaner, because... Buying a motor will be an expensive pleasure. In addition, the contact on one of the wire connections may simply break. Here the repair will not be difficult, especially if you are “friendly” with a soldering iron.
If the problem is that the vacuum cleaner does not pull and turns off due to the motor brushes that you decide to replace, be careful when connecting them. Incorrect connection of the brushes may cause the vacuum cleaner to blow out dust instead of sucking it in after repair.
These are all the main causes of malfunctions. Finally, I would like to note that if your vacuum cleaner with a water filter has poor suction, you need to proceed by analogy with ordinary equipment. The only difference is that instead of the dust collector, you need to properly rinse the aqua filter! We hope that now you know what to do if there is any deterioration in cravings or its complete absence!
Electric motor repair
If you decide to restore the old electric motor, lubricate or change the bearings, perform a complete disassembly.
First, unscrew the screws with a screwdriver and remove the impeller casing. Use a socket wrench to unscrew the nut. In most engines it has a left-hand thread. The impeller is pryed from opposite sides with two screwdrivers, trying to remove it from the anchor.
Unscrew the tightening screws on the body and remove the brushes. The motor will split into two parts: one will contain a stator with a copper winding, and the other half will come out with an armature and bearings.
All parts are carefully wiped off dust with a dry cloth or brush. Use a puller to remove the bearings and install new ones. If necessary, lubricants are pushed into the seat with the balls and separator. Assembly occurs in the reverse order of installing new brushes.
Necessary tools and instructions for complete disassembly
If a person has experience in handling household appliances, he can already determine the cause of a malfunction in its operation by sound. When the bag is full, the vacuum cleaner hums or makes a characteristic hissing sound. In case of more serious damage to the engine or board, its sound becomes intermittent, dust begins to fall from all holes, and the smell of burnt wires appears in the room.
Depending on the nature of the problem, you may need:
- two screwdrivers (phillips and flat-head);
- pliers;
- sandpaper;
- awl;
- wire cutters;
- vice;
- file;
- several connectors and spare wiring.
When replacing filters, screwdrivers are needed to remove the rear grille, which is screwed on with self-tapping screws. When working with a board or wiring, you cannot do without other tools.
The problem may be discovered during disassembly of the case. Fortunately, the cause of the breakdown is not always the engine. If the relay-regulator connector is loosened or the board is simply damaged, you can fix the problem yourself.
Step-by-step instructions for disassembling the housing of a vacuum cleaner:
carefully remove the grill; put it aside; take out the filter; Check the filter membranes: if they are light, it is clean. When contaminated, the membranes become dark; remove the filter out; Unscrew the screws using a screwdriver; remove the upper part of the housing; carefully disconnect the board connector from above; remove the board and casing; unscrew the round “protector”; remove the engine and inspect it for damage. Locks and fastenings on Samsung vacuum cleaners can be screw or in the form of latches
The screw fastening is removed by unscrewing six dowels in sequence. You will find two of them on the front of the lid, and four more on the other side of the case, at the end and at the handle. The electronic board that controls the motor is protected by a top cover secured with plastic clasps. You can carefully pry them off with an old DVD or card. If you have a plastic ruler, try using it to move the latches to the side, holding them with a disk. So, they will not be able to return to their previous position, and the lid can be easily removed
Locks and fastenings on Samsung vacuum cleaners can be screw or in the form of latches. The screw fastening is removed by unscrewing six dowels in sequence. You will find two of them on the front of the lid, and four more on the other side of the case, at the end and at the handle. The electronic board that controls the motor is protected by a top cover secured with plastic clasps. You can carefully pry them off with an old DVD or card. If you have a plastic ruler, try using it to move the latches to the side, holding them with a disk. So, they will not be able to return to their previous position, and the lid can be easily removed.
Attention!
Samsung locks are very fragile, so you need to disassemble them carefully so as not to break them.
After “releasing” the control board, inspect it. If dust accumulates on the tracks, carefully clean, fix damaged connectors or replace the wiring in the right places. De-energize the system and remove the board. Before replacing wires, mark their connectors with a marker so as not to confuse them.
Disassembling the case
The difficulty of disassembling the case lies in the presence of hidden bolts. The manufacturer hides them under buttons, covers and other parts. Repair work begins with preparing the tool. You will definitely need a set of straight and shaped screwdrivers.
Moreover, now we often see screws not for a Phillips screwdriver, but for a triangular or asterisk one. To test the wires, fuse, and switch contacts, you need a multimeter. It is advisable to have tweezers on hand for grasping small screws.
If you plan to disassemble the electric motor, you will need a bearing puller, a hammer, and a set of wrenches of sizes from 8 to 17 mm. Materials needed include Litol lubricant, WD-40 rust-corroding liquid, new bearings and brushes.
Disassembling the case begins by unscrewing all visible screws. Samsung usually doesn't hide them. The approximate location of the screws is shown in red circles in the photo, but each model may vary. If the top cover of the case cannot be removed, it means that there is still a hidden fastener somewhere. Moreover, these may not be screws, but latches on the case.
After disconnecting the top cover from the bottom of the case, do not rush to remove it abruptly. There may be wires coming from the electronic unit. To avoid breaking them, the chips are disconnected on the board. Now you can carefully remove the cover. The review includes an electric motor with wires, as well as other electrical parts located inside the lower half of the housing.
The top cover with screws is set aside so that nothing gets lost.
General structure and operating diagram
Regardless of the form factor and purpose, the design of all types of vacuum cleaners is almost the same. They consist of a long flexible tube, at one end of which a brush is attached, and the other is connected to the device itself. Inside the vacuum cleaner there are:
- bag or container for collecting garbage and dust;
- filtration system for purifying exhaust air;
- an engine that is responsible for suction (today the most common are motors with a power of 1500 or 1800 Watts, while modern models are not as noisy as the Soviet “Raketa” and “Chaika”).
- a metal or plastic case in which all of the above elements of the unit are hidden.
The principle diagram of the operation of any vacuum cleaner is as follows. The engine creates rarefied air inside the housing, and as a result of the difference in pressure, air masses from the outside are sucked in along with debris and dust. The dirty stream enters the dust collector, where the main debris is filtered out by the walls of the bag, water (in devices with aquafilters) or using cyclone technology. Small parts of dust that are not retained in the walls of the dust collector enter the fine filtration system, consisting of dense, finely porous material. The air that passes through these filter elements is almost completely freed of suspended particles. In this way, debris is removed as much as possible from the incoming stream.
List of sources
- kachestvolife.club
- samelectrik.ru
- TechnoSova.ru
- hitech-online.ru
- stroy-podskazka.ru
- qteck.ru
- principraboty.ru
- kliningovyj-raj.ru
- expertland.ru
- xn——7kcglddctzgerobebivoffrddel5x.xn--p1ai
The vacuum cleaner vibrates and makes noise
It happens that during seemingly normal operation, a loud noise is heard and the unit beats. In this case, repairing a Samsung vacuum cleaner (you can’t always do it yourself, but it’s still worth trying) will consist of the following:
If you have a vertical model of vacuum cleaner, then most likely the noise is from a damaged fan - inspect it. Replacing and balancing the fan yourself is not an easy task; it is best to entrust it to a specialist. If the vacuum cleaner is a washing one, inspect the pump that pumps water into the hose. The recommendation for repair is the same - see a specialist. In most vacuum cleaner models, the cause of rattling is “broken” bearings on the brush. If you are confident in your abilities, you can try replacing them yourself
Take the roller and carefully unscrew the end cap and remove the metal shaft from it. Holding it with pliers, unscrew the next limit switch, then replace the bearings, boots and gaskets
Put everything back in its place.
Diagnosis and Troubleshooting
To diagnose problems, first analyze the situation. Remember what events preceded the failure. If the vacuum cleaner turns off during operation and does not turn on, perhaps a malfunction occurred during operation, for example, due to some object getting into the motor. Remember if you dropped the device or damaged it. You may have not cleaned your vacuum cleaner for a long time, which could lead to clogs and damage.
To identify problems with the power source, you can connect the device to a different outlet. If it starts working, then the problem has been found. You can also connect another device to the same power source. If it is working properly and functions normally, then the problem is in the vacuum cleaner itself. To assess the network voltage, use a special indicator in the form of a screwdriver, which may be included in the tool kit.
Troubleshooting
In the vast majority of cases, the cause of the malfunction is the failure of the motor. This can happen with absolutely every model from any manufacturer. The main sign of its malfunction is excessive noise and the formation of a dust cloud. Also, engine failure directly affects the suction power of the device.
Weak or no suction power may also indicate a hose malfunction. Also, evidence of a violation of the hose tightness can be excessively quiet operation of the device.
A decrease in the suction speed of the product may indicate bearing failure. The main symptom of this malfunction is the periodic restoration of normal operation of the device.
Low suction speed may be due to bearing failure
The reason that the device does not turn on may be a simple broken cord. First, the cord stops winding up and coming out normally, and then it becomes impossible to fix and remove it, which eventually leads to its fracture.
Weak "pull"
As we have already found out, if the vacuum cleaner does not suck in dust well, then you will most likely have to repair the vacuum cleaner hose (you have a Samsung or a product of a different brand - it doesn’t matter). First of all, make sure that nothing is stuck in it - foreign objects caught in the hose greatly reduce traction. Simply put, look into the hose and remove the blockage
Simply put, look into the hose and remove the clog.
If you are sure that the hose is not clogged, carefully inspect it and check the integrity of the corrugation. Very often, housewives are too lazy to bend down to move the unit from place to place, and they simply drag it around the room “by the tail.” This causes gaps to appear between the turns of the corrugation, resulting in reduced traction. If you find a gap, take electrical tape and wrap the gap tightly in several layers. Such repairs, of course, will not be enough for a long time, and over time the hose will still have to be replaced, but it will still serve you for some time.
If everything is fine with the hose, check all the filters and the garbage bag - they may be very dirty. Clean the filters thoroughly and replace the bag with a new one. Also, do not forget to check the position of the power regulator - it may be out of order. Return it to the desired position.
The process of disassembling and repairing a vacuum cleaner
Before disassembling the device, prepare the necessary tools and consumables:
- a set of screwdrivers (usually two Phillips screwdrivers are enough for screws of different sizes and two flat ones);
- pliers or wire cutters;
- tweezers;
- 12 mm socket wrench;
- bench vice;
- round file;
- hacksaw for metal;
- a pair of wooden blocks (about 1×4 centimeters);
- lubricant
After the preparatory stage, we proceed to the actual disassembly of the device. It is necessary to disassemble in strict sequence:
The first step is to remove the sealing grill located under the cover of the dust bin compartment. The cover is secured with a pair of screws or other threaded connections. Unscrew the screws using a screwdriver with the required cross-section, clockwise. Next, the control unit and the dust container cover are disconnected. Based on the design features and model of the vacuum cleaner, the dust collector is either simply pulled out or unscrewed. Below it is a waste collection system where the housing is connected to the motor. To get to the motor, you need to separate the body of the product from the base. In a number of models, this is done by unscrewing a secret screw hidden in the handle. The motor is protected by a special fabric gasket, which is attached to the hose inlet. This gasket must be removed and cleaned, and if necessary, replaced. At the next stage, the wires that supply power are removed from the engine. To do this, you must first unscrew the screw clamps. Regardless of the brand of the device, the first thing you should do is check the bearings, since this is responsible for the normal functioning of the motor. The primary signs of bearing pair wear - irregularities and cracks - serve as a signal to replace parts. At the same time, you need to check the integrity of the brush and motor armature. If the parts are in good condition, lubricate them with oil. You need to remove the boot with tweezers, clean it and also lubricate it for prevention. Now let's move directly to the motor. To do this, you first need to remove the casing using a straight screwdriver. The casing fits quite tightly to the motor, so you need to tap it a little to get the casing to come off.
However, it is important to calculate the forces, otherwise the integrity of the component may be compromised. After removing the casing, access appears to the impeller, secured with built-in nuts. The nuts are attached with glue, so you will need a solvent. There are four screws under the impeller that secure the motor itself.
You can simply unscrew them one by one. When free access to the motor appears, we proceed to checking its performance. If some violations are identified, the problems are eliminated as far as possible independently, and the failed elements are replaced. The device is assembled in the reverse order.
All removable components and the housing must be thoroughly cleaned and wiped with a cloth to remove dust.
Healthy! If you decide to repair a wet vacuum cleaner with your own hands, then you will have to work with the water pump. The pump is an important functional element and is responsible for supplying water to the dust collector, its place at the inlet
Therefore, when repairing such a unit, it is necessary to pay special attention to disconnecting the pump
Step-by-step instructions for disassembling the engine
Using a screwdriver, unscrew the two bolts on the side, which are located in the upper part of the case. Next, you need to turn the body a little and look at the engine. If you look closely, you can see that the coil is preventing it from being pulled out.
Therefore, it is necessary to carefully free the motor from the wires and disconnect the connectors. The coil should remain in place. After removing the motor from the housing, clean it thoroughly. Next, the sealing rubber is removed by unscrewing the side bolts. Using a screwdriver, you need to separate the two halves of the motor housing and remove the motor from the casing (this point was described above in the general provisions for disassembling the device). There are folds at the top of the motor that should be bent in the other direction
The two halves need to be separated and the turbine freed from the housing. Use a 12mm socket to unscrew the bolt. The stator should be wedged with pre-prepared wooden blocks, holding the structure. The turbine is removed, after which the washer is removed and the bolts are unscrewed. There are four screws at the bottom that can also be unscrewed. Then the brushes are removed and the anchor is knocked out. We insert the wrench into the hole and hit it with a hammer. After this, the motor will be easily removed and ready for testing.
The most common toilet failures
Before repairing the device, it is important to determine the cause of the breakdown, familiarize yourself with the rules for performing restoration work, and only then begin to eliminate the accident. To do this, you need to shut off the liquid supply to the drain container, remove the tank lid, drain the water and carefully inspect the mechanism. To do this, you need to shut off the liquid supply to the drain container, remove the tank lid, drain the water and carefully inspect the mechanism
To do this, you need to shut off the liquid supply to the drain container, remove the tank lid, drain the water and carefully inspect the mechanism.
The most common problems are:
- crack or chip of the toilet bowl;
- strong noise during operation of the device;
- violation of the integrity of the supply hose;
- failure of the lever, water release button;
- tank leakage through fixation units;
- continuous flow of water into the toilet bowl, flush cistern.
The reason for the formation of a chip on the surface of the device is a strong blow, for example, a heavy object falling into a bowl. To eliminate this problem, you should use epoxy resin or a special glue that can be made at home.
If water is found on the floor near the toilet, you should pay special attention to the integrity of the gaskets located between the tank and the toilet, as well as to the water hose. Most likely the breakdown is caused by their wear; to eliminate the problem, they must be replaced. Let's take a closer look at the causes of toilet breakdowns and methods for eliminating them.
Let's take a closer look at the causes of toilet breakdowns and methods for eliminating them.
Toilet device