If you have the time and skills, you can make a water heater yourself. It is indispensable for a private home where there is no central water supply.
A water heater is a device for continuously heating water in a water supply system.
It will also be useful in the apartment during periods when the hot water is turned off. First you need to think through the technical aspects, understand the operation scheme, and then begin assembling the tank and heating element.
How to make a coil
The coil is an important part of the device.
It can be based on a metal or metal-plastic pipe with a small diameter. Typically, copper or brass is used, as they have a high level of heat transfer. The manufacturer can choose the diameter of the coil at his discretion. The main condition is that its contact with water is maximum.
The serpentine tube is wound in a spiral onto a cylinder-shaped mandrel. For this purpose, a log or pipe with a large diameter is used. When winding the coil, it is necessary to monitor the turns. They shouldn't touch each other.
Do not make the winding tight, as it will be very difficult to remove the coil from the mandrel.
The number of turns on the coil is directly dependent on the volume and height of the tank. Typically, for every 10 liters, 1.5 kW of coil heating power is used.
Calculation of the main parameters of the boiler
Before you begin searching for material and directly manufacturing, you will need to calculate the minimum volume of the tank and the working length of the heat exchanger.
Volume and shape of the tank
The volume of the water tank directly depends on the number of residents permanently residing at the place where the equipment is installed. It is believed that a person uses up to 80 liters of water per day. For the calculated value, it is recommended to take 45–50 liters per person. If the norm is exceeded, the water in the tank will stagnate, which will certainly affect its quality.
The shape of the tank is selected taking into account the pressure in the plumbing system. If the pressure is low, then the use of homemade boilers with a square tank is allowed. If the pressure in the system is high, only equipment with a rounded bottom and top can be used.
Boilers with a storage tank of square and rectangular shape can only be used in water supply systems with low operating pressure
The fact is that increased pressure contributes to the occurrence of bending forces on the walls of the tank, so a square or rectangular tank can become deformed. A container with a round bottom is more resistant to deformation due to better streamlining.
Heat exchanger power and length
In vertical indirect heating models, a copper coil is usually used as a heat exchanger, located between the inlet and outlet.
Boiler coil made of copper pipe
For DIY production, it is best to use a copper pipe with a diameter of 10 mm. This product can be easily bent by hand without using any tools. When using a metal-plastic pipe, it should be taken into account that the heating temperature of the coolant should not be more than 90 °C, otherwise the pipe will be deformed and the joints will leak - this will lead to mixing of water in the tank.
The length of the pipe required for the manufacture of the coil is calculated by the formula L = P / (3.14 ∙d ∙∆T), where:
- L—pipe length (m);
- d—pipe cross-section (m);
- ∆Т – temperature difference between heated and cold water (оC);
- P is the power of the heat exchanger for every 10 liters of water (kW).
According to experts, for every 10 liters of water there should be at least 1.5 kW of thermal energy. Taking this into account, you can calculate the length of the pipe for making the coil.
For example, let’s calculate the material for a coil that will be installed in a boiler with a capacity of 200 liters. The temperature of cold water supplied to the container will be 15 oC, and after heating it is necessary to obtain water with a temperature of 80 oC: L = 1.5 ∙20 / (3.14 ∙0.01 ∙65) ≈ 15 m.
Table: length of copper heat exchanger for boilers with a capacity of 50–200 liters
| Storage tank volume, l | Equipment power, kW | Heat exchanger length, m | Boiler tank diameter, m | Coil diameter, m | Number of turns |
| 200 | 30 | 15 | 0,5 | 0,4 | 12 |
| 150 | 22,5 | 11 | 0,5 | 0,4 | 9 |
| 100 | 15 | 7,5 | 0,4 | 0,3 | 8 |
| 50 | 7,5 | 4 | 0,4 | 0,3 | 5 |
The number of turns of the coil depends on the method of bending and the distance between the elements. Typically, the coil is positioned so that the distance between the coils and the walls of the tank is at least 10–12 cm. The distance between the coils should not be less than 5 cm. The calculated values for storage tanks of various volumes can be seen in the table above.
If an indirect type boiler needs to be equipped with a tubular electric heater, then the power is calculated based on the fact that to quickly heat 50 liters of water, a heating element with a power of at least 1.5 kW is required. In addition, any combi boiler must be equipped with a thermostat.
What you need to know about security
Do not forget that we are dealing with a source of increased danger - an electric heating device, therefore, when assembling and using it, you must follow some rules:
Be sure to use a separate electrical line to connect the induction boiler, and also equip it with a safety group.
- If water circulates naturally in the boiler, be sure to equip it with a temperature sensor so that if it overheats, the device turns off automatically.
- Do not connect a homemade water heater to an outlet; it is better to draw a separate line for this with a larger cable cross-section.
- All exposed sections of wires must be insulated to protect people from electric shock or burns.
- Never turn on the inductor if the pipe is not filled with water. Otherwise, the pipe will melt and the device will short out or it may even catch fire.
- The device must be mounted at a height of 80 cm from the floor, but so that about 30 cm remains from the ceiling. Also, you should not install it in a residential area, since the electromagnetic field has a bad effect on people’s health.
- Don't forget to ground the inductor.
- Be sure to connect the device through an automatic circuit breaker so that in the event of an accident, the latter will cut off the power from the water heater.
- A safety valve must be installed in the pipeline system, which will automatically reduce the pressure in the system.
Assembly of the absorber for the collector
The manufactured heat exchanger must be heated by sunlight. But in order for significant volumes of water in a container to heat up under the sun evenly and quickly, the area of the heat exchanger alone is not enough. It is necessary to make another device, larger in area, that accumulates heat and transfers it to the water heater. This device is called an "absorber".
It can be made from thin sheets of metal, which retain heat for a long time and also heat up quite quickly. Tubes are laid between the sheets, and glass sheets . At the bottom of the structure there is a thick layer of insulation; as a rule, glass wool is used for this role.
The law is what the drawbar is, where it is turned there and out
The design on YouTube is not illegal, but it is not very convenient. There is even less chance of setting it up correctly for use. Here are a couple of tips to help you do this somehow:
The radiator in the video resembles something from a car hood. There was no time to figure out what exactly it was, but the point is that you will need not just a coil, but just such a corrugated surface. This will significantly increase the efficiency of the device, on which both efficiency and gas fees (if there is a meter) ultimately depend.
This device is a gas instantaneous water heater, which should produce about 4 liters of warm water per minute. It’s easy to calculate how much power it should have for this:
N = A / t = (4200 x 4 (45 - 8)) / 60 = 10.36 kW, this is the power achievable for a factory gas water heater. You can only find out if you can make an appropriate heat exchanger at home by trying it.
The device itself is a coil, which is connected at one end to a cold riser, and at the other to a shower head or mixer. The flow is regulated by a valve. In this sense, you will have to use an old cast-iron tap at the inlet or a bronze tap at the outlet of the coil. The radiator is placed on the hob grate and heated by one or two burners. It is clear that the hose must be heat-resistant, otherwise various unpleasant consequences are possible.
An adult must supervise the operation of the device and, in case of danger, turn off the supply of blue fuel while someone is washing or doing the dishes. A gas water heater or an electric water heater is much safer from this point of view. I would also like to add that even purchased equipment needs to be configured, which means that the intervention of a qualified technician will be required. Sometimes a set of jets (injectors) needs to be replaced, in other cases a reducer is installed in the gas supply path. In the latter case, the system resembles traditional propane-butane power supply.
Tank insulation
To minimize heat loss, the tank must be wrapped in a layer of thermal insulation . For this use:
- isolon;
- construction foam;
- mineral wool;
- foam;
- polyurethane foam.
Some people use foil-based underlay for laminate flooring. In this case, the boiler is wrapped like a thermos. The insulation is fixed using strip ties, glue or wire. We recommend insulating the entire body. This will ensure not only long-term storage of hot water, but will also reduce the duration of heating of the tank, which will reduce coolant consumption .
Without carefully organized thermal insulation, the water in the tank quickly cools down. Most often they resort to the construction of a double tank: a small container is placed inside a large one. The resulting space between them also serves as thermal insulation.
How to assemble an induction boiler yourself
The modern market of heating devices offers a large selection of different models of induction heaters for both domestic and industrial use. Despite the fact that today such equipment has not reached the level of widespread use in heating systems, its cost is high. The price for domestic boilers starts from 25,000 rubles, and for industrial boilers - from 100,000 rubles.
To save money, you can make an induction heater yourself. Even a non-specialist can do this kind of work.
Device with welding inverter and plastic pipes
All materials and components used for assembly are available and are often at hand. What is needed for this:
- wire rod or stainless steel wire (diameter up to 0.7 cm);
- copper wire;
- metal grid;
- a fragment of a plastic pipe with thick walls for the heater body (inside diameter 5 cm);
- welding machine;
- adapters for mounting the boiler to the heating system;
- tools;
- pump to ensure water circulation.
Stainless steel wire needs to be cut into pieces 0.5-0.7 cm long. Fill the plastic pipe tightly with them and close it on both sides. There should be no free space in it. A metal mesh is installed at the bottom of the tube, which allows you to keep steel particles inside.
Next, you should make the main heating component - the induction coil. Copper wire is wound onto a plastic pipe. It is necessary to make at least 100 neat turns at the same distance from each other. The induction coil is then connected to the individual heating system. The boiler is installed in any part of the pipeline. To pump water, you need to build in a pump.
The homemade device is connected to the inverter using an external copper winding. Electrical and thermal insulation work must be carried out on the boiler. All open areas are covered with special material. Basalt wool is used for insulation. This is necessary so that the pipe is heated without losing heat energy to the air.
Device with transformer
This option is easier to assemble than the previous one. What you will need to make it yourself:
- three-phase transformer with mounting option;
- welding machine;
- copper winding.
It is necessary to insert the pipes into one another and weld them. The design in cross section should resemble the shape of a donut. It performs two tasks simultaneously - a heating element and a conductor. Then the heater body is wrapped with copper wire and connected to the transformer. To prevent heat loss during operation, a protective casing can be installed on the boiler.
Induction heating is a good alternative to standard heating systems. Its efficiency is about 97% efficiency. Such systems are economical, operate on any liquid, operate silently, and do not emit harmful substances.
If the assembly rules are followed, the boilers are safe to use. They are durable. But if any element becomes unusable, replacing it will not be difficult. All materials are easily replaceable and available.
How to check battery capacity?
Very often, the owner of a used battery is faced with the task of determining its residual capacity. The classic and, to our credit, the most reliable and effective way to check the actual capacity of a battery is considered to be a test discharge. This term refers to the following procedure. The battery is first fully charged, after which it is discharged with direct current, and the time during which it is completely discharged is measured. After this, the battery capacity is calculated using the already known formula:
Q=I·T
For greater calculation accuracy, it is better to select the value of the constant discharge current so that the discharge time is about 10 or 20 hours (this depends on the discharge time at which the nominal battery capacity was calculated by the manufacturer). Then the obtained data is compared with the passport data, and if the residual capacity is 70-80% less than the nominal capacity, the battery must be replaced, since this is a clear sign of severe wear of the battery and its further wear will occur at an accelerated pace.
The main disadvantages of this method are the complexity and labor-intensive implementation, as well as the need to remove batteries from service for a fairly long period of time. Today, most devices that use rechargeable batteries for their operation have a self-diagnosis function - a quick (in just a couple of seconds) check of the condition and performance of energy sources, but the accuracy of such measurements is not always high.
Advantages of induction type units
The undoubted advantages of this type of home heating devices include the following characteristics:
- efficiency - the conversion of electrical energy into heat occurs almost completely without significant losses;
- ease of use - constant maintenance of units of this type is not required;
- compact dimensions - induction water heaters are small in size, they can be installed in the heating system in almost any room;
- quiet operation – this equipment operates quite quietly, no noise occurs during its operation;
- long service life - induction units are durable and can operate smoothly for 30 years or more;
- high environmental friendliness - no harmful emissions occur during operation of the device, a chimney installation and a ventilation system are not required.
Many people believe that induction boilers are much more profitable than other home heating options. And compared to equipment equipped with heating elements, the heating time of these units occurs almost twice as fast. Due to the constant circulation and vibration of the liquid, scale does not form in the pipes and inside the device, which greatly facilitates the maintenance and care of the heating system.
But this type of device also has some disadvantages. And the main disadvantage is that induction equipment is quite expensive. But you can try to make such a heater for heating your home yourself.
Homemade version of the heating element
Subscribe to the author
Follow the author if you like his publications. Then you will receive notifications about his new posts.
You can always unsubscribe from notifications in the author's profile.
We return to the glass, make notches on the inner surface or use an engraver to achieve surface roughness for better adhesion. We degrease and put a small amount of sealant into the groove, recess the heating element into this sealant, so that all the cavities are filled as much as possible. We check with a multimeter that the spiral does not penetrate the body. There should be room in the glass for a thermocouple or thermistor. While the sealant dries, prepare the thermistor. You can attach wires in different ways. Can be soldered with refractory solder, silver, brass. Weld using arc welding. Just twist it. I use crimp. I couldn’t find such thin cartridges in local village stores; I used scraps of a thick needle from a disposable syringe. Conventional crimping cannot compress stainless steel of such a small radius, so I crimped it in a “nano” vice. You could hit it gently with a hammer. We isolate the conclusions with Kapton tape. And we put our temperature sensor in the remaining space of the glass and fix it with sealant. Let it dry.
Fill the glass with sealant to the top with a small margin. Dry, warm up to operating temperature. Let it cool. Use fine sandpaper to smooth out the resulting end. The sealant sands amazingly. If you need to replace the temperature sensor, you can carefully pick it out and place another one in the hole and seal it back with sealant. But in all my practice, I have never had to change temperature sensors because of the temperature sensors themselves.
Pros and cons of induction water heating devices
The device has a fairly simple design and does not require special documents permitting use and installation. The induction water heater has a high degree of efficiency and optimal reliability for the user. When using it as a heating boiler, you don’t even have to install a pump, since water flows through the pipes due to convection (when heated, the liquid practically turns into steam).
The device also has a number of advantages, which sets it apart from other types of water heaters. So, an induction heater:
- much cheaper than its analogues, such a device can be assembled independently without any problems;
- completely silent (although the coil vibrates during operation, this vibration is not noticeable to humans);
- during operation it vibrates, thanks to which dirt and scale do not stick to its walls, and therefore does not require cleaning;
- has a heat generator that can be easily made sealed due to the operating principle: the coolant is located inside the heating element and the energy is transferred to the heater via an electromagnetic field, no contacts are needed; therefore, there will be no need for rubber seals, seals and other elements that can quickly deteriorate or leak;
- there is simply nothing to break in the heat generator, since the water is heated by an ordinary pipe, which is unable to deteriorate or burn out, unlike a heating element;
Despite the huge number of advantages, an induction water heater also has a number of disadvantages:
- the first and most painful for owners is the electricity bill; the device cannot be called economical, so you will have to shell out a fair amount of money to use it;
- second, the device gets very hot and heats not only itself, but also the surrounding space, so it is better not to touch the body of the heat generator during its operation;
- third, the device has extremely high efficiency and heat transfer, so when using it, be sure to install a temperature sensor, otherwise the system may explode.
MANUFACTURING A CERAMIC HEATING ELEMENT
To make a miniature heating element, you need: nichrome with a diameter of up to 0.1 mm, thin (slightly thicker than nichrome) non-elastic steel wire, asbestos thread and the thinnest sewing needle inserted into the marking object of a drawing set called a “ready box”. The first step is a strong and compact connection of the ends of nichrome and steel wires using the twisting method.
Now you need to assemble the presented circuit. It will help you determine the length of nichrome wire from which to wind the heating coil.
When everything is connected, gradually increase the voltage, look at the readings of the power supply voltmeter and ammeter. In this case, at a voltage of 11 volts, the current consumption was almost 0.5 A. Multiplying these indicators, we obtain the approximate power of the future heating element - 5.5 W. The coil has not yet warmed up to red (at full power) and there is no need to burn it, it is already clear that it will be possible to supply 12 or even 13 volts to it when the heating element is ready. So the desired power of 8 W will be easily achieved. Finally, the resistance of the section of nichrome wire to which voltage was applied is measured - for comparable control of the length when winding the spiral.
To begin the winding process, a steel wire is threaded into the same “eye” as a needle, onto which an asbestos thread is mounted, designed to act as a mandrel for winding the spiral and at the same time as the base of the future heating element. It is important - before starting winding, the junction of the nichrome and the steel wire must be at least a few millimeters (2 - 3 mm) from the edge of the asbestos thread towards its middle (it’s wrong in the top photo, I corrected it before winding). It’s better to wind it a little more; when the needle is pulled out, you can easily unwind the excess, but you won’t be able to wind it too much. The spiral on the asbestos thread removed from the needle is measured to determine the resistance and adjusted to what is required.
Next you will need talc and office (silicate) glue. The most non-specific action awaits, because the method of applying the protective layer (full dielectric in the future, after drying) can, in principle, be different. I suggest watching the video with the one that seemed the most progressive in all respects. And first of all, in terms of talc consumption.
Other methods of making a water heater
You can build a water heater powered by the sun. This is a fairly common design, which is distinguished by its efficiency. The device is often found in country houses. Making the device is not particularly difficult, so many can build it with their own hands.
- large capacity tank (100 l or more);
- PVC pipes for filling the container and supplying water to it;
- steel corners measuring 20 mm or square blocks of wood measuring 50 mm for a frame for a container.
It is more advisable to use polyethylene barrels as containers. They are distinguished by their strength. They should be placed in a sunny place where there is no wind. As a rule, the roof of a summer shower is chosen for installation.
In order for the barrel to heat up better, it needs to be painted black. Screens are installed on the leeward side for protection. They are constructed from boards coated with reflective material similar to foil. In this case, the sun's rays are directed towards the tank and increase the temperature of the water. In hot weather, in a container of 200 liters you can get water whose temperature will be 45 ºС.
Required materials and tools
The storage tank of the device is made of heat-resistant plastic, stainless steel, aluminum or ceramic-coated steel.
As blanks for the tank, you can take plastic barrels for food products, aluminum tanks or an unnecessary gas cylinder. As a tool you need to prepare:
- angle grinder;
- electric drill with core drill for metal;
- argon-arc welding machine;
- set of wrenches;
- disc for grinding and polishing metal;
- sandpaper.
Fittings, drain valve and other connecting elements are selected based on the size of the connected pipe. Additionally, FUM tape, a safety valve, a magnesium anode and a nozzle for its installation are purchased.
Homemade induction boilers
The simplest circuit of the device, which is assembled, consists of a piece of plastic pipe, into the cavity of which various metal elements are placed in order to create a core. This can be thin stainless wire rolled into balls, wire cut into small pieces - wire rod with a diameter of 6-8 mm, or even a drill with a diameter corresponding to the internal size of the pipe. From the outside, fiberglass sticks are glued to it, and a wire 1.5-1.7 mm thick in glass insulation is wound on them. The length of the wire is about 11 m. The manufacturing technology can be studied by watching the video:
The homemade induction heater was then tested by filling it with water and connecting it to a factory-made ORION 2 kW induction cooktop instead of the stock inductor. The test results are shown in the following video:
Other craftsmen recommend using a low-power welding inverter as a source, connecting the secondary winding terminals to the coil terminals. If you carefully study the work done by the author, the following conclusions arise:
- The author did a good job and his product undoubtedly works.
- No calculations were made on the thickness of the wire, the number and diameter of the coil turns. The winding parameters were adopted by analogy with the hob; accordingly, the induction water heater will have a power of no more than 2 kW.
- In the best case, a homemade unit will be able to heat water for two heating radiators of 1 kW each, which is enough to heat one room. In the worst case, the heating will be weak or disappear altogether, because the tests were carried out without coolant flow.
It is difficult to draw more precise conclusions due to the lack of information on further testing of the device. Another way to independently organize induction heating of water for heating is shown in the following video:
The radiator, welded from several metal pipes, acts as an external core for the eddy currents created by the coil of the same induction hob. The conclusions are as follows:
- The thermal power of the resulting heater does not exceed the electrical power of the panel.
- The number and size of the pipes were chosen randomly but provided sufficient surface area to transfer the heat generated by the eddy currents.
- This induction heater circuit turned out to be successful for a specific case where the apartment is surrounded by the premises of other heated apartments. In addition, the author did not show the operation of the installation in the cold season with recording of the air temperature in the rooms.
To confirm the conclusions drawn, it is proposed to watch a video where the author tried to use a similar heater in a free-standing, insulated building:
Solar Water Heater Designs
Now that the idea of a solar water heater is clear, let’s try to design it ourselves. The truck's tank does not need modification. Black, with a neck on top for filling with water, and often an outlet on the bottom. All that remains is to place it on the shower, fill it with water, and wait for the Sun to do the work. Of course, the water will be cool in the morning; you can wash in the afternoon. The advantage of the device is its simplicity. You will have to clean the tank of gasoline and oil so as not to go bald. Not everyone can afford to buy a factory-type solar water heater.
It is necessary to fill the tank with hot water and detergent, let it settle, and drain. Repeat the process, rinse with clean water, achieving crystal clear drainage. Most of the crap will be removed from the tank. In the future, you can put the unit in the sun for a week, drain the water, and do not wash it. After the procedure, the tank can be used for showering.
As for the question of where to get it, today electronic message boards are full of offers to sell used containers. Modern ones are often made of aluminum, while older ones are made of steel. The issue price is 2000 rubles. We consider the use of complex structures inappropriate. If you have steel (not cast iron) radiators like the one shown in the picture lying around, try to assemble a standing device, only for the summer. We will not use glass or gas tanks; we will need black paint and pipes. We believe that the design should contain a container for hot water located in the house of a sufficiently large volume.
You will need a low-power flow pump with fitting dimensions for a standard pipeline. We offer to make homemade solar water heaters in the image and likeness of factory ones. Let's place on the roof slope series-connected radiators of at least three, painted black.
We paint the pipes of a homemade solar water heater in the same way. We insulate the home tank with liquid rubber. Forget polyurethane foam, no other sprayed thermal insulation comes to mind. There are four holes in the homemade solar water heater tank:
Three at the top:
- Water intake.
- Replenishing water supplies.
- Battery output.
Below, hot water from the batteries will enter the tank.
Convection currents in the tank will take on a natural character. Warm water enters from below and begins to rise upward. It is necessary to install a horizontal reflector plate opposite the entrance to prevent the formation of a vertical flow above the entrance. We install the flow pump on the hood near the corresponding upper hole. For the location of the radiators of a homemade solar water heater, we choose the southern slope of the roof. It can also be a horizontal roof. The bottom of the radiators is finished with reflective insulation like Penofol. Only the sunny side can be painted with black paint.
The structure is ready. It is not advisable to cover the assembly with glass; it is advisable to protect it from the wind. The winnings will be received. The population will benefit from solar water heaters for their summer cottages. At night we turn off the pump and remove the structure from the roof for the winter. Factory-made solar water heaters for heating will give you a hundred points head start in efficiency, but we will crush you with price. A cheap factory manifold costs 15,000 rubles. If you want to spend money, we’ll look into a heat pump for heating for a substantial sum.
We will leave solar-powered water heaters to Germany and similar countries. In Europe, there is a government support program for energy-saving technologies; electricity can be pumped back into the grid (no joke). We will assemble a solar water heater for a swimming pool using the technology discussed above. Radiators can be laid out on a platform; the tank will be an artificial reservoir; do not forget to disinfect the water. It's a good idea to use mirrors lined with aluminum foil. You can stick the film on thin plywood panels and collect energy in the right place. It will turn out cheap and cheerful. There will be protection against the wind, and the radiators will heat up faster. The installation location is north of the collectors.
Now readers know how to make a solar water heater.
DIY induction water heater diagram
The device is a transformer with two windings: primary and secondary. The first circuit converts electrical energy into eddy currents, thereby creating a directed induction field, which provides induction heating. In the secondary circuit, the converted energy is transferred to the coolant (in our case, it is water).
In addition to the transformer, the device contains a generator and a pump (optional).
Heat generator components and parts
The device includes:
- an alternating current generator that increases the frequency of the current;
- the inductor, which transforms electricity into magnetic energy, is a coil of copper wire;
- heating element, most often its role is played by a metal pipe.
Principle of operation
An induction water heater consists of a generator, a coil and a core, the latter is heated by electromagnetic energy
The device converts electrical energy into electromagnetic energy. The latter, in turn, acts on the core (pipe), which heats up and transfers thermal energy to the water. All these energies are converted by an inductor consisting of a coil and a core. The generator is used to increase the frequency of the current, since with a standard frequency of 50 Hz it is difficult to achieve high heating.
Electric indirect heater
The use of heating elements does not apply to indirect heating methods, since there is direct contact of water with the primary heat source. An exception is the induction water heater. The liquid receives energy virtually, as it were, without touching the internal thermoelement. In fact, it is not in the design at all.
The main advantage of the system is that heating occurs not due to direct thermal contact with a source of electrical energy, but with the help of eddy currents. Losses on the heat transfer coefficient are minimal, efficiency tends to 100%. At the same time, both the metal pipe and the liquid itself are heated (if it is sufficiently thermally conductive). In addition, flow-through induction heaters are significantly safer than boilers with a traditional electric heater: there is no contact of water with an element connected to the electrical network.
The disadvantage is obvious: heating requires an electrical connection. That is, the option of indirect heating using a wood-burning (gas) boiler does not work. The room must be electrified.
Indirect heating boiler design
An indirect heating boiler is a storage tank that is not dependent on energy resources (gas, electricity, etc.). Inside the container, made of stainless steel, there is a heating element 1 in the shape of a spiral.
Cold water enters the tank through an inlet tube located at the bottom of the device. The water in the unit is heated using the moving coolant of the heating system. The hot water outlet pipe is located at the top. To make using the tank convenient, it is equipped with taps with a ball design. The outer part of the device is covered with heat-insulating material.
The water heater diagram is shown below.
The advantages of the unit include:
- possibility of connecting to a central heating system;
- installation near a heating boiler;
- low cash costs when installing the circuit;
- economical use of energy resources;
- water supply at a constant temperature.
Water heater assembly steps
We have prepared all the necessary tools and materials, then we will figure out how to make the entire device yourself.
- Before you begin assembling a instantaneous electric water heater with your own hands, it is necessary to clean all metal parts of the product from dirt and corrosion. This can be done using a drill, using a disk attachment with metal or polymer bristles (depending on the degree of contamination); if you don’t have one, you can use a brush with metal bristles.
- Make markings on a sheet of metal at the places where the heating element is installed; the sheet must exceed the diameter of the flask into which the heating element is inserted.
- Disconnect the fasteners from the heating element. Using a drill, its size should exceed the diameter of the heating element leg, make holes to attach it to our homemade device, the size of the hole should correspond to the diameter of the bolts for fastening.
- Using a core, make marks on the metal along the end of the flask, making sure that the holes are in the middle.
- Use a grinder to cut out the outlined sketch, then make another one of the same size, only without holes. These will be the bottom and top of our device.
- Connect the resulting part (circle with holes) with the heating element. Check the tightness of the connections; if there is a gap somewhere or an insufficiently tight fit, correct it.
- Then weld the cut circle to the flask.
- Adjust the flask; it is necessary that the difference in the length of the heating element and the flask is approximately 1.5 cm.
- Cut two holes in the pipe, one at the top and one at the bottom. One will be intended for cold water inlet, the second for hot water outlet.
- Using welding, weld the pipe sections that have threads on one side and the unthreaded side to the holes in the bulb.
- Weld together the two previously cut circles with the ends of the housing for the heating element.
- Depending on how you will further mount the device, weld a grounding bolt to the heating chamber so that it does not interfere with you.
- Make a connection to the water supply and carry out a test run to make sure that the connections are tight and that nothing is blocking the flow of water; if a leak is detected, fix it by welding or improving the tightness.
- Then disconnect the device, clean it from dirt, prime it, and apply anti-corrosion paint.
For work of this type there must be appropriate qualifications and experience. In order to make its use as safe as possible, it is necessary to ground your device.
DIY instantaneous induction water heater
Before you begin installation, you need to stock up on the necessary parts. So, the best option would be a high-frequency welding inverter with a smoothly varying current range. Such a device will cost the least. A more expensive option would be a three-phase transformer, which is the AC power source for the water heater inductor. In this case, you should use a coil of 50-90 turns, and use copper wire with a diameter of 3 or more millimeters as the material.
As a core, you can use either a metal or polymer pipe together with wire (used as a heating element). In the latter case, the thickness of the walls should not be less than 3 mm in order to easily withstand high temperatures.
To assemble the water heater you will need: wire cutters, screwdrivers, a soldering iron and a welding machine if a metal pipe is used.
Installation of an induction water heater
Wrap the pipe with copper wire, making about 90 turns.
There are many options for assembling the device. We suggest trying to assemble the device according to the following scheme:
- Prepare your workplace, materials and tools.
- Fix a small piece of polymer pipe (remember that the minimum wall thickness should be 3 mm).
- Trim the ends of the core to leave 10 cm of wire left for taps.
- Mount a corner on the lower outlet. In the future, the return from the heating should be connected here (if the heater is used as a boiler).
- Place the chopped wire tightly around the pipe. It is necessary to make at least 90 turns.
- Install a tee on the top pipe through which hot water will flow out.
- Install the protective circuit of the device. It can be made from either polymer or metal.
- Connect copper wire to the water heater terminals, then fill the core with water.
- Check the functionality of the inductor.
How to install an instantaneous water heater
The process of installing a instantaneous water heater with your own hands includes a preparatory period
First of all, it is important to correctly determine the model. To choose a device that best suits its characteristics, take into account the following factors:
- the number of people living in the house;
- maximum hot water flow with all taps open at the same time;
- number of water points;
- required temperature of water leaving the tap.
Having a clear understanding of the requirements, you can begin to select an instantaneous heater of suitable power
Separately, it is worth paying attention to other nuances: complexity of installation, price, maintainability and availability of spare parts for sale
Organization of power supply
The power of household instantaneous heaters varies from 3 to 27 kW. Old electrical wiring will not withstand such a load. While a non-pressure device rated at 3 kW can still be connected to an existing electrical network, powerful pressure models require a separate line.
A powerful water heater cannot be connected to an outlet. A straight line is laid from the device to the electrical panel. An RCD is provided in the circuit. The circuit breaker is selected according to the power of the flow-through electrical appliance. According to the standard, the indicator is 50–60 A, but you need to look at the instructions for the device.
The cable cross-section is selected similarly, taking into account the heater power, but not less than 2.5 mm 2. It is better to take a copper wire and definitely a three-core one. The instantaneous water heater cannot be used without grounding.
Choosing an installation location
The choice of location for the water heater is determined by the convenience and safety of using the device:
When installing a water heater in an apartment, it is important to choose a place so that there is easy access to the device. There are control buttons on the body. All family members will set the optimal water temperature according to their preference
The installation of the electrical appliance is carried out in such a way that splashes of water do not fall on its body when using a shower or sink. The device is placed as close as possible to the water points and electrical panel, taking into account convenient connection to the water supply
All family members will set the optimal water temperature according to their preference. The installation of the electrical appliance is carried out in such a way that splashes of water do not fall on its body when using a shower or sink. The device is placed as close as possible to the water points and electrical panel, taking into account convenient connection to the water supply.
The choice of installation location depends on the type of flow device:
- Non-pressure low-power models are designed to connect one water point. The water heater is often designed as a faucet installed on the sink. Non-pressure models are mounted under the sink or on the side of the sink. The device can be equipped with a hose and shower head. It would be optimal to install a instantaneous water heater in the bathroom near the shower stall. When the question arises, how to connect a non-pressure instantaneous water heater, there is only one answer - as close to the mixer as possible.
- Powerful pressure models are capable of providing hot water to more than two water points. It is allowed to install an electrical appliance near a cold water riser. With this scheme, hot water will flow to all taps in the apartment.
The presence of IP 24 and IP 25 markings on the water heater means protection from direct contact with jets of water. However, it's not worth the risk. It is better to place the electrical appliance in a safe, dry place.
Wall mounting
The instantaneous water heater is installed on the wall using the hanging method. The product includes dowels with self-tapping screws, a mounting strip, and brackets. When installing an electric instantaneous water heater, two important nuances are taken into account:
- Support strength. A wall made of solid materials is ideal. The device is characterized by light weight. It can even be mounted on a plasterboard wall. The main thing is that the partition does not wobble, and a mortgage is provided under the gypsum board for reliable fixation of the brackets.
- During installation, ensure that the body of the flow device is perfectly horizontal. At the slightest tilt, an air lock forms inside the water heater chamber. A heating element not washed with water in this area will quickly burn out.
Installation work begins with markings. The fastening strip is applied to the wall and the drilling holes are marked with a pencil.
It is important at this stage to set the level horizontally. Holes are drilled according to the markings, plastic dowels are driven in with a hammer, and then the fastening strip is screwed in with self-tapping screws. The supporting base is ready
Now all that remains is to attach the water heater body to the bar
The supporting base is ready. Now all that remains is to attach the water heater body to the bar.
Main types of breakdowns
Modern manufacturers have learned to create excellent luxury water heating equipment. It uses gas to operate efficiently and rarely fails. However, even the best gas heaters cannot avoid breakdowns. The list of inevitable malfunctions includes:
- water leaks;
- poor heating of the liquid;
- discharge of power elements;
- weak water pressure;
- lack of gas.
Owners of gas boilers can repair some faults themselves. Anyone can change the batteries in the power supply. It is also easy to eliminate weak water pressure - perhaps excess scale has simply formed in the heat exchanger. To remove it, remove the heat exchanger and rinse thoroughly. For these purposes, you can also use special descaling liquids.
It is not difficult to solve the problem of poor water heating on your own. The main reason for such a malfunction is often contamination of the heat exchanger with soot. The solution to this problem is to remove the mentioned element and remove plaque. If more significant problems occur, you should contact a professional.
Instructions for the first start-up of the BKN system
After the BKN is completely connected to the coolant and the hot water supply line and pressurized for leaks, proceed to its first start-up:
- Open the taps on the supply and return of the coolant from an external heating source.
- Open the hot water tap on the mixer and release the air until a steady flow of water comes out of the tap, after which the water on the mixer is turned off.
- Set the heating temperature using the thermostat and wait for the water to heat up to the desired temperature or control it using the readings of a dial thermometer.
During the heating process, a thorough external inspection of the structure is once again carried out for density and the thermal insulation qualities of the tank are checked.
During the first start-up, the heating time of the boiler at maximum coolant parameters is monitored, as well as the operation of the automatic control and safety system.
Main types of breakdowns
Modern manufacturers have learned to create excellent luxury water heating equipment. It uses gas to operate efficiently and rarely fails. However, even the best gas heaters cannot avoid breakdowns. The list of inevitable malfunctions includes:
- water leaks;
- poor heating of the liquid;
- discharge of power elements;
- weak water pressure;
- lack of gas.
Owners of gas boilers can repair some faults themselves. Anyone can change the batteries in the power supply. It is also easy to eliminate weak water pressure - perhaps excess scale has simply formed in the heat exchanger. To remove it, remove the heat exchanger and rinse thoroughly. For these purposes, you can also use special descaling liquids.
It is not difficult to solve the problem of poor water heating on your own. The main reason for such a malfunction is often contamination of the heat exchanger with soot. The solution to this problem is to remove the mentioned element and remove plaque. If more significant problems occur, you should contact a professional.
Those who have seen enough of the video on YouTube about a homemade gas water heater, which consisted of a coil placed directly on the hob in the kitchen, have probably already dreamed of how they can get a lot of boiling water cheaply. Actually this is not true. Today we will talk about why you should not make a gas water heater with your own hands.
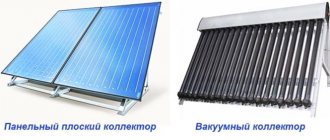
Types of solar collectors
The standard device has the form of a metal plate, which is placed in a plastic or glass case. The surface of this plate accumulates solar energy, retains heat and transfers it for various household needs: heating, water heating, etc. Integrated collectors come in several types.
Cumulative
Storage collectors are also called thermosiphon collectors. This DIY solar collector without a pump is the most profitable. Its capabilities allow you not only to heat water, but also to maintain the temperature at the required level for some time.
This solar heating collector consists of several tanks filled with water, which are located in a thermal insulation box. The tanks are covered with a glass lid, through which the sun's rays shine through and heat the water. This option is the most economical, easy to operate and maintain, but its effectiveness in winter is practically zero.
Flat
It is a large metal plate - an absorber, which is located inside an aluminum case with a glass lid. A do-it-yourself flat-plate solar collector will be more efficient if you use a glass cover. Absorbs solar energy through hail-resistant glass, which transmits light well and practically does not reflect it.
There is thermal insulation inside the box, which can significantly reduce heat loss. The wafer itself has low efficiency, so it is coated with an amorphous semiconductor, which significantly increases the thermal energy accumulation rate.
When making a solar collector for a swimming pool with your own hands, preference is often given to a flat integrated device. However, it copes just as well with other tasks, such as heating water for household needs and heating a room. Flat is the most widely used option. It is preferable to make an absorber for a solar collector from copper with your own hands.
Liquid
From the name it is clear that the main coolant in them is liquid. A do-it-yourself water solar collector is made according to the following scheme. Through a metal plate that absorbs solar energy, heat is transferred through pipes attached to it into a tank with water or antifreeze liquid or directly to the consumer.
Two pipes approach the plate. Through one of them, cold water is supplied from the tank, and through the second, already heated liquid enters the tank. Pipes must have inlet and outlet openings. This heating circuit is called closed.
When heated water is directly supplied to meet the needs of the user, such a system is called open-loop.
Non-glazed ones are more often used to heat water in a swimming pool, so assembling such thermal solar collectors with your own hands does not require the purchase of expensive materials - rubber and plastic will do. Glazed ones have higher efficiency, so they are able to heat the house and provide the consumer with hot water.
Air
Air devices are more economical than the above-mentioned analogs that use water as a coolant. The air does not freeze, does not leak, and does not boil like water. If a leak occurs in such a system, it does not cause as many problems, but it is quite difficult to determine where it occurred.
Self-production does not cost the consumer much. The sun receiving panel, which is covered with glass, heats the air that is between it and the heat-insulating plate. Roughly speaking, this is a flat-plate collector with space for air inside. Cold air enters inside and, under the influence of solar energy, warm air is supplied to the consumer.
Such options are durable and reliable and are easier to maintain than devices that use liquid as a coolant. To maintain the desired air temperature in the cellar or to heat a greenhouse with a solar collector, just this option is suitable.
Work principles
To assemble an induction boiler with your own hands, you need to study what it consists of and understand the principles of its operation.
The device heats up due to the energy of the electromagnetic field. The coolant takes it over itself and converts it into heat.
The magnetic field is created in an inductor (this is a cylindrical coil with a large number of turns). As electricity passes through it, it creates a voltage around itself. The magnetic flux moves in a closed circle perpendicular to the electric field. Alternating current creates eddy currents and generates energy into heat. Electricity is transferred to the heater without direct contact.
Induction heat is consumed efficiently and economically, so water with this heating method reaches high temperatures in a short period of time. The coolant receives about 97% of the energy.
Induction water heater components
Organizing a heating system in your own home using an induction boiler will not require major redevelopment. It is based on a transformer consisting of primary and secondary windings.
Vortex flows are formed in the primary winding from electrical energy and create an electromagnetic field. It goes to the secondary, which functions as a heater.
The secondary winding is the boiler body. It includes elements such as:
- external winding;
- core;
- electrical insulation;
- thermal insulation.
To supply cold water to the device and remove warm water to the heating system, two pipes are installed to the water heater. The lower one is mounted on the inlet section, and the upper one on the hot water outlet part.
The heat created by the boiler is transferred to the coolant. Most often it is water, since it can quickly absorb heat. Due to the built-in pump, hot water enters the heating system through the pipe. The liquid constantly circulates, so overheating of the equipment is not possible. Cooled water is supplied and hot water is discharged.
When circulating, the heating fluid vibrates, which prevents scale from depositing inside the pipes. An induction water heater can be installed in any room, since no noise is created during operation.
Installation and operation of a heating boiler
Boiler in the heating system
After performing all the necessary calculations of the boiler power and its volume, you can begin to integrate the device into the heating system
An important task is to determine the installation location. Having decided on the purpose of the boiler in the heating system, you need to read the instructions for its installation. The best option would be installation in close proximity to the boiler
In this case, the transfer of thermal energy from the coolant to water is most effective.
But at the same time, you may encounter the following difficulties in organizing heating using a boiler:
- DHW system supply. In a heating system with a solid fuel boiler, it is most convenient to place the boiler directly in the boiler room. But then to supply heated water to the premises you will need a separate pump and control devices for it;
- A large volume of capacity if heating through a boiler is planned for large residential areas. There is a problem with the placement of the heating element;
- Electrical supply to ensure the operation of the heating element. For the normal functioning of the boiler for heating a private house, it is also recommended to install an autonomous source of electricity.
Having resolved these issues, you can proceed directly to installation.
Installation of a heating storage tank
Installed boiler
To install the heat accumulator, it is necessary to prepare a flat area in advance. Its heavy weight should be taken into account - if necessary, a separate foundation is made or the floors are reinforced.
The optimal installation option is on a separate platform. This way you can avoid contact of the housing with the concrete surface, which will reduce heat losses in the electric heating boiler. Almost all manufacturers make containers with special legs. If they are missing, it is recommended to install insulation on the floor.
The procedure for connecting the boiler to the heating system is to perform the following steps:
After installing the container, you need to check its position relative to the horizon. No deviations are allowed. Connect to heating
It is important that the diameter of the pipes is equal. Otherwise, after connecting the boiler to the heating system, excess hydraulic resistance will appear. If installation is carried out in an unheated room, the boiler body is insulated. A connection to the hot water supply is made so that the boiler works not only for heating, but also for hot water supply.
Upon completion of this work, you need to check the tightness of all connections and start the heating system. It is recommended to measure the temperature of the water in the tank and the coolant in the pipes within 2-3 weeks after the boiler is turned off. This way you can determine the actual time of maintaining the required heating level in the heating circuit from the boiler.
Conditions for proper operation of the boiler
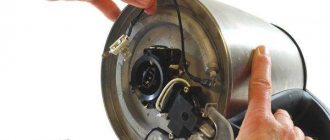
Scale on the heating element of the boiler
Servicing a storage tank is practically no different from carrying out the necessary procedures to maintain the functionality of any electric boiler with heating elements. And in this case, in order for the boiler to work normally in the heating system of a private home, you must follow the manufacturer’s recommendations.
This can be ensured even before the heat supply from the boiler is made. It is best to purchase models with the so-called “dry heating element”. On it, scale formation occurs much more slowly. You should also pre-filter the water before feeding it into the storage tank.
In addition to these procedures, you must do the following:
- Once a month, check the integrity of the thermal insulation of the structure;
- Monitor the duration of maintaining the coolant temperature during the heat supply mode through the boiler. The difference between calculated and actual indicators should not exceed 15%;
- Checking the tightness of connections. It is recommended to replace the gaskets before each heating season. This way you can achieve more reliable heating of a private home using a boiler.
The control unit of some models is sensitive to voltage changes. To avoid damage to this expensive device, you should connect a stabilizer for the boiler in the heating system.
Idea N1: Making a local mini-heater
For this design, you will need two rectangular pieces of glass, metal foil, a paraffin or stearin candle, a wooden block (or a block of other dielectric material), an electrical cord with a plug, and sheet metal for contacts.
The manufacturing procedure for such a mini heater is as follows:
Figure 1: elements for making a heater Fig. 2: Combine two glasses
Fold the edges of the foil under the glass to one side.
Rice. 3: Fix the contacts on a wooden block
It should be noted that the maximum temperature of such a heater should be about 40ºC. Naturally, you won’t be able to heat a house, cottage, or garage with such a homemade heater; it is suitable for heating tents, a work area in front of a workbench, or other space directly in front of the work surface. If the device gets too hot, you will need to reduce the resistance of the conductive elements; for this you can use thicker foil or increase the thickness of the soot.
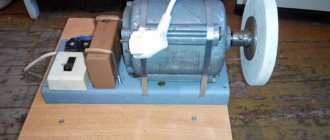
First steps: preparing the handle-body of the future soldering iron
To begin with, a wooden cutting was taken (it is better to take birch or maple), turned “to suit” and sanded. It can be given any shape, but for the first time I did not do any extra work. It should also not be made too long, although this is a matter of taste.
Wooden handle to be used as a handle
Next, a drill with a thick drill bit began to work, on which I marked the hole limiter using electrical tape. A depth of 2-3 cm was quite enough for a 12 V mini soldering iron. A hole made in the center of the handle at the end will serve to install the power socket and draw wires to the heating element.
An identical hole was drilled on the reverse side, which will serve to install the soldering iron tip.
Drill identical holes on both sides of the soldering iron handle
Homemade low-power devices
The models described above are suitable only for local heating. To heat a room, you need to build a more powerful heater, the manufacturing technology of which will be discussed below.
Option 1. Creating an oil device
A self-made oil heater has high efficiency and is also quite functional and safe. The principle of operation of the device is based on the fact that a heating element located inside the housing heats up the oil located near it, as a result of which the convection movement of flows is activated.
To ensure smooth power adjustment, the device is equipped with a rheostat or discrete switches. To automate the process, a thermostat and a rollover sensor are additionally installed.
To make an oil heater you need to prepare in advance: