Here you will learn:
- How profitable are solar collectors?
- Classification according to temperature criteria
- Types of solar collectors
- What can you make a solar system from yourself?
- Polycarbonate manifold
- Solar collector made from a hose or flexible pipe
- Collector Stanilova
- Collectors from scrap materials
- How to connect a solar collector to a tank (shower) by gravity
- How to connect the collector to the hot water supply
A solar collector for heating water with your own hands can be made from plastic or copper pipes, from a hose, from bottles or cans. We offer simple diagrams of such structures.
How profitable are solar collectors?
The payback of such devices depends on the breadth of use. In the southern regions, where there is a lot of sun, they are beneficial. But at the level of the 52nd parallel, they no longer pay off if they are used for heating (there is little sun in winter), but they pay off further north if they are used for hot water supply in the off-season and in the summer.
In Europe, for example, where gas is expensive and equipment is cheap, collectors are definitely beneficial for heating, even in the northern regions.
Our cheapest summer solar collectors, which can be made literally from scrap materials, or which are made “semi-handicraft” in local factories, are definitely advantageous.
They are used for heating water in a swimming pool, summer shower, hot water supply in the house and heating houses in the off-season. In winter conditions, cheap (homemade) collectors cannot compete in efficiency with factory ones; they become more like coolers, and therefore are not used.
Pros of a solar water heating system
Solar heaters have the following advantages:
- Relatively simple design.
- The reliability level is quite high.
- Such a system can be used for a year.
- The period of use is more than a dozen years.
- The commissioning of such a system helps to reduce the cost of electrical energy and coolants.
- Installation of the unit is carried out without prior obtaining a permit. Installation takes minimal time and is simple.
- The weight of the structure is relatively light.
- Autonomous operating mode.
Flaws
Before using solar water heaters for your home, consider the disadvantages:
- Factory-designed equipment is more expensive.
- The level of efficiency depends on various indicators: climatic region, time of year, etc.
- Hail and wet snow have a detrimental effect on the condition of the installation and its performance.
- Installation of the container in which heat is accumulated takes some time. This process requires additional costs.
Despite all its disadvantages, solar water heating is growing in popularity. After all, it is considered environmentally friendly.
Classification according to temperature criteria
There are quite a large number of criteria by which certain solar system designs are classified. However, for devices that can be made with your own hands and used for hot water supply and heating, the most rational option would be to separate them by type of coolant.
So, systems can be liquid and air. The first type is more often applicable.
In addition, a classification is often used based on the temperature to which the working components of the collector can be heated:
- Low temperature. Options capable of heating the coolant up to 50ºС. They are used to heat water in irrigation tanks, in bathtubs and showers in the summer and to improve comfortable conditions on cool spring-autumn evenings.
- Medium temperature. Provide a coolant temperature of 80ºС. They can be used to heat rooms. These options are most suitable for furnishing private homes.
- High temperature. The coolant temperature in such installations can reach up to 200-300ºС. They are used on an industrial scale, installed for heating production workshops, commercial buildings, etc.
High-temperature solar systems use a rather complex process of transferring thermal energy. In addition, they occupy an impressive amount of space, which most of our lovers of country life cannot afford.
The manufacturing process is labor-intensive, and implementation requires specialized equipment. It is almost impossible to make such a version of a solar system on your own.
It is quite difficult to make high-temperature solar panels using photovoltaic converters at home
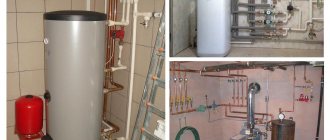
Option with two barrels
What is required for the solar collector (in this example, the area is 1 sq. m):
- corrugated “fifteenth” pipe;
- water will flow into a 160 liter tank with 1 cm foam insulation.
The difference between the point of intake and the entrance to the collector is 2 m.
The water discharge point has been moved from the top to the bottom third of the tank. This way the warm and cold layers mix better. Reaches +45... +50° on sunny days, on cloudy days - +35° C.
Two 160 liter barrels are tied with polypropylene pipes - they are easier to work with than metal-plastic ones. The system operates on the thermosiphon principle, convection: hot liquid goes up, cold liquid goes down. No pump, fuel or electricity is required; circulation occurs automatically.
They build a frame from a pipe for the solar collector, tilt 45°, orientation - strictly south. They make stands for barrels.
The hot water barrel can be equipped with a heating element so as not to be left without water on cloudy days. At the bottom of this tank there are 3 outlets: 2 for the line from the solar collector (warm water is pumped into the tank, cold water is returned to it). The third conclusion is for the shower mixer. The pipes, additionally insulated, are connected by American connections, that is, they can be disconnected if necessary, without damaging the elements, by simply unscrewing. It’s also more convenient to assemble the system right on site.
Ordinary garden hoses, insulated with foamed polyethylene, are laid from the tanks to the mixer; they are fixed to the fittings with ordinary clamps. These hoses are combined in front of the mixer: a shunt with a ball valve is installed. This element is for comfort: if you run out of warm water, you can open the valve on the shunt and the liquid level in the tanks is equalized, and when it is supplied, both barrels are filled equally, eliminating the need for separate filling.
The tap is closed after filling the tanks. Then the system functions like this: cold liquid enters the manifold through its lower pipe, expands when heated in it, rises and through the upper pipe goes to the storage tank, and from there to the shower. It is important that the barrels are located 0.5–1.5 m above the collector. It is necessary to organize the intake of water from the warm upper layers, for which a corrugated intake hose (can be taken from a washing machine) is equipped with a foam float.
To monitor the amount of liquid, a transparent tube with a black float is inserted into the warm water tank (heat accumulator). The tanks are insulated with penofol - 2 layers of 5 mm each. The warm container was covered with a 5 cm thick circle of EPS.
The above insulation is not particularly effective, it can be used for the period of preparation of a more thorough finishing, consisting of 100 mm mineral wool, 5 cm polystyrene foam. This element is extremely important: the barrel will work on the principle of a thermos, it will cool down by only a few degrees per day, which will make it possible use warm liquid at night.
How the system works: an example from real experience
The solar collector system with shower described above showed itself to be excellent even in the not particularly warm, compared to the South, climate of the Moscow region. In the evening, the tanks are filled with 120–130 liters. The sun starts heating them and the solar collector at 8:30 or earlier. In our case, until this time the shadow of the house was falling. By 18:00 the rays begin to lie tangentially - the efficiency decreases.
Result: 120 liters, poured from a well with t° +8 at an air t° of +22...+24, by 15:00 they warm up to +45° C. By 17:00 - up to +52° C. On cloudy days at The temperature of the environment is 18–20° C and reaches +35° C. The heating is quite enough for a well-warm shower. It should be taken into account that insulation can be improved. In 5 months savings on your electricity bill reaches RUB 3,500.
Types of solar collectors
The standard device has the form of a metal plate, which is placed in a plastic or glass case. The surface of this plate accumulates solar energy, retains heat and transfers it for various household needs: heating, water heating, etc. Integrated collectors come in several types.
Cumulative
Storage collectors are also called thermosiphon collectors. This DIY solar collector without a pump is the most profitable. Its capabilities allow you not only to heat water, but also to maintain the temperature at the required level for some time.
This solar heating collector consists of several tanks filled with water, which are located in a thermal insulation box. The tanks are covered with a glass lid, through which the sun's rays shine through and heat the water. This option is the most economical, easy to operate and maintain, but its effectiveness in winter is practically zero.
Flat
It is a large metal plate - an absorber, which is located inside an aluminum case with a glass lid. A do-it-yourself flat-plate solar collector will be more efficient if you use a glass cover. Absorbs solar energy through hail-resistant glass, which transmits light well and practically does not reflect it.
There is thermal insulation inside the box, which can significantly reduce heat loss. The wafer itself has low efficiency, so it is coated with an amorphous semiconductor, which significantly increases the thermal energy accumulation rate.
When making a solar collector for a swimming pool with your own hands, preference is often given to a flat integrated device. However, it copes just as well with other tasks, such as heating water for household needs and heating a room. Flat is the most widely used option. It is preferable to make an absorber for a solar collector from copper with your own hands.
Liquid
From the name it is clear that the main coolant in them is liquid. A do-it-yourself water solar collector is made according to the following scheme. Through a metal plate that absorbs solar energy, heat is transferred through pipes attached to it into a tank with water or antifreeze liquid or directly to the consumer.
Two pipes approach the plate. Through one of them, cold water is supplied from the tank, and through the second, already heated liquid enters the tank. Pipes must have inlet and outlet openings. This heating circuit is called closed.
When heated water is directly supplied to meet the needs of the user, such a system is called open-loop.
Non-glazed ones are more often used to heat water in a swimming pool, so assembling such thermal solar collectors with your own hands does not require the purchase of expensive materials - rubber and plastic will do. Glazed ones have higher efficiency, so they are able to heat the house and provide the consumer with hot water.
Air
Air devices are more economical than the above-mentioned analogs that use water as a coolant. The air does not freeze, does not leak, and does not boil like water. If a leak occurs in such a system, it does not cause as many problems, but it is quite difficult to determine where it occurred.
Self-production does not cost the consumer much. The sun receiving panel, which is covered with glass, heats the air that is between it and the heat-insulating plate. Roughly speaking, this is a flat-plate collector with space for air inside. Cold air enters inside and, under the influence of solar energy, warm air is supplied to the consumer.
A fan, which is attached to the duct or directly to the plate, improves circulation and improves air exchange in the device. The fan requires the use of electricity to operate, which is not very economical.
Such options are durable and reliable and are easier to maintain than devices that use liquid as a coolant. To maintain the desired air temperature in the cellar or to heat a greenhouse with a solar collector, just this option is suitable.
DIY water heating tank
Diagram of solar modules.
The most common solar heater is the outdoor shower. You can construct such a hot water supply system with your own hands. It's not difficult at all. Its basis is a water tank, which is heated by solar radiation. Despite its primitiveness, such a structure is quite capable of satisfying the need for hot water in the warm season.
The biggest disadvantage of this heating method is that, despite the fairly high temperature of the water in the tank during the day (sometimes up to 45ºC), it drops during the night. In order to reduce heat loss at night, it is necessary to either insulate the tank at night, or drain the remaining hot water into an insulated tank. Such a reservoir can be gas or electric boilers, widely used in households. The choice of a boiler as a storage tank is also justified because on a cloudy day the water in the tank will not warm up above 30ºC, and in any case it has to be heated.
When choosing this type of solar heater, you need to consider several of its disadvantages:
- the need to fill and drain the tank daily;
- on a cloudy day, the water in the tank does not heat above 30ºC.
Related article: How to make wall moldings with your own hands
Installation of a water heating tank
Diagram of a solar water heating system.
To build a solar water heating tank with your own hands, we will need:
- heating tank;
- boiler;
- water supply with three taps;
- water level sensor.
Any water container can be used as a heating tank: a steel barrel, a cube, or even large-diameter pipes. However, the most convenient for installation and use is a special polyethylene tank for a summer shower with a volume of up to 300 liters. It has a flat shape, light weight, painted black, does not rust. All this ensures rational heat absorption and easy DIY installation. For water supply, you should choose metal-plastic or polypropylene pipes for cold water. The water level sensor is mounted on the tank lid and is used to monitor its filling level. The installation and operation diagram of this system is shown in the figure.
To fill the heating tank with water, tap 3 must be closed. Taps 1 and 2 remain in the open position. After filling the container, the pressure water supply is turned off with tap 1. At the end of the day, the heated water is drained into the boiler by opening tap 3. If there is no need to use the heater, you should turn off tap 3 and use the boiler as usual.
What can you make a solar system from yourself?
First, you need to understand what operating principle a solar water heater uses. The internal structure of the block contains the following components:
- frame;
- absorber;
- a heat exchanger within which the coolant will circulate;
- reflectors to focus the sun's rays.
The factory solar water heating collector works as follows:
- Heat absorption - the sun's rays pass through the glass located on top of the body or through vacuum tubes. The internal absorbent layer in contact with the heat exchanger is painted with selective paint. When sunlight hits the absorber, a large amount of heat is released, which is collected and used to heat water.
- Heat transfer - the absorber is located in close contact with the heat exchanger. The heat accumulated by the absorber and transferred to the heat exchanger heats the liquid moving through the tubes to the coil inside the heat storage tank. Water circulation in the water heater is carried out by forced or natural means.
- DHW — two principles of heating hot water are used:
- Direct heating - hot water after heating is simply discharged into a thermally insulated container. In a monoblock solar system, ordinary household water is used as a coolant.
- The second option is to provide domestic hot water with a passive water heater based on the principle of indirect heating. The coolant (often antifreeze) is sent under pressure to the solar collector heat exchanger. After heating, the heated liquid is supplied to a storage tank, inside of which a coil (playing the role of a heating element) is built, surrounded by water for the hot water supply system. The coolant heats up the coil, thereby transferring heat to the water in the container. When the tap is opened, heated water from the heat-storing tank flows to the water collection point. The peculiarity of a solar system with indirect heating is its ability to operate throughout the year.
The operating principle used in expensive factory-made solar systems is copied and repeated in do-it-yourself collectors.
The working designs of solar water heaters have a similar structure. They are only made from scrap materials. There are schemes for the production of collectors from:
- polycarbonate;
- vacuum tubes;
- PET bottles;
- beer cans;
- refrigerator radiator;
- copper tubes;
- HDPE and PVC pipes.
Judging by the diagrams, modern “Kulibins” prefer homemade systems with natural circulation, thermosiphon type. The peculiarity of the solution is that the storage tank is located at the top point of the hot water supply system. Water circulates through the system by gravity and is supplied to the consumer.
Features of installation and operation of liquid heating manifolds
To place the solar collector, choose a spacious place that is not shaded throughout the day. The mounting bracket or subframe is made of wooden slats or metal so that the tilt of the water heater is adjusted within the range of 45 to 60 degrees from the vertical axis.
To install the solar water heater, a support frame is assembled
Connection to an indirect heating boiler or heat accumulator is made using threaded fittings and copper, metal-plastic or multilayer polypropylene pipes. They are covered with a layer of thermal insulation.
Connection diagram for a solar heater in a system with forced movement of coolant
To reduce heat losses, the storage tank is placed as close as possible to the installation. Depending on the conditions, natural or forced circulation of the coolant is organized. In the latter case, a controller with a temperature sensor embedded in the outlet pipe is used. Pumping of working fluid through the circuit will turn on when its temperature reaches the programmed value.
A seasonally operating system is charged with water, while year-round use of a solar water heater requires the use of an antifreeze fluid. The ideal option is a special antifreeze for solar systems, but to save money, liquids intended for car radiators or household heating systems are also used.
Polycarbonate manifold
They are made from honeycomb panels with good thermal insulation properties. Sheet thickness from 4 to 30 mm. The choice of polycarbonate thickness depends on the required heat transfer. The thicker the sheet and the cells in it, the more water the installation can heat.
To make a solar system yourself, in particular a homemade solar water heater made of polycarbonate, you will need the following materials:
- two threaded rods;
- propylene corners, the fittings must have an external threaded connection;
- PVC plastic pipes: 2 pcs, length 1.5 m, diameter 32;
- 2 plugs.
The pipes are laid parallel to the housing. Connect to the hot water supply via shut-off valves. A thin cut is made along the pipe into which a sheet of polycarbonate can be inserted. Thanks to the thermosiphon principle, water will independently flow into the grooves (cells) of the sheet, heat up and go into the storage tank located at the top of the entire heating system. To seal and fix the sheets inserted into the pipe, thermally resistant silicone is used.
To increase the thermal efficiency of a cellular polycarbonate collector, the sheet is coated with any selective paint. Heating of water after applying selective coating accelerates approximately twice.
Classic shower design with a barrel and a solar collector with a plastic coil
All the methods of the considered homemade products are simple: in general, this is an insulated housing with tubes (metal, plastic), a barrel on the top of the cabin in direct sunlight and a circulation line. All other methods are modifications of the described design. Under ultraviolet light, plastic loses its strength and cracks, so a metal tank is also good. However, you can use any material, even a wooden barrel, as long as it does not dry out.
It is also not necessary to make a complex design for the water outlet, or to provide for the possibility of mixing it with cold liquid. You can get by with a simple flexible overlapping hose with a shower head. If the barrel is filled with a household pump, manually with buckets from a well, then there is also no need to build a pipeline to the supply tap (our example with it).
Assembly Features:
- Frame for the cabin: metal profiles, strips (even suitable from a landfill), PVC pipes, wood, any material from which you can build a stable structure. You can do without a frame, if there is somewhere to secure the barrel, but the place should be open on all sides, they will do , for example, unshaded roofs of extensions and other structures. As walls, you can use fabric drapery, opaque polyethylene.
- Barrel. The volume and material are chosen by the user at his own discretion, our case is 120 l, plastic.
- Water supply, piping: garden hose, plastic pipes (25 mm) with fittings, quick-release connections.
- Drainage: trench and pit.
Iron frames from old spring beds were used for the cabin. Welding was used. There are jumpers on the frame and a seat for a barrel on top.
Drainage is a hole at a distance from the shower with grooves that gradually deepen away from it. The depressions are filled with coarse crushed stone, gravel and construction waste.
Next, holes were made with a hand drill for the legs of the frame, which were installed in them and concreted (a bucket for each support).
The procedure for constructing a summer shower with illustrations
Preparation of elements: barrel, pipes, shower head, hose, float valve for water supply.
The supply will be carried out through a dedicated channel using a flexible hose (10 m ¾ inch). We also purchased 5 m of a tube thinner than ½ inch to separate the flows - to the shower tap and for filling.
First you need to make a flooring so as not to step on dirt while taking a shower. This element is treated with antiseptic impregnation and painted with yacht varnish.
We mark the barrel to correctly install the supply/fill line. On the east side, to the left of the entrance to the shower, there is a water inlet (for filling from the yard tap). There we will mark the place to drill a hole for a regular float valve from the toilet tank. We drill with a screwdriver and a step drill.
The valve (float) is inserted and secured with a nut. We install the faucet with the hole down, so the hose will not break. We use tow and Unipack sealing lubricant.
Next, we use quick-release connections to connect to the hose. You can also insert a thermometer into the barrel.
We install 2 fittings. First, we designate the filling level, cold water outlet (bottom), hot water inlet (top).
We cut 2 more fittings into the bottom - for the shower and for the drain, just in case. We attach a faucet to the first one. In our case, it has a tee with a valve for adding cold water. You can get by with a simpler design - one tap. We put a plug on the drain pipe. We attach a sinker to the supply hose.
The top of the barrel is covered with a lid, and several small holes are drilled there for “breathing.” The tank is filled with a yard tap through a flexible line. But you can also fill water in buckets, using a pump through the top without a separate line.
The barrel itself acts as a kind of solar collector, a thermos, heating up in the sun.
solar collector
A grid (coil) is assembled from ordinary plastic pipes (external diameter 20 mm) and fittings. Plugs are welded diagonally at the upper and lower ends. A manifold of 25–20–25 mm tees is welded on top and bottom.
The next stage is the body: a frame made of 50x50 mm timber with sides:
We make thermal insulation so that the captured solar heat is accumulated inside the box. We use extruded foil polystyrene foam 30 mm:
Marking for pipe holders and their installation:
We install the solar collector just below the barrel; a metal frame was built for the structure, but it can also be made simpler: from wood or simply fixed with support on a suitable surface.
Next are the important “little things”: glass, plexiglass or thick film for the box, transparent/translucent plastic, sealing with polyurethane foam. The latter measure is extremely desirable, since even a small hole can lead to critical heat loss. The lid is transparent so that the effect of the rays is enhanced: they get inside and once again heat the pipes by reflecting from the foil coating. The entire line is insulated with penofol.
This system provides heating up to +51° C. Natural circulation: water, heating up inside the collector, periodically splashes out of it into the barrel, is taken from the upper segment to the shower, and the cold layer is simultaneously forced out from below onto the coil.
Flaws
The reason for the relatively weak heating: the thermal conductivity of polypropylene (the coil is made from) is very low, comparable to expanded clay and wood, that is, it is better suited for insulation rather than heat transfer. If you use metal (especially blackened copper), including as the inner lining of the box, then the temperature can be raised to the boiling point in hot climates.
You can also replace polypropylene with corrugated stainless steel tubes, like those from a shower hose. Place duralumin plates inside as reflectors.
Advice: do not use a plastic valve with a float - it will crack, as it is not designed for warm water; use a brass design.
Possible knot variations
The barrel can be insulated with polyethylene and similar materials; if they are black, the efficiency will improve.
Faucet principle: If there is a cold water supply line, it can be used to both fill the tank and dilute the hot shower. That is, there must be power from a yard tap or another tank for cold water connected to a “hot” barrel.
Solar collector made from a hose or flexible pipe
Those who have a private house with a garden or a dacha, of course, know that the water remaining in the temporary light mains after watering the beds quickly heats up. This positive quality of hoses or flexible pipes was used by craftsmen to create solar heat exchangers from them. It should be noted that such a collector will cost many times less than one bought in a store, but for the manufacturing process to be successful, some effort must be made.
Such a manifold may consist of one or several sections into which hoses tightly coiled in a spiral “snail” are laid and secured.
This design can be called the simplest, both in design and installation. Its main disadvantage is that it practically cannot be used without the use of forced circulation, since if the pipe contours are too long, the hydraulic resistance will exceed the pressure force created by the temperature difference. However, solving the issue of installing a circulation pump is not at all difficult. And such a system installed in a country house will be an excellent help and will quickly pay for itself, including the costs (very insignificant) for powering the pump.
Similar collectors are also used to heat water in swimming pools. They are connected to a filtration system, which is necessarily equipped with a pump. Water, circulating through the collector pipes, has time to heat up before entering the pool.
In some cases, when creating an entire solar battery system, you can do without installing a storage tank. This is possible when hot water is used only during the day and in small quantities. For example, a circuit of 150 m of pipe having an internal diameter of 16 mm holds 30 liters of water. And if five or six such “snails” from pipes are collected into a single battery, then during the day each family member can take a shower several times, and there will still be a lot of hot water left for household needs.
Materials for production
To make such a solar water collector, you need to prepare some materials. It is not at all impossible that some of them will be found in a barn or garage.
A rubber hose or a flexible black plastic pipe with a diameter of 20 ÷ 25 mm is essentially the main element of the system in which heat exchange will occur during water circulation. The amount of hose will depend on the size of the solar panel - it can be 100 or 1000 meters. The black color of the hose is preferable because it absorbs heat more than all other shades.
It should be noted right away that metal-plastic pipes are not particularly suitable for making a collector, even if they are coated with black paint. The fact is that their plasticity in this case is insufficient - they break when bending a small radius and thus, even if the integrity of the walls is not violated, the intensity of the water flow will decrease.
Hoses are sold in coils of 50, 100 or 200 meters. If you plan to make a large-volume battery, you will have to purchase several bays. If you plan to use, for example, 50 or 100 m of hose in each section, then you should not buy a whole 200-meter coil, it is better to purchase a ready-made measured hose. This will help save time during installation.
The hose can be laid not only in a round spiral, but also oval, and also in the form of a coil.
As a good alternative, you can try modern PEX cross-linked polyethylene pipes. They have good plasticity, but it’s not hard to figure out how to give them black color if it’s not on sale.
- If the slope of the roof on which the collector battery will be installed is steep, then special boxes are made from bars, plywood or metal sheets for the hose spirals. To do this, you will need bars 40×40 or 40×50 mm, plywood 6 mm thick, or a metal sheet 1.5–2 mm thick. The blanks of the future module are treated with an antiseptic (wood) or anti-corrosion compounds (metal). Then a box is assembled from them into one or more spirals. By the way, you can use old window frames as the sides of the box, onto which the bottom part is simply mounted.
- For pre-treatment of metal and wood, it is necessary to purchase antiseptic, anti-corrosion and primer compounds.
- Hoses (pipes) will experience considerable loads both from the mass of the coolant and from temperature changes and internal pressure. Therefore, they will try to disrupt the installation, deform, and sag, so it is necessary to provide special fastenings to maintain them in the initially specified position.
This can be a metal strip that is secured between the pipes with self-tapping screws.
Another option is a loose bundle with a tight cord or a plastic clamp-“tie” with a cross or crossbar. But still, this fastening method is more suitable for a plastic pipe than for a hose, since it can sag on the cord when the rubber expands. If a reinforced rubber hose is chosen for the collector, then this method is quite suitable for fixation.
Another fastening option suitable for a plastic pipe or reinforced hose can be nails with wide heads. They can be driven either into the bottom of the box (in this case it must have a thickness of at least 10 mm), or onto a kind of cross made of a block.
- It will also be necessary to prepare connecting elements for the hose or pipes. There are quite a lot of varieties of such fittings, but you need to choose exactly those that are designed for the material chosen for the manufacture of the manifold. In addition to such connectors, threaded fittings will be required to transition from a plastic or rubber pipe to a common metal one. Such a connection will be necessary if the collector consists of several modules. To know how many connecting elements are required, you need to draw in advance a schematic diagram of the system being created and calculate their number on it.
- To combine all modules into a single battery, you will need two collectors - a piece of metal pipe. Through one of them, fixed at the bottom of the battery, cold water will flow into the heat exchangers, and in the second, fixed at the top, warmed water will be collected.
The upper pipe will connect to the storage tank, that is, go to the consumer. It should have a diameter of 40 ÷ 50 mm.
Battery installation
Having prepared everything you need, you can start working.
- First you need to treat all wooden parts of the future structure with an antiseptic.
- Next, if the bottom of the modules is made of metal sheet, it must be coated with an anti-corrosion compound. Typically, mastic designed to cover the undersides of cars is used for this.
- After the compositions have dried on the prepared elements, single or common modules are assembled from them.
- Then the hoses are laid in them, for which the holders are secured.
- To allow pipes to pass freely through the sides of the modules, holes are drilled for them - in the upper and lower parts. Accordingly, the cold water inlet pipe is led into the lower hole, and the heated water outlet into the upper hole.
- If several modules are mounted vertically, or one common one, into which several pipe “snails” are also placed, one above the other, then the lower end of each of the spirals is connected to the upper outlet of the underlying one - and according to this sequential principle, the entire “column” is switched. The lowest end is connected to a common metal collector through which cold water will flow. All adjacent vertical rows are mounted in the same way - with a common connection to the supply manifold.
- Accordingly, the upper ends of the hoses of the uppermost horizontal row of modules are connected to a metal collector pipe through which hot water is discharged for consumption.
- The spiral-shaped collector circuit can also be mounted on a metal sheet installed not on the roof, but near the house, on its southern side, or near the pool, if it requires heating. In this case, the metal base will contribute to faster heating of water and heat retention in the pipes, since it has good thermal conductivity and heat capacity.
- Another option for a thermal solar collector can be laying the circuit on the roof plane in special boxes in long parallel rows along the entire length of the roof.
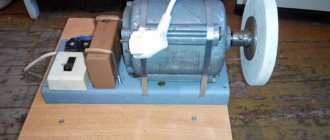
How to assemble a solar water heater for your home with your own hands?
The advantage of solar water heaters is that they are quite easy to make with your own hands without special training.
So, 18 steps necessary for self-assembly of a solar collector: We make a grid from parallel metal pipes (10-15 mm in diameter), fastened by two transverse pipes (with a diameter of at least 20 mm). To connect, we drill holes in wider pipes (according to the diameter of narrow parallel pipes). We weld the absorber - a metal sheet - to the frame. For better heat transfer, you need to press the metal sheet as tightly as possible to the frame (weld all sections of the connection). Cover the absorber with black heat-resistant paint. We wait until it dries completely. We make a wooden frame with a height of about 100-150 mm. The width and length of the frame are calculated based on the dimensions of the absorber. We place the absorber inside a wooden frame. We cover the frame with ordinary window glass (from 4 mm thick). Double-glazed windows can also be used. At the same time, the efficiency of the water heater will increase, but its total weight and the cost of the project will also significantly increase. We treat the frame with an antiseptic and paint it with paint (preferably resistant to humidity, to protect it from precipitation). We drill holes in the frame so that cold and hot coolant can enter the metal frame of the absorber. We cover the rear part of the structure (under the absorber) with heat-insulating material. It is recommended to use min. cotton wool
It is important that the insulating material is able to withstand temperatures up to 200 degrees. Cover the bottom of the frame with plywood or boards. The main thing is to ensure that moisture does not penetrate into the water heater. We nail the strips for fastening the glass (in the inside of the frame). Attach the seal, insert the glass and another seal onto the glass
All this is attached using galvanized sheet. All cracks in the structure are filled with silicone to reduce heat loss. We find the battery capacity. It could be an old boiler, metal barrels... the main thing to remember is that the container must withstand the water pressure in the system (several atmospheres). There are 4 holes in the tank. Two for the heat exchanger. One for cold water entering the tank (at the bottom of the tank) and one for hot water exiting (at the top). We place a spiral-shaped heat exchanger (made of copper or stainless steel) in the tank. We connect the collector and the battery tank. To do this, you can use plastic or metal-plastic pipes (to prevent heat loss, we insulate the system well). At the top point of the system, we attach an expansion tank (to regulate the pressure in the system).
We hope that our article was useful to you and will help you in building a solar water heater with your own hands.
Collector Stanilova
Engineer Stanislav Stanilov presented the world with the most versatile solar collector design. The main idea of using the device he developed is to obtain thermal energy by creating a greenhouse effect inside the collector.
Collector design
The design of this collector is very simple. Essentially, this is a solar collector made of steel pipes welded into a radiator, which is placed in a wooden container protected by thermal insulation. Mineral wool, polystyrene foam, and polystyrene can be used as thermal insulation materials.
A galvanized metal sheet is placed at the bottom of the box, on which the radiator is mounted. Both the sheet and the radiator are painted black, and the box itself is covered with white paint. Of course, the container is covered with a glass lid, which is well sealed.
Materials and parts for manufacturing
To build such a homemade solar collector for heating a house you will need:
- glass that will serve as a lid. Its size will depend on the dimensions of the box. For good efficiency, it is better to select glass measuring 1700 mm by 700 mm;
- glass frame - you can weld it yourself from corners or put together from wooden planks;
- board for the box. Here you can use any boards, even from dismantling old furniture or plank floors;
- rental corner;
- coupling;
- pipes for radiator assembly;
- clamps for attaching the radiator;
- galvanized iron sheet;
- radiator inlet and outlet pipes;
- tank with a volume of 200−300 liters;
- aqua chamber;
- thermal insulation (sheets of polystyrene foam, expanded polystyrene, mineral wool, ecowool).
Stages of work
Stages of making a Stanilov collector with your own hands:
- A container is made from boards, the bottom of which is reinforced with beams.
- A heat insulator is placed at the bottom. The base must be especially carefully insulated to avoid heat leakage from the heat exchanger.
- Afterwards, a galvanized plate is placed at the bottom of the box and a radiator is installed, which is welded from pipes, and secured with steel clamps.
- The radiator and the sheet underneath are painted black, and the box is painted white or silver.
- The water tank should be installed under the collector in a warm room. Between the water tank and the collector you need to install thermal insulation to keep the pipes warm. The tank can be placed in a large barrel into which expanded clay, sand, sawdust, etc. can be poured. and thus insulate.
- An aqua chamber must be installed above the tank to create pressure in the network.
- Do-it-yourself solar collector installation should be done on the south side of the roof.
- After all the elements of the system are ready and installed, you need to connect them into a network with half-inch pipes, which must be well insulated in order to reduce heat loss.
- It would be a good idea to build a controller for the solar collector with your own hands, since factory devices do not last long.
How to make a solar water heater at home?
We bring to your attention detailed instructions for making a solar boiler with your own hands. The process is quite labor-intensive, but the result is worth it.
First, you need to prepare the materials and tools necessary for the work. You will need:
- Glass 3-4 millimeters thick;
- Wooden slats 20x30 millimeters;
- Beam measuring 50x50 millimeters;
- Boards 20 millimeters thick and 150 wide;
- Tin strip or pipe fasteners;
- OSB sheet or plywood 10 mm thick;
- Metal corners;
- Furniture hinges;
- Tin strip or pipe fasteners;
- Insulation with metallized coating;
- Sheet of galvanized sheet;
- Mineral wool;
- Metal and copper pipes with a diameter of 10-15 millimeters and 50 millimeters.
- Connecting clamps and couplings;
- Sealant;
- Black paint;
- Rubber seal for doors and windows;
- Aquamarkers;
- Plastic barrel or metal tank with a volume of 200-250 liters.
Once everything necessary for the work has been prepared, you can proceed directly to the manufacture of the solar water heater. The process itself is divided into four stages, which we will discuss in more detail below.
Stage 1. Making the box
At the beginning of the whole process, you need to make a housing for the future water heater. This should be done based on the following sequence of actions:
- From the prepared boards, assemble a box of the size you need.
- Sew the bottom of the case with a sheet of plywood or OSB.
- Once the box is assembled, seal all joints and cracks.
- Cover the inside of the case with a heat reflector. This way you will avoid heat loss.
- Cover all surfaces with a layer of mineral wool.
- Cover the finished layer of thermal insulation on top with tin sheets and treat all cracks with sealant.
- Treat the inner surface of the case with black paint.
- Install a glazing frame made of wooden frames. To do this, cut the slats to the sizes you need and connect them using metal corners for these purposes.
- Install glass on both sides of the frame, having previously treated one-fourth of the slats with a liquid-consistency sealing material.
- Attach the frame to the base of the cabinet using furniture hinges.
- Glue strips of rubber seal to the ends of the body.
- Prime and paint all exterior surfaces of the water heater housing.
That's all, the body assembly is complete. Now you can safely move on to the next stage.
Stage 2. Making the radiator
You can make a radiator for a solar water heater by following the following steps:
- Prepare two pieces of pipe with a diameter of 20-25 millimeters and the length you need.
- In a pipe with a large diameter, drill holes at a distance of about 10 centimeters from each other.
- Insert the sections of previously prepared pipes into the holes so that the ends protrude 5 millimeters from the reverse side.
- Weld or solder connections.
- Weld threaded bends for external connections diagonally to the ends of pipes with a diameter of 50 millimeters. The remaining ends need to be muffled.
- Paint the radiator with black heat-resistant paint in several layers.
Stage 3. Installation of the collector
Immediately before installing the radiator in the box, you first need to mark the places in its walls through which the outlets will pass to connect the water supply and extraction pipes. After that:
- Using these marks, holes of the required diameter are drilled.
- Next, install the radiator into the housing close to the bottom and fix it along the entire length of each element. This should be done in 4-5 places using strips of tin or other fasteners designed for this purpose.
- Now the collector body is covered with a frame and rigidly fixed with screws or corners.
- Next, all cracks are sealed.
The final stage. Arrangement and connection of a solar water heater:
- Insert threaded outlets into the container that you are going to use as a heat accumulator. One point should be made at the bottom of the container for supplying cold water, and the second should be placed at the top for heated liquid.
- Afterwards, the container must be insulated using mineral or stone wool, as well as other heat-insulating material for these purposes.
- An aqua chamber complete with a float valve is mounted 0.5-0.8 meters above the tank in order to constantly create a constant low pressure in the system. In addition, to install the pressure pipeline from the water supply to the aqua chamber, half of one pipe should be used.
- After the container is completely filled, water will flow from the drainage hole of the aqua chamber. Next, you can turn on the water supply from the water supply and fill the tank.
That's it, your solar water heater is ready!
Collectors from scrap materials
Assembling a solar collector for heating a house with your own hands is both cheaper and more interesting, because it can be made from various available materials.
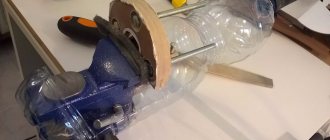
From cans
The coolant of a solar collector made from aluminum cans is air. The cans are connected to each other to form a pipe. To make a solar collector from beer cans, you need to cut off the bottom and top of each can, dock them together and glue them with sealant. The finished pipes are placed in a wooden box and covered with glass.
Basically, an air solar collector made from beer cans is used to eliminate dampness in the basement or to heat a greenhouse. Not only beer cans, but also plastic bottles can be used as a heat storage device.
From the refrigerator
You can make your own solar water heating panels from an unusable refrigerator or the radiator of an old car. The condenser removed from the refrigerator must be rinsed thoroughly. Hot water obtained in this way is best used only for technical purposes.
Foil and a rubber mat are spread on the bottom of the box, then the capacitor is placed on them and secured. To do this, you can use belts, clamps, or the fastening with which it was attached in the refrigerator. To create pressure in the system, it would not hurt to install a pump or aqua chamber above the tank.
From plastic and metal-plastic pipes
How to make a solar collector with your own hands, having plastic pipes in your home arsenal? They are less effective as a heat storage device, but are several times cheaper than copper and do not corrode like steel.
The pipes are laid out in a box in a spiral and secured with clamps. They can be coated with black or selective paint for greater effectiveness.
You can experiment with pipe laying. Since pipes bend poorly, they can be laid not only in a spiral, but also in a zigzag. Among the advantages, plastic pipes can be easily and quickly soldered.
From metal pipes
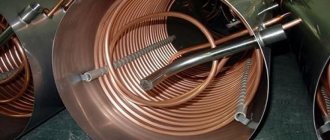
This assembly option is similar to the Stanilov manifold. When assembling a solar collector from copper pipes with your own hands, a radiator is welded from the pipes and placed in a wooden box lined with thermal insulation from the inside.
Copper pipes will be the most effective; aluminum pipes can also be used, but they are difficult to weld, but steel pipes are the most successful option.
Such a homemade collector should not be too large so that it is easy to assemble and install. The diameter of the pipes on solar collectors for radiator welding should be smaller than that of the pipes for coolant input and output.
DIY solar water heater
A solar water heater can run forever; all it needs to function fully is solar energy and hot water flow. But even in the absence of owners and inadequate consumption of heated water, there is no need to worry, it will cool down and again rise to the first level of heating, and will always be at a temperature of at least 60 degrees. Drawing conclusions, you can understand that the solar water heater does not depend on third parties and no one except you can turn off your hot water.
Below is an example of how to make a simple, but high-quality and reliable solar water heater. To get started we need:
- Large pipes and copper tubes (you can use a ready-made coil);
- Roll insulation;
- Tank;
- OSB (can be replaced with another type of chipboard tile);
- Sheets of copper;
- Glass;
- Fittings, plugs, dowels, screws, corners;
- Black paint.
If all the parts are available, you can immediately begin manufacturing the solar water heater.
Creating an absorber
One of the most labor-intensive processes in the manufacture of a device, if it is completed, only the smallest detail remains. Many people use a ready-made coil from the refrigerator as it, in order to do less and quickly get a ready-made water heater. This is a big mistake of many, since it is much more difficult to correct existing problems due to poor quality assembly. If you do decide to use the coil, rinse it thoroughly. We will discuss with you an option that is much more reliable and durable. Let's start creating the absorber step by step:
- We make an absorber frame from 2 copper tubes, their diameter should not exceed 22 millimeters. On one side of each pipe we install a fitting and a plug, and on the other we make 2 threads. To make it clear what an absorber is, let’s imagine a coil from a refrigerator.
- We make holes in the pipes; they should be clearly symmetrical and located at a distance of 10 centimeters from each other. The diameter of the holes should not exceed 9 mm in diameter.
- Insert tubes into the resulting holes and seal each one so that there are no gaps left.
- In order to completely make sure that the entire system is sealed, pass water through it; in places where there are small holes, it will definitely leak.
- Using a sheet of copper we make a backing for the coil. Copper is considered one of the most durable materials in the modern world, which is why we use it. We weld 2 sheets to the coil and weld the sheets together. If desired, you can paint the sheet black, this will increase the functionality of heating water.
Solar water heater housing
- The first step is to knock down a box that will be equal to the finished absorber. The box must have no top, and in order for it to be strong and last a long time, iron corners must be screwed into the corners using self-tapping screws. The height of the walls should be within 25 cm.
- The next step is to lay insulation in the finished box; it is better to choose rolled insulation; isover works well.
- Now we need to make a layer that will reflect the sun's rays. This will significantly increase the efficiency of the water heater. Thanks to this step, all the heat will remain in the system and will not leak out.
- We cover the finished box with glass, fill all joints with foam or cover it with mounting glue.
The second stage of the solar water heater is completed.
How to connect a solar collector to a tank (shower) by gravity
The weak point for summer solar collectors remains the need to use a pump. This dramatically increases the cost of the design or makes it completely unacceptable.
But you can make a heating tank connected to the solar collector so that the liquid moves by gravity. The principle of gravity flow is preserved - the heater is located lower than the storage tank (radiator).
According to this scheme, when using pipes from ¾ inches, water should move by gravity. The heated water from this tank can be drained into the pool.
Design of simple solar water heating systems
From an economic point of view, it is more profitable to design a solar water heater with your own hands.
Simple design
For these purposes, tanks that are coated with black paint are required. They are connected to the water main from the house. From such a container water flows into the shower.
A DIY pool water heater is constructed from a trough, pipes for cold water and an overflow, outlet and valve. A transparent lid is used to cover the container.
Simple designs have the following disadvantages:
- In cloudy weather, the water container does not heat up.
- The container is filled with liquid every day. The heated water is carefully drained.
- Such a device is placed only in a horizontal position. Therefore, at certain times the efficiency decreases.
Using the collector
Installing a collector designed on your own is more profitable from a practical and economic point of view. But to achieve a positive result, preparation is required.
Design of a heat receiver
In order to heat water year-round, the following is required:
- Accumulating container.
- Refill container.
- Collector.
Installation of pumping equipment is not necessary. To circulate the coolant, the heat receiver is installed below the tank. The make-up container is located higher than the storage container. The container into which the heated liquid is transferred is compacted.
The second container is equipped with a float valve for the system to function. A pipe is connected to the branch pipe through which cold liquid will flow.
To construct a water heater with your own hands, use:
- Copper tubes.
- Tubes made of polymer compounds or plastic.
- Flat radiators made of durable steel.
- Aluminum tubes.
To construct a housing for the heater, wood and plywood are often used. Craftsmen construct a polycarbonate solar collector with their own hands.
If everything is done correctly, you can get the following benefits:
- You can use such a system even at maximum load.
- The payback period of the designed heater is minimal.
- Reduced fuel costs.
- Such a system is quickly prepared for operation.
How to connect the collector to the hot water supply
The best monetary benefit comes from the manufacture and operation of a collector made of aluminum or copper tubes on metal under glass, connecting it to the hot water supply system.
Since the collector and spiral in the boiler are a small-sized heated system, it must be equipped with an expansion tank and a safety valve. Circulation is carried out using a low-power pump. A good collector will provide the house with hot water even in the off-season...
About the solar system
Solar water heaters are used to increase water temperature and for heating systems. They simply connect to existing systems, and the economic effect of using them is enormous - up to 60%.
This technical device works simply:
- Water is heated by the sun in a heat exchanger located in a specially designed storage tank. As a rule, using two tanks at the same time is most effective. They are usually made of copper, since the thermal conductivity of this metal is high. This allows you to use heated water for domestic needs and in the heating system.
- By convection, the hot air is directed upward, and the cold remains below. With built-in electronics, it is possible to regulate these processes and quickly respond to all changes in the functioning of the system. There cannot be direct human contact with these functions, because everything can be monitored remotely.
If the weather is cloudy, then the required amount of heat will not be generated from solar energy, but the heating system continues to function. And, on the contrary, if it is hot outside, then you can get a sufficient amount of energy from the sun. In this case, a redistribution of the coolant occurs in the expansion tank due to the expansion of the material under the influence of high temperatures.
Pool water heater
A solar water heating system can be used to heat water in a swimming pool. Despite the fact that it is often located in the open air, the water in it warms up to a comfortable temperature only on particularly hot days. The rest of the time, a solar collector connected to the pool’s water supply system will help warm up the pool. This option is also suitable for heating indoor swimming facilities.
The solar installation can be assembled in production or manually. In addition, it can be used in winter in clear weather.
The assembly diagram for a pool water heater is the same as the one above. The difference is the larger sizes. To install the device, it is recommended to prepare a special area lined with paving slabs or concrete. It will give greater stability to a large structure.
DIY Solar Installation Options
The peculiarity of self-built solar water heaters is that almost all devices have the same design of a thermally insulated box. Often the frame is assembled from lumber and covered with mineral wool and heat-reflecting film. As for the absorber, metal and plastic pipes are used for its production, as well as ready-made components from unnecessary household equipment.
From a garden hose
A garden hose folded like a snail or a PVC water pipe has a large surface area, which makes it possible to use such a circuit as a water heater for the needs of a summer shower, kitchen or swimming pool heating. Of course, for these purposes it is better to take black materials and be sure to use a storage container, otherwise the absorber will overheat during the peak summer heat.
A flat manifold made from a garden hose is the simplest way to heat water in a pool.
From an old refrigerator condenser
The external heat exchanger of a used refrigerator or freezer is a ready-made solar collector absorber. All that remains to be done is to equip it with a heat-absorbing sheet and install it in the case. Of course, the performance of such a system will be small, but in the warm season, a water heater made from refrigeration equipment parts will cover the hot water needs of a small country house or cottage.
The heat exchanger of an old refrigerator is an almost ready-made absorber for a small solar heater
From a flat radiator of a heating system
Making a solar collector from a steel radiator does not even require the installation of an absorbent plate. It is enough to cover the device with black heat-resistant paint and mount it in a sealed casing. The productivity of one installation is more than enough for a hot water supply system. If you make several water heaters, you can save on heating your home in cold, sunny weather. By the way, a solar installation assembled from radiators will heat utility rooms, a garage or a greenhouse.
A steel heating radiator will serve as the basis for building an environmentally friendly water heater
Made from polypropylene or polyethylene pipes
Pipes made of metal-plastic, polyethylene and polypropylene, as well as fittings and devices for their installation, allow you to build solar system circuits of any size and configuration. Such installations have good performance and are used for heating rooms and obtaining hot water for household needs (kitchen, bathroom, etc.).
The advantage of a solar collector made of plastic pipes is its low cost and ease of installation.
From copper tubes
Absorbers built from copper plates and tubes have the highest heat transfer, therefore they are successfully used for heating the coolant of heating systems and in hot water supply. The disadvantages of copper collectors include high labor costs and the cost of materials.
The use of copper pipes and plates for the manufacture of the absorber guarantees high performance of the solar installation
Manufacturing recommendations
For those who prefer simple solutions, there is an option long ago invented by our grandfathers. One or more tanks painted black are installed on the roof of a house or a separate shower room. This water heater works simply: warm water flows through a vertical pipe from the barrel directly into the shower, you just have to open the tap. To fill the container, a water main is laid to it. With good solar activity in the summer, the water in the barrel heats up in just a few hours.
A simple tank on the roof cannot compare with a solar collector in terms of efficiency, even a homemade one. Therefore, having decided on the dimensions of the heat sink, it is necessary to make a housing where the coil should then be placed. It is preferable to assemble it from wood; it does not transmit heat as much as metal. Before laying the heat exchanger, the rear wall must be insulated with a layer of foam plastic. The general diagram of a solar water heater with a storage and make-up tank is shown in the figure:
Just assembling a heat receiver with your own hands is not the whole job; you need to use it correctly in the water supply system. The solar water heating installation shown in the diagram consists of a tank - battery, make-up tank and the collector itself. You should not install unnecessary pumping equipment; you should allow the water to circulate naturally. It is necessary to ensure that the battery is positioned slightly above the heat sink, and the make-up tank is above the storage tank.
The hot water tank must be insulated; any rolled material is suitable for this. In order for the storage water heater to operate in automatic mode, a float valve must be installed in the second tank that responds to a decrease in the liquid level. A pipe from the water supply is connected to the valve connection. Now, during the flow in the main tank during washing, cold water will be supplied to its lower zone. Do not forget to provide a vertical air outlet pipe raised to the required height.
Advantages and disadvantages
Advantages of a do-it-yourself solar water heating system:
- Low cost.
- Possibility to assemble the structure yourself.
- Using free solar energy.
- Energy savings in the warm season are up to 60%.
- Heating water, heating a house in areas where communications are not connected.
- With proper organization, year-round use is possible.
Flaws:
- Dependence on weather conditions.
- Inability to function in the off-season.
- When installing in areas with variable climates, an additional heating source is recommended.
- Low productive capacity.
- Equipment for installation site.
- For forced circulation of liquid in the system, an electric pump is required, which leads to additional costs.
As a source of alternative energy, a solar water heating system significantly saves costs on electricity, gas supply, purchase of liquid and solid fuel, etc. Such an installation can be done independently with the necessary set of materials and tools. This will significantly reduce the consumption of other energy resources that you have to pay for.
A solar installation is also effective in the cold season, if you follow the installation rules. In clear weather, it will also accumulate solar heat, warming the water. The main thing is to properly insulate the pipeline and storage tank.
Stanilov installation - how to make it yourself?
In Europe, home heating units manufactured according to the drawings of Stanislav Stanilov, a famous inventor and engineer from Bulgaria, are in demand. You can assemble such a solar collector with your own hands, guided by the following work flow diagram:
- We take wooden boards with a section of 12x2.5 (3) cm, knock together a box from them, additionally reinforcing its bottom with 5x3 cm blocks.
- We place heat-insulating material on the bottom of the resulting box - mineral wool, polystyrene foam or foam boards, and on top - a sheet of tin or ordinary iron.
- You will need to make a tubular radiator from steel pipes (weld several pipe products together) and install it in a box.
- We carefully fix the radiator with steel pipe clamps, cover the cracks and gaps in the box, and seal it.
- We paint the external structural elements white or silver (thereby significantly reducing heat losses), the radiator and the bottom of the box are black.
After this, you will need to make a heat storage device and a special front chamber. The function of the first can be performed by any sealed container with a volume of 150–400 liters. It is allowed to take several tanks and connect them together. It is easy to make a fore-chamber from a vessel (necessarily sealed) with a volume of 40 liters or more. A regular ball valve used in a toilet cistern should be placed in it. It is necessary to form a small but constant pressure in the chamber.
The storage tank of a homemade device for heating a house is thermally insulated and placed in a pre-prepared plywood box. The distance between its walls and the storage tank is filled with foam plastic and mineral wool. Some craftsmen also use ordinary sawdust for insulation to reduce the cost of the structure. Now you can begin assembling and installing the collector. First, mount the front camera and storage device into one structure. The water level in the storage tank should be 0.8–0.9 meters lower in relation to the level in the front chamber.
Then you connect the pipes to the components of the manifold: the storage tank replenishment, the water supply (hot) to the mixers, the water supply (cold) to the front chamber and to the mixers, the cold water input and two drainage pipes - for the front chamber and for the storage tank. In areas with low water pressure, it is recommended to install pipe products with a cross-section of 1 inch, and in areas with high pressure - 1/2 inch. To connect pipes, bends, tees, adapters, and fittings are used. Here you need to look at the situation, which elements to purchase when installing a collector for heating a private house.