If you need to perform milling work and do not have the money to purchase an industrial device, you can make a milling cutter from an angle grinder at home. The machine will not be inferior to industrial analogues - of course, subject to skills in the field of welding and wood cutting. For a home workshop, a do-it-yourself milling cutter made from an angle grinder is considered an excellent option that requires the lowest economic costs.
Materials used
The grinder is considered a multi-purpose device , on the basis of which various designs can be made. One of these devices is a router. Made from a grinder with your own hands, it copes only with simple cutting tasks. Such work will require the fulfillment of certain conditions, the main of which are ensuring good fixation of the tool in the plumb plane and its movement relative to the plane of the workpiece.
To make a milling machine from a grinder, the following materials are required:
- A grinder or drill with a running motor.
- Components with the support of which devices will be fixed in the structure. They must be strong and reliable.
- Base for mounting the router: thick plywood or thin-sheet alloy.
- Welder.
- Fastening components.
- A regular set of locksmith tools.
Design Features
A standard router consists of the following components:
- Base or frame.
- Work stand.
- Electric drive.
- Electric motor.
- Working mechanism.
If the base and work table can be made from scrap materials, then the working head, electric motor and cutters are a little more difficult to build.
When considering the option of using a grinder to make a machine, it is important to provide for the presence of a stepper motor in the design. The drawings take into account that the installation of the cutter requires the use of stepper motors. Creating a working head is not an easy task. These characteristics immediately affect what abilities the machine will have.
The following technical characteristics are important:
- Electric motor rotation frequency.
- The power of an electric motor.
- Desktop scale.
- Maximum weight of workpieces.
Important rules for cutting wood
Cutting and processing wood can be done using a well-known device - an angle grinder. A power saw made from a sanding device will help you handle small wood jobs.
Milling with a grinder will require compliance with the following rules:
- use the attachment only for wood products;
- work is carried out with gloves;
- the unit must be securely fastened;
- minimum operating speed;
- before use, you should make sure that the material does not contain nails, screws or other metal components;
- the mechanism must be kept in one plane, avoiding distortions;
- The nozzle is replaced when the power supply is turned off.
Checking the functionality of the tool
The excitement disappeared as soon as the button was pressed. Fraser behaved wonderfully. The only drawback was the imperfect smoothness of the sole, which did not glide over the surface of the chipboard very well. However, the unit did its job, and this was already pleasing.
First launch of a manual router: at first glance, almost without complaints
After going through the first strip and selecting a groove in the chipboard, it seemed to me that something was missing. The not-too-straight edges of the chosen path also indicated this. It seemed that the master who made it had his hands shaking.
The edges of the selected groove are quite uneven and something needs to be addressed about this
After some thought, I understood. After all, I had to make an effort, and without the original handle from the grinder, it’s not very convenient to do this. But in the form in which it is, it is impossible to put it in place - the guide of the frame is in the way. A wide nut and a piece of stud came to the rescue again. The nut was screwed on one side onto the handle, and on the other side I screwed in the stud. The resulting design fixed a corner instead of one of the bolts.
This is the handle our mini-milling machine has:
After these manipulations, the work became much easier, and the edges of the selected grooves were smoother. This means that at the moment there was no point in inventing anything new with our router. Perhaps later thoughts will come on how to make the base platform more movable, reducing the friction force, but for now I am satisfied with the final result.
Homemade router from a drill
To make a router from a drill with your own hands, you will need drawings, an angle grinder and a movable table. It can be made from plywood and usually consists of two walls facing each other. The distance from one to the other must be recorded. A metal cone with a pointed end is attached to the moving part of a homemade machine. Wood cutters can have different shapes, lengths and processing widths.
The machine is made almost the same way as from a grinder. The difference lies in the principle of attaching the sleeve for turning workpieces. When using the grinder as a milling machine, it is necessary to make an auxiliary adapter.
You can build a wood router from a grinder yourself. There are many videos on this topic on the Internet. There is always the opportunity to change and add something to the design of the cutter, the main thing is that the machine is easy to use.
Originally posted 2018-04-18 12:10:17.
Procedure
First, decide which milling tool you need - stationary or manual. Both options have their own characteristics during assembly and operation.
Stationary
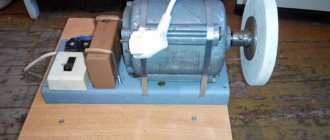
If you need a stationary milling machine, keep in mind when designing it that its capabilities will depend on the power and rotation speed (number of revolutions) of the grinder motor, as well as the area of the table for work (workbench). To process parts made of small, fragile wood, a small grinder with a motor power of 500 W is enough. If the milling cutter has to work with metal workpieces, the power of the angle grinder motor must be at least 1100 W.
The design of the milling cutter consists of the following elements:
- stable base;
- movable/fixed tabletop with lined strip;
- drive unit.
Lamella milling machines are distinguished not by a vertical, but by a horizontal arrangement of the working cutter. There are 2 options for designing a homemade milling machine:
- fixed table – movable tool;
- movable worktop - stationary tool.
In the first case, for horizontal processing of a part, the procedure is as follows:
- fix the angle grinder to the plate vertically (the cutter attachment is positioned horizontally);
- guides are installed around the table for moving the plate with the tool;
- the workpiece is fixed on the working surface.
Thus, processing of the fixed part is carried out with a movable tool. In the second case, you need to ensure the immobility of the grinder and the mobility of the working surface. To move the tabletop, a structure of guides is constructed underneath it with the ability to fix the position of the working surface. The angle grinder, in turn, is mounted on a vertical frame on the side of the workbench. When a machine with a vertically positioned working attachment is required, the procedure is as follows:
- assemble a frame from pieces of wood or corners, ensuring they are rigidly fastened to each other (using welding or fasteners);
- attach a sheet of chipboard or plywood to the frame;
- make a hole for the angle grinder shaft - the diameter of the recess must exceed the corresponding cross-section of the shaft;
- secure the tool inside the frame using clamps or punched tape on the bolts;
- on the working surface of the table, build guides (from slats, slats, etc.) to move the part;
- sand and paint all surfaces;
- The toggle switch for turning on the tool can be fixed for comfortable use.
All heads of self-tapping screws (bolts, screws) must be recessed and not protrude above the surface of the work area. Keep in mind that the guide rails must be removable; different workpieces require different locations. It is most convenient to fix them using self-tapping screws. The tool should be located conveniently and accessible for quick replacement of the working attachment (cutter, disk, etc.).
To fully use any homemade milling machine, you need to purchase cutters - additional attachments for the grinder in the form of cutting discs or key attachments. If the first ones replace the grinding disc of an angle grinder without any problems and are easily secured to the shaft with a clamping nut, then for the second type of attachments you will need an adapter.
Manual
The easiest option is to convert the grinder into a manual milling machine. Please note that in this case, it is necessary to securely secure the workpiece - using a vice or clamps, in order to eliminate the possibility of vibration or shifting of the workpiece. There are several ways to convert an angle grinder into a manual router. Here is one of them.
First, make the basic base of the tool according to the drawings. The ideal option would be a base made of a metal sheet of sufficient thickness and weight, because the weight of the base directly affects the stability of the device. Then make a fixing plate - a bracket to hold the angle grinder. The material is the same as at the base. You need to make a hole for the back of the tool, the one where the handle is located. Cut out the blanks into the shape you want.
Weld sections of square pipes to the ends of the product to move along vertically located guides. The guides will be longer sections of square pipes, but with a smaller diameter. They need to be welded to the base. To increase the reliability of fixing the tool, you can make and weld unique “ears” from a metal sheet. To fix the tool at the desired height, it is necessary to make a mount. You can weld 2 nuts, screw threaded rods into them, onto which wing nuts are attached by welding. With this device you can easily and quickly change and secure the required position of the tool.
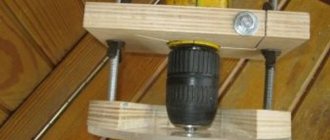
Now you need to install the drill chuck as an adapter for the working cutter attachment. Pre-cut a thread inside it that matches the angle grinder shaft. Then screw it onto the shaft and fix the necessary cutter in it. Assemble the machine. Fix it in the bracket.
Test its operation. If there is no excess vibration or uncontrolled shifts during operation, everything is in order. Otherwise, you need to check where the inaccuracy came from and correct it.
