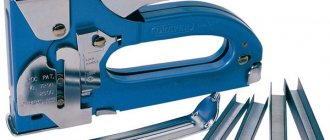
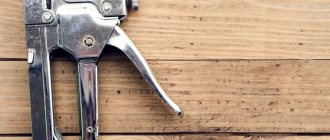
A furniture stapler is a fairly universal tool with which you can not only perform furniture upholstery procedures, but also a number of other construction operations.
Today, there are several types of similar equipment, differing in their operating principles:
- pneumatic,
- electric,
- manual.
Pneumatic staplers are used in industry, and electric and manual staplers are used in everyday life. Models belonging to the latter type are the most common in the furniture industry due to their mobility and ease of use. Let’s use this example to look at the principle of operation, operation and repair of furniture staplers.
However, before moving on to this procedure, I would like to say a few words about staples and their varieties.
Many people forget
Before work, adjust the adjusting screw according to the material of the surface you are going to work with.
If it is hard plywood, strong penetration of the material will be required, therefore, it is worth setting a high force. If it is a loose surface, the force must be reduced so as not to break through the fabric, or for example the PVC panel that you are shooting.
During operation, it is recommended to press the lever with one hand and press the adjusting screw with the thumb of the other hand. Then the recoil will be minimal and the load will be distributed evenly in the stapler. You will be able to nail the brackets much better.
Wrong option
The mistake many people make is that when the stapler runs out of staples, they pull back the two-sided tabs of the frame lock, open it and try to insert the next clip of staples through the front part on the impact mechanism side. As a result, with an awkward movement, the spring mechanism continually throws the clip back, and it flies many meters away, after which you have to search for it for a long time. Often the clip can fly into the eye of the unlucky “stapler operator”. Here is a video that shows what not to do, although the operator himself is not aware of it.
How to insert staples into the receiver
The design of all mechanical hammers is almost the same. There is a handle-lever, due to which pressing occurs, and at the bottom of the stapler there is a metal plate that opens the receiver. This is where we have to load the staples.
Before you buy brackets at a hardware store, you need to find out what size will fit your device. As a rule, the size and type of suitable staples are indicated on its body.
For example, the body of our stapler indicates a width of 12 mm and a depth of 6-14 mm. This means that you will only be able to charge staples in this range.
Smaller or larger brackets will not fit into the receiver. The size of the staples in millimeters is also indicated on their packaging.
To insert projectiles into the stapler, you need to open the metal plate on the back surface.
To do this, you need to take it with your thumb and forefinger on both sides, then pull it towards you and slightly down. Thus, we press the metal tab on the back surface of the plate, and pull out a metal spring, similar to the one found in a regular office stapler.
If there are any staples left in your stapler, they will fall out once the spring is pulled out. If they are not there, then it’s time to install new ones for further work.
The staples are inserted into the receiver (the hole is in the “P” position). Next, insert the spring back, closing the metal tab. That's all, the tool is loaded and ready to go!
Characteristics and types of furniture brackets
The main indicator that is taken into account when choosing a bracket is its depth. Depending on the nature of the work performed, this indicator can vary from 4 to 14 millimeters.
So, for example, in order to carry out the procedure of upholstering furniture with fabric, a staple with a depth of 8 millimeters will be sufficient, while for fixing thicker materials, a staple with a greater depth should be selected.
Also, depending on the overall dimensions, staples are divided into the following types:
- 53 - is the most common. Staples of this type have a width of 11.4 millimeters and a thickness of 0.7 mm. The depth of this fastening element varies from 4 to 14 millimeters;
- 140 – having the following characteristics: width – 10.6 millimeters, thickness – 1.2 mm, depth – similar to the previous type;
- 36 – this marking means that the stapler can shoot staples that have a semicircular shape and are mainly used for cable installation;
- 300 - These are special nails intended only for the stapler.
When choosing a bracket, you should also take into account the structure of the material from which it is made.
Regular steel staples work just fine on regular wood. However, if you are dealing with particleboard or plywood, you should purchase staples made from hardened steel, as regular ones may simply bend.
What to do if a bracket gets stuck
It is worth noting another very important point that will help you in your work. It happens that the staples become bent and get stuck in the exit hole. They cannot be hammered into the surface and cannot be pulled out by hand.
In this case, we will need to pull out the feed magazine completely.
This option exists for almost all professional staplers.
First you will have to repeat the opening of the metal plate and pull out the spring.
Next, in the middle of the lower part of the stapler you need to find an iron part, slightly protruding from both sides. Grasp it tightly with your thumb and forefinger on both sides and pull down forcefully.
This will remove the entire feed magazine that was in the tool.
You will see a jammed staple that can now be easily pulled out by hand.
Putting the stapler back together is not difficult: the entire pulled out block returns to its place with a press. You should hear a click when you do this. Afterwards, do not forget to replace the spring.
How to use a stapler
Refueling
In order to load the stapler with staples (i.e. load the staple gun), you must first move away the spring intended for pressing them. The staples themselves are placed in a special groove, in which, in fact, they need to be placed. After this, the spring is put in place. The tool is completely ready for use.
Video: how to thread a stapler with staples
Now you know how to insert staples into a stapler, we can proceed directly to work.
Shot
In order to fix the necessary element, you should firmly attach the device to the place where you plan to hammer the bracket. After this, without lifting the device from the surface, you must press the trigger button (lever). If these manipulations are successful, you will hear a characteristic sound and see a staple inserted into the material.
Tips and tricks
In order to protect yourself when working with a construction stapler, you should follow some rules:
- If you use a mechanical model of the device, it is necessary to adjust the screw regulator. This operation should be performed on a piece of rough material by rotating the screw from minimum to maximum. If the staple goes in all the way from the first shot, you can start working on the “finishing” part. Otherwise, re-adjustment is required;
- In order to drive the staples at the same distance, you should first mark the necessary places with a pencil or ballpoint pen;
- Hold the material with your free hand so that when firing it does not move from the pre-designated place;
- Keep track of the number of staples in the “store” so as not to be left without a single fastening element at the most inopportune moment;
- After finishing work, secure the handle with the safety catch to prevent spontaneous or accidental firing.
In addition to all the above tips, you may also need help repairing this construction tool, since the stapler, like any other equipment, tends to break.
Repair
The most common cause of stapler failure is a breakdown of the impact mechanism . However, in order to get to it, you must first disassemble the tool. This can be done by performing a number of simple operations:
- Remove the adjusting screw;
- Remove the spring;
- Remove the protection cover;
- Remove the pins;
- Remove the lock washers.
If the list of actions does not make it clear to you how to disassemble the stapler, then you can see this in the video below.
After performing all the above manipulations, you will be able to see the drummer, which, for the most part, fails due to the exhaustion of its resource.
In order to repair this element, you should remove it, place it in a vice and, using an ordinary file, give the striker its original shape.
That's it, the repair is completed, and the instrument is again in full combat readiness.
Tips on why the stapler does not work and how to fix it:
- If your tool does not finish (does not finish) the staples, then try tightening the spring, it may have weakened;
- If a construction stapler bends the staples, try adjusting the spring tension bolt (relax or tighten, experiment). Another probable cause of malfunction is a mismatch between the type of staples and the structure of the material - for chipboard and plywood it is recommended to buy staples made of hardened steel;
- If the staples do not come out of the stapler, but bend and get stuck inside, perhaps the striker (tongue) that pushes them has become rounded and needs to be sharpened;
- If the mechanism itself works, but the staple does not fire, it is possible that the staple does not grip, or the firing pin has worn out. Try filing the firing pin and turning the damper with the other side.
Watch the video to see how to repair a staple gun with your own hands.
Video: do-it-yourself stapler repair
How to disassemble a furniture stapler, what to do if it jams. What could be the reason, what to do if the construction stapler does not fire staples:
The real-time video shows step by step how to disassemble the stapler, what could be the cause of the breakdown and how to fix it yourself, as well as how to assemble the stapler.
Not just parentheses
Some staplers can work not only with staples, but also with studs of various shapes. The designations of what the stapler works with are indicated on its body or in the instructions.
I tuck the nails into the stapler in the same way as with staples, but you need to be careful after pulling out the spring. A row of nails must be loaded along one of the outer edges of the letter “P”, and not inside this very letter!
If you want it to produce two nails side by side when working with a stapler, load the second row along the second outer edge. Next, the spring is inserted and the stapler is closed.
Furniture stapler diagram
A manual construction stapler has a magazine into which a clip of staples or special nails is loaded. The bracket is hit by a firing pin, which is attached to the firing pin. The size of the striker in the tool depends on the dimensions of the consumables (staples) used. The hammer, in turn, touches the spring, the degree of compression of which is adjusted by a special screw. The shock is absorbed using a shock absorber located inside the stapler.
See the diagram for the device of the stapler:
Stapler device with a twisted mainspring
A coiled mainspring is installed on inexpensive models.
Manual stapler with a leaf (spring) mainspring
A stapler with a leaf spring is more powerful and expensive.
Household and professional
Like all other tools, construction tackers are conventionally divided into household and professional. The difference in cost is significant—many times. And this is justified, because it’s about the functionality, the number of operating modes, settings and the working resource:
- Household models have a small working life, since they are mainly made of plastic.
- Professional tools are made of steel, often stainless steel. They contain plastic elements, but, as a rule, these are metal handle linings to soften recoil.
Important! There is also an intermediate class - semi-professional. They fall between these two categories in terms of quality and price. Often it is in this group that it is better to look for a tool to use at home. It works well and is relatively inexpensive.
The sequence of adjusting the stapler
Setting up a staple gun is needed in the following cases:
- after purchasing the tool before starting work;
- if the stapler stops completely driving in the fasteners;
- when starting to work with a material of a different density than the previous one.
If the stapler stops driving in the fasteners completely, this is due to gradual wear of the spring of the impact mechanism or its loosening. For some time, the adjustment will help, but after that you will need to purchase a new stapler.
Design and principle of operation of a construction stapler
The furniture stapler is widely used by builders and furniture makers, as well as representatives of other fields of activity. Based on the type of energy used to fire a shot during operation, the following types of takers are distinguished:
- mechanical;
- electrical;
- pneumatic.
The first two types are intended for domestic use, while the last type of tool is considered professional and is used mainly when performing large-scale work. The operating principle of mechanical and electric staple guns is based on pushing out fasteners by the force of a cocked (compressed) spring. After pressing the trigger, it unclenches, which causes the striker to move. He strikes the staple (nail or pin), driving it into the surface of the material.
Mechanical stapler design
Manual (mechanical) staplers differ from their analogues in their simpler design. They consist of the following components and parts:
- cocking handle;
- a safety bracket that protects against accidental shots when transporting the tool;
- impact springs;
- shock absorber;
- drummer;
- striker;
- impact force regulator, providing the ability to work with material of varying degrees of hardness (different densities);
- housings;
- charging spring;
- store for fasteners;
- rammer (with spring and lock);
- tip that allows you to accurately drive fasteners.
The diagram of the staple gun device is shown in the photograph below.
The impact mechanism is the main unit of the stapler, cocked by the force of the worker’s muscles. It can be equipped with two types of springs:
- twisted;
- spring (plate).
Manufacturers indicate in the operating instructions for products the type of spring installed.
The twisted spring mechanism shown in the photo above is equipped with cheap models. They can be easily distinguished by the adjusting screw located on the tool body on the opposite side of the staple outlet hole. But it is also possible that the wing will be missing, then you will need to refer to the instructions to determine the type of spring installed.
Leaf springs are more powerful, but more expensive than their coiled counterparts. At the same time, the impact of a tool equipped with them during operation is less. They also have a long service life and are easier to cock. The leaf spring mechanism is installed on models intended for professional use.
To make it easier to work with the tool, the handle is covered with rubber pads, and the magazine is made with a transparent insert (which makes it easy to control the presence of staples or nails).
Design features of electric and pneumatic staplers
The device of a network-type electric stapler is shown in the photo below.
The numbers in the photograph correspond to the following structural elements:
- trigger;
- fuse;
- handle with special coating;
- power cord;
- on/off switch;
- shock force regulator;
- pusher mechanism;
- shop.
Inside the tool there are electric drive and impact mechanisms. In this case, the electric motor is designed to charge the spring.
Battery models do not have a power cord: batteries are installed instead.
The design of a pneumatic furniture stapler is more complex than its mechanical counterparts. Pneumatic tools consist of the following structural elements:
- housings;
- a cylinder with a piston located inside it;
- starting systems (trigger mechanism);
- magazine for fasteners with a pusher;
- impact mechanism;
- an inlet fitting designed to connect a high-pressure hose to the tool;
- regulator of penetration depth of fasteners (impact force);
- air distribution unit.
Pneumatic type scrapers are powered by the energy of compressed air supplied by a compressor or from a cylinder. After pressing the trigger, the gas passes through the air distribution unit. Next, the compressed air enters the cylinder, causing the piston to move. The latter transfers energy to the striker striking the fastener. After impact, the staple or nail is driven into the surface of the material.
Let the stapler work properly for many years!
As practice shows, mechanical staplers break much less often than electric staplers. After all, the simpler the device, the lower the likelihood of malfunctions. But in order for it to work properly, it is very important to properly care for it. Since there are many metal parts in a manual stapler, it is necessary to protect them from corrosion. Each time after use, clean the housing and the staple release hole from dirt, wipe dry with a rag, and if you put the tool away for storage, lubricate it with machine oil. In general, it is recommended to lubricate the exit hole after every 1000 shots to ensure easy release of the fastener. That's probably all you need to know about caring for a mechanical stapler. Be sure that if you follow these rules, the tool will last for many years and will become a reliable assistant in your work at home, in the country, or in the workshop.
If you have not yet purchased a mechanical stapler, you have the opportunity to do so right now! On our website you can order both the tool itself and the branded equipment necessary for the job. For details about delivery and payment methods for goods, you can contact the manager by phone: 8-800-333-83-28.
Source: www.vseinstrumenti.ru
How to adjust a mechanical, manual stapler (staple shooter) so that it finishes off the staples?
I have come across two options for adjusting staplers, both had to be adjusted.
I’ll say right away that all these instructions didn’t really help, I had to use about a dozen paper clips to achieve the best result, and then adjust it every 15-20 strokes as I worked. Therefore, the adjustment process is a constant action during use.
Another point - one builder advised relaxing the spring after work so that there is no stress on it during storage, this is the reason that it needs to be adjusted before each work.
How to charge other types?
Electric staplers operate by ejecting the staple after pressing the drive button. Such a device requires a network connection to a power source to operate. Among the assortment, you can choose the optimal model with a rechargeable battery or connection to a network adapter.
The dimensions and cost of electric staplers are significantly increased compared to conventional staplers. In addition, such devices have a bulky handle and an inconvenient cord location.
The pneumatic type is activated by supplying compressed air, which promotes the ejection of consumables from the store. The devices support long-term battery life, are spacious and have high performance. At the same time, pneumatic staplers have the disadvantage of noise emitted during operation. Such a device of impressive size is inconvenient to transport. Most suitable for construction professionals.
Learning how to use a staple gun is quite simple, but you need to read the instruction manual and make sure the tool is set up correctly in order to change fasteners. If you need to remove staples hammered into the surface, you will have to use an anti-stapler. To remove furniture brackets, you should carefully squeeze out their ends using a screwdriver or pliers when you do not have a special tool for removing them.
The construction stapler is refilled as follows.
- Before disassembling the spring, you need to lock the device using a button or lever. The type of blocker depends on the characteristic features of the model.
- The groove is pulled out. You need to make a physical effort or press a button.
- Pull out the inner rod by displacing the metal spring. Place the paperclips on the rod. The tip of the device should be facing towards the handle.
- The rod is inserted back, then the magazine is closed.
- The device is removed from the safety lock and test shots are fired to check its functionality.
After testing the device, you need to make sure that it functions without failures. To do this, adjust the spring tension and follow safety precautions. Please remember that the device is potentially dangerous. Working with it requires the following precautions:
- after use, you need to install the fuse back;
- It is prohibited to direct the device towards oneself or any living creature;
- It is not recommended to handle the device if you are feeling unwell;
- the workplace should be clean and the lighting should be bright enough;
- The stapler should not be used in damp rooms.
In order to correctly insert the brackets into the furniture unit and replace the consumables, you must open the lid or pull out the corresponding container before charging the device. After this, pull back the feed mechanism, then install the clip into the body. By filling the device with brackets, the mechanism is loosened and the clip is secured. Close the fixture or push in the tray.
Penetration of the material is realized by pressing the working area towards the area that needs to be fixed. Next, the lever is activated, causing the staple to pierce the surface.
How to choose a device: advice from professionals
To choose the optimal stapler, you need to solve the following problems for yourself:
- frequency of use of the tool: every day or from time to time;
- places of use: indoors, outdoors. Is there electricity there?
- Do you need precision driving of equipment;
- materials you plan to work with.
Depending on the purpose and working conditions, choose the type of stapler:
- for infrequent work with non-solid materials, a mechanical stapler is suitable;
- If you don't need precision in installing staples and have the ability to swing, then consider choosing an impact stapler. He's light. Attached to the mounting belt;
- for a large amount of work in places where mobility is needed, take a closer look at a cordless tool;
- if you work indoors with an outlet and don’t want to overpay for the battery, buy a stapler with a mains connection;
- If you need a stationary powerful device, don’t hesitate to take a pneumatic tool.
What characteristics to look for when choosing a stapler:
- presence of impact force regulator. A mechanical tool has two types of regulation: minimum and maximum or smooth adjustment. Electric has up to 6 modes. The setting is made using a software switch. The thinner the material, the less the impact force, otherwise dents will form;
- Double punch. Only electric staplers have it. For hard materials, large equipment is used that will not clog immediately. The double strike mechanism itself determines this and works a second time. If there is no such mechanism, then you will not immediately see that the nail heads are not completely hammered in;
- removing fasteners using a stapler. If this function is available, then to remove poorly hammered equipment you will not have to do it manually or with a nail puller;
- body material. Structural steel staplers weigh more than plastic ones;
- rubber inserts on the handle. Their presence reduces the recoil of the tool, and the hand gets less tired;
- Battery type: nickel-cadmium suitable for low temperatures. But they have a memory effect, so they discharge quickly. They are used in inexpensive models;
- lithium-ion. They hold a charge longer, but are less resistant to mechanical stress;
- nickel metal hydride. Lightweight and have a long charge life;
