What are the types of heating element malfunctions?
Malfunction of the heating element can be caused by several reasons:
- a burnt-out filament located inside the tube;
- life-threatening short circuit of a burnt wire connected to the device body;
- the formation of a thick layer of scale, which interferes with the heat transfer process and leads to overheating of the heating element.
How to check a water heater? First of all, you need to inspect it for any damage or cracks. A rupture of the heating element shell indicates poor quality of the part. If minor damage or roughness is found, the device cannot be repaired. It just needs to be replaced. If there is no visible damage, a ring is made using a multimeter.
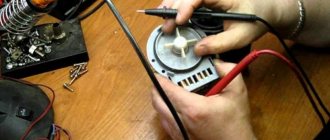
How to check the heating element of a kettle with a multimeter
This check is carried out only to identify possible causes of malfunction of the kettle, since if the heating element is faulty, it cannot be repaired. The kettle is disconnected from the electrical network, and its flask is freed from residual water and wiped dry. The heating element of the electric kettle is located at the bottom of the device, it is very easy to reach. Before ringing the heating element, you will need to unscrew the standard fasteners from the bottom cover.
Next, using standard technology, the heating elements of the electric kettle are checked with a multimeter with a resistance measuring range set at 200 Ohms. Check the calculated resistance of the elements by its power, which is indicated on the housing plate. If the reading differs by more than 10% from the standard, then internal problems begin that can lead to failure of the spiral. If the reading on the scale is 1 Ohm or infinity, then the heating element of the kettle is already faulty and must be replaced.
Where is the water heating element located?
If we consider different brands of machines (Indesit, Bosch, LG), then the heating element in each type of model can be located in different places, and it is most convenient to approach it either through the back panel or through the front.
But if you are not aware of this, you can still find it yourself:
- The back panel of the machine is inspected. If the lid is large, then the heating device is located behind it;
- The machine must be placed on its side and the bottom inspected. This may be how you detect the heater;
- The easiest way is to remove the back panel. If there is no heating element there, then it will be easy to install it in its place.
There is another option - use a flashlight to illuminate the inside of the drum of the machine. If you have good vision, you can determine the exact location of the heater.
Having found the heating element, you need to make sure that it is working. Note that for such a procedure there is no need to dismantle the element.
General concept of heating element
Included in the design of devices designed to heat air or water. Heating elements differ in technical characteristics and structural features. The most powerful heating elements are supplied to boilers designed for heating water in everyday life.
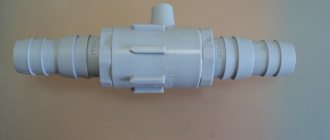
Tubular electric heater design
The heating element is made in the form of a copper, iron or steel tube, in the cavity of which there is a nichrome spiral. The heating spring is surrounded by sand, which dissipates heat and prevents overheating. The ends of the spiral are connected to contact rods. The latter are attached to the tube with ceramic insulators. Plates are used to supply current. Tubular heating elements differ in diameters and shapes.
Where is
To gain access to the heating tube, you need to remove the protective housing. To do this, unscrew the bolts and dismantle the bottom cover. Under it there are places for installing the temperature sensor and heating element.
In older boiler models, the heater is secured with a nut. New devices use a clamping bar for fixation.
What do you need to know before taking measurements?
If you have a multimeter, you can test the heater of a broken household appliance yourself.
But first you will need to find the technical data sheet of the faulty product and find out the nominal power value of its heater.
This is important, since to test the electric heater we will need to know the nominal value of its resistance, which is calculated from the formula of Ohm’s basic law:
R=U²/P,
where R is the desired electrical resistance (Ohm);
P – heating element power (W);
U – operating network voltage (V).
The operating voltage of the home electrical network is mainly 220 V. The power of the heater can be found from the passport data of the household device (W). The resistance value is obtained in Ohms. Now you can start testing the electric heater.
Calculation of indicators
Before checking the TEN, you need to know very clearly how to ring it and what data is considered correct.
To calculate resistance, you need to rely on:
- U is the voltage supplied to the heating element. In our household electrical networks, it is usually 220V.
- P – water heater power. You can find out this parameter by referring to the manual. If the manual doesn't say so, Google it and find your SM model.
Next, using a simple formula, as in a physics lesson in 7th grade, we calculate the resistance in Ohms:
R= U²/P.
If the resulting figure is displayed on the tester screen during testing, then the heating element is working.
So that you do not make mistakes in calculations using this formula, we will give a practical example.
Let's say the heater power is 1800 W. We substitute the values into the formula and get:
R=220²/1800=26.8 Ohm. As a result, the working heating element should show 26.8 Ohms. Remember this mark and you can start checking.
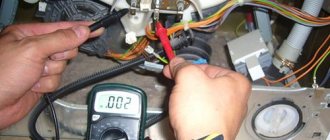
Checking the current leakage of the heating element
First of all, the search for the cause of the malfunction must begin with checking for current leakage. Usually, if this happens, immediately when connected to the network, the RCD or differential switch is triggered and the line is de-energized.
The leak search is performed as follows:
- Unplug the electrical appliance being tested from the outlet;
- We disassemble it to gain access to the electric heater terminals;
- Turn on the dial mode on the multimeter and insert the probes into the “COM” and “VMa” connectors;
- We first ring one contact on the device body, then the other;
- Possible results:
– There is a signal , the indicator on the display is close to “0” – the heating element is faulty;
– No signal , “1” on the display – no leakage;
Unfortunately, by calling in this way, you will not always be able to detect a breakdown. Quite often, this is detected only by a specialized tester - a megohmmeter, which tests circuits with high voltage. Minor insulation damage is detected only in this way. The multimeter will only detect obvious defects, for example, when the phase conductor touches the neutral conductor.
Often, a leak can be detected by measuring the heating element when it is turned on. But I don’t recommend doing this unless you are 100% confident in your electrical skills.
If you find a leak , a connection between one of the contacts and the housing, you need to look for the location of the breakdown. I advise you to disconnect the power wires from the electric heater and take measurements without them. Then you will understand whether the heating element or other elements of the power circuit are to blame.
General principles for checking the serviceability of the heating element using a multimeter
Testing the heating element with a multimeter, regardless of the type of equipment in which it is installed, can be carried out after the resistance and power on it have been calculated. These quantities are interrelated. The first indicator is determined from the equipment’s passport data. It is necessary to know it in order to correctly set the resistance testing range. After accurately determining the resistance of the heating element, its actual power is determined and how much it corresponds to the passport data.
Checking the resistance of the heating element
Set the heater power. It can be viewed in the equipment passport. The voltage for the home network is usually 220 V. After this, the current can be determined using a simple formula:
I=P:U, A.
Using Ohm's Law you can find the resistance:
R=U/I, Ohm.
An example of determining resistance for heating elements popular in terms of power. To do this, first measure the resistance with a multimeter:
1000 W - 48.4 Ohm; 1500 W - 32.27 Ohm; 2000 W - 24.2 Ohm; 2500 W - 19.36 Ohms.
How to measure the power of a heating element with a multimeter
Next, by measuring the resistance on the heating elements with a multimeter, you can determine the actual power, compare it with the passport indicators and determine the ability of such heaters to provide the desired heating temperature and the possible danger of overheating of the coils.
Р=U2/R, W
Examples of calculating the actual power of a heating element based on the measured resistance with a multimeter: 49 Ohm, actual power 987 W, which is lower than the standard 1000 W, the equipment will heat the environment longer;
25 Ohm, actual power 1760 W versus 1500 W, element overheating by 17.3%; 20 Ohm, actual power 2200 W versus 2000 W, element overheating by 11.0%; 15 Ohm, actual power 2933 W versus 2500 W, element overheating by 17.3%
Important! If the heating element overheats by more than 10% power, the coil may melt.
Standard test of the heating element with a multimeter
For all models of heating equipment, there is a general method for checking heating elements with a multimeter. This includes mandatory safety measures when working with electrical equipment. Before starting work, all household devices must be disconnected from the power supply with a visual break. For example, the power plug must be removed from the socket.
The standard test is most applicable when testing the serviceability of a water heater heating element. When carrying out this, you will need to disconnect the supply conductors from the connectors of the heating element.
After this, the multimeter is turned on in ohmmeter mode. For the power of heating units up to 2.5 kW, a sufficient limit of 200 Ohms. Next, the probes of the meter touch the terminals of the heating element. Based on the data obtained, the condition of the heating elements is analyzed:
- the resistance corresponds to the calculated value - the tubular element is operational;
- resistance equal to 0 Ohm - this is an internal short circuit of the element, replacement is necessary;
- resistance 1 ohm, spiral thread broken, replacement required.
Breakdown of the heating element to the body
This phenomenon is an emergency and creates a danger of electric shock to a person when it touches the body, and even when using hot water from a boiler or boiler. This phenomenon is especially dangerous if the damaged electrical equipment does not have a reliable grounding line.
In order to check the serviceability, the multimeter is switched to the “buzzer” mode. The first probe of the meter is connected to the terminal of the heating element, the second to the body. It is allowed to connect it to the grounding terminal of the element.
When a breakdown is detected, a buzzer will sound. The owner of the equipment will have to replace the heating element and monitor the functionality of the protective grounding.
Important! In the event of a breakdown, you will need to additionally measure the insulation condition of the heating element. What is a megohmmeter used for, with the voltage set to 500 V? The measuring probes are connected to the body of the heater and heating element. The standard resistance must be 0.5 Ohm.
Technology for checking heating elements with a multimeter for various heating equipment
While there are general approaches for testing heating elements, many heating devices have their own differences caused by design and operating conditions.
How to ring a heating element for an open or short circuit
To check the heating element, you must first calculate its resistance using the power value P. Its value can be found in the technical documentation. The voltage U in the network is taken equal to 220 V. Resistance R is calculated using the well-known formula: R = U2/P.
The check is carried out according to the following algorithm:
- set the multimeter to a resistance range of up to 200 Ohms;
- touch the wires of the measuring device to the terminals of the heating element;
- if it is in good condition, it will show a resistance value close to the calculated value;
- the value “0” indicates the presence of a short circuit inside the heating element;
- value “1” – indicates an existing break.
At the next stage, the presence of a breakdown of the heating element to the housing is checked:
- the tester switches to sound mode;
- one of its wires touches the output of the heating element, and the second - its body;
- the appearance of a sound signal indicates a breakdown of the housing, that is, it is necessary to replace the heating element in the water heater.
Verification technology
To test the wires, the multimeter is switched to buzzer mode
If there is a problem with the boiler, you should check the heating element on the water heater with a multimeter - this is the most reliable and accurate way to assess the condition of the part. Before you begin testing, you need to separate the current-carrying conductors from the element.
Sequence of testing work:
- The device switch is placed on the range of values where the heating element indicator should fall. It can be calculated by knowing the power consumption of the device and its operating voltage. The larger the first parameter, the lower the resistance value.
- The probes of the measuring device are placed to the contacts of the heating element being called.
- If the part has not become unusable, the display will soon show a digital indicator close to that obtained in the calculations. The number “0” on the screen indicates a short circuit situation. If a unit appears on the left side of the display, most likely the element’s spiral has broken. Using an analog meter in this situation shows infinity.
- Then the heating element is tested for electrical breakdown. The switch is set to the “buzzer” type position. They work with one probe. They are sequentially touched to the heater terminals. If the multimeter does not make any sounds, the test results are satisfactory. If there was a high-pitched squeak, the heater was shorted to the housing.
The thermostat indicator is measured in a manner similar to that described in paragraphs 1-3. When encountering a unit indicating a break, press the safety unit button. When the thermostat can work again, measurements continue.
How is the resistance indicator of the heating element determined?
To check an element, it is not enough to know how and with what instruments this is done. It is necessary to have information about the value of its resistance. To begin with, it is recommended to calculate this value. To do this you will need the following information:
- Voltage supplied to the water heating element. As a rule, this indicator (U) is equal to 220 V. This voltage is present in the household electrical network of our apartments.
- The heater power indicator is R. It can be easily determined, you just need to look at the operating instructions. The second option - the power of the heating element can be checked on the Internet based on the model of the machine.
Having all the necessary information, we determine the resistance R using the special formula R=U²/P. The resulting resistance indicator is formed in the heater during operation. If the heating element is working properly, then the figure obtained by the formula will appear on the multimeter screen.
Tips and tricks for checking the heating element yourself
When using the device for a long time, it is necessary to evaluate the performance of the heater even in the absence of signs of failure. The following preventive measures are also carried out:
- repeated rinsing of the tank with water;
- replacement of anodes;
- cleaning the heating element with vinegar, a special product or citric acid.
If the water is too hard, scale forms on the boiler elements in contact with it. The service life of the part is reduced to 3 years. In the absence of inspections and maintenance, the following problems arise:
- poor operation of the RCD;
- turning off the water heater control unit;
- malfunction of the safety valve.
In most such cases, the heating element must be replaced.
Calculation example
So, for example, when measuring you got a result of 20 ohms. Substituting into the formula, we calculate:
P, W Heating element power = 2202 V household voltage squared / 20 Ohm resistance of the heating element = 2,420 W
Accordingly, the power of the heating element that we tested is 2420 W, which fully corresponds to the declared indicator in the passport. And considering that it passed all other tests successfully, it means that the problem is not in it and you need to look further, for example, ring the electrical circuits or measure the voltage in the socket.
If the multimeter shows a result of 100 Ohms, then the power will be only about 500W. This is naturally not enough for normal operation and full heating of water. An increase in resistance can be caused by various processes: a decrease in the cross-section of the conductor, oxidation or contamination of contacts, etc. In any case, such a measurement will give you the necessary information for further search for causes.
As you can see, checking the operation of the heating element is quite simple; for this you only need a multimeter and a little free time. Many problems will be revealed by a simple test, and if this does not help, then by measuring the resistance parameters of the heating device.
And if you encounter any problem not described here, want to add something or find an error, write in the comments, it will be useful to many.
Diagnostic options
There are several ways to check a part. The simplest is a visual inspection. The part is removed and checked for scale or mechanical damage. Plaque is dissolved with vinegar or citric acid. The tube is kept in the composition for 5-6 hours.
Megaohmmeter
The method is used to detect minor insulation damage. The tester flag is set to 50 V. One probe is connected to the spiral contact, the second to the boiler body.
If a figure greater than 0.5 MOhm appears on the device screen, the heating element does not need to be replaced.
Checking with a tester
The device is equipped with a 360° rotating regulator. It is set at 200 ohms. After this, the probes of the device are connected to the contacts of the heating element. If 0, 1 or an infinity sign appears on the screen, the coil is faulty. After this, they check for breakdown of the housing. The tester is switched to buzzer viewing mode. One probe is connected to the tubular heater, the second to the housing or ground terminal. If the multimeter starts beeping, do not touch the boiler until it is unplugged.
Indicator light
Electricians use this device in the absence of a tester. The neutral from the network is connected to one of the contacts, and the phase passed through the lamp is connected to the second. If the indicator lights up, the heating tube is working properly and does not need to be replaced.
Avometer
Checking with this device helps ensure that the heating element is working properly. To do this, perform the following steps:
- Disconnect the boiler from the power supply. Remove the protective cover.
- Disconnect the wires going to the heating element. Connect the heater terminals to the avometer, take readings, compare them with the parameters in the technical data sheet.
Using LED, battery or power source
If you don’t have a tester, you can use a dead Krona battery and an indicator found in any household appliance. The LED is connected in series to the battery and heating element. The heater has resistance, so it is not necessary to include a resistor in the circuit. If the LED lights up, the coil is working properly. To check the insulation resistance, disconnect the assembled circuit from the contacts of the heating element and apply it to the element tube. The LED should not light up. The battery in the circuit can be replaced with a charger from a laptop or cell phone.
Phase indicator
If you have such a tool, you can check the performance of the heating element. The resistance of the insulating filler will be measured with greater accuracy. To check, perform the following steps:
- Find a phase in the socket. Most often it is located on the right.
- Connect one of the heater contacts to the phase output using a piece of cable. The indicator tip touches the opposite rod of the heating element. The lamp should light up. If it does not glow, the spiral is broken.
- They touch the bulb of the element with the sting. The lamp should not be lit. The glow of the indicator indicates contact of the spiral with the tube.
Using electrician supervision
Anyone can check the heating element this way. To do this, any lamp is connected in series with a heater and a household electrical network. The check is done like this:
- Connect the cable with the plug to one of the contacts of the lamp socket. Another piece of wire is connected to the second terminal.
- Screw a lamp operating from a 220 V network into the socket. The free cable of the socket is connected to the remaining contact of the heating element. The plug is inserted into the socket. If the spiral is working properly, the lamp lights up. When this does not happen, the heater is faulty.
- Remove the plug and connect the right terminal of the cartridge to the bulb of the heating element. Insert the plug into the socket. If the lamp does not light, there is resistance between the insulation and the bulb, the part is working properly.
How and with what to ring the heating element?
You need to find out which side the heater is located on. Inspect the body of the washer. The large rear hatch probably hides a TEN behind it. In the publication “How to replace a heating element in a SM” we gave an example of placing an element in different models.
Once you get to the part, disconnect the power wires from the contacts. It is not necessary to dismantle the product for diagnostics.
How to check the heating element in a washing machine with a tester:
- Calculate the resistance of the part. It may differ for each manufacturer. To do this, take the operating voltage (220 V) and power (indicated in the manual). For example, the power is 1800 W. Make the calculation using the formula: R=220²/1800=26.8. It turns out that the normal resistance of the heating element should be 26.8 Ohms.
Checking the operation of the heating element of a washing machine with a multimeter is carried out as follows:
- Set the toggle switch to resistance detection.
- If the screen shows normal values (about 26.8), then the part is working.
- Number 1 on the screen indicates a broken spiral. The product cannot be repaired, only replacement is needed.
- A value of 0 means a short circuit.
Now you need to check for a breakdown in the housing.
Important! Failure of the dielectric can lead to sparking and fire of the machine.
Switch the tester's toggle switch to buzzer mode. Place one probe on the contact and the other on the ground. The buzzer beeping means a breakdown. The heater must be replaced.
When replacing a part, remember the heating element connection diagram. During the disassembly process, you can photograph the stages of work. Here is a detailed inspection video:
If you do not have a multimeter at hand, then it is better to contact a specialist. Without the device, diagnostics will not be possible.
What you need to know before testing
A tubular electric heating element contains one or more spirals that have high resistance, due to which they heat up when electric current passes through them. To avoid short circuits and other electrical problems, the coils are placed in insulated metal tubes.
Before checking the heating element, it is necessary to determine its normal resistance. This is necessary so that when testing you have a standard with which to compare the readings of the device. This way you can easily determine how much the value measured by the multimeter differs from the calculated one, and how much these values diverge.
To calculate the normal resistance of the heating element, you need to use a formula of the form
R=U2/P
where P is the power indicated on the equipment casing. So, if an electrical device operates at a voltage of 220 Volts, and its power is 1000 Watts, the resistance calculated by the formula will be equal to 48.4 Ohms. As you can see, calculating the value is very simple!
Dialing methods
There are methods that allow you to evaluate the serviceability of the device if you do not have a multimeter at hand when problems are detected. They give a less accurate result than working with a digital meter, but it is quite possible to assess the need to replace a part with their help.
The simplest method to check the heating element on a water heater does not require the use of any tools. However, it will be necessary to remove the element from the heating device. The heating element must be carefully examined. If the assessment of the condition is hindered by accumulated scale, it is dissolved by soaking the part in water with vinegar or citric acid. It needs to be kept in acidified liquid for about 6 hours.
Scale deposits cause a number of common problems with equipment - because of them, the heating time of water increases, and the part itself, if not promptly cleaned, soon burns out.
If scratches, any deformations or dark spots are found on the heating element, it should definitely be replaced.
Using an indicator screwdriver on the battery is also allowed for checking. Before testing, be sure to disconnect the equipment from the current and disconnect all conductors from the heating element. The first terminal clamp is touched with a finger, and the tip of the tool is brought to the second supply clamp, touching the end contact. If the indicator lights up, the heater has not failed.
Heating elements are tested with special test lamps. This option is suitable for professional electricians or people who have sufficient experience in handling circuits. You can assemble the circuit yourself using a 220 V incandescent light bulb. It is screwed into a socket to which single-core copper wires are connected with probes screwed to them. The lamp is connected to the network between the device being tested and the power source. If it lights up, the unit is functioning normally. To check the heating device, a mains neutral is supplied to one of the contacts, and a phase wire with a connected lamp is supplied to the other.
Checking the heating element with a multimeter
To begin the testing process, you must first secure your work by disconnecting the household unit from the network. You just need to unplug the electrical power cord from the outlet, and for an electric kitchen stove with a separate line, perhaps turn off the circuit breakers in the apartment electrical panel. In any case, you need to turn off the power to the equipment.
It would be more correct to proceed according to the following algorithm.
- Provide access to the electrical heater terminals. It may be that in some cases the heating element will have to be completely removed from the unit for ease of testing.
- Disconnect the wires from the heater.
- If there is scale on the device, then it is necessary to clean the heating element from it.
- After this, carefully inspect the heater for cracks, swelling or other signs of damage.
- Prepare the tester (multimeter) by switching it to the electrical resistance measurement mode. The measurement range must be selected depending on the result obtained, which we calculated using the formula for the nominal resistance for the heater of our equipment.
Tips on how to extend the life of the heating element
In conclusion, a little about how to extend the life of the heating element. There is nothing pleasant about when a water heating device in a household appliance fails. However, there are some recommendations that will allow you to postpone this unpleasant event:
- It is necessary to promptly replace the magnesium anode, which protects the heating element;
- The most important requirement is to use the highest quality water possible. If necessary, filtering devices should be installed on the water supply;
- It won’t hurt to inspect the heating element at least once a year for integrity and scale formation on it;
- If you need to replace parts, it is best to use original components.
There is no need to set the maximum water heating in the device unless absolutely necessary. Usually the manufacturer indicates the optimal temperature regime for its operation. This will save electricity and extend the life of the heating element.
There is nothing particularly difficult about how to measure the resistance of a heating element. But only if there is complete confidence in the correctness of the operations being carried out. Otherwise, the best solution would be to seek help from a specialist.
Non-standard ways to check heating elements
If it is not possible to check the heating element using one of the above methods, then you can connect the wires from the cord with a plug directly to the terminals of the heating element and insert the plug into the socket for a few seconds. If the heating element starts to heat up, then the coil is intact. Be careful not to get burned with your hand when checking the heating temperature of the heating element.
To check the insulation resistance, one of the ends of the cord, with the plug removed from the socket, must be disconnected from the heating element output and connected through a fuse designed for a protection current of no more than 5 A to the heating element tube. Then insert the plug into a household electrical outlet. There is no time limit here. If the fuse does not blow immediately, then there is no short circuit between the coil and the housing and the heating element is working.
It is simply unrealistic to list all possible ways to check the heating element. The heating element can even be checked using a landline telephone by connecting it to a break in one of the wires with which the telephone is connected to the network. If after connection there is a signal in the removed tube, then the heating element is working. You can even not pick up the phone, but call him from your mobile phone. The presence of a bell sound will confirm the integrity of the heating element coil.
What is heating element
A heating element is a tubular electric heater. It is based on a spiral with a high electrical resistance value. When current passes, it heats itself and heats the water. The entire space between the body and the wire spiral is filled with a special insulating compound. It does not conduct electricity, but transfers heat well.
Electric heating elements are available in a large number of appliances in the house. This is not only a boiler and a kettle, but also a washing machine, oven, electric stove and even a hairdryer. Each of these devices contains a tubular electric heater, in one form or another. Due to long service life or other factors, the element may fail.
Before deciding whether to replace it, you need to check the heating element. To do this, you can use a multimeter (tester). This is a fairly useful device with which you can ring the heater of a washing machine, kettle and any other water heater. The cost of the device varies from 250 to 2000 rubles. The approximate range and prices can be found at this link.
If you are not yet familiar with our article on how to descale a boiler, then I recommend everyone to read it at this link.
Other verification options
You can check the heating element for a break without a multimeter or a tester, using a control light:
- one of its contacts connects to the network;
- the second - to the electrician's light bulb;
- if there is no break, the light will light up.
The serviceability of the heating part can be easily checked with an indicator screwdriver, without even removing it from the device:
- disconnect extraneous wires;
- touch one of the element contacts with your fingers, and the other with the tip of a screwdriver;
- at the same time, the finger of the other hand must be pressed against the metal patch at the end of the screwdriver;
- If the indicator light does not light up, there is a break in the heating filament.
If problems arise with the insulation of the heating element, current may leak into its body. If a current protection unit is installed in the system, it will start to operate when it reaches half the rated value. But the multimeter does not detect it, since there is no short circuit to the housing. To check the insulation and measure its resistance, use a megohmmeter in the measuring range of 500 V. One probe touches the contact of the element, the second touches its body. Normally, the indicator will be more than 0.5 Mohm.
Checking the breakdown of the heating element on the body
First, you need to set the multimeter to ringing mode. Next, we touch the heating element contact with one probe of the device, and the body with the second.
- If the tester does not emit any sound signal, there is no breakdown on the case.
- When the device beeps, this is a sign that the heating element has a breakdown in the body. In this case, it will need to be replaced.
With these manipulations you can check the performance of a tubular electric heater using a multimeter (tester).
Did you know that you won't miss any of our content if you subscribe? Subscribing is easy: just enter your email in the form below this article and click on the “Subscribe to newsletter” button. This way you will always be aware of our publications!
I hope the article was clear and useful. Now you know how to check (ring) the heating element with a multimeter and understand whether it needs to be replaced or whether you need to look for problems elsewhere.
How to change the heating device?
We found the heating element and made sure that it should be replaced. First, disconnect all wires. To avoid confusion in the future, it is recommended to first record the order of their connection with a camera.
To remove the heating element, you need to unscrew the nut located in the middle part of the device. Now you need to pry the heater with a screwdriver and carefully remove it, rocking it in different directions. It is now recommended to immediately remove scale from other elements surrounding the water heater. The new heating element is carefully installed on special mounts. If you make a mistake, it will touch the tank during operation. All that remains is to connect the wires and assemble the machine to run it for testing.
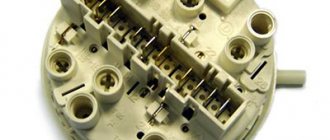
Device and types
In order to make the right choice when purchasing electrical equipment, it is necessary to study the characteristics of all available varieties. Heating elements are either closed or open.
Wet or open elements operate by direct contact with the liquid in the tank. The configuration of the element has a classic look; a similar detail is present in any electric kettle. If a part of this group fails, its replacement will not require complex work. The open heating element contains magnesium oxide and quartz sand inside its tube. These components belong to the type of heat-conducting substances. The basis of heating elements is nichrome wire.
Manufacturers produce various water heaters with open-type heating elements. Based on the distinctive features of products, products can be classified.
Depending on the method of fastening, the elements can be nut or flange. The latter variety is divided into cast and stamped products.
- An important point is the presence of an anode socket. Devices with a nut may not have an anode fastening or may be manufactured with additional fasteners on the flange.
- The shape of heating elements can be standard straight or curved in different directions.
Open type elements have the following positive characteristics:
- the main advantage of wet heating elements is the high speed of water heating;
- products with this type of heating element have a low cost;
- high-quality products are additionally coated with glassy enamel, which reduces the risk of corrosion and scale formation on the base of the part.
The disadvantages of wet heating elements include the low level of product safety, as well as a significant reduction in heat transfer as a result of scale formation on the surface of the tube. As a result, more electricity will be consumed to heat the liquid in the boiler. In addition, the low quality of city water negatively affects the service life of such products.
Closed-type elements require placement inside a special ceramic flask, which heats the water. The part itself does not come into contact with the liquid, due to which it received the name “dry” heating element. The flask is subject to high safety requirements, so the product is made of steatite or magnesium silicate. The raw material used to manufacture the heating element is stainless steel.
Closed heating elements have the following advantages:
- the devices are distinguished by a high level of safety during operation, due to which the occurrence of a short circuit is not possible;
- the devices are convenient and easy to use;
- these types of water heating products have a long service life;
- devices are economical;
- If malfunctions occur, the products can be repaired.
The disadvantages of such heaters include the fact that closed-type parts are manufactured specifically for each model of water heater. For this reason, in the event of a breakdown, the heating element can only be replaced with a similar part, which sometimes causes some difficulties.
Causes of failure
We listed the main reasons for the failure of the heating element in the introduction. Now we will dwell on this issue in more detail so that you understand why the breakdown occurs and how it can be avoided in advance.
So, the first reason is, of course, hard water. Here, the only rational way to prevent scale formation is to install special filters in the water supply system that reduce hardness, thereby extending the service life of the heater. It is also recommended to do preventative cleaning of the heating element from time to time.
Another culprit is low voltage in the network. As a result of a decrease in voltage, the current increases, which can cause the heating element core to overheat and subsequently completely burn out. The most rational solution here would be to install a voltage stabilizer, which we discussed in detail in the corresponding article.
Well, the last of the most popular reasons for the failure of heating elements is a breakdown of the temperature controller, which results in overheating of the heater. The fact is that the thermostat gives a signal about the timely switching on and off of the heating element when a certain temperature is reached. If the regulator breaks down, the heating element may not turn off, it will overheat and the circuit will break. No one is immune from this problem; only timely detection of a malfunction will help to avoid it. This type of breakdown is most often observed in electric stoves and heaters.
Advice!
To extend the life of the heater, we recommend setting the temperature to a medium level or slightly lower. In this case, even if scale covers the surface, overheating will not be as strong as it would be when setting the maximum parameters.
If a magnesium anode is installed in the water heater, we recommend monitoring its condition and replacing it if the anode is damaged. The fact is that the anode protects the heater from scale, which means it extends its service life.
So we looked at the typical reasons for the failure of heating elements. We hope the information provided was useful and interesting for you!
We also recommend reading:
- How to use a multimeter correctly
- Dishwasher malfunctions
- How to replace the heating element in a washing machine
Like 0) Dislike 0)