Modern built-in ovens are multifunctional devices for preparing dishes of any complexity, from spit-roasted suckling pig to pies and cakes. Each housewife has special requirements for the reliability and safety of the oven. The control panel of the device should be clear and logical; operating modes and additional options play an important role when choosing this type of equipment. In stores you can find a huge number of gas and electric models. It is often difficult for an inexperienced consumer to choose just one of the offered options.
Both gas and electric cooking methods are in demand and find their buyers. Both methods have certain advantages and disadvantages. Our mothers and grandmothers also used gas ovens, but they are quite primitive compared to modern models. People like to cook with gas not only because of the very low cost of this fuel (the average price in Russia is only 5 rubles per cubic meter). Many people claim that food cooked on burners turns out much tastier than using electric equipment. Let's try to figure out what the features and advantages of cooking in a gas oven are.
Terms of use
Before preparing food, you must familiarize yourself with the instructions for using the appliance. Operating instructions for a gas oven are included with each piece of equipment. If you take into account all the nuances, the equipment will serve for a very long time.
How to properly use a gas oven when baking? To do this, you need to follow a few simple recommendations:
- there should be no kitchen utensils inside the cabinet during cooking; only a wire rack can be in it;
- Before cooking, you need to set the required level, and then it should not be changed;
- you need to preheat the oven, and for this 10 minutes are enough, after which you can prepare the dish;
- During cooking, you should not open the door often so that a lot of heat does not escape.
Many homes use a gas oven. Simple instructions will help you on how to use it. Compliance with all rules will allow you to use the equipment safely.
Safety precautions when lighting the oven
No matter how you light the flame in the oven, you should always follow specific rules for safe operation. Interacting with gas is always a risk, so you should be extremely careful to eliminate the likelihood of an emergency.
Next, let's look at the basic rules for safely igniting the oven:
- Before turning on a gas oven, always ventilate it to free the space from possible gas accumulation.
- Inspect the hoses, periodically check the tightness of their connections, and if necessary, replace the worn one with a new one.
- Make sure the oven burner is fully ignited. If any section does not burn, turn off the gas supply, ventilate the cabinet and relight the flame.
- Never leave a working oven unattended, and remember to check for flames through the cabinet door window.
- Never use the oven while it is on as a heating source. You cannot heat the kitchen using air heated by a burner.
- Thoroughly clean all surfaces inside the oven after each cooking. Grease deposits and other contaminants can clog the igniter holes or the burner itself, which will cause the flame to burn unevenly or be completely absent during subsequent operation.
The smell of gas or the sound warning of a leak sensor is an alarm signal in which the use of the equipment is prohibited. Ventilate the room and, if possible, find the source of the fuel leak.
You can carry out the initial diagnosis of oven malfunctions yourself if the procedure does not involve disassembling the main components. In other cases, the work should be entrusted to a specialist
It is always worth monitoring the operation of potentially dangerous equipment. Incorrect functioning of any elements should raise alarm bells and become a reason to call a technician from the gas service to carry out an inspection, diagnose the problem and fix it.
Lighting the oven
A gas oven heats up quickly compared to an electric oven, which is necessary for quick cooking. The equipment is used to heat food even if the lights are turned off in the house.
How to light a gas oven? First you should check whether the equipment is connected to the gas system. It is also necessary to familiarize yourself with the images on the plate. You need to pull out the metal bottom. Inside there will be a burner with curved holes for the flame to escape. There are 1 or 2 holes for ignition. A match is brought to them, and at the same time the relay turns.
How to light a gas oven if it has an ignition button. The burner tap must be turned to set the required temperature. Then press the gas supply start button. And the fire is activated by another button, which is located on the side of the panel. If there is no gas for several seconds, then turn off the equipment and repeat the procedure.
About gas pressure
Are you planning a big move to a new building? You can forget about the gas stove. Unfortunately, gas supply is not possible in modern residential high-rises. What can we say, even in old 5-9 storey buildings you often encounter the fact that gas simply “does not reach” the apartment due to low pressure.
This is where the creativity of housewives comes into play. Some people light a fire with a branch from a broom, and some make a paper rope. If you are “lucky enough” to encounter a problem with low gas pressure, first release it.
After this, roll the paper into a tube, wet the end you hold in your hand with water, and set the other on fire. Use this “miracle design” to light the oven. Do this only as a last resort if necessary. If there is none, call a gas specialist. There is no point in taking on the “headache” of someone else’s responsibilities.
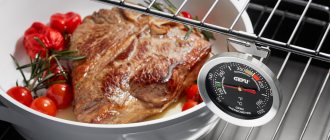
Methods for determining temperature
How to determine the temperature in a gas oven? It is important to know how this procedure is performed in order to prepare the dish correctly. You need to throw a little flour onto a baking sheet. If it turns rosy, then the temperature is about 230 degrees. The golden color indicates an indicator of 170. When the flour does not change for a long time, the temperature is about one hundred degrees.
To be able to determine the temperature, you need to purchase a special thermometer. It is also measured by another method - a piece of paper. It should be placed on the bottom of the oven. If the leaf turns yellow slowly, the temperature is set to medium, and if the leaf turns brown quickly, the temperature is set to high.
Rule No. 4 – silence and order
If you are baking with yeast dough or making delicate sponge cakes, then never slam the oven door too hard! The dough may fall sharply and will not rise again, no matter what you do.
The oven must be handled with respect and care: do not rattle the baking sheets, do not push them in with force, and do not slam them along the way (with your hand, foot, etc.).
Do not store old pans and pots in the oven. Many of us do this. But the oven is not a cabinet for unnecessary kitchen utensils, but a stove. An important and necessary thing in the house.
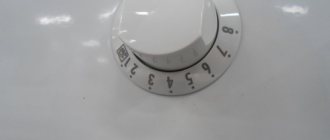
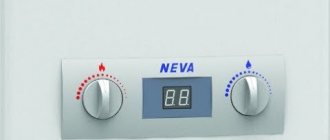
Level selection
The quality of food is largely influenced by the level at which the gas oven operates. How to use it to make delicious food. Many recipes do not indicate what level of equipment should be set to cook dishes. You can rely on generally accepted methods.
The universal level includes the middle level, when dishes are baked efficiently from all sides, including top and bottom heating. If you want to create a golden brown crust, then at the end of cooking you should set the level to high. When it is necessary to bake the bottom of the dish, a minimum indicator is required. Gas stoves "Hephaestus" with a gas oven are equipped with the necessary functions to make cooking comfortable.
What to do if a problem is detected?
It happens that the problem of weak gas supply and flame extinction is caused by accumulated grease on the electric ignition or regulator. By cleaning them from contaminants, you can eliminate this problem. Also check the spark plug; if the holes are clogged, the flame crown will be small or smoky.
It may be worth monitoring whether oxygen is entering the oven. To do this, check that the oven door is closed tightly.
Many, noticing that something is wrong, wonder: what is wrong and how to fix the stove themselves? However, if you encounter any problem that requires appropriate qualifications, it is better not to try to fix the stove yourself. Such intervention without the appropriate skills and knowledge is fraught with big problems.
If you yourself do not have the necessary tools and knowledge to fix problems, then calling a specialist will be the best solution.
If your gas stove has not passed the warranty period, then call the service center of the company where you purchased the equipment. If the warranty period has expired, then call a qualified specialist from other companies in your city. The technician will be able to professionally fix all problems and tell you how to care for the stove.
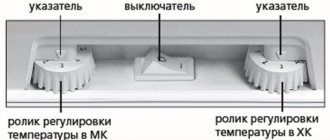
Setting the mode
It is advisable to choose uniform heating from above and below for cooking. This mode is ideal for baking, roasting fish and meat. Many modern devices have several modes, one of which is strong heating of the lower heating element and standard heating of the upper one.
Equipment at medium and high prices is equipped with a fan on the rear wall. It is used to heat food evenly. Typically, the technique is used for baking whole pieces of meat and fish.
The bottom heating mode is necessary for creating dishes that are topped with fruit or cheese to prevent burning. It is suitable for heating prepared foods. Top heat is used to create succulent dishes. The Indesit gas stove with gas oven is equipped with several modes that allow you to cook different foods.
Some types of equipment have low heating, in which both heating elements operate. The mode is suitable for defrosting food and drying food. Modern appliances are equipped with a grill mode, with which food can be cooked as if it were roasted over a fire.
How to install an oven: steps
In order not to rack your brains over how to accurately install a built-in oven with your own hands, act according to a pre-developed plan.
Preparation of tools and auxiliary materials
In general, to quickly install an oven in a suitable kitchen niche, you will most likely need:
- drill with a set of drills and cutters;
- screwdriver or screwdriver;
- insulating tape;
- standard connecting terminals for wires;
- knife;
- a plug with a piece of cable of the required length, if the oven was purchased without them.
If it turns out that there is no electrical network connected to the installation site, ending with a suitable socket, you will have to take care of the method of laying it and masking the laid route.
Make sure there is an outlet for connecting the oven
Preparation of the workplace
When considering options for how to build in a new oven, you should take care in advance of having a niche that is somewhat larger than the size of the oven. There can be several ways to create it:
- provide an appropriate compartment when ordering a kitchen set;
- purchase a separate module manufactured specifically for built-in ovens;
- select a suitable compartment in existing furniture;
- make changes to the design of the existing cabinet by independently equipping the necessary niche.
The size of the gaps left was discussed earlier.
Important! Deviations of clearances in a larger direction are not as critical as in a smaller direction.
Installation
Before installation, you need to make sure that the cable with a plug can be connected from the oven to the outlet intended for it. If there is no corresponding hole in the back or side wall, you must carefully make it yourself using a drill or jigsaw.
The oven is installed in a niche in accordance with the requirements of the instructions supplied with the product. It can stand on adjustable legs or be attached with special screws to the side walls of the compartment allocated for it. In this case, its front panel with the door becomes an integral part of the interior
During the installation process, it is important to ensure a horizontal position of the device and reliable fixation
Connection
The stage of connecting the oven is usually combined with its installation, since after final installation, access to the rear wall of the device is most often impossible. There are two ways to connect electrical equipment to the electrical network:
- directly;
- through a plug-socket connection.
Electric oven cable markings
In the first case, it is recommended to use standard terminals designed for suitable power. The second option is more preferable. Ovens are usually sold with an existing power cable ending in a standard plug. Otherwise, you will have to make it yourself by connecting to the corresponding sockets inside the oven body.
During the connection process, it is important to correctly secure the grounding wire to the terminals intended for this purpose on the oven body, in the plug, socket and on the input panel. To eliminate the possibility of error, it is painted yellow or green in three-core cables
Carefully! Electrical connections of powerful household appliances using twists are not allowed. Direct contact between aluminum and copper should be avoided
Professionals use soldering or screw clamps.
Functionality check
Any installation must end with startup tests. Before turning it on for the first time, it is recommended to carefully remove any remaining grease from the internal surfaces of the oven chamber using a clean and slightly damp cloth. The test run takes place for 30 minutes at a temperature of 250 °C without placing food in the oven. The appearance of a faint burning smell and a little smoke is not evidence of a malfunction. Most likely, it is the factory oil burning out.
After installation, you must start the oven
It is advisable to check the equipment in all modes provided for in the instructions. At the same time, the operation of indicators and useful functions is checked. If no deviations are noticed, you can begin operation.
Types of ovens
Nowadays many types of gas equipment are sold. Each of them is equipped with its own functions necessary for high-quality work. Popular brands include:
- gas stoves "Hephaestus" with a gas oven: have an attractive design, compact size and safety of use;
- the manufacturer Gorenje produces classic-looking equipment with a control panel and an enamel hob;
- DeLuxe brand products are popular for their reliable and convenient operation, the presence of enamel grids, a drawer for utensils;
- Beko products have mechanical electric ignition, protection against accidental activation, as well as a “minimum fire” function;
- equipment called Zanussi is equipped with gas control of the oven, electric ignition, and the surface is made of easy-to-clean enamel.
The Indesit gas stove with gas oven has a mechanical control and an enamel panel. Compact dimensions allow you to install the equipment in the right place.
Rules for inclusion and operation
You can light the oven in a gas stove manually or using an electric igniter (automatic or semi-automatic).
Manual activation
Modern mid-price models (for example, Nord, DARINA, Gefest 3200-05) are equipped with only the necessary functions without frills. Switching on occurs through mechanical rotary switches, there is often an audible timer, convenient for the cooking process, and a gas control function, which serves to turn off the gas supply if the flame goes out. But you need to ignite the gas-air mixture in the traditional way (with matches, a piezo lighter, etc.).
To turn on a gas oven manually, you need to open the door, hold a burning match to the igniter hole, press and turn the mechanical switch to the maximum flame position. The handle should be pressed for 10 seconds to ensure gas flow and ignition. When the thermocouple heats up, the safety valve will turn off. Then, after making sure that the fire is burning, you can use the oven for its intended purpose.
Electric ignition
Modern stove models (for example, Indezit, Greta) often have both basic functions and additional ones. They are equipped with a timer, bright lighting, a gas control system and an electric igniter. This function involves lighting a fire in a gas burner using an electric spark without opening the oven door.
Important! Electric ignition of the oven can be automatic (by turning the gas regulator) or semi-automatic (by additionally pressing a separate button).
To turn on ovens that have an electric ignition function, you need to perform the following steps:
- use the fire regulator to set the maximum mode, thus starting the gas supply;
- press the electric ignition button;
- make sure there is fire and release the button (after about 5-10 seconds).
You should know that the electric ignition button must not be held down for more than 15 seconds. If the burner does not light during this time, it would be correct to open the oven and ventilate for a minute, then try again .
How to turn on the grill
Modern models of luxury ovens are equipped with a gas grill function. To turn it on, you just need to bring the fire (a burning match, a lighter) to the top burner of the oven and turn the corresponding gas regulator clockwise until it stops.
Oven functions
If the oven does not have a “Grill” mode, then an equally tasty dish can be obtained using universal heating. When large pieces of meat or fish are baked, you need to control the process during cooking. The pieces should be watered with the released juice.
In addition to the classic method, you can bake dishes in the oven using an artificial shell, such as foil or a bag. The first material is used for cooking meat, fish, and vegetables. If foil is used, it is important to follow a simple rule: the shiny surface should be turned toward the dish, and the matte surface should be turned outward.
The bag is great for baking a dish along with a side dish, you just need to make holes in its walls in advance. This procedure allows you to cook food juicy and soft. You can cook porridge and soup in the oven, which gives the dish a wonderful taste.
Conclusions and useful video on the topic
The video below demonstrates the process of testing a thermocouple installed on one of the models of gas boilers.
The video explains in detail how to remove, check, change an important component of a gas water heater, without which the equipment actually remains operational only in uncontrolled mode, which is extremely dangerous for the end user:
Replacing the sensor yourself is possible. However, for this, the home craftsman must have plumbing skills and be able to use measuring instruments:
Thanks to the thermocouple, the ignition and heating process is automated, increasing the safety of the gas water heater and boiler. The material considered allows us not only to fully appreciate the technological significance of the thermocouple device in the design of gas-using equipment and to understand the structural intricacies of home boilers, but also, if necessary, to repair the equipment yourself
At the same time, it is important to remember the safety rules, and if you have doubts about your own abilities, it is better to turn to specialists
Would you like to talk about your personal experience of testing the functionality of a thermocouple? Or do you have useful information on the topic of the article and would like to share your knowledge with other users? Write your comments, participate in discussions - the feedback form is located below.
How to choose a gas stove?
In order for equipment to serve for many years, it must be chosen correctly. First you need to determine which cabinet is needed - dependent or independent. In the first case, the oven is built into the hob. Independent cabinets can be built into any place in the kitchen.
It is also important to decide on the size and volume of equipment. The height and depth of almost all cabinets are the same. Only the width can be different - 45 cm, 60 or 90. In terms of volume, the equipment ranges from 56 to 74 liters. The size of the equipment should be determined based on the number of people in the family, frequency of cooking, and area of the room.
The equipment will look much better if you choose it based on the design of the room, the set. The main colors are white, black, silver.
It is advisable to purchase appliances with convection, since they are equipped with a fan that circulates air. This ensures even baking of the food. You can also cook food on 2 baking sheets together.
The equipment does not have a self-cleaning function. These ovens have a catalyst that softens and breaks down food residues. If the function does not work, there will be a coating on the surface that can be wiped off with a cloth.
It is important to ensure that the cooker has the necessary functions. This could be lighting, gas control, electric ignition. The right equipment will be the best assistant in preparing tasty and healthy food. You just need to follow the operating rules.
Typical gas oven malfunctions
Even with careful use and proper ignition, the flame in the oven burner may be unstable or disappear completely. These common problems have very specific causes and are fairly easy to fix.
If the flame in the oven ignites without problems, but often goes out after some time, the reason can be sought in the operation of the gas control system. Most likely, its sensor is faulty or dirty, and therefore does not respond to ignition correctly, sending a signal to shut off the gas supply.
In the same situation, the thermocouple and solenoid valve of the gas stove may turn out to be problematic components. The latter does not receive enough voltage due to a breakdown of the flame control sensor and automatically shuts off the supply of blue fuel.
If the solenoid itself breaks down, the valve is not held in the open position, which also prevents proper gas flow.
In addition to malfunctions of specific parts, the cause of the flame going out after heating the oven may be an incorrectly adjusted minimum flame level. After maximum heating, the burner goes into gentle mode. If it does not meet the required parameters, the thermocouple will not warm up enough, which is why the device turns off.
If the gas burner in the oven does not turn on at all, the primary diagnosis will be to identify blockages in its openings, which may form due to carbon deposits or food debris, or contamination of the gas nozzle itself. If there are no deposits interfering with ignition, the structural parts are probably worn out and require replacement.
The gas tap as a separate unit can also influence the incorrect functioning of the burner in the oven. Any link in the design of the internal rotating mechanism may be damaged. Often this part cannot be repaired and must be completely replaced.
Slab design
A modern gas stove combines several systems, each of which is responsible for the normal functioning of controlled parts and devices.
- The basic one is a gas system. It consists of burners, burners, pipelines and shut-off valves.
- Electric - it is responsible for lighting, electric ignition, and in some models ensures the operation of the grill installation.
- The supporting structure is the body of the product, which is made of stainless steel sheet and coated with enamel.
Each gas stove has a standard set of parts. Different models may have their own nuances and unique design, but the composition of the main components has not changed. The schematic diagram of a gas stove is shown in the photo below.
General principle of operation of the equipment
Regardless of the type of model, its cost and arrangement of elements, all equipment works according to the same scheme. The only exception may be some exotic industrial equipment with combined fuel.
Operating principle of a gas stove:
- Gas is supplied to the burner from the mains or an independent source (cylinder).
- After opening the shut-off valve, fuel flows to the burner.
- The design includes a mixing system, where gas, in contact with air, changes its properties.
- The mixture is taken to the divider, where it is evenly distributed around the perimeter.
- Using auto-ignition or a match, the composition is ignited, and combustion is maintained at a user-specified level.
If the system is debugged and works as the manufacturer intended, then the fuel will burn completely without emitting fumes, and the flame will stably maintain the selected level. The efficiency will remain close to 100%. A faulty system will smoke, periodically go out, or refuse to ignite at all.
How to use the speed grill?
If you often cook juicy steaks and vegetable dishes, then a grill pan will not be superfluous in the kitchen. It allows you to achieve the same taste from a dish as in a restaurant. But keep in mind that you can use a grill pan on a gas stove only for its intended purpose; it is not suitable for other stoves.
As a rule, in addition to the grill pan, the kit also includes:
- Lattices.
- Pallet.
- Lid.
A gas grill can be easily distinguished from a familiar frying pan by the hole for the wick. During cooking, food is laid out on a grated bottom and the big advantage is that fat and other products do not decompose, but are collected in a tray. Thanks to this, the food is safe, flavorful and low in calories.
How to properly use a grill pan on a gas stove:
- After use, wash and dry the pan.
- During cooking, the pan should not touch the fire. It is convenient to use a small burner.
- To prevent the food from turning out dry, fill the tray with water (a glass is enough) before starting cooking.
- After pouring water into the pan, place a wire rack on the bottom and lay out the food, and then cover the pan with a lid.
- It is better not to pour too much oil. Lubricate only the ribs of the grate.
- Do not grill on a cold grill. Wait a moment for the pan to heat up.
- Do not cut foods finely; they will lose their juiciness during cooking.
- Do not clean the grill with abrasive products or rough sponges.
Also read: Immersion and stationary blender: which one is best to choose for home
Some nuances of using stoves of various brands
If, after following the recommendations described above, it was still not possible to light the oven of a gas stove, then the problem may be a malfunction of the stove or individual functional elements. Since gas equipment is potentially dangerous, immediate fault detection and repair are required.
Owners of devices from brands such as Greta, Darina, Gorenje may encounter difficulty in lighting during operation. When you turn on and press the relay, the burner lights up, but when you release it, it stops. This moment occurs as a result of prolonged use when the thermostat fails. Due to the breakdown, it does not detect the temperature in the cabinet, so the fire goes out immediately. Another common problem that consumers encounter is the gas control contacts coming off in the oven. Most often it occurs in slabs of the Indesit and Hephaestus brands.
Elimination of any cause is prohibited to be carried out independently. To do this, you need to call gas service specialists; they will not only determine the cause of the breakdown as accurately as possible, but will also quickly eliminate it.
Burner products
Many people confuse the burner and the burner, so the burner is located inside the stove under the hob, and on top there are burners with dividers, which can be removed and wiped during wet cleaning (just try not to let water get into the holes of the divider). If you remove the burner, then underneath it in the depths you can see the burner body and the nozzle, from the hole of which the gas enters the socket of the divider, where it mixes with air for stable combustion. Each burner is characterized by a certain power; in everyday life there are the following options:
- minimum flame when the regulator is in the extreme left position;
- medium heat - the regulator is in the middle;
- maximum combustion - the regulator is in the extreme right position, the burner is completely heated, the flame is stable and does not come off the divider, the gas burns completely.
Gas burner diagram
Experts have this concept - the optimal power of a product. It is determined by the most complete combustion of blue fuel and is indicated in the technical characteristics of the gas stove.
When switching to another type of fuel, for example, liquefied gas from cylinders, it is necessary to change the jets, and the entire set. It is better to entrust such work to a professional - he will immediately adjust the pressure and ensure that complete combustion of the fuel occurs.
There are only three types of burners commonly used:
- diffusion;
- kinetic;
- mixed option.
The names come from the combustion feature: in the first version, there is no forced mixing with air - a stream of gas enters the bell of the burner, where it naturally mixes with air. The oven burner is of the first type - air is taken from the inside of the stove. In the second option, suction is carried out due to the energy of gas movement under low pressure, mixing occurs and the combustible mixture is supplied to the burner. In modern models, a third option is used, when half of the air is taken from inside the product, and then in the bell of the burner the mixture is additionally mixed with the outside air of the kitchen.
Hot spots are very important!
Due to natural air circulation, the difference at different points in the oven can reach 5 °C or even higher. Perhaps this is not very important for baking meat or poultry, but for casseroles, soufflés, delicate desserts and pastries it is a significant difference.
To make communication with the oven more comfortable, find its hottest spots. One of the easiest ways is to experiment with slices of white bread. To do this, preheat the oven to 180°C. Place 6-8 pieces of wheat bread for toasting on a wire rack (all pieces should be the same thickness) end to end. The best option is to occupy the entire grid. Place it on the lowest level and bake the bread until an obvious color change occurs. It should dry out and brown quite a bit, but not burn! Record the cooking time. Remove the wire rack, remove the bread and examine the bread. Pay attention to the places where the bread was fried the most - these are the hot spots of the lower level. Go through all levels, setting approximately the same time, and find all the points. Then, when baking or roasting, be sure to use this knowledge by distributing dishes inside the oven correctly and thoughtfully.
Hot spots can also be identified using coconut flakes or breadcrumbs.
Attention! Most gas ovens (especially not the newest ones) are bound to have hot spots. Gas ovens tend to make the air inside the oven more humid than electric or convection ovens because combustion of the gas releases some moisture. This may cause problems with getting a crispy crust.
TIP: Gas ovens are notorious for having hot spots, so to avoid them it is important to rotate the pans 1-2 times during cooking (depending on the cooking time). This guarantees even baking. When baking quick breads or muffins, rotate the pan 90° halfway through the cooking time. If you are baking multiple trays of cookies, swap the top and bottom trays and then rotate them. Long-cooking dishes such as casseroles will benefit from rotating the pan at least twice.
Bake chicken in the oven