What types of television antennas are there?
Main types of antennas:
- meter (MV), length from 1.5 m;
- decimeter (UHF), length from 15 to 40 cm;
- all-wave (MF + UHF), combining both types.
To receive digital TV signals, you need a UHF antenna, but an all-wave antenna may be suitable.
For high-rise buildings in cities, it is recommended to use collective antennas. Their positive aspects:
- Excellent TV signal quality.
- Configures the wizard during installation. Residents of high-rise buildings do not need to configure anything additional.
- Regular maintenance, which is monitored by the management company, HOA, and provider.
The disadvantages include:
- Difficult to install. It is produced only by a specialist.
- High cost.
- Subscription fee, which is charged by television broadcasting operators after concluding contracts.
Outdoor individual antennas are installed in the private sector or in low-rise buildings. They pick up a signal from a nearby TV tower. The quality of the signal will depend on how the antenna is oriented in space.
There are indoor antennas, with and without an amplifier:
- flat unidirectional, reliable and inexpensive, precise orientation is important for them;
- spatial - the most reliable and expensive, for installation outdoors;
- frame ones, the simplest ones, require being located near the repeater.
There are also active and passive antennas. The difference is where the television signal is received and transmitted - directly to the television device or through an amplifier. Passive antennas work well when the signal is strong. Active - through the amplification block.
When choosing an antenna you need to consider:
- Distance to the nearest TV tower. The antenna should be located 30-40 km from the tower. At greater distances, the signal loses quality.
- Obstacles between the television tower and the TV. Various buildings, for example, can interfere with the signal.
- Distance from antenna to television receiver. A long antenna cable weakens the signal; you may need an amplification device or another, more expensive cable.
- Power. At high power, a television signal travels long distances.
In the room, the antenna is placed near the television receiver and turned in the direction of the television tower.
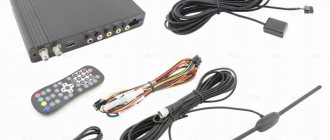
Satellite equipment - functionality and installation
As you know, a satellite chosen by the user at his own discretion (usually Sirius 5.0E, Amos 4.0W, Hotbird 13.0E or others) transmits the signal. The task of the satellite dish is to reflect it onto a converter, which converts the received data and, in turn, sends it to the set-top box . And only the receiver sends the signal to the TV receiver via cable.
What is needed to install the plate
A typical satellite dish mounting kit includes the following items.
- A dish for transferring a signal from a satellite to a converter. The minimum diagonal is 60 cm, the maximum is 120 cm. The required size depends on the area where installation is taking place, as well as on the obstacles located in front of the plate.
- Bracket (selected according to the diagonal of the plate), anchors for fastening.
- Converter or head. The device is designed to convert the signal reflected from the dish and then transmit it to the set-top box.
- Disek, which serves to combine two or more converters.
- TV cable.
- Receiver. To watch free channels, you can purchase the simplest set-top box. If you plan to view paid content, you will need a receiver with a card acceptor.
- F-connectors required for connecting the cable.
Installing the plate
Satellite dishes should be installed in an easily accessible location. This is necessary to always be able to repair or adjust the equipment.
Important! The antenna should initially be pointed south. There should be no obstacles of any kind in its path: buildings, branches, trees and the like, since such obstacles significantly degrade the quality of the received signal.
The equipment always comes with instructions, and the plate must be assembled in accordance with the recommendations outlined in this document. In this case, during the installation process the following important points should be taken into account:
- the bracket with the antenna must be very firmly fixed to the wall so that a strong gust of wind does not tear off or damage the equipment;
- correct installation of the bracket requires the converter to be directed downwards;
- the cable must be sealed and securely secured with ties and electrical tape;
- it must be mounted so that the satellite dish rotates freely in all planes, which is required for ease of setup.
Necessary equipment for connection
To connect the antenna to a television receiver or set-top box, you will need a coaxial cable with a resistance of 75 Ohms. There are copper cables coated with a thin layer of copper.
When choosing a cable, consider:
- type of signal (satellite dishes are installed using imported cables);
- distance to the TV tower (especially important for outdoor antennas connected at a considerable height);
- diameter of the central core of the cable (standard – 1 mm);
- various interference during installation (here you need a cable with maximum shielding);
- outer shell: black – PVC, white – polyethylene (master’s choice – PVC).
The following brands of cables are most often used:
- RG 6. High quality and inexpensive. Production: Russia-China.
- RK 75. Made in Russia, high quality. Can be used for any type of connection.
- RG 59. Ineffective at a distance of more than 200 m.
A plug is used to connect the antenna cable.
The F-plug is recommended for use with all modern television devices.
Connecting to a TV via a receiver
The simplest and most common way to connect satellite equipment to a TV is to connect through a receiver . To connect the set-top box to the television panel, you can use the following connectors:
- antenna input;
- RCA, also known as “tulip” - for transmitting an analog signal;
- component connector;
- SCARD;
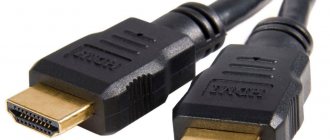
- HDMI.
Important! Connecting the set-top box to a TV receiver via a tulip or television cable with a standard antenna plug or F-connector provides a low-quality image. The best picture can be obtained when connected via HDMI. And from the converter to the receiver the signal is transmitted through a television cable with a connection through the F-connector.
In addition to its main purpose, an external receiver performs a number of additional functions, for example, playing photos, videos or audio from a flash drive or hard drive, connecting a TV to the Internet, etc.
Step-by-step instructions for assembling the antenna cable
At this stage you need to mount the plug on the cable:
- Remove 1 cm of the connected cable from the outer insulation.
- Turn the braid and foil back, where the whole cable is.
- Remove the internal insulation and expose the central core.
- Screw the F-plug onto the unscrewed braid.
- Shorten the central core to 2-3 mm.
- If necessary, screw the adapter onto the screwed-in plug.
The installation of the plug is the same when connecting the antenna cable directly to the TV or through a set-top box.
How to install the antenna plug on the cable
Antenna wires are available on the market in different standards with different diameters. The girth of the plug must be selected to match the diameter of the cable. This will ensure uninterrupted and reliable operation of the installation.
Basic tools needed:
- scissors;
- knife (not too sharp);
- pliers (optional).
Installation under F plug
You may be interested in: Stripping a television cable for the F-connector (connector)
Screwing such a popular F-connector onto a cable means doing a set of standard steps:
- cut the wire at a right angle to the desired length;
- cut off the cable sheath with a knife, 12-15 mm long (minimum);
- bend the shielding conductors to the outer side of the insulation;
- cut off the inner insulation of the core with a knife, leaving it about 4 - 5 mm;
- Before screwing on the connector, check that the screen does not touch the core in any way. Screw the end cap until it stops, turning it clockwise, pressing it against the cable. If necessary, you can hold the connector with pliers.
- Adjust the length of the central core so that the protrusion of the cable core is up to 1 - 2 mm.
Installing a screw plug
Before the invention of F-type cable terminations, connectors of a slightly different, but in their own advanced design were used, which also did not require soldering, but were put on the cable using a different algorithm.
Installing a TV plug with a screw
Many people still have them in their household, so let’s find out how to use it to connect to an antenna.
So, the body of this connector consists of plastic and metal parts. The plastic part is removable. You need to unscrew it from the metal part and thread the cable into it (this way you won’t forget about it or lose it).
Next, prepare the edge of the cable where the plug will be mounted. Using a sharp knife, remove a centimeter-long cylindrical section of the outer sheath of the wire. The exposed braided layer of the screen must be shortened by 5 mm from the edge of the cable. Along with it, cut off the core insulation. Thus, you will get a machined end of the cable with successively offset layers, where the central core protrudes forward.
Thread the coax into the plug as follows: place the clamp for contact with the screen over the braid (it needs to be pressed around the cable), and pass the main core into the screw fastener and tighten it until it stops. Now you need to restore the integrity of the plug by screwing its polymer part onto the metal.
Installing a Solder Plug
Although the solderable plug can be safely classified as a relic, it must be admitted that it provided excellent contact and is still relevant in combination with multi-wire flexible radio frequency cables of the type RK-75-4-12 and similar in structure.
In addition to the plug and cable you will need:
- soldering iron, tin or rosin;
- cable stripper;
- a small metal file or needle file that will be used to clean up the soldering area;
- multimeter, ohmmeter or light bulb to check the plug contact.
Now let's get down to business. We remove the outer (black) insulation from the cable to a length of about 3.5 cm. We thread the end of the cable into a plastic cartridge. We clean the metal “ears” of the plug with a file. The bare aluminum or copper braid is divided into two equal parts, forming two “whiskers” (you will solder them). Don't forget to expose the center conductor from the protective layer. Once cleaned, it fits into the plug. Now the soldering iron comes into play. You need to solder the braid to the connector petals, and then the cable core in the central channel of the plug.
You can verify the reliability of the contact at the soldering site by trying to tear it off, for example, with a knife. If you manage to tear off the solder, it means that the soldering was unsuccessful, and you need to arm yourself with a file again. The same applies to solder drips - they need to be removed.
After all the manipulations, combine the plastic sleeve with the metal base (a special lock will work).
If the mesh braid protrudes beyond the edges of the connector, then, for aesthetic reasons and for safety reasons, it should be cut off. Braid wires can easily penetrate the skin and, breaking off at the level of its surface, are difficult to remove and cause stabbing pain.
Connecting and configuring different types of antennas
The back panel of the TV is equipped with a socket where the antenna is connected. It is easily recognized visually: it is a metal groove with a hole or a protrusion inside the plug. To receive a satellite signal, there is a second connector nearby with a thread onto which the plug is screwed.
Connection to a public antenna
Connection to a collective television antenna occurs after concluding an agreement with the management company. Nowadays people are more often turning to providers of various telecommunications services.
A branch is added to the common house cable, going to the apartment. A plug is attached to the end of the cord stretched around the apartment. It connects to a TV receiver or set-top box. All that remains is to set up TV channel reception.
Connecting the cable to an individual antenna
There may be two connection options here. If the antenna manufacturer has provided the ability to attach a cable and plug, it is easy to assemble the circuit. If you need to connect the cable yourself, you need to follow these steps:
- Remove the top insulation from the cable and turn the braid back.
- Remove the insulation from the central core.
- Insert the core into the screw connection and tighten it with a screwdriver.
- Press the braid and cable with another terminal.
Setting up a TV antenna
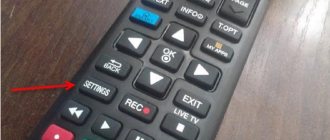
To set up a television antenna you need:
- Check the signal level. Go to “Menu”, select “Auto Configuration”. A signal level scale will appear on the screen. When the signal is above 50%, a passive indoor antenna is suitable.
- Point the antenna in the direction of the repeater. Use the interactive map of CETV (https://map.rtrs.rf/) to find out where the nearest TV tower is located. The antenna must be oriented in this direction.
- Find areas with better signal reception in the room where the television receiver is located. To do this, simply move the antenna around the room, usually such places are located near doors or windows.
- Launch the channel search function on the TV: “Settings” – “Automatic search (setup)”.
LAYING A TV CABLE IN AN APARTMENT!
ATTENTION: only this week, CONSUMABLES are at our expense (TV cable, dividers, plugs, nuts), you pay only for installation work and connection to the panel!
How quickly does the technician arrive?
- departure within 1-3 hours within the Moscow Ring Road (7 days a week);
- departure outside the Moscow Ring Road the next day;
- travel to the nearest Moscow region by agreement;
A modern color TV is a kind of window into the world for a huge number of people: that is why the television signal is continuously broadcast throughout the planet, reaching its most remote corners.
What kind of kit does the master arrive with:
- hammer drill (drill);
- a set of drills (from simple to 50 cm);
- cable stapler;
- 100 meters of cable;
- plug, nuts;
- divider (crab);
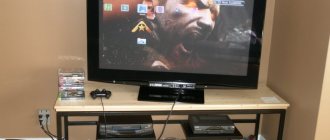
You can organize the operation of a TV in your home in different ways, but the most popular option today (due to the harmonious combination of price and quality) is to install cable TV.
Upon arrival, the master performs an inspection and begins:
- repair of TV sockets;
- replacing the crab (divider);
- plug repair;
- TV signal diagnostics;
- setting up TV, channels;
- complete replacement and installation of television cable;
Our specialists have everything necessary to ensure fast, high-quality and at the same time quite affordable installation of the correct cable: which will allow your TV to perfectly reproduce the signal and, in any weather, delight your viewers with watching their favorite programs in the proper image and sound quality.
What TV cable do we use?
- We have been purchasing cables from a trusted supplier for 10 years;
- cable brand RG6 (RK-75);
- cable thickness 6 mm in diameter;
- white cable;
- this cable is recommended according to GOST for home television;
How to connect several TVs at once to a single antenna
You will need splitters (couplers) or. How the connection occurs:
- Strip the coaxial cable.
- Place the F-plug on the cable and insert it into the input hole of the splitter.
- Insert TV wires into the outlet holes using connectors.
Splitters have from two to eight outputs, depending on their model.
Which TV plug is better and more reliable?
Currently, all connection technology in television installations is based on type F connectors. With the help of them, terrestrial, satellite, cable TV, and collective installations are created. The variety of F-connectors is huge - from cheap Chinese crimp, compression and self-crimp plugs to “fast” CaP type connectors. In addition, there are straight and angled versions of the connector.
Here's what speaks in favor of this type of cable connection:
- F-connectors are inexpensive;
- in installation you can only use a knife;
- F-connectors provide good contact, are noise-resistant and universal;
- maintain reception quality.
Basic mistakes when connecting an antenna and their solutions
Many people have very similar difficulties here:
- No TV signal. Try moving the antenna around the room. If this does not help, it is recommended to choose another reception option (for example, satellite TV).
- Not all channels are received. Most likely, only one channel package is connected. First you need to determine the broadcast frequency of the repeater (tower) using the RTSR card, then manually configure the remaining channels in the menu. Enter “Menu” – “Channel settings” – “Manual tuning” – “Program”. Using the button on the remote control, assign the channel the desired number. Run “Search”, then “Save”. Set up other channels in the same way.
- The signal is noisy. The antenna also receives additional noise. You need to place the receiver higher, keeping the direction towards the television tower.
When do you need a signal booster?
Today's cable and satellite providers deliver high-quality digital video and audio to your TV, depending on the equipment you use. However, in some homes, a single incoming cable channel is connected to multiple TVs using a splitter, and the more the incoming signal is fragmented and redirected, the more the overall speed and quality suffers. The image may become grainy and snowy, or blurry ghost images may appear.
Cable TV amplifiers are used to improve the quality of cable TV picture and reception and improve the speed and reliability of your signal.
You need to connect this device between your TV and the receiver, and closer to the signal source. It would be ideal to place the TV amplifier in the main branch box. If the signal comes from a local antenna, then you will need to use a special amplifier designed for installation on site of the matching device.
How to check if the connection is correct
When the image on the TV screen periodically disappears, it means that the antenna is working at the limit of its capabilities. The signal strength can change due to rain, heat, wind, or any noise outside the window. Overheating or hypothermia has a bad effect on the contacts in the receiving antenna.
Expert opinion! A master with many years of experience in connecting television antennas, Andrei Yakovlev, advises choosing an antenna with a reserve level of the receiving signal. TVs have a function with which you can check the quality and signal level.
For successful reception, the signal level must be at least 60%, and the quality must be 100%. Check the correct location of the antenna in space, check the distance to the TV tower. Check the integrity of the cable periodically.
Features of the satellite dish
The satellite dish directly displays the signal from the satellite. After which the signal enters the converter and receiver. Ultimately it passes through the cable to the television receiver. Due to the fact that the signal passes directly, TV channels have HD quality and good sound. The dish is capable of receiving a variety of waves. Therefore, such television is famous for its diversity. Here you can find any channels.
Instructions for crimping - connecting with your own hands
SO, the process is not complicated, but you need to do everything carefully, otherwise we will simply ruin the antenna cable, I will list it point by point:
- We take a knife, step back from the end of the cable about 1 - 1.5 cm, and carefully cut only the upper plastic winding in a circle - it is important not to damage the “screen” and the aluminum part underneath it! Let's take it off!
- Now we have an aluminum winding and a screen in front of us; we need to bend them onto the cable itself.
- Next, we have an insulator in front of us, we retreat 0.7 - 1 cm and cut it to the main core, the main thing is not to damage it either. It is certainly thick and durable - but without fanaticism! We remove the insulator.
- We take the F connector and simply screw it onto the bent insulator, it is important that the central wire falls into the hole in the center.
- In fact, everything is ready, you can connect to the receiver or screw the antenna connector on top. Who needs what?
As you can see, there is nothing complicated, but for those who do not quite understand, I present a video version.
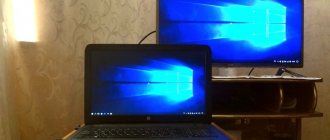
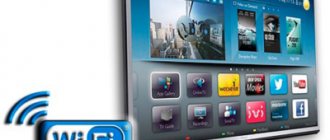
Wireless connection via Wi-Fi or Ethernet
To exchange data, it is necessary that the devices be equipped with a Wi-Fi module or support this technology.
For laptops this will not be a problem; with rare exceptions, they have built-in Wi-Fi, just like Smart-TV. For TVs that do not support the Smart function and regular desktops, you will need to connect an external or built-in adapter.
ATTENTION! for TV it is better to purchase an adapter of the same brand.
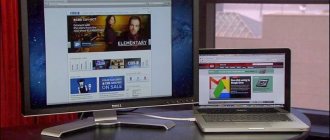
Transferring image and sound from a computer to a TV is carried out in two ways:
- Via a local Wi-Fi network using a router or cable;
- Intel Wireless Display (WiDi) or Wi-Fi Miracast technology.
Connection via LAN (or DLNA)
It is carried out by combining devices via a router. The TV must have the function of supporting DLNA technology; this characteristic is reflected in the instructions or description.
You will need to create folders on your PC with movies, audio tracks, and photos. Local network capabilities allow you to view the contents of folders on a TV monitor by controlling the remote control.
Setting up a local network:
- Configure the router to automatically distribute network settings with a password.
- Connect TV to local network. You should find the Network Settings tab in the menu and activate the wireless connection function. Find yours in the list of found networks, enter the password and connect.
- To easily manage files stored on your PC, you need to download and install an access program on it, or in other words, create a media center. There are many programs, it is very easy to find one that is understandable and convenient.
- That's all, you can view audio, video and photos.
Using the same DLNA technology, you can connect your computer to your TV using a twisted pair cable. To do this, both devices must have LAN (Ethernet) connectors. A local network created in this way is similar to a wireless one.
WiDi/Miracast technology
Allows devices to communicate directly with each other via a Wi-Fi connection, without involving a router.
By connecting your TV to your computer using WiDi/Miracast, you can not only view the contents of your desktop memory, but also everything you see on the network. These are films, TV channels, photographs, videos, etc.
Setting up your TV and PC is easy:
- Install the Intel Wireless Display program on your computer, if it is not already there.
- Start broadcast.
- Activate the WiDi/Miracast item in the menu.
- You can watch.
Advantages of connecting via a wireless network:
- High switching speed.
- Excellent picture and sound quality.
- No wires.
There are practically no disadvantages.
Extending the TV connection cord
The need to move the device requires lengthening the cable. You can change the length in two ways: using F-connectors, connectors and using a filter for digital signals with different frequencies.
In the first case, the ends of the cable are freed from the sheath and connected with plugs. For better contact of the main cores, the connection point is wrapped with insulating tape.
The second uses a splitter that has one input and several outputs. The extension process is no different depending on the F-connector used.