There is nothing complicated about connecting a DVD player to the TV of the equipment in question. However, you need to know some subtleties, otherwise the procedure may take more than one hour.
- Which connectors can you connect a DVD player to your TV?
- Connecting DVD to TV: adapters used
- DVD connection
- Connecting DVD to old TV
- Possible problems and solutions
- Additional recommendations
- Checking the functionality of the equipment
- Caring for your DVD player
- TV screen care
Which connectors can you connect a DVD player to your TV?
After purchasing equipment, you should examine it for available connectors.
The most popular sockets for connecting DVD to TV:
- HDMI. This is the best option, especially if the connection is to a plasma TV. In this case, the highest quality picture and sound is guaranteed. Experts advise choosing a high-quality cable for connection. The best option is a wire of at least 2.0 marked High speed with Ethernet from a trusted manufacturer.
- RCA. One of the most popular connectors is popularly known as “tulips”. The node consists of three colored sockets (white and red for audio playback, yellow for video).
- SCART. An obsolete connector, rarely found on modern receivers. The playback quality is similar to RCA; for correct operation you will need an appropriate SCART-RCA cord.
What to do if the TV is old?
In this case, to connect the TV to the video installation, use an RCA cord, since the equipment produced back in Soviet times is equipped with only 1 connector - an antenna.
There are several connection options:
- Using an RF modulator. Video and audio signals from the DVD are fed to the RCA port, converting the information, and then go to the antenna output.
- Constructive change of TV. In this case, install an RCA socket and integrate it into the TV on the rear panel (requires professional assistance).
- Using the player's audio output. If the TV has only one port, connect the cord to the audio output of the player, where there are 2 connectors of different colors (use only white), and to the input on the TV.
After completing the steps, go to the menu and select Mono or L/Mono mode. When the system starts up, play the video.
Old TVs may have poor signal reception because the sockets become unusable over a long period of use. If this happens, it is more advisable to carry out repairs by replacing the connectors.
Connecting DVD to TV: adapters used
Another option for connecting a DVD player to a TV is S-video. It is relevant if the previously mentioned methods are not available. Only the image is transmitted through the connector; for sound you will need adapters with “tulips” or a 3.5 mm jack.
If the player has a similar connector, and the TV receiver has a classic antenna input, it is possible to use the S-video-RF configuration combination. Experts note that all types of adapters are available on the modern market; choosing the right option will not be difficult.
Available connectors
Before connecting a DVD player, you need to familiarize yourself with the availability of ports on the TV. As a rule, manufacturers equip equipment with the maximum number of connectors to make it easier for the user to connect various devices. The most popular are HDMI and “tulips”. But Scart and S-video ports are also used.
Connecting using HDMI
The HDMI port is considered optimal when connecting a DVD player to a TV, because it provides the ability to transfer video to the screen without loss of quality. Outwardly, it is somewhat similar to a USB connector, but only thinner and longer. Experts say that this is the best way to connect the DVD player to the plasma. It is advisable to use cable models 2.0 and higher, which are marked “High speed with Ethernet” and only from leading manufacturers. If you have no idea how to connect correctly, then check the labels on the connectors.
Connecting with Scart
A not very popular method of connecting a DVD to a plasma TV is to use a Scrat connector. Sound and image transmission is carried out in the same quality as when using HDMI. But the problem is that this port is quite rare on modern devices. To connect the player and TV, you will need to purchase a special Scrat-RCA cord, where one end is inserted into the player, and the other (where the “tulips” are) into the TV.
Connection using RCA
For many years, so-called tulips have been considered the most popular method of connecting any TV-video device. The RCA connector has three colors: red and white are needed for audio playback, and yellow is for video. Such connectors can be on one side of the wire or on both. In order not to make a mistake and correctly connect the DVD to the TV, you need to combine the plugs with connectors of the same color.
Connecting with a component cable
The component cord contains five plugs that must be connected to the DVD player. You need to be guided by the color markings and Output inscriptions. The audio ports include red and white, and the video ports have another red, green, and blue. In order not to get confused in the red “tulips”, lay them out on the table and make sure they are positioned correctly: green, blue, red for the video image and white, red for the audio.
The other end of the cable is connected to the outputs of the corresponding color and labeled Input on the TV. Before turning on, make sure that all plugs are firmly seated in the connectors. Turn on the TV using the required data source.
DVD connection
To properly pair your TV with DVD, you must select the appropriate method. Having prepared the required cable and equipment, perform the work adhering to the recommended scheme. If everything is done correctly, the process will not take much time.
At the connection stage, the DVD player and TV receiver must be de-energized. After completing the procedure, the equipment must be turned on and checked for functionality.
SCART
Sometimes the cable in question is included with the player. It is difficult to confuse it with analogues, since the plugs have impressive dimensions. You don't need any additional equipment to pair your TV and DVD. You just need to find the appropriate sockets and make the connection.
If there are several SCART connectors on the TV, select the socket labeled “In”.
HDMI
This connector is typical for modern modifications of equipment. To properly connect the TV to the DVD, adhere to the following scheme:
- Find a suitable socket on the back of the TV. Often it is labeled “In HDMI”; on the player, select a similar connector labeled “Out HDMI”.
- Use a special cable to pair devices. The cable is not included in the kit and must be purchased separately.
- In the TV menu, select the reception of signals from the HDMI port.
- The equipment is turned on and the correct connection is checked. If everything is done correctly, you can enjoy any movies in excellent quality.
S-video
In this case, a special cable will be required. Only the picture will be sent through it. To display sound you will need “tulips”. The red plug is for the right speaker, the white plug is for the left speaker. Once connected, no additional configuration is needed. They include DVD and TV, and the quality of the played files is second only to the HDMI system.
RCA
With tulip cables everything is simple. You just need to connect three plugs, according to the colors. First, the adapter is fixed on the DVD player, then on the television receiver. This method has one drawback - the image quality leaves much to be desired.
For plasma and other modern modifications, one of the methods listed above is more relevant.
Using a Component Cable
“Advanced” models of DVD players are equipped with five standard RCA connectors. To pair devices, the connection is carried out strictly according to shades. The result is high quality picture and sound.
After connecting the wire between the TV and DVD, the pairing is checked. The appearance of a stable video and audio signal indicates the correctness of the work done.
Connection
Let's consider the features of connecting the above methods.
Important! Before connecting the DVD to the TV, both devices must be de-energized. This is especially true for equipment that is ten years old or older. The latter is extremely sensitive to “hot” synchronization.
HDMI
All modern TV equipment is equipped with an HDMI interface. Using it, you can connect a DVD player to Sony, LG, Samsung and other TVs. Some models have multiple ports, each of which is numbered. There is no difference between them as such. But, for example, some BBK players require connecting the cable only to connector number 1 or HDMIin. There were no problems with other brands in this regard.
Connection procedure:
- We insert the plug on the DVD into the HDMI connector (may be designated as HDMIOut).
- We connect the other end to a similar port on the TV.
- We turn on the equipment and open the settings menu on the TV.
- Find the “Signal Source” section (or similar).
- Select the HDMI interface and, if necessary, agree to data transfer.
In some cases, you may need to restart the TV.
RCA
In the case of “tulips”, there should be no problems connecting the video player to the TV. Here, each cable has its own color coding. The yellow wire is responsible for video transmission, and the red and white wires are for audio output. On some TVs, for example, from the Supra brand, there is not a color, but a letter marking: Video, AudioR, L (right and left channel).
Connection process:
- We connect the cable to the appropriate interfaces on the DVD and TV.
- On the TV remote control, select AV mode.
- On smart models, you need to go to settings and set the signal source to RCA/AV.
When connecting the player to TVs from Philips, Sony and other brands running the Android platform, you may need to restart the equipment, otherwise the TV will not be able to detect the DVD player. If the TV is new and equipped only with an HDMI interface, then you will have to buy an RCA->HDMI format adapter.
SCART
Almost all old branded models of DVD devices were equipped with this interface and a SCART cable. It’s quite difficult to find the latter in stores, but still possible. In any case, there are plenty of offers on Aliexpress.
The player is connected to a modern TV using an RCA adapter. That is, the adapter will be in SCART -> RCA format. The process itself is similar to the procedure described above.
Important! Some DVD devices have a pair of SCART connectors. You need to connect to the interface marked In.
S-Video
The component interface is similar to RCA in both appearance and connection method. There is also color coding here, so it is almost impossible to make a mistake. When connecting the player to TVs from LG, Samsung, Sony and other modern models, you cannot do without an adapter.
In this case, you will have to choose whether to watch broadcast television or work with a DVD device, because the adapter is connected to the antenna connector.
Connecting DVD via S-Video:
- We connect the color markers to the player, and the other ends to the adapter.
- We connect the adapter to the TV into the main antenna connector.
- In the TV settings, specify the signal source - AV or S-Video.
- We connect the speaker system (headphones, speakers) to the 3.5 or 6.35 mm port.
Connecting DVD to old TV
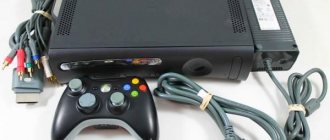
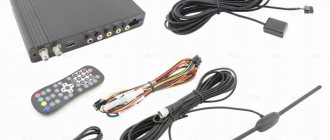
Soviet-era TV receivers are equipped only with an antenna socket. To connect a DVD player, you will need to use high-frequency modulators (HF or RF). This device is used to receive and broadcast signals from DVDs using the well-known “tulips”. As a result, the pulses are converted, with the ability to connect the unit to the antenna connector.
Game consoles such as Shogi were connected in a similar way. Modules can be purchased in specialized stores. A 5 volt unit is used as a power supply. Connecting a DVD to an old TV is possible by making structural changes to the TV receiver. To do this, install an RCA connector responsible for the composite signal and a switch.
If you do not have the appropriate skills, it is better to contact a specialist. Most TV experts will build the required mechanism without any problems. If the TV model has only one audio jack, the problem can be solved by connecting the wires on the player panel. You will need to plug a red and white plug into the TV. Simply connect the second “tulip”, which will ensure the supply and broadcast of sound. It is worth noting that such audio playback will be in mono mode.
For the pairing of the equipment in question to work correctly, you must activate the corresponding section in the TV settings. Open the menu, select the item responsible for adjusting the sound, select the line MONO or with a similar name, depending on the model of the receiver.
How to connect a DVD player to an old TV
On such models, the user will most likely not be able to find an HDMI connector and an S-Video port. Such devices have only RCA and SCADA ports.
Therefore, you can use the methods discussed above to connect. It is not advisable to buy an adapter from SCADA to HDMI, because If the signal is lost, it will be weak and unstable, and the image will greatly lose quality.
It is easier to connect DVDs to old TVs using “tulips”. In this case, the quality of the transmitted image will be better than on the SCADA interface. The quality can be further improved in the TV settings using the remote control.
Possible problems and solutions
Maksim
Equipment repairman
Ask a Question
Question to the expert
The equipment does not turn on or does not work correctly. What to do?
Check the wiring and socket for serviceability. Inspect the wire for damage. If other equipment turns on without problems from the power source, you need to contact a service center.
What to do if there is no sound or picture?
Replace the wire with a better one
Poor picture or audio quality. What to do?
Check the reliability of the plug connections. If breaks or play are observed, the product should be sent in for repair.
Lack of technology activity...
Check the connectors for foreign objects and dust.
Problems with the first connection. What should I do?
Possible manufacturing defect. To confirm or refute functionality, you must consult a professional technician.
Possible problems and their solutions
Although the process of synchronizing the plasma panel and DVD player is simple, users may encounter some difficulties.
The most common problems and ways to solve them:
- If the equipment does not work,
then first check the power supply. There is a possibility that the root of the problem lies in the wiring or socket. Try connecting the device to a different network. If it is the power supply system that is causing trouble, then it is best to contact a specialist. - If there is no sound and picture,
you need to check the condition of the wire that is used for synchronization. If defects are found, replace it with a new one. After replacement, configure the plasma panel. To do this, select “new signal reception source” in the menu. - If the device broadcasts a poor image,
check the reliability of the connection. The plug must fit tightly into the port. If a gap appears in the connector, then there is only one solution - contact service. - There is no signal.
Quite often the cause of the problem is a foreign object in the connector. This could be particles of debris or dust accumulation. Clean your equipment periodically. To do this, you can purchase a can of compressed air and blow out the connectors.
Additional recommendations
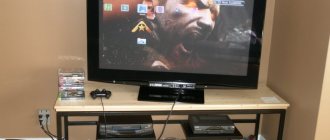
When pairing a TV and DVD, you must take into account the correct placement of the devices. Experts do not recommend installing the player on a TV. During operation, the equipment heats up, transferring heat to each other. This violation often leads to the breakdown of one or both devices.
Mounting the TV on top of the DVD player is also not the best option when connecting. Even if the TV has compact dimensions, not every player has sufficient body strength. The best option is to use a special cabinet equipped with a shelf for DVDs.
It is recommended to place the player near the TV. This allows you to avoid heating the wires, which causes deterioration in the reception and transmission of audio or video impulses. Elevated temperatures have a particularly negative effect on HDMI cables. If the tension on the wires is critical, they may simply fall out of their respective sockets.
Cables must be stored in a dry place, out of reach of small children and pets. To ensure reliable fixation, ties and identical fasteners are used. There should be no kinks on the cord; during long-term storage, it should be carefully folded.
Available DVD connectors
Before proceeding with the procedure for connecting the DVD player to the TV, find the available ports.
This port is considered the most optimal method to connect the player to the TV. The connector can transmit video of any format to the screen without losing quality.
In terms of external parameters, HDMI is similar to a USB connector. The main difference is that the port is thin and oblong.
It is best to use cable form 2.0 (or higher). It is important that there is the “High speed with Ethernet” marking.
Choose wire from well-known brands. If difficulties arise, check with the markings on the connectors.
Scart
This is not the most convenient option. Although the quality of sound and picture does not suffer during transmission, this port is very rarely found on modern plasma panels and you will need an auxiliary wire for connection.
Another name for the connector is tulip. For many years, it has been the most common way to connect not only a DVD player, but also other television devices.
RCA has the following colors:
- red;
- white;
- yellow.
The first two are necessary for sound playback, the last one is used to transmit video images.
Connectors can be located on one side of the cable or on both sides at once. To avoid mistakes, refer to the colors on the TV and connectors.
S-Video
It is recommended to use this port to connect a DVD player when other options are not feasible. Data transfer through S-Video has limitations - it can only provide a picture for viewing. To transfer the audio track you will need an adapter.
Checking the functionality of the equipment
After manipulating the selected method of connecting the DVD to the TV, you need to check the operation of the equipment and, if necessary, make additional settings. The process is carried out as follows:
- devices are plugged into the socket and “Start” is activated;
- start the DVD player;
- press Setup on the player’s remote control;
- open the “image options” menu item;
- adjust the characteristics in accordance with the recommendations given or tips specified in the instruction manual;
- Choose your favorite equalizer option and sound level.
After the operations have been completed, in most cases you can watch your favorite movies in decent quality. For those who love a variety of special effects, experts recommend additionally purchasing suitable speakers, which are connected separately and enhance the audio display.
When purchasing a DVD player from any manufacturer, you should check the availability of a cable for connection, compatibility with the existing TV model, and sometimes you need to buy an adapter.
If you know the basic rules, connecting equipment and setting up will not take much time even for an inexperienced user.
TV with built-in player
To turn on a TV with a built-in player, there is no need to use cables or additional equipment. To operate the device, you only need to pull out the disc tray, insert a movie and press the play button. The guide will help you decide how to connect a DVD to your TV. You can even connect old TVs (Samsung, Philips) to the new player.
DVD players are quite common because they allow you to significantly expand your entertainment world. Their cost is low, so anyone can purchase such a device. There are many ways to connect a DVD player to a TV and they all have their own characteristics, but they are not complicated. After setting up, you can watch movies for as long as you like and a countless number of times.
Caring for your DVD player
The average lifespan of a high-quality player is at least 5 years (50-60 thousand hours). The laser head of the device is exposed to dust, moisture and requires appropriate care. Long-term operation of the device is guaranteed if the following rules are followed:
- Clean the player with a dry cloth without using aggressive detergents.
- If there is a monitor, it is wiped with special disinfectant wipes.
- Do not place the equipment in rooms with high humidity and sudden temperature changes.
- It is not allowed to turn on the equipment with wet hands.
- For writing models, it is recommended to use cleaning discs.
- There is no need to turn on the device “idle”.
- Use licensed, unscratched discs.
- Avoid touching the working parts of the DVD with oily and dirty hands.
Connection options
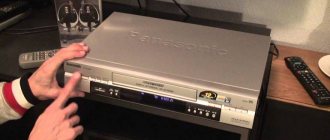
The instructions should tell you how to connect the VCR to your TV. Installing the equipment takes a minimum of time. It is necessary to connect the connectors with a special cable. However, users have many questions. Not everyone understands the names of interfaces and their purpose.
There are several ways to connect a VCR to a TV:
- coaxial cable;
- RCA cord;
- SCART wire.
Each of these options has its own advantages and disadvantages. The final choice must be made in accordance with the interfaces that your TV is equipped with. For example, some modern models have an RCA connector, while others have a SCART connector.
It is possible that you will not find the necessary interfaces. This applies to new products on the TV equipment market. In this case, you will need to purchase an adapter.
Now let's take a closer look at each of the options presented above. We will create step-by-step instructions for setting up a correct connection.
TV screen care
A TV paired with a DVD player requires appropriate maintenance. It is prohibited to wipe the screen with liquids containing alcohol, acetone or other aggressive compounds. It is recommended to remove dirt and dust from the surface of the TV receiver using a clean rag or special napkins. You can buy them in hardware stores.
Ignoring these rules leads to the formation of streaks, stains on the screen, even scratches or microcracks. Hard tap water is also not an option. Each TV comes with instructions. Which details care methods and precautions.
You can connect the DVD player to the TV receiver yourself. Even an inexperienced user can handle all the manipulations. The main thing is to follow these recommendations, decide on the connection method, activate the equipment correctly and enjoy your favorite TV series or movies. If you follow the rules and there are no equipment malfunctions, the process will take a few minutes.
Possible problems
First of all, you should check the integrity of the cables and plugs. Make sure that the latter fit well in the connectors and do not move. The wires should not be strained under any circumstances. A cable malfunction is indicated by a picture with ripples, specific “snow” and artifacts.
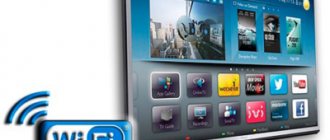
If there is no image on the screen, then you need to check not only the main channels, but also additional ones, which are marked with a “+” sign or double letters. On Smart TV format models, set the current signal source. It must match the interface to which the cable is connected. Sometimes it is enough to turn the equipment off and on for the TV to see the DVD player.
A large number of different set-top boxes can be connected to a Smart TV device, increasing the capabilities of the equipment. Find out how to connect a DVD to a TV later in the article.