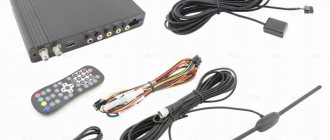
Not all modern TV models come with Smart functionality. Of course, you can “pump” the device by connecting a special set-top box, but there is a cheaper and easier way. It is enough to know how to connect a laptop to a TV via HDMI.
Connecting a laptop and TV is a very simple task. Simply connect one end of the wire to the socket on the laptop, and the second plug to the port located on the back cover or side of the TV. What will it give? Once connected, you will be able to watch movies, TV series and sports broadcasts on the big screen. In essence, the TV will serve as a second screen. Everything you run on your laptop is automatically transmitted to your TV screen.
What you need to connect your laptop to your TV via HDMI
Before we move on to the question of how to connect a laptop to a TV via HDMI, we’ll make a list of the necessary devices. You only need three things:
- HDMI cable;
- TV;
- laptop.
Synchronizing your TV and laptop is a simple process. You only need to buy a cable that will allow you to duplicate the image on the big screen. It is very rarely included in the basic package. It's inexpensive. You don't need a program to connect TV to your laptop. Therefore, any special skills are not required either. Just follow the instructions.
Some TVs and laptops do not have an HDMI interface, but this is very rare. In such situations, you need to buy an adapter for other connectors.
Connection using RCA
This scheme gives the worst picture. This is not surprising, since RCA (“tulips”) were used even during the introduction of television as such. The signal is transmitted over three wires - two for stereo sound and one for video. Today there are practically no computers equipped with appropriate connectors. Regarding televisions, RCA was the standard back in the years of popularity of devices with a cathode ray tube (kinescope). If your PC has the appropriate connectors, then connecting everything is easy:
- turn off the TV;
- connect the cables - focus on the color, and for sound transmission use a mini jack-2RCA cable;
- If the video adapter does not automatically detect the TV, then in its settings, turn on the “composite” or composite picture output mode.
Don't trust online sellers who offer VGA-to-RCA adapters and the like. There are the following reasons for this:
- such a combination necessarily requires a separate hardware video converter;
- a good video converter will cost so much that it’s easier to buy a new inexpensive TV.
Preparation
Connecting a laptop to a TV via HDMI is done according to the following scheme:
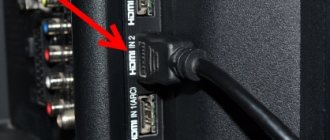
- Find the HDMI interface on your laptop. It is usually located on the left or right.
- Find the connector on the TV through which we will connect the laptop. It is located on the back panel, sometimes on the side. Remember its number, it is usually written in small print next to the connector.
- Connect your laptop and TV using an HDMI cable. It is the cord that acts as the connecting element.
When you have connected the cable, the connection is complete, proceed with the setup.
Types of HDMI cables
There are three main form factors that an HDMI cable can come in. The first is a simple type A, which has 19 contacts, and is used in full-size devices - computers, televisions and set-top boxes. This is the most common type. Mini-HDMI type C is a more compact connector that is used in equally compact devices - smartphones, tablets, netbooks and sometimes video cards. It is also equipped with 19 contacts and its characteristics are in no way inferior to its “bigger” brother.
Variety of connectors. Micro-HDMI type D is the smallest connector in the entire family. Despite its size, it also contains 19 contacts and fully complies with the specifications. Along with the mini version, it is used in smartphones, tablets, video cameras and other portable devices. In fact, there are two more types - B and E. The first is only in the official specification, and has never been used in real devices, since it has 26 contacts and is quite large in size. The second one is quite rare - it is used in car multimedia systems. Equipped with 19 contacts and has additional shielding to protect against interference from other vehicle devices. There are a huge number of adapters for other types of connectors that allow you to output images from a laptop via HDMI for devices such as old TVs or PCs.
Setting up your TV
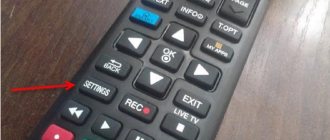
When the cord is connected to the TV, take the remote control to open the main menu. You need to switch to HDMI, that is, change the signal source. Each TV has a different setup menu.
Mostly, the signal source is selected in the “External Inputs” section or using the “Source” button on the remote control. Set your TV's priority to the HDMI connector with the number to which the cable is connected. When you are done, the laptop desktop will appear on the screen.
Possible problems
Even with correct manipulations, problems may occur when connecting the cable. The most common problem is that there is no sound transmitted through the TV, or the computer does not see the device.
No sound playing
This is a fairly common problem related to settings. In order for the TV to broadcast sound in addition to the image, the following actions are carried out:
- The start key opens the menu and finds the “sound” item in the search window.
- By opening this tab, you can see all the devices connected to the computer. Most likely, the name of the TV model will not be found in the connected devices.
- In order to see inactive devices, right-click to open an additional menu in the tab.
- By checking the box “show disabled devices”, you can see the name of the TV model and turn it on using the sub-item in the pop-up window after right-clicking on the device name.
- Changes in settings are confirmed by pressing the OK button at the bottom of the window.
- The remaining devices are turned off using the same algorithm.
In addition to the main reason, there are several other options why sound is not broadcast. The problem may occur if the TV supports multiple HDMI ports. In this case, you should check in the settings which port transmits sound by default and connect the cord to it or configure the sound on the desired connector using the TV menu.
The device may not support HDMI audio. To check this you will need:
- Call up an additional menu on the “My Computer” shortcut with the right mouse button.
- Using the “properties” key, select “device manager”.
- In the window that appears, find the item “Sound, game and video devices” and check whether the computer supports High Definition Audio.
If high-resolution audio is not supported by your device, you will need to update the driver on your video card.
The laptop does not see the TV
If the image does not appear when connecting via an HDMI cable after setup, there are several possible reasons why this is happening:
- the HDMI cord or socket itself is faulty;
- the settings on your PC or TV have gone wrong;
- problems with the video card – driver update required;
- laptop virus infection.
You will need to double-check all the settings on the PC to determine whether the signal source on the TV is found correctly (whether the name on the screen matches the number of the port into which the connector is inserted). The video card is checked through the device manager and, if necessary, reinstalled or updated on the manufacturer’s website.
In addition, the device is diagnosed for the presence of malware , and if after all the manipulations the problem is not resolved, you should send the device to a service center to look for technical problems.
Laptop settings
Once everything is connected, you can adjust the image quality. This is a mandatory measure if HDMI from a laptop to a TV displays a picture for the first time. Otherwise, the image may be unclear or blurry.
Follow the simple step-by-step instructions:
- Right-click on an empty space on your desktop.
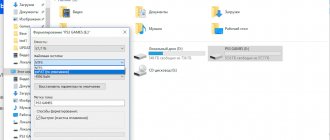
- From the drop-down context menu, select the “Screen Resolution” command.
- By adjusting the screen resolution, you need to select the optimal picture quality.
Change the resolution and see how the image quality improves or deteriorates. There are also several options for connecting to a TV:
- duplicating laptop screen on TV;
- expansion of the work area;
- TV as a second monitor – the laptop screen and TV work independently. You can, for example, simultaneously play a movie on the TV and surf the Internet or work on a laptop screen. This type of connection creates a load on the video card;
- The laptop screen is turned off, only the TV works.
This completes the setup. Now you can enjoy watching your favorite movies on the big screen. Setting up a connection on a netbook follows a similar principle.
Cable - how to choose the right one?
You can display the image using the following cables:
- HDMI. The most common interface. Advantages: completely digital method of data transmission (maximum quality), no need to install drivers, cable length can be any, image and audio track are transmitted simultaneously, universal connection (almost no equipment compatibility problems). The downside is that HDMI only became widely popular in 2010.
- VGA. The old interface that most computers and TVs older than 10 years have. Pros: easy connection (no more difficult than HDMI), will work with outdated equipment. Cons: the signal is transmitted in analog form (not the highest quality), you need to use a separate cable to transmit sound. There is a smaller version of the connector - mini-VGA, which can sometimes be found in laptops.
- DVI. A digital video transmission interface common in the computer world. Used to connect monitors to a computer and would have been the most popular on the market if not for HDMI. The advantage is that the image is transmitted digitally. Disadvantage: decreased popularity in the market. A caveat is that when using a DVI-HDMI adapter, not only the picture will be transmitted, but also the sound.
- S-Video, RCA. Outdated analog interfaces that are practically not used today. It should only be used for old equipment that does not have any of the above connectors.
We recommend taking these tips into account when selecting wire:
- if the TV and computer are no more than 10 years old , then most likely they have HDMI connectors - choose this interface;
- if the TV and computer are more than 10 years old , then most likely they use a VGA video interface - don’t bother and don’t select other connection options;
- if the TV is old and the computer is new, then a simple option would be to purchase an HDMI-VGA adapter - the picture quality is not perfect, but under such circumstances you will not achieve anything better;
- if the TV is new and the computer is old , then there is a high probability that the TV is equipped with a VGA connector and using the appropriate cable will be rational, but if it is not available, then definitely buy a VGA-HDMI adapter - it is more expensive than HDMI-VGA.
Using a wireless monitor
This function uses Miracast technology, a standard for wireless multimedia signal transmission. The technology allows you to transmit video signal packets in the ITU-T H.264 format. This provides:
- Playing file contents;
- Complete duplication of what is happening on the second device.
The technology works in two directions - from laptop to TV and back. The main condition is that the receiver and transmitter are equipped with Wi-Fi modules, and that the software and hardware have adequate support for the Miracast wireless display.
Note! The laptop must be no older than 2013, its video card must support DirectX 12, and the system must have a virtual Wi-Fi Direct adapter. Connecting to a display wirelessly is best implemented in Windows 10.
If the TV is not equipped with a Wi-Fi adapter, no problem. You can use special devices such as TV-Box, which allow a regular TV to acquire smart functions. These devices run on the Android operating system and support wireless display mirroring technology.
There are also models for Windows, but their price tag is already higher than that of Android TV-Box.
Or use an Apple TV set-top box. Only it does not support Miracast, but works through its own AirPlay. Therefore, connection is only possible with Apple products: MacBook, iMac, iPhone, iPad.
The wireless display function on TV or set-top boxes is called differently:
- Screen Mirroring;
- Screen Beam;
- Mirascreen;
- MirrorShare and more.
How to connect a laptop to a TV via WiFi:
- On Windows 10, in the lower right corner, click on the notification icon to open the notification panel.
- Click Cast to Screen. Also, this menu is called up with the Win+P keys.
- In the next item, select the line “Connect to a wireless display”.
- At the same moment, in the settings of the TV or set-top box, find the “Wireless connection” item.
- Open it and run Search.
- Activate the found devices with each other by pairing.
After this, the display will broadcast everything that happens on the laptop screen.
The peculiarity of the technology is that a router or Internet is not required for the connection.