You can connect a huge variety of devices to your computer. All PC users should know about the features of each process. Today we need to figure out how to connect a projector to a computer. In fact, bringing your idea to life is not as difficult as it seems. The main thing is to know about some connection nuances. What should users pay attention to? What will help bring your idea to life?
Selecting a Projector Type
First of all, let's understand the different types of projectors. In most cases, it will be one of two models: DLP (digital light processing) or LCD (liquid crystal display).
In an LCD projector, three liquid crystal matrices, each of which is responsible for creating an image of a primary color, create three pictures - red, green and blue. Using a glass prism, they are combined, giving a full visible spectrum, and in this form they are transmitted to the screen.
A DLP projector uses a single chip made up of millions of microscopic mirrors. Each can be rotated to direct its light toward or past the projection screen, so that each mirror essentially acts as a TV pixel. A rotating color wheel is located in front of the light source and determines what color image is currently being projected. Three-chip DLP models are also available, in which the light is split into three components and recombined, just like in LCD projectors, which eliminates the need for a color wheel.
In addition, there is a projection system LCoS, which stands for “liquid crystal on a semiconductor” and it works almost like DLP - only instead of mirrors, liquid crystals are used to control the light. This method is used by Sony and JVC under the names SXRD and D-ILA, respectively.
All of these technologies have their advantages and disadvantages. DLP generally has better brightness and clarity, but it tends to have a "rainbow effect" (red, green and blue colors do not mix but appear separately) when monochrome images are not perfectly combined. LCD projectors are cheaper and don't suffer from this effect, but they do have problems conveying motion and the blacks are less deep than other types of projectors.
In turn, LCoS does not have the rainbow effect, like DLP, and the tendency to burn out matrices, like LCD. However, it is more difficult for them to create deep blacks than DLP models. In addition, they are usually more bulky and expensive.
With all the differences between technologies, when choosing a new projector, you should not rely only on their characteristics. It is best to read the reviews of the model you like and make a decision taking them into account.
Projector
For a system with a projector, a cabinet is required. The projector is neither a video source nor an audio amplifier. A separate video source and speakers are needed.
We need a receiver. A receiver is a device that performs two functions: firstly, it switches the signal from one of several inputs to an output, and secondly, it is a multi-channel audio amplifier.
It is quite large, you need to take this into account when planning space in the cabinet. In the picture above we see 4 HDMI inputs, 1 HDMI output to the projector, 5 outputs to the speakers, to the left of them is the output to an active (that is, requiring an electrical outlet) subwoofer. This is a 5.1 receiver - 5 speakers and 1 subwoofer. The number of speakers can also be 7, 9, 11, 13, and the subwoofer can be 2.
In the cabinet we put the receiver and video signal sources: set-top box, media player, Blue-Ray, etc.
Is it possible to make a projector with a wireless audio system, such as Sonos, and without a receiver? Can. We will still need a video source, let it be an Apple TV, which we will place next to the projector near the ceiling. We will transmit sound to the soundbar using an optical cable or an HDMI cable. Since Apple TV has only one HDMI output, we will need an HDMI splitter. If we transmit sound via optics, then we need a splitter for HDMI and optics, and if we transmit via HDMI, then we need a splitter for two HDMIs, one of them with support for ARC (audio return channel, audio transmission without video via HDMI). The new Sonos soundbars have only HDMI input, but come with an optical-to-HDMI adapter. So, for versatility, you can add an optical cable (Toslink) and HDMI, but to reduce the cost, only an optical cable is enough.
4K or Full HD: which resolution to prefer?
While buying an HDTV seems like a weird fad these days, a 1080p projector makes perfect sense, especially if you're on a budget. There are many decent options on the market; our favorite is the Epson EH-TW650.
Projectors in the price category 100,000 - 300,000 rubles. allow you to count on 4K resolution - four times more than HD. It's not true 4K, but it still uses 4.15 million pixels (or slightly less) - half of Ultra HD's eight million. With pixel shifting, which quickly and alternately displays two lower-resolution images to create a final high-resolution image, projector manufacturers can claim 4K support and receive certification from the Consumer Technology Association (CTA) in the US.
The upper end of the price spectrum is occupied by devices with true 4K resolution. Their prices start from 450,000 rubles, but they guarantee that the image will be as clear as possible, as intended, without any tricks. The best picture we've ever seen was produced by the excellent JVC DLA-Z1, which costs an impressive amount of money.
Ultimately, the price and size of the projector will determine the resolution you can expect; All that remains is to choose the best option from the available ones.
Is it possible to get HDR at the same time?
Today, only a crazy person would buy a 4K TV without HDR (high dynamic range) support. With projectors everything is much more complicated.
Most often, HD projectors do not support HDR. Many inexpensive 4K projectors can handle HDR10 (the standard version of HDR) from Blu-ray discs or streaming services, but can't reproduce the full range of colors.
For example, the BenQ W1700 model, according to the words, however, reproduces only 96% of the Rec.709 palette. The five-star Optoma UHD40 projector does much the same thing.
Of course, having the ability to receive a signal in HDR is better than not having it; However, you can also find a projector with full HDR support - you'll just have to pay a lot more for it. The Award-winning Sony VPL-VW260ES is a decent starting point for decent HDR10 pictures, and the more you're willing to spend, the better the picture you'll get.
Installation
Before installing the product, be sure to read the documents that come with it. Each model of projection equipment has its own nuances. If you did not receive it out of the “box” and you do not have instructions, you can find them on the manufacturer’s official website.
You should not put devices with high resolution in a small room. The product has characteristics that must be considered before purchasing. Setting up a projector begins with choosing a location for it. It is better to look at the entire set of projection equipment in advance and measure the room in which you are going to put it. To calculate everything. Use the information on the manufacturer's website. Or look at the documentation for the device. It indicates the optimal distance to the wall and recommended screen sizes.
A modern projector is not a filmoscope for filmstrips that could be viewed on a “white sheet.” Although nothing prevents you from using the old proven method. But to get a high-quality picture and fully experience the effect of presence, you need a special screen. Its size largely determines how to install and configure projection equipment.
There should be a calculator on the manufacturer's website. There you need to indicate the screen characteristics and device model. And get the recommended distance from the projector to the wall. These are approximate values - it is not necessary to check the length down to the millimeter.
To calculate it yourself, you need the device’s projection ratio, horizontal and vertical offset. These parameters are in the equipment specifications. Using them you can figure out where to put it.
If you have a standard room with a sofa and a couple of armchairs (and not a theater room with several rows of chairs), then the screen should be hung at a height of 61-92 cm from the floor
If the projection ratio is 3:1 (three to one), and the screen size is 200 centimeters, then the distance between the product and the wall should be 3 × 200 (multiply the projection ratio by the size). This is the recommended value. Focus more on your perception. If you are not happy with the picture, move the projector.
The vertical offset determines the height at which the projection equipment should be located. This parameter is indicated as a percentage. Some people place the playback device on the floor, some on the nightstand, some hang it from the ceiling. If the vertical offset has a plus sign (for example, +90%), the image will be higher than the device. If with a minus sign (-91%) - lower. Some models allow you to rotate the lens.
Correct installation of the screen is also an important point. Of course, this largely depends on the situation in the room. Projection equipment should be positioned so that you can watch movies comfortably. But you still need to follow some recommendations.
- Do not project the screen onto a wall that is exposed to direct light. Even a good and properly configured projector will show poorly if the room is very bright.
- There should be no foreign objects between the device lens and the wall. If you decide to place the product behind the audience, be aware that their heads may block part of the frame.
- The closer the lens is to the wall, the brighter the image. But this reduces clarity. Turn on your projection equipment to see what the final picture will look like. Without such a check, it is impossible to select the projector’s resolution, contrast and other parameters.
- Find a position so that the projection hits the screen directly. If necessary, place the device higher or lower. Sit in the place from which you will watch the video. Check whether everything is clearly visible, whether shadows from objects or glare are interfering.
- If you are hanging the device from the ceiling, use a special mount.
- Decide in advance where the wires will be located and whether they are long enough.
To the computer
The projector can be connected to a computer as a second monitor or instead of it. This way, video from your PC will be played on the big screen. And you can configure settings using your mouse and keyboard.
Projection equipment and displays typically use a single video adapter port, VGA. And to connect them simultaneously, you need a VGA-DVI cable. For the monitor, leave the main video output. Connect the projector to the DVI slot via an adapter. If the video card has several VGA ports, additional wires are not needed. Use those included with the device (located with it in the box). Some projection equipment models work via HDMI and even USB. If these slots are not present, you will also need an adapter.
Once connected, the computer should detect the presence of a projector. If it came with a driver, install it. Or in the projection equipment settings, find “Signal source” and specify the port to which the cable goes.
To interface with two video devices:
- Start - Control Panel.
- Screen icon. It's in the "Design" section.
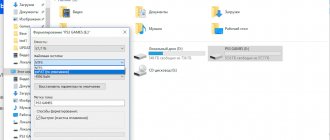
- “Screen resolution” or “Screen settings” item. They're on the left.
Screen resolution
- If the PC “sees” the projection equipment, then two desktops will be available in the menu.
- A “Multiple screens” drop-down list will also appear there.
- You can choose one main display. And then switch.
- Or the “Duplicate” line so that everything is the same on the monitor and projection.
- Or the “Expand screens” option. Then one device will be a continuation of the other. If you drag an object outside the “boundaries” of the monitor, it will appear in the projection.
With a computer it’s easy to figure out how to flip an image on a projector:
- Open Screen Settings. This is where you were working with two displays.
- Select the device desktop.
- Pay attention to the “Orientation” item. There you can select the options “Landscape”, “Portrait” and “Inverted”.
Setting screen orientation in Windows 7
When connecting to a PC, an error like “Signal not recognized” may appear on the projector. This does not mean that the equipment is incompatible. The device simply does not support the resolution that is set on the computer. Look in the instructions for the product to see which picture size is suitable for it. The same information is available on the manufacturer's official website. Set the desired resolution in the display settings.
If you are using the device instead of your main monitor, you will have to do the final projector setup on the larger screen. This is not very convenient. Especially when the computer is far away and you can’t see the projection.
The product can support Wi-Fi. But to work on such a network, you need to create a DLNA (multimedia) server. Another loophole is to connect the projector to the PC and the monitor to the projector. And you will have two screens.
To the player or set-top box
The image shows the connection of the projector to the set-top box and other equipment
Projection equipment works in conjunction with DVD players or set-top boxes if they have suitable ports. But then the choice of parameters depends on the menu of all products used. And it can vary greatly depending on the model.
The projector is connected to the player like a regular monitor. After connecting, go to settings and set the appropriate resolution. This is indicated in the specifications of the projection equipment. Be sure to read the instructions for these devices. If on a large screen it is inconvenient to “climb” through the parameters in search of the desired item, connect the set-top box to the monitor, reconfigure it, and then connect it to the projector.
Cameras, camcorders, Blue-Ray and game consoles can also be used. Check the instructions to see what devices your projection equipment supports. After connecting, start searching for new gadgets on it or specify the port in the “Signal Sources” menu.
To a smartphone or tablet
It's better to use Wi-Fi or Bluetooth. Because for a wired connection you will need two adapters, which must be purchased separately. The first is from your phone's port to HDMI. The second is from HDMI to VGA.
There is a wireless connection between the projector and your phone using Wi-Fi
But there may be a problem. The HDMI cable will occupy the smartphone slot into which the “charger” is inserted. And playing video on a projector requires a lot of energy. If your phone battery drains quickly, look for a cord with a splitter that has ports for HDMI and a charger.
The result is a rather complex chain of cables. Run the projector to search for new hardware. And you can enjoy the picture.
It's easier to do this via a wireless network:
- In the projector settings, go to “Signal Source”. The name may vary. All available ports are listed there.
- Select "DLNA" or "Wi-Fi". The network name and password will appear.
- Activate Wi-Fi on your phone.
- Find the projector's network and enter its password.
- Open the settings of your smartphone or tablet.
- Item "Screen".
- "Wireless Monitor" or "Wireless Projector".
- Select your device and allow data transfer.
- There you can select the brightness, contrast, and in some models even flip the image.
DLNA
To connect all audio and video equipment into one multimedia network:
- Control Panel - HomeGroup. If you have active display by category, then go to the “Network and Internet” section.
- Click Create Group.
- Click "Next".
- Select the objects to which you want to provide network access. It will only be for devices included in the group. The projector requires "Video", "Music" and "Images".
Selecting objects to share
- If you already have a HomeGroup, give it access to media content.
- Confirm the changes.
- A password will appear that must be entered when connecting new equipment to DLNA. It can be changed.
- Click "Done". The current group settings are displayed.
- Click "Allow devices to play shared content."
- Come up with a name for your multimedia library.
- When connecting a projector, give it access to HomeGroup. And it will open files that are in the “C:UsersPublic” or “C:UsersPublic” folders.
You can also download programs to manage general graphics, audio and video data. For example, there are the JRiver Media Center and Home Media Server utilities.
With a wireless connection, the functionality of the projection equipment is limited. You won’t be able to change image parameters via a computer or figure out how to flip the screen on a projector. Only content viewing is available - you can open files from shared directories.
TV and cabinet with equipment
A more serious option. The cabinet can contain different video sources. For example, these:
- Media player (Apple TV).
- CD, DVD, Blue-Ray players. All films can be found on the Internet, but personal collections have not gone away.
- Game consoles: XBox, Sony. Or old Dandy and Sega.
- File server with HDMI output. If there is such an output on the NAS, then it may be a little more convenient to watch video from it directly than to pull video over the network.
- Video camera server. Of course, it’s safer to hide it somewhere and watch the cameras from an app on your smartphone, but sometimes you want to quickly switch the video input to the server and see the cameras on the big screen.
- Audio system receiver. We'll write about him a little later.
When the TV is on a stand, the cables can be laid neatly in a bundle behind the TV leg so that they are almost invisible. So something like this:
The TV is on the stand
But if the TV is hanging on the wall on a bracket (or is standing, but the cables should not be visible), then it makes sense to provide the opportunity to hang the TV as close to the wall as possible, and lay the cables from the TV to the equipment hidden in the wall. This is what it will look like:
Cables from the TV to the cabinet are hidden in the wall
There are TV models from several manufacturers in which all interface connectors, including the power input, are placed in a separate block connected to the TV with a single cable, due to this the TV turns out to be very thin and elegant. In this case, as in the case of a regular TV with connectors on its body, you must first lay a channel in the wall for cables from the TV to the cabinet. If the wall on which the TV hangs is built from gypsum board, a channel is still needed to make it easier to install cables later.
Pipe in the wall behind the TV
A rectangular ventilation duct can be used as a channel. Like this:
Sold in construction stores. It costs about 100 rubles. Dimensions 110x60mm or so. If the wall is concrete or brick, then a groove is made in the wall, a pipe is laid in it and plastered. This is the minimum sufficient pipe size; a power cable, internet cable, two HDMI cables will fit into this size, but you won’t be able to fit anything else through. Cables can be pulled out of the wall through a 90-degree ventilation turn. Then everything will be convenient. Since it can be very inconvenient to insert cables from a TV hanging on a bracket into an outlet located directly behind it (you have to remove the TV), it is better to move all the cables, including the TV’s power supply, to the cabinet. You can always extend the TV power cable or buy a similar one of longer length. Then you don’t need any sockets behind the TV, just a pipe outlet.
Connecting the Projector to a PC
The guide presented in this article is suitable for connecting the projector to both a PC and a laptop. But keep in mind that not all devices are equipped with the necessary video inputs and outputs by default.
Step 1: Connection
The process of connecting the projector should not cause any difficulties; you just need to follow the instructions we provide. Do not forget that both devices must first be disconnected from the high-voltage network.
- Locate one of the following connectors on the projector and your computer:
- VGA;
HDMI;
- DVI.
- At an electronics store, purchase a cable that has identical connectors on both sides.
If there is only one type of connector on the projector and PC, you will have to get a suitable adapter.
- Connect one of the connectors of the purchased cable on the rear wall of the projector in the “Computer IN” or “HDMI IN” block.
- Do the same on your computer and make sure the wires are connected tightly. In the case of a VGA cable, be sure to secure the connector using standard clamps.
Ideally, both devices should have the same type of connector.
Note: HDMI is the most optimal, as it guarantees high quality video signals.
Some models can be used wirelessly by default, working via WiFi.
After completing the wire connection, turn on the power on both devices, after which you can proceed to setting them up.
Wired connection
Before we move on, let's prepare the equipment.
- We inspect the case of the laptop and projector. Let's determine what connectors are available here. The ideal option is similar sockets on both devices. They provide an optimal level of communication.
There are four types of interface.
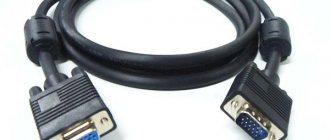
Analog VGA , found on older laptops. Capable of transmitting video signals only. When using it, a mini jack wire is additionally used, which transmits sound from the PC.
DVI standard has several varieties (which differ significantly in video resolution, the ability to transmit analog, digital signals, etc.). Rarely present on modern models.
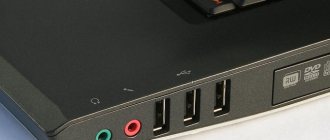
USB input . Often used when there are no other options. After all, such a protocol exists in almost any device. The appropriate wires are usually on hand. But it will require installing a special driver on your PC.
BY THE WAY. Using USB significantly reduces the quality of the video stream.
HDMI is the most popular and convenient digital format. It is distinguished by its ability to transmit images and audio in the highest resolution and HD quality. There are several interface modifications. On PCs, Micro Size or Mini Size are often available.
ON A NOTE. If the ports do not match, purchase the appropriate adapter.
- We calculate the required length of the cord. There are various cables on sale, the possible maximum is 100 meters.
The distance between devices within 10 m does not affect the communication level. With a further increase in distance, a core of larger cross-section is required. But it is preferable to place the devices within the same room. Otherwise, inconveniences arise when working with the equipment.
Now let's move on to the connection process.
ATTENTION. We carry out manipulations only when the equipment is turned off.
On the back of the projector we find the “Computer in” port. We connect one wire plug to it. The other side connects the cable to the laptop connector.
IMPORTANT. VGA and DVI standards are equipped with side latches. We tighten them all the way and check the tightness of the contacts (they should not dangle).
Then there are three scenarios.
The first method: turn on the devices. First - a projector, then a computer. Windows automatically determines which device the image should be output to. The equipment starts working.
The second method is used when the translator is equipped with a control panel. In this case, after launch, look at the “Source” button. It is designed to search for an incoming signal. Other options are special switches for a specific protocol (HDMI, VGA).
The third alternative is that the video projector has its own menu. Here are the necessary connection adjustments.
RECOMMENDATION. Models differ in their internal interface. We advise you to study the instructions for the device to avoid mistakes.
We use Wi-Fi
Wireless communication will require protocol support on both devices. This is done in two ways:
- an external transmitter is used;
- the built-in module is used (this feature is implemented in expensive devices).
We pre-load special drivers onto the laptop from the installation disk included with the projector.
If there is no such floppy disk, go to the projector manufacturer's portal. We find the appropriate software for the PC. Download and install.
REFERENCE. Software installation is a prerequisite. Otherwise, the switching will not work properly.
We connect a separate adapter via the projector's USB input (the built-in component is activated automatically when the device is turned on). The green color of the indicator indicates that the equipment is ready for use.
On the laptop we activate a special switch. It may be located in different parts of the case, depending on the model.
Data transfer starts.
Setting up a broadcast in PowerPoint
This application from Microsoft is often used when presenting slides. After all, it happens that photos are displayed on the wall, but simple text appears on the PC monitor. The program corrects this discrepancy.
The problem is solved in several steps:
- Find the “Slide Show” tab in the menu;
- activate the “Show presentation on” item;
- Select a video projector from the drop-down list;
- save the changes.
Step 2: Setup
When connecting a computer to a projector, it is necessary not only to connect the equipment correctly, but also to configure it for further use. In some cases, the configuration is carried out automatically; just turning them on is enough.
Projector
- As mentioned above, projectors usually automatically configure themselves to transmit video signals. You will be able to know that the connection has been successful if the projector begins to display an image from the computer after turning on.
- Some equipment models are equipped with a control panel with a “Source” button, when pressed, the search for a video signal begins, and when it is detected, the picture from the main monitor is duplicated on the wall.
- Sometimes the projector remote control may have several buttons corresponding to a particular connection interface.
- There are also projectors with their own menu for settings, the parameters of which should be set based on the instructions included in the kit.
Screen resolution
- Review the specifications of the projector you are using, particularly the supported screen resolution.
- On the desktop, right-click and select “Screen Resolution”.
- Through the “Display” list, select the projector model.
- In the graphics settings, change the value according to the requirements of the connected equipment.
- On Windows 10, there are a few additional steps required.
Read more: How to change screen resolution in Windows 10 - If you did everything correctly, the image quality from the projector will be stabilized.
Display Mode
- To change the way the projector operates, press the “Win+P” key combination on your keyboard.
The keyboard shortcut is universal for versions of Windows OS higher than the seventh.
The interface with display mode settings may differ from what we presented.
- Select one of the available options:
- Computer only – the projector will be turned off, the image will remain only on the main screen;
Duplicate – the image from the main monitor will be copied by the projector;
- Expand – the working area will become the same for the projector and computer. In this case, the main monitor will always be on the left side of the virtual space.
- Only the second screen - the image will remain only on the projector wall.
- If you are using a laptop, there will be an additional button on the keyboard (Fn) that allows you to instantly switch the display mode.
In Windows 10, the names of the items are slightly different from those in previous versions.
By following these steps, you can easily achieve a positive result by successfully connecting and setting up the projector.
Projector, TV and audio system
Not the rarest option: they mostly use the TV, but if they want to watch a movie, the screen is lowered and the projector is turned on. But at the same time, the multi-channel audio system must work with both the projector and the TV.
There are two options: either we take a receiver with two outputs, or we install a separate HDMI matrix. Receivers with two HDMI outputs are not uncommon; they are not found only in the lowest price segment; on average (from about 45 thousand rubles) they are available. You can conveniently switch the output from the projector to your TV.
An HDMI matrix should not be confused with an HDMI switch (switch), which has several inputs and one output. On the contrary, we need to have 2 exits. The HDMI matrix has several inputs and several outputs; we can switch the video signal as convenient for us. Control from the remote control or via RS232 or RS485 interface. In principle, for tasks that do not require sound amplification, you can use a matrix instead of a receiver.
Adjusting the Projector
Many projectors have features for adjusting different projection distances and angles. The most common settings are: image zoom adjustment, focus adjustment, tilt adjustment, horizontal and vertical keystone adjustment.
These examples will help you determine the necessary adjustments to obtain a clear image without any distortion.
Focus adjustment needed
Most projectors have a focus adjustment ring (or options in the control menu). Rotate the ring to the right or left until the image is clear. Note the sharpness of the small text as you adjust the focus. Have a person with good eyesight check the focus adjustment. Note: Focus must be adjusted again after any changes in projector location, zoom, or changes in horizontal and vertical keystone distortion.
Angle adjustment required
Adjust the angle of the projector by raising or lowering the front stand of the projector. If that's not enough, try placing something under the counter for extra tilt.
Changing horizontal keystone distortion
Horizontal keystone correction compensates for high or low projector angles by widening the top or bottom of the image to fill the screen evenly. The availability and location of these adjustments may vary depending on your projector model. As a rule, they can be found in the program menu or on the projector body in the form of special control buttons.
Changing vertical keystone distortion
Vertical keystone correction compensates for the lack of centering of the projector image. The availability and location of these adjustments may vary depending on your projector model. As a rule, they can be found in the program menu or on the projector body in the form of special control buttons.
Selecting an HDMI cable
Please note that you should not skimp on the HDMI cable! Especially on a long one. Especially on one that is mounted inside the wall (to the projector), and which cannot be changed later. Otherwise, it turns out that the whole cool home theater system for hundreds of thousands of rubles simply won’t work. With a cheap cable, the picture may be glitchy or may not work at all. I had a facility where video via HDMI was transmitted perfectly, but in ARC mode the cable did not work at all, I had to buy a new one and leave it hanging on the wall, since it was no longer possible to hide it neatly. HDMI cables - only 2.1 Hi Speed standard, only from a normal manufacturer. No noname for $10 on Aliexpress. A 10-12 meter cable costs no less than 10 thousand rubles. This also applies to toslink-toslink optical cables; a 10-meter cable costs no less than 4 thousand rubles.
For long HDMI cables, pay attention to the direction of the cable.
To be sure, it is better to run the HDMI cable corrugated and make sure that it is not touched in any way during finishing.
This is roughly what a layout of a home theater wall with a TV, receiver and projector might look like:
In general, designing cables for home theater systems is not easy. Especially non-standard configurations, such as wireless audio, switching between a TV and a projector, connecting to multi-room systems and other audio and video sources. I haven’t yet mentioned the control cables for all this equipment. So to complete the project I need an understanding of what use cases the system is expected to have.
45, total, today
Related posts:
- Multiroom audio system project on Sonos Let’s consider the process of designing a multiroom audio system for a country house on…
- Cable installation for a Smart Home As I already wrote, the most unreasonable way to save money in construction...
- Three new products from Sonos: ARC, FIVE, SUB Sonos has new products again. The last time new products appeared was…
- Sonos Amp - a new multiroom system, review New from Sonos I almost missed the appearance of a new product on the market...
- Audio multiroom on Sonos: selection of equipment In the spring of 2021, this article from 2021 is almost completely...
- Cables for LED strips I’ll tell you about one important point, namely how...
- Payback of the electrical and Smart Home project For me, all the advantages of preliminary implementation of the electrical, low-voltage and...
How to turn off the projector
After completing the presentation, the projector should be handled with the utmost care; do not mindlessly pull out all the wires and press the buttons. First, you need to close all documents and presentation tabs on your computer. Then return the screen extension to the desired position. Disable settings that display or hide images from the screen to the projector.
You need to turn off the projector step by step, just like you turned it on. The off button is pressed after making sure that all the lights are extinguished. Press the button once until the fan stops working . Only then can you disconnect the projector from the power supply.
After turning off, be sure to close the screen curtain to prevent dust from getting on the monitor itself. For preventative purposes, the screen itself can be wiped with a soft cloth soaked in alcohol or vodka. For these purposes, you can find special wipes or liquids for cleaning the monitor in stores.
The remote control and port can also be wiped with alcohol. Timely disinfection and cleaning of the projector will preserve its operation for a long time. We carefully wind up the wire cables, making sure that there are no kinks or creases.
After the devices are completely turned off, carefully disconnect all wires from all devices and put them in the box with the projector.
It is worth remembering that a projector is a very necessary device for modern presentations. Therefore, it needs proper care and the correct system of use. This device is very fragile and you should treat it with care and clean all its elements in a timely manner. Then it will serve you for a long time and will become an indispensable assistant during presentations.
Programs for working with projectors
Very often, when working with a projector, they use the Power Point program. Using it, you can enable the presenter method, where some of the information will be displayed on another device and will be visible only to the presenter.
The notes feature allows you to make additional notes. This allows you to avoid having to learn the entire speech by heart. A pen or laser pointer highlights certain important elements.
Also, using the program, you can view all slides at the same time or, conversely, change the size of one slide.
Sometimes when using small laptops it is necessary to download special applications for the projector, the same as for mobile phones. In order for the monitor to work separately or together with the desktop in these applications, it is configured separately.
Using the taskbar on all screens
With the right setup for a second monitor or projector, you may find it useful to have multiple taskbars to make it easier to switch between applications and files on your desktop.
Here's how to show taskbars on all screens and change how taskbar buttons appear on them.
- Quickly slide your finger inward from the right edge of the screen, click the Search button (if you're using a mouse, select the top-right corner of the screen, and then click the Search button), and then type Taskbar and navigation in the search box.
- Click the Taskbar and Navigation button.
- In the Multiple screens section, select the Show taskbar on all screens check box and select the appropriate options to configure Show taskbar buttons and Buttons on other taskbars.
- Click OK.
The nuances of connecting a wireless laptop
The following are the nuances for setting up the work:
- If you have a wireless projector, then you need to acquire drivers and a program to establish their “communication” with the laptop. Then connect the so-called antennas
(they look like ordinary flash cards) to both the laptop and the projector. As soon as the green light turns on, the Power devices will begin their interaction. - To seamlessly connect a laptop to a projector, there is an open-access program called “Connecting to a Projector”
. It may be present as a bonus in your laptop. There should be no difficulties here - you just need to launch it and use the proposed properties for their intended purpose. - Using hot keys,
you can select image output modes: turn off the projector or display the image only on the projector. The laptop will be inactive, so if additional “interventions” are suddenly needed, it is better not to use this function. It is also proposed to expand the screen, improve image clarity - these are all the keys from F1 to F
Possible problems and their elimination
The connection does not always work correctly. Or there is no signal at all.
First, check the tightness of the wire in the corresponding connectors. If there are additional ports, we try to pair the equipment through them. Then we reboot the laptop. This simple measure often helps.
Now let's move on to software settings.
- The system does not independently detect the connection of a new device.
The first method is the keyboard shortcut Win + P (in the English layout). The menu that appears offers possible options.
Choose from four scenarios:
- “Computer only”: no data is transferred to an external device.
- “Expand”: allows you to display part of the desktop on the image broadcast by the projector.
- “Duplicate”: implies simultaneous operation of the screens of both devices.
- “Projector Only”: means that the laptop display goes dark for the entire duration of the broadcast.
@reedr.ru
ON A NOTE. When viewing high-quality video, we recommend choosing the latter mode. This is especially important for weak laptops. This reduces the load on the processor and video card.
The second way is using a special key on the keyboard in the F2-F11 row. It works in conjunction with the Fn button.
- The resolution on the laptop monitor and the projector images do not match. This leads to distortions (stretching, compression) and other defects.
REFERENCE. This indicator depends on the capabilities of the projector. Budget devices support up to 1024x768, expensive ones - up to 1920x1080.
Fixing the problem on PC:
- Right-click on a free area of the desktop and click “Screen Resolution” in the context menu;
- select the appropriate value, confirm the changes by pressing the “OK” button.
BY THE WAY. A different scheme works on Windows 10: Start button - Settings - System - Screen - Advanced settings.
- Contact between devices suddenly disappears. This failure is caused by a problem with the drivers.
Go through Control Panel - Device Manager. On the equipment screen, look at the lines “Video adapters” and “Other devices”. In the last list we look for the name of the projector. The defect is indicated by a yellow sign next to the names.
We go to the official website of the translator manufacturer and download the necessary software. Open the Manager again. Right-click on the model name and select “Update Drivers.” Specify automatic search or manual selection. Manual installation will be required if Windows does not see the necessary files.
Setting up a connection between a laptop and a video projector is possible even for a novice user; you just need to strictly follow the instructions. Connection takes a minimum of time and effort. The methods discussed above differ from each other. A wired connection is the most reliable method of broadcasting, but sometimes requires additional adjustments. Wi-Fi communication provides mobility, but it can be interrupted and the data transfer speed often changes. Problems that arise are usually resolved on their own. If something does not work out, this indicates a possible technical defect. In this case, we recommend contacting a service center.
What to do if there is a black screen after connecting?
If after these manipulations you see a black screen with the words “No signal”, then you should check the image settings. Namely, the resolution that is supported by the projector should be set on your laptop:
- Go to this path: Start - Control Panel - Display - Screen Settings. Here you can set not only the main and secondary screens, but also bring the screen resolution in line with the projector resolution.
- Here you can set the screen orientation depending on the playback object.
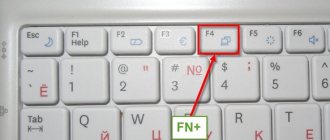
If after the work done the image is not displayed, then you can use the keys to switch to an external monitor, most often this key is F4. If you don’t find such a key or nothing happens after pressing it, use the Win+P combination on the English keyboard.
You can also read other instructions that will tell you how to connect a second monitor, TV and Wi-Fi to your computer (laptop).