The apartment is dusty. We should clean up. The equipment is already plugged in, you press the button, but nothing happens. It’s not clear what to do: take it to a repair shop or try to repair the vacuum cleaner yourself. Let's figure it out.
The instructions are universal and suitable for most models: AEG, Bosch Ergomaxx, Bimatek, Bissell, Black Decker, Bork, Clever Clean, Daewoo, Deebot, Dexter / Dexter, Dyson / Dyson, EIO Targa Duo / EIO Targa Duo, Electrolux Ergorapido, ZAC, TwinClean / Electrolux Ergorapido, TwinClean; Elenberg / Elenberg, GiNZZU / Ginzu, Gorenje / Gorenje, Gutrend / Gutrend, Hansa / Hansa, Hilti / Hilti, Hitachi / Hitachi, Hoover / Hoover, Iclebo / Iklebo, iLife / Ilife, Kambrook / Kambrok, Karcher SE / Karcher, Kirby / Kirby, Kitfort / Kitfort, LG Kompressor, VK / LG, LV, LG or, as is customary, LG Compressor; Makita / Makita, Metabo / Metabo, Midea / Midea, Miele / Miele, Mile or even Mille, Moulinex / Mulineks, Neato / Neato, Nilfisk / Nilfisk, OBI / OBI, Panasonic / Panasonic Panda / Panda, Polaris / Polaris, Philips HR , Triathlon/Philips Triathlon (sometimes called, excuse me, “Philips”); Rainbow SE / Rainbow, Redber / Redber, Redmond / Redmond, Roboclean / Roboclean, Rolsen / Rolsen, Roomba / Rumba, Rowenta / Rowenta, Samsung SC, VC, Twin / Samsung SC, VC, Twin; Sanyo / Sanyo, Scarlett SC / Scarlet, Seebest / Sibest, Singer / Singer, Shivaki / Shivaki, Siemens Super 510 / Siemens Super 510, Siemens-Electrogerate, Tefal / Tefal, Thomas Twin / Thomas Twin, Thomson / Thomson, XRobot / Iksrobot , VAX / Vax, Vitek / Vitek, Xiaomi Redmi / Xiaomi Redmi, Zanussi / Zanussi, Zelmer Aquawelt / Zepter / Zepter, Soviet and Russian - Buran-5m, Whirlwind, Rocket, Typhoon, Ural-3, Calm and any other manufacturers, including car vacuum cleaners, electric vacuum cleaners, robotic vacuum cleaners, battery-powered, vertical, built-in, washing, industrial, garden and construction models... Phew. If only they were repairable.
Typical breakdowns of different types of vacuum cleaners
Vacuum cleaners can have three types of dust collectors: a bag, a cyclone system and an aquafilter. Each of them has its own characteristics both in operation and in breakdowns.
Regular vacuum cleaner with bag
How it works: the blown air passes through the bag. The dust settles on the ultra-cleaning filter (HEPA) and reaches the engine compartment. The filter performs two functions - it “takes” dust and acts as a compressor. The most common malfunctions:
- Torn or clogged dust bag,
- Clogged filters
- Broken wire
- Worn carbon brushes in the motor.
How to prevent: Be careful what you vacuum. If you hear extraneous sounds during operation or severe overheating of the housing, check and replace the filters. Some models turn off themselves and clean the air filter if the air intake power drops.
Cyclone filter
How it works: the blown air passes through the dust collector, where a strong air flow is formed. The “vortex” scatters particles of debris along the walls of the tank so that they cannot return back. The waste settles in the dust collector and on the filtration system - meshes, sponges and a HEPA filter. A common malfunction: if the container is filled with debris, metal and sharp objects pierce the filter, get into the motor and break it. How to prevent: Empty the dust container before each cleaning.
"Water filter
How it works: water is poured into the dust collector (usually made as a round or square container). The air passing through the telescopic pipe whips the water into small particles and releases it under the front visor. The dust travels from the hose to the bottom of the dust collector, where it settles. What is left passes through, in the place where the moisture remains. Purified air without moisture passes through the motor and cools it.
Frequent faults:
- If a vacuum cleaner with a HEPA filter is poorly cared for, fungus and mold quickly appear due to high humidity. Mold spores are blown out during cleaning (we sense it by the smell of dampness) - requires replacement;
- in some models, thin streams of water flow at the junction of the hose and the body - the seals are wrinkled or torn.
How to prevent: fill the tank only with clean water and only up to a certain mark indicated on the body.
Clean, wash and dry thoroughly all parts involved in cleaning.
The brush does not spin
The vast majority of robot vacuum cleaners are equipped with one or two side brushes. And some models have a turbo brush. It is not surprising that one of the types of malfunctions is brush breakage. If your side brush does not work, or the turbo brush does not rotate, then most likely they are simply clogged with dirt, dust and too much wool and hair. For the same reason, one wheel of the device may fail, or both wheels at once. Therefore, the brooms and wheels must be periodically carefully removed and thoroughly cleaned. If you notice that the device is too noisy during operation, then most likely you have not installed the brushes back correctly.
The reason why the brush does not spin
If after cleaning the left brush or the right brush still does not work, then the problem is much more serious. It is possible that the side brush motor is broken or the gearbox is broken. In this case, we recommend that you contact a specialist and do not try to fix the problem yourself.
The video below clearly shows what to do if the brushes on the iRobot Roomba do not spin:
Main parts of the vacuum cleaner
To determine our breakdown, let's look at how various elements of equipment work.
Filters
They are the ones who bear the brunt of waste processing. First of all, check them: excess debris impairs suction, leads to shutdown during cleaning or even burnout.
Cleaning the filter is easy - rinse it with water and let it dry without placing it on the battery or blowing it with a hairdryer.
Hose
“Clogs” may form in the hose from socks, rags, hair, pet hair, or simply a large amount of dust. If debris has already accumulated, remove it carefully so as not to damage the inside walls of the hose.
Perhaps there are no “plugs”, but the problem is a hole or crack. The problem can be solved using improvised methods:
- wrap the lesion with construction tape;
- make a patch from a thin elastic band or an overlay from silicone.
Brush
The brush collects large debris and lifts the carpet pile for more effective dust removal. Over time, it becomes clogged and stops picking up dust. It is quite easy to clean a standard brush from tangled hair, threads, wool, for example, after 2-3 cleaning cycles.
A turbo brush consists of a roller coated with plastic bristles: the roller rotates and collects debris with the bristles. Without timely cleaning, the turbo brush will clog just as quickly as a regular brush.
Cord and wire
The cord may be broken, torn, or disconnected from the control board, causing no power to flow to the motor. It needs to be replaced and the new connection must be tightly insulated.
The wire retracting mechanism may break, then the equipment will not wind the cable inside the case. What to do with this is in the instructions below.
Engine
Engine repair and diagnostics are the work of a professional. Don't even try to fix something if you don't understand electrical engineering.
How to repair a vacuum cleaner motor at home: step-by-step instructions + video
Control boards
Just like with the motor, do not try to re-solder the board without knowing its operating principle and repair rules. It could turn out even worse.
What to do if the vacuum cleaner from LG does not turn on
Many factors can lead to a situation when the vacuum cleaner stops turning on, but the most common of them are:
- clogged dust collector or filters - leads to the mechanism operating in a state of constant overload, which causes engine overheating;
- contact interruptions - occur when the cord or socket is damaged;
- wear of parts and individual engine components.
When encountering such “behavior” of equipment, first of all you should carefully conduct a diagnosis. And after clarifying the cause of the breakdown, make a decision on further repairs.
Diagnostics
In order to understand why the vacuum cleaner does not turn on, it is recommended to use the elimination method. The main actions must be carried out in the following sequence:
- Check the working condition of the outlet.
- Inspect the power cord and plug.
- This is followed by checking the degree of filling of the dust container and cleaning the filters.
- Contamination of the motor or failure of a part or entire engine assembly.
Solution
Each diagnostic stage is accompanied by the following actions:
- To check the outlet, connect the vacuum cleaner to any other outlet in the house and turn it on. If the motor continues to be silent, you need to move on to the next step.
- When inspecting the cord and plug there should be no external damage. There is melting on the plug, and bends on the cable.
- The filters should be replaced with new ones, and the bag should be cleaned of debris and dust, rinsed under cold water if it is plastic and not rag. The dust collector can only be replaced after it has completely dried.
If none of the above actions gave the desired result (the vacuum cleaner still does not turn on), then the reason lies in a motor failure. This malfunction is quite serious and its solution requires certain skills.
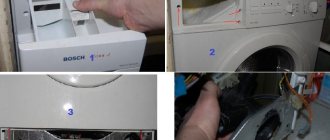
In order to get to the motor, you need to disassemble the vacuum cleaner itself. This procedure consists of several steps:
- Unscrew the lid of the dust collector using a screwdriver, and then remove the mesh for sealing and disconnect the electrical unit;
- take out the dust container and unscrew all visible screws of the compartment;
- The motor is disconnected from the power cable by unclamping the screw terminals.
First of all, after removing the motor, it is necessary to carry out a visual inspection:
- take out the brushes and change them if they are worn out;
- assess the condition of the armature collector;
- if the copper plates are heavily soiled, clean them with fine-grade sandpaper;
- inspection of bearings (the integrity of the cage is checked, the absence of cracks, lubrication is carried out);
Rotation of the bearings inside the socket during manual rotation of the armature indicates the need to disassemble the engine.
When disassembling a washing vacuum cleaner, you will also need to dismantle the water pump, which is done by disconnecting the water supply pipes.
The most common breakdowns
Doesn't turn on
If the vacuum cleaner stops turning on or stalls while cleaning, check:
- Is the outlet working? Try connecting other electrical appliances to it;
- Are the plug and wire intact - the cord often breaks and the veins inside the sheath are torn;
- the power button “sinks” or the power regulator (on some models the speed regulator is located on the tube with a hose) is shorted due to “old age”;
- how full the dust collector and filters are - most likely they will have to be cleaned;
- whether large objects got into the hose - socks, toys, etc.;
- Is there a burning smell coming from the vacuum cleaner? Perhaps the armature winding, stator winding, or the entire motor has burned out.
In addition, the vacuum cleaner may turn off after a long cleaning due to overheating. In this case, wait half an hour and try to turn on the device again.
What to do if the vacuum cleaner stops turning on: 7 main reasons + video instructions
Doesn't collect trash
If the vacuum cleaner begins to hum and does not suck up debris well, you can provide first aid:
- Empty the dust bin.
- Check to see if there is a foreign object (such as a sock) stuck in the pipe or brush. If an object is stuck in the brush, remove it; if it is in the pipe, carefully push it with a long stick to the beginning or end of the pipe. Rinse the pipe and brush with water to remove any small debris.
- Inspect all existing filters. Rinse and thoroughly dry the fine air filter. Put it back into the device and try vacuuming.
- Check the garbage disposal: it may also contain excess garbage. If there is one, thoroughly clean or wash the fabric bag.
The vacuum cleaner has lost suction power: 5 ways to fix the problem yourself
Smells burnt
If during cleaning the engine stops and a burning smell appears or smoke starts to appear, the problem is in the winding of the electric motor. The repair will not be quick, but you can do it yourself:
- Remove all bolts from the device body.
- Remove the housing cover and wire reel. Pull out the engine.
- Unscrew the bolts from the sides and remove the rubber seal.
- Separate the housing into its components using a screwdriver.
- Remove the motor from the protective container.
- Bend the flanges and disconnect the motor, opening access to the turbine. A bolt will be waiting for you there.
- Unscrew the bolt from the turbine using a socket head of the appropriate diameter. Hold not only the stator firmly, but also all other parts.
- Unscrew everything that connects and blocks access to the brushes.
- Take out the brushes.
- Knock out the anchor using a wrench and hammer.
- Check the bearings. Grease them with oil if required.
- Replace the parts that need them and reassemble everything in reverse order.
The cord is not fixed
If after cleaning the wire refuses to return to the reel or during cleaning it randomly rolls into the “socket”:
- Remove the cover of the device.
- Pull out the drum, as well as the coil spring of the lever, along with the bushing.
- Remove the brake roller and lever.
- Replace damaged parts (coil spring, support, etc.)
- Adjust the desired cord tension in the reel.
- Assemble the drum and install it in its usual place.
- Test to see if the stopper secures the cord.
- Reassemble the structure in reverse order.
Battery won't charge
It is possible that the cordless vacuum cleaner broke down precisely because of problems with the battery, especially if it is already old. It is ideal to change the battery every 2-3 years: during this period, the battery completely loses its ability to accumulate and release energy, since there were more than 300-400 charge-discharge cycles. The suction power gradually decreases, the battery takes a long time to charge and quickly discharges. There is nothing you can do here other than a complete replacement.
Severe mechanical damage
These are problems associated with various impacts, sudden movements and other damage that have a strong impact on the condition of the unit: piercing the housing, falling out of the handle, breaking the hose fastening. In the best case, the equipment will be repaired by a service center; in the worst case, for example, if the case is badly pierced, the device cannot be repaired.
Hole in the filter
If the filter breaks, it is usually already “extremely worn out”. Sometimes the cause may be careless cleaning or washing. The main thing we can advise you is not to try to make a replacement using improvised means following lessons on YouTube. It's easier to buy a new one and be more careful when cleaning.
There is no water flowing into the hose
The reasons can be very different - from mechanical stress to natural wear and tear of devices. It is quite possible that the hose is clogged or the water pump is “covered” - check them.
Turns off during operation
The vacuum cleaner may turn off on its own and work intermittently for the following reasons:
- the filters are too dirty - input, output or both at once;
- the room being cleaned is too hot;
- the flexible hose or inlet is clogged;
- a lot of debris in the engine;
- graphite brushes inside the motor are faulty;
- inside the unit, the power contacts have come loose or broken (read: burnt);
- problems with the socket.
Check if your device has these problems and fix those that are found - clean the filter, hose, motor, plug the cord into another outlet.
The electric motor runs intermittently
If the graphite brushes become unusable, the springs that are supposed to press them against the electric motor commutator are weakened. The electric motor will work jerkily, “every once in a while.” Contact the service center for diagnostics, just do not delay.
Gives an electric shock
If you receive a discharge by pressing the power button, most likely the insulation of the wires inside the case is broken. Or a terminal has fallen off somewhere inside and is shorting to a metal part.
Other reasons:
- there are a lot of synthetic things in the house (clothing, flooring), due to friction with which static electricity accumulates;
- There is no grounding in the socket. You can fix it yourself (by connecting the yellow-green wire) or call an electrician.
Blows in the opposite direction
Most often, a vacuum cleaner works on “blowing” rather than “blowing” for two reasons:
- The engine gasket has shifted or become unusable - depressurization has occurred and a vacuum is not created in the “suction circuit”.
- the garbage bag has “gotten bad”;
- The dust container is not securely secured.
Correct them. If the problem continues, show the device to specialists.
Does not work
Most often, you can hear the comment from users of this type of equipment that the robot vacuum cleaner does not work. This definition can mean anything. We will look at several cases when the robot does not turn on or has stopped working on one type of floor covering, as well as how to fix such a breakdown.
If the device does not turn on with the power button, then the reason may be a low battery. What to do in this case? First of all, the robot vacuum cleaner must be installed on the docking station and left until the battery is fully charged. Make sure that the charging base is properly connected to the network: check that the power cord and plug are connected to the outlet, and that there is voltage at the outlet itself.
If the robot cleaner still does not turn on and the red light is on, then the cause is probably a malfunction of the battery itself.
If the robot vacuum cleaner does not respond to the buttons on the remote control and does not start, you should check the batteries inside the remote control and replace them if necessary.
It happens that when cleaning, devices designed for cleaning all types of floor coverings do not work well or bounce on the carpet. This malfunction is typical for iClebo robot vacuum cleaners. This indicates a malfunction of the rubber scraper due to a manufacturing defect, damage, or drying out of the rubber. In this case, eliminating the breakdown consists of replacing the scraper with a new one.
In addition, a robot vacuum cleaner designed exclusively for dry cleaning may not work due to the fact that it accidentally sucked in water. To prevent it from breaking, you need to do the following:
- turn off the power, remove the dust container, clean and wipe dry;
- remove existing filters and dry;
- remove, clean from tangled hair, wool and dust, wipe with a dry cloth and after complete drying, install back;
- thoroughly dry the device itself, make sure that the circuit board is dry;
- turn on the power.
Recommendations and lifehacks
- Before and after cleaning, inspect the filters for heavy contamination. We recommend cleaning them after each use.
- Empty the bag or container after each cleaning session.
- Store the vacuum cleaner in a dry place with minimal humidity. Try to keep water away from the engine and electrical circuits.
- Do not drag sharp objects when cleaning - they can pierce the tube, tear the corrugation, the dust collector and create many problems.
- Try not to overheat the vacuum cleaner. After each room, let him rest for a couple of minutes.
- Do not kick or hit the unit, monitor its external condition.
Can't see the base
It also happens that a robot vacuum cleaner copes with all functions perfectly, cleans cleanly and efficiently, but has difficulty returning to charge or does not find the base every time.
To figure out why the robot does not go to the base on its own and finds it poorly, it is necessary to carry out a number of the following measures:
- Make sure you remove the protective film from the infrared panel of the docking station. Check that the sensors are not covered or dirty and that there are no foreign objects on the bumper.
- Visually inspect the docking station and cord for mechanical damage.
- In some cases, the robot vacuum cleaner cannot enter the base because the cleaning process as usual was started not from the base, but from another area of the room.
- If the robot vacuum cleaner does not see the base, then it is not necessarily broken. The docking station may simply not be installed correctly. Make sure that there are no obstacles within a half-meter area on either side of the base and select the most optimal location for its placement in accordance with this requirement.
Sequence of disassembling the electric motor
Electric motors of LG vacuum cleaners are similar in design to motors from household appliances from other manufacturers. Only the dimensions, power and location of the technological holes for fastening differ.
Begin disassembling the electric motor by removing the brushes. Use a screwdriver to unscrew the screw terminals. Sometimes instead of them there are clamps on springs. After disconnecting the contacts, the brushes are removed from the brush holders.
Using a screwdriver, remove the impeller protective casing. LG vacuum cleaners have motors where the casing is secured with an edge roller. The sides are bent with a thick, durable screwdriver or other device.
The impeller is located under the protective casing. The part is clamped on the armature shaft with a nut with a left-hand thread. It unscrews to the right side clockwise. It is easier to grab the nut with a socket wrench. However, a new problem arises. The nut on the armature shaft is too tight. It cannot be unscrewed from a rotor rotating on bearings.
Wedging
To make the anchor stationary, you can use the holes located in the end of the motor. They are hidden under a rubber damper, which is easily removed. A thin screwdriver is carefully inserted into the hole and inserted into the gap between the rotor and stator until it wedges them. This method is simple, but can cause damage to the winding if you have to exert significant force to unscrew the nut.
Clamping with a vice through wooden blocks
You can clamp the anchor with a metalworker's vice behind the commutator, but to get to it, two bars are cut out of solid wood - attachments. The thickness of the workpiece should fit into the brush holders. At one end of each block, use a round file to select a recess for the round shape of the collector. The workpieces are inserted into the brush holder with the sawn end and clamped with a vice. With one hand they hold the motor by the body, and with the other they try to unscrew the nut.
The danger of this method is damage to the collector. If you do not calculate the clamping force with a yew, the copper current-carrying plates will become deformed. They can be restored on a lathe, provided that the dielectric gasket between the elements is not damaged.
Capturing the anchor with wire
The most harmless way to stop the rotor is to grab it with a wire. To work, you will need about 30 cm of copper wire in insulation. They make a loop from the wire, grab the commutator and begin to rotate the armature. The insulated core will be wound until the gap between the brush holders and the rear of the rotor is filled. When the moving part jams, try to unscrew the nut.
I cut through
The method is more labor-intensive and requires certain skills. At the end of the shaft where the nut is located, a slot is made for a screwdriver. A neat cut can be obtained using an engraver or even an ordinary drill, holding a diamond disc in its jaws.
Attention: Upon completion of work, it is necessary to thoroughly blow out the motor from metal filings, which can damage the rotating parts or cause a short circuit.
Afterwards, the shaft is fixed with a screwdriver inserted into the slot, and the fixing nut is easily unscrewed using an open-end wrench.
How to assemble?
To reassemble the vacuum cleaner, you need to perform all the steps in reverse order. The main thing is not to lose or confuse the location of the parts. The hardest part is assembling the motor.
The algorithm of actions is as follows:
- a pressure gasket and a wavy metal ring are put on the shaft with bearings;
- cover the rotor with an impeller and a petal, screw on the brushes;
- crimp the metal cover using pliers;
- install the engine back, connect the contacts.
All that remains is to screw the control board, connecting it to the terminals, insert the cleaned filter and assemble the housing.