Hello. I was prompted to write this article by the upcoming upgrade of my home system and the recent Desktop article. Metal. Silent. Is yours?. To find an acceptable option, I had to sift through a bunch of case models and now I want to share my pain with you.
The article will describe the typical problems of typical cases (with a lot of pictures), some examples of good layouts and my wishes for the ideal case. I will not provide links to case models, since I do not want to make advertising or anti-advertising for anyone.
A typical computer case from a thermodynamic point of view
To avoid any questions, I want to immediately explain why I cannot use a small, silent computer like the Intel Nuc or Mac Mini.
Why do I need a computer?
- Internet (with the habit of opening 100,500 tabs in the browser)
- Games
- Movies and TV series (I use SVP to raise the framerate to 60FPS)
- Sometimes programming (enough at work)
- Sometimes video editing
That is, my computer should dissipate ~500 Watts of thermal power (100 processor, 300 video card, 100 everything else).
There should also be an SSD for the OS with programs and space for a HDD with file storage. I'm not yet ready for NAS.
⇡#Internal device
Internal structure of the case, left view
The case was opened... Deja vu! Without any external body kit, we see the Thermaltake Chaser A41. That is, of course, everything is the other way around. The point here is to familiarize yourself with the buildings. Soprano was announced much earlier than A41, but came to our laboratory later, thus becoming number two.
Guess the body from the photo
The same motherboard tray, which has a large window, allows access to the rear of the processor socket. To the right of the motherboard there are the same three holes for cable management, covered with rubber curtains. And one more thing for the power supply wires is still there.
Soundproofing foam on the walls
But the width of the body has decreased slightly: the rise stamped outward has been replaced by a lush, foamy soundproofing panel oriented inward.
Differences in the thickness of the sound absorbers of the right and left walls
As you can see in the group photo, the thickness of the foam layer is not the same. From the user’s side (left-handed, don’t be offended, there are more of us), the sound will encounter a whole centimeter of material along its path. The layer on the right is much thinner.
Four five-inch drives install without tools.
Internal structure of the case, right view
Fixation is carried out only on one side using plastic latches. Perfectionists can pick up a screwdriver and add screws to the right side; fortunately, there are more than enough of them in the package. Here you can also see the free space behind the main drive rack, which is supposed to be used for cable management.
Universal 2.5/3.5" Slide
They are the same ones with attached drives
Despite what the box says, the 2.5" and 3.5" drives cannot be secured without the use of a screwdriver. Devices placed in a transverse rack must first be screwed to plastic slides.
Drive rack, front fan air intake
After this, you can place the drives without tools - push them in until they click. The discs are screwed through soft anti-vibration pads with special screws with a large head.
You can't do without dismantling the fan
Another two- or three-inch device is also pre-attached to the sled, but its installation has become a little more complicated since the A41: it now requires not only removing the front panel of the case, but also unscrewing the fan blocking access to the position.
Top slide 2.5/3.5 inches
SSD installed in the top slide
Like last time, we placed an SSD here so that there are no problems connecting additional power to the video card.
The last 3.5-inch drive can be placed in the top position, located under the 5.25-inch bays. There are no slides used here, so smaller drives cannot be secured. By the way, this three-inch compartment is accessible from the outside: nothing will interfere with the installation of a memory card reader or other (useless) accessory.
Inside the dock
Back of the dock, buttons and ports
The docking station is a plastic “glass” (for clarity, our paperclip assistant holds protective curtains). At its very bottom there is a printed circuit board that does not contain any logical elements, so that the version of the interface to which you connect the corresponding cable is supported.
Docking station circuit board
The power and data connectors are simply connected to the SATA and molex contacts brought inside the case. It is not entirely clear why the manufacturer chose this outdated type of connector for power supply - owners of modular power supplies will be forced to connect an additional “tail”. Now, if the case also had a reo-bass (by the way, I wonder why it’s not there?), such a drawback would be less significant.
Face-off | Front panel internals |
A fan that once interferes with the installation of one of the disks brings only benefits the rest of the time. Due to the large span of the blades, it blows air over all the disks, creating more comfortable operating conditions for them.
Drive bay filters and covers
The case is protected from dust penetration by a removable plastic filter in the front panel, located opposite the fan. Another filter covers the bottom of the case, we have already seen it. The plugs for the 5.25- and 3.5-inch bays are molded from plastic and do not allow air to pass through. Nothing soundproofing was found in their design.
The New Soprano claims to support expansion cards up to 315 mm in length and coolers up to 175 mm in height. If everything is clear with the first limitation, then the second requires a little explanation: to install such a cooler, you will have to slightly wrinkle the soundproofing pad. The force is quite small, but without pressing the side wall it will not be possible to install it in the intended grooves, which can cause a slight distortion. There is enough space above the motherboard; there should be no problems with any of the processor coolers refusing to fit.
If desired, the power supply can be placed with the grill facing up
The power supply is located at the bottom. It is installed on stamped metal stands, which is also atypical for “quiet” cases - it would be quite possible to make vibration-isolating inserts.
The power supply practically has a runway at its disposal
The chassis allows you to place a power supply up to 180 mm long without covering the seat for a 120 mm fan. If there is no need for the latter, the power supply will be able to occupy all the available space up to the hard drive rack, that is, it is possible to install models up to 315 mm in length (as in the case of a video card, without taking into account the wire output). To maintain the possibility of hidden wiring, the maximum block length can be considered equal to 24 centimeters.
To organize air flows in the case there was room for two fans. That is, there was room for three, but out of the box there are still two of them.
Front 200mm fan
The ThunderBlade version, which has lost a third of its landing height (now it is two centimeters), is responsible for the air intake. It also prevents PC components from getting bored by illuminating them with soft blue light.
Rear 120mm fan
The rear fan with an unusual blade shape belongs to the TurboFan series. Unlike its big brother, it is bolted through vibration isolating pads. Both wind turbines are very quiet: according to the manufacturer, the maximum noise level is only 13 and 16 dB for the large and small ones, respectively.
The painting and treatment of internal surfaces was carried out with high quality, there is absolutely nothing to complain about.
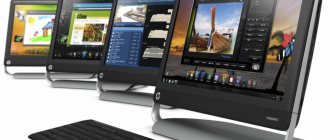
Which components are the noisiest?
- "Wrong" CPU cooler
- Video card with turbine as a cooling system
- Case fans - if the filling is powerful, then the “quiet” fan options simply will not have time to remove hot air from the system unit.
- "Wrong" power supply
If in the case of a cooler and power supply you can find quiet options, then with a video card there is no ideal solution. But more on that later.
Now I’ll give an example of a typical case layout and tell you what’s wrong with it:
- A PEC-type video card stands under the processor and memory and effectively heats them up.
- Convection does little to help cool components.
- A lot of empty space (and, as a result, the dimensions of the system unit are too large).
- But at the same time, the air flow from the front fans is blocked by empty hard drive cages.
- This particular model claims to be “quiet” and in some places there are even sound-absorbing plates installed, but in fact the noise comes out through the holey rear panel of the case.
Quiet Hard Drives – SSD
SSD (English solid-state drive) are solid-state drives based on NAND flash memory. SSDs replaced conventional HDDs several years ago due to their main advantage - speed. In addition to speed, SSDs differ from traditional hard drives in their silent operation since they have no moving parts. SSDs are also smaller and lighter than HDDs. In addition to advantages, solid-state drives also have disadvantages - a relatively high price per gigabyte and a smaller resource. However, the last statement is controversial, since modern models of solid-state drives have a warranty of up to 10 years.
SSD - “silent” replacement for HDD
For our silent PC, SSD is the most suitable option. 120 GB SSD Silicon Power S55 Slim as an affordable model We chose the most affordable model on the market. To solve office problems, the resource and performance of this model is more than enough. During our work, we carried out synthetic testing with the CrystalDiskMark and obtained the following results. Not bad for a budget SSD. I was very pleased with the speed of working with 4K blocks in random reading and writing. It is this characteristic that determines how fast the disk will operate in Windows.
SSD performance testing
Component complaints
Yes, they are. The classic layout does not imply compact placement, but everyone is already accustomed to this.
Video cards
A long time ago, when the ATX standard was adopted and the now classic motherboard layout was invented, no one thought that the hottest component of the system would be installed in the AGP (later PCI-E) slot. And then video cards began to increase power consumption and a miniature stove was located under the processor.
There is nothing to be done about this, but there is a note on the cooling system. The most common cooling option now looks like this:
This cooling system compared to a turbine:
Quieter, keeps the graphics card cooler and is liked by all reviewers. But there is one thing - it does not remove hot air from the case. Thus, in addition to the noise from the video card fans, the noise from the case fans is added (in the summer I had to install an additional powerful blower fan, otherwise the case would suffocate).
motherboards
As the largest component of the system.
Full-size ATX is rarely needed these days. Typically, only a video card and, in rare cases, a sound card are plugged into PCI slots. Everything else is already built into the motherboard.
But this is easily solved, since there are mATX and mini-ITX formats. But in most miniITX cases it is difficult to provide good cooling and, as a rule, there is no 3.5″ slot for HDD, so my choice is mATX.
Now I want to go through all the points in order and point out the typical problems of typical cases.
Ventilation and dust protection
A short lyrical digression on the topic of how forced ventilation should be organized.
Automotive filter ventilation unit
On military equipment, such things filter the air and create excess pressure, preventing pollutants from entering through the cracks. The same principle is used in operating rooms, some data centers and in microelectronics manufacturing.
If we apply this to computer cases, to create excess pressure inside the case, blower fans with dust filters must be installed. It would seem that everything is obvious. But let's look here:
Formally, everything is in place - 2 blower fans behind the dust filter.
But here, next to the fans, large holes are visible. That is, instead of creating positive pressure inside the case, the fans will disturb the air near the front panel.
It is clear that excess holes can be sealed with blue electrical tape, but why not do it right right away?
Another option:
This time the exhaust fan will knead the air around you. And at the same time, suck up dust if the power of the blower fans is insufficient.
And some cases simply suffer from excessive holes:
Dust protection? What other protection against dust?
And my favorite:
More fans to the god of fans!
No comments.
There are more or less adequate options:
2 blower fans with a dust filter, 2 exhaust fans, no extra holes (except for PCI plugs). It’s just not clear why the LSS from the video card heats the air entering the case.
I also wonder why they don’t use HEPA filters for blowing. The coarsest HEPA filter folded like an accordion will provide less airflow resistance and better filtration than any mesh. Yes, these filters cannot be completely cleaned. But this is the dream of any manufacturer - to sell consumables at a wild markup! Joke. Or maybe not.
⇡#Introduction
The Soprano series has been on the market for quite a long time, and thanks to its characteristic wave-shaped front panel, it is easy to recognize among other models of the brand. It would be unreasonable to radically change the usual appearance, so the main changes took place inside - they are reliably hidden from view by solid walls made of thick steel.
Available colors
This case is available in two classic colors: black and white. The interior of both versions is identically black, so the review will also be useful for those interested in the lighter side of the design variation.
As you might guess, the rejection of the transparent window and ventilation holes was not done for the sake of beauty: Soprano joined the currently fashionable movement of fighters for silence.
It would not be amiss to warn the reader that during the course of the story we will from time to time refer to a review of the Thermaltake Chaser A41 case. The fact is that it and “The Soprano” are built on the same platform and the differences between them can be listed literally on the fingers of one hand. Nevertheless, the purpose of our today's experimental subject is completely different, and therefore the demand from him is also different. So, let's see how well the case performs in its new role.
Thermaltake New Soprano case
| Performance characteristics of the Thermaltake New Soprano case (VO900M1N2N) | |
| Form factor | ATX Middle Tower |
| Supported motherboard form factors | ATX; Micro ATX |
| Max. permissible height of the processor cooler, mm | 175 |
| Max. permissible video card length, mm | 315 |
| Power supply standard, mm | 180 (possible to install a power supply up to 295 mm) |
| Bays and Slots | |
| 5.25" open bays | 4 |
| Open 3.5" bays | 1 |
| 3.5/2.5" closed bays | 5 |
| Expansion card slots | 7 |
| External ports | 2 x USB 3.0; 2 x USB 2.0; 2 x 3.5 mm TRS (mini-jack, microphone and headphones) |
| Fans | |
| Included | 1 x 200x20 mm (600 rpm, 13 dB) - front wall; 1 x 120x25 mm (1000 rpm, 16 dB) - rear wall |
| Fan mountings | 1 x 120 mm - at the base |
| Overall dimensions: WxHxD, mm | 220x475x511 |
| Material | steel SECC, 0.8 mm |
| Weight, kg | 8,3 |
Ease of maintenance
In this context, everything is simple - I want to be able to vacuum the dust filters without disassembling the case.
Also, for the sake of ease of maintenance, I discard the life support system
A liquid cooling system will make the computer much more expensive and will require additional fuss, otherwise a new life will appear in the coolant, an incomprehensible slimy mass will clog the microchannels and (or) the liquid will leak/evaporate.
I have already spoken about the stove under the processor and I want to give a couple of examples where this problem has been solved.
1) Case with motherboard rotated 90 degrees:
Convection and fans work together. In tests for cooling efficiency, this case showed very good results.
2) Horizontal placement of the motherboard
Everything is clear here - hot air rises from the processor and video card to the top. The components do not heat each other.
3) Cases are upside-down
The motherboard is rotated 180 degrees, that is, the video card is located above the processor and no longer heats it.
4) You can use a riser to connect a video card
This way the video card can be placed in the part of the case farthest from the processor and the components will heat each other less.
He's gone. But something came closer to my ideas about the ideal layout
I'm not an Apple fan, but I like the Mac Pro. There are only blower fans and component radiators are installed in the air flow from them.
Someone is crowdfunding to raise money for a clone of this case, but they will not be able to implement the most important feature - flow-through radiators.
The end result will be the same as with fake Christmas tree decorations - they look like real ones, but they don’t bring joy (cooling).
I wouldn’t like to end the article on a sad note, so I’ll tell you about options for solving the problem:
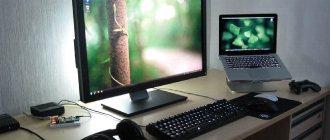
Place the body where it cannot be heard
No comments. A long cable to the monitor and a USB hub will allow you to take the system unit even to the balcony. Or to your home server room. At the same time, this will partially solve the dust problem. Another thing is that this possibility should be taken care of even at the repair stage.
Choose from available options
If you look, you can still find a case with decent dust insulation. There is no need to rely on sound insulation, so we choose the quietest components. You will also have to put up with a lot of empty space inside.
For myself, I chose a mATX case with a horizontal motherboard.
Do it yourself
You can do without the case and hang all the components on the wall. Of course, here you also need to choose quiet cooling options for the video card and processor. If you hang the motherboard with the connectors down, the components will not heat each other, and convection will help with cooling. The dust problem will remain, but with an open stand everything is visible and easy to clean.
I didn't do that because I was lazy and had a curious cat.
Small-scale production
Here, too, you can do everything yourself, but I haven’t found where I can get a suitable thermosyphon.
There is such a thing:
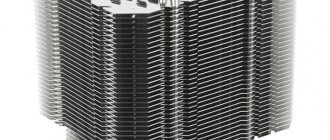
Google the words “aluminum radiator profile”.
It is used for cooling LED-based lighting systems and is inexpensive. The width (which I managed to find) is up to 30 centimeters. Base thickness from 6 millimeters. In some cases it can be ordered already anodized.
And this radiator profile can be used as a housing wall.
Via thermosyphon:
... install the motherboard with the processor.
We remove the standard cooling system from the video card and, using a riser via a thermosyphon, attach it to the same radiator. You are awesome! Actually, not really. It bothers me that the contact between the thermosiphon and the radiator profile may be insufficient. Of course, you also need to use thermal paste here, but is that enough?
In addition, you can install several fans below to help with load.
According to my estimates, a 30 by 30 cm radiator profile with weak airflow should be enough for 300 watts of thermal power from the processor and video card.
That's all, I hope this article will help someone.
PS
If anyone knows how to find a ready-made thermosiphon, please write in a personal message or in a comment.
P.P.S.
Thanks to evilme for the article Learning to write on Habr. It’s much more convenient to write this way than in a web editor or Word and then transfer it to Habr. I’ll add on my own that I recommend installing the “Russian - Code Spell Checker” extension to combat the inevitable typos.
The final stage is the selection of remaining components and assembly
To assemble and launch our ultra-budget and silent PC, there is very little left - to choose a suitable motherboard, RAM and case.
We selected the missing parts based on the principle “the cheaper, the better”, but despite this we tried to choose high-quality components from reputable manufacturers.
So, what we got:
| PC part | Name | Price, rub.) |
| TOTAL | 14632 | |
| Motherboard | MSI H81M-P33 Micro-ATX | 2801 |
| CPU | Intel Celeron G1850 2.9 GHz | 2644 |
| Radiator | Arctic Cooling Alpine 11 Passive Cooler | 750 |
| RAM | SAMSUNG 4 GB DIMM DDR3 1600 MHz | 1218 |
| SSD | Silicon Power Slim S55 120 GB | 2756 |
| power unit | FOX ATX-500BT | 2650 |
| Frame | Aerocool Corporate Series CS 100 Advance | 1558 |
Summing up the interim results, we can confidently say that the computer turned out to be really budget-friendly, even despite the current dollar exchange rate. The total cost of the assembled budget and silent system unit was less than 15,000 rubles. It remains to be seen how stable this whole thing will function.