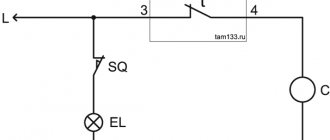
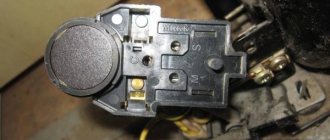
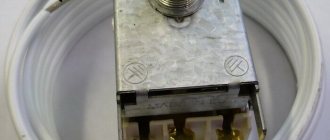
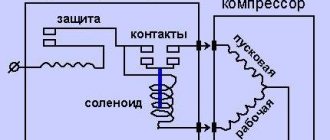
The refrigerator thermostat is a relay that, based on the degree of cooling of the chambers, sends a signal to start or stop the compressor motor. Failure of this part can lead to complete failure of the unit. In some cases, repairs can be done yourself, but if you do not have sufficient experience, it is better to call a specialist. In this article you will find information about the device, operating principle, causes of failure, methods of checking and repairing the thermostat.
What is a thermostat for a refrigerator?
A mechanical relay consists of the following elements:
- bellows with tube;
- spring;
- a control handle that rotates a screw or roller;
- electrical insulating gasket. Protects the internal components of the thermostat from adverse external factors (humidity);
- power lever;
- contacts.
Outwardly, it resembles a small box. On one side, a hermetically sealed tube filled with refrigerant extends from it. Its length in different relay models ranges from 0.8 to 2.5 m. The end is attached to the evaporator. With a small diameter, it is problematic to ensure a tight fit of an even tube, so it is bent into an elbow or curled into a spiral.
On the other side there are contact terminals with which the thermostat is connected to the electrical circuit and controls the operation of the compressor. Depending on the number of additional functions of the refrigerator, their number varies from 2 to 6.
The design of the thermostat in household refrigerators may differ slightly. Some models are equipped with a semi-automatic evaporator defrost unit, which simplifies the process of removing ice.
Temperature sensor device
The detector must be considered together with the thermostat (temperature regulator) - these two units function together, they are the ones who adjust the operation of the cooling system. In fact, this is the core of the control part, to which a selector is connected, a touch panel for setting the desired mode.
A thermostat with a relay is a box with a selector on the wall of the refrigerator, inside its compartment. In modern models, the assembly is often built into the body, usually in the upper part. The outer segment consists only of an adjustment knob (selector), a control panel with buttons, a touch or conventional display, and an indication.
Using a graduated selector or on a touch screen, depending on the advancedness of the product and the type of control - mechanical, electronic - the user sets the cooling and freezing modes (normal, super freezing, etc.).
There are 2 types of thermal sensor designs.
Electronic (connected to a microcontroller, to a microcircuit) is a small piece of sensitive material in a plastic case, a thermistor, thermocouple, and a small board with it. The element's terminals are connected to the thermostat or control unit microcircuit. When the temperature changes, the resistance of the thermocouple changes, which is recorded by the microcontroller (MC) and compared with the values set by the user. Next, the command from the MK is sent to the relay, which closes/opens the contacts. In this case, there are 2 wires that supply a small voltage to the sensor. The thermostat, or rather the control unit with such a device, is also electronic.
A more common version of a thermal detector is mechanical. It should especially be considered together with a thermostat of the same type - it is, rather, a part of it, more inseparable than that of electronic varieties; it is usually irreplaceable, although this is theoretically possible. A more suitable name for the entire assembly is a thermal relay. This version of the sensor is a sealed metal capillary tube filled with refrigerant inside. Some models have a copper bulb at the end. One end of such an element is placed in the location where measurements are required, the second with a bellows goes into the thermostat, connecting there with mechanical parts that affect the circuit contacts.
There is a certain pressure inside the bellows tube that varies depending on the temperature. At the other end, attached to the thermostat, there is a bellows (corrugated elastic shell), the tension of which changes when the user adjusts the frames for closing/opening contacts (motor on/off) using a selector with a spring. At a certain temperature, the refrigerant changes its state (expands/contracts), the pressure in the tube changes, the part entering the thermostat moves and presses or stops acting through the bellows on the rod that closes or releases the electrical circuit.
When the cooling level reaches the one set on the selector, the sensor signals this (electronic version) or stops putting pressure on the thermostat spring - the relay releases the contacts or they themselves separate depending on the pressure. The motor stops working. Thus, freezing and hypothermia are excluded. Over time, the temperature begins to rise for natural reasons and due to the “rest” of the compressor. The described process occurs in reverse.
The principle of operation of the thermostat
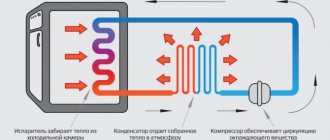
The operation of the device is based on the change in pressure in the bellows tube that occurs when the temperature in the refrigerator and freezer increases or decreases. When its value increases, the spring is compressed, the contacts are closed, the compressor is turned on and vice versa.
The temperature at which the contacts switch occurs is determined by the tension force of the spring. In refrigerators with a mechanical type of control (most models from domestic manufacturers - Atlant, Nord, Biryusa, Oka, Orsk, Sviyaga, Exqvisit, as well as some units of imported brands - Indesit), it is regulated by a handle that rotates a screw, which moves the nut to the end of the elastic element.
Attention! Modern units (Stinol, Liebherr, Samsung) are equipped with electronic thermostats, consisting of a control module and temperature sensors for each cooling zone. Such a device allows you to more accurately record temperature changes.
Possible causes of failure
There are several obvious signs that indicate a broken thermostat:
- the compressor works without stopping, or with short-term stops (this can be understood by the constant noise of the refrigerator);
- the inside walls are covered with ice, and snow freezes in the freezer;
- the refrigerator compartment is set to low or high (relatively) temperature;
- Water is spreading under the refrigerator;
- The refrigerator switches itself off and stops working.
The main reason for thermostat failure is mechanical wear of the elements. The most likely damage is:
- bellows body. The tightness will be broken, part of the refrigerant will escape, and ensuring the required pressure to turn on the compressor will become impossible;
- contacts due to burnout;
- connections between the tube and the evaporator. The tightness provided by the adhesive joint will be broken.
How to check functionality yourself
There are many ways to check the functionality of the device at home. Particularly indicative are those that are related to a specific problem. For example, if the refrigerator is running without stopping, you should turn it off, defrost it, unscrew the temperature control knob to the minimum value and turn it on again, after placing a thermometer inside the refrigerator compartment. If after a couple of hours the thermometer measurement value is more or less than +6°C, then the thermostat needs to be replaced.
Checking for ice formation inside the refrigerator is carried out in a different way. With the compressor running, turn the regulator knob and increase the temperature. If the thermostat is working properly, the compressor will stop working.
If the problem is that the equipment does not turn on, the thermostat is checked by directly shorting the two wires included in the thermostat. If, when disconnecting the device from the electrical circuit, the refrigerator turns on, then the thermostat is faulty.
There are testing methods that require dismantling the device. Basically, they are used by specialists, but the average person can also use them. One such way: using a multimeter. Having dismantled the thermostat, place its tube in cold water for several minutes, and then connect it to a multimeter, previously set to “resistance” mode. The device is recognized as working if “0” is displayed on the tester when “ringing the circuit”
Thermostat position
Let's look at the placement of the device using the example of the Stinol refrigerator. It is located on the panel that is located above the door. For the convenience of its location, a temperature control knob is mounted nearby.
The process of removing the thermostat is simple:
- turn off the power to the refrigerator;
- pry the handle with an awl or a thin screwdriver and remove it;
- carefully remove the decorative trim from the protrusions, as it is made of fragile material;
- Unscrew the nuts holding the thermostat, and then the screws securing the control panel. Lastly, remove the screws from the door hinges, supporting it;
- after dismantling the door, unscrew the fastening screws on the back of the refrigerator and remove the top cover;
- disconnect the contact connections of the thermostat and remove it.
Attention! For error-free subsequent installation of the device, mark the wires or photograph them before disconnecting.
In units with mechanical control, the thermostat (early models of the Atlant, Oka brand) is located inside the refrigeration chamber. On one of the panels you can see a small plastic box. To remove it, unplug the refrigerator, remove the temperature control knob by pulling it towards you, and the protective housing, which is held in place by latches.
Measuring the temperature in the refrigerator
To set the optimal temperature in the refrigerator, it is measured using a thermometer. If there is no special or built-in device, use a thermometer to measure the temperature of the liquid for bathing children. It is placed in a glass of water and placed on the middle shelf of the chamber overnight. Then the readings are checked. If they are above +4°C, the adjustment knob is turned towards cooling. If below +2°C, the temperature is increased.
To measure the temperature in the freezer, use an outdoor thermometer. It is placed between foods and left overnight. If the temperature is above -18°C, turn the knob to decrease it. If below -24°C, they increase it.
Methods for checking the thermostat
If the refrigerator stops turning on, there may be several reasons. To confirm that the device is faulty, follow these steps:
- unplug the refrigerator;
- remove the casing from the thermostat;
- disconnect the wires that enter the device;
- close them together.
In old units, 2 wires come from the thermostat terminals, and in new ones - 4. They are distinguished by color:
- yellow with green stripe – grounding;
- brown - from the outlet;
- red, orange or black - from the engine;
- green, white or yellow - from the signal indicator.
In refrigerators with a No Frost system and an electronic temperature control relay, you need to close the 2nd and 3rd wires, which will make it possible to exclude the device from the engine switching circuit. The motor will be connected directly.
A breakdown of the thermostat is indicated by the compressor turning on when the wires are connected in this way. If it does not start, then the cause of the problem lies in a malfunction of the start-protection relay or the engine itself. Only a master can correct the situation.
A more reliable test is the method of ringing the thermal relay. Perform it using a multimeter:
- turn off the refrigerator;
- remove the thermostat;
- on an analog multimeter, set the switch to minimum and fix the arrow at 0. On a digital device, leave the switch in the “200” position;
- end of the bellows tube for 2 min. place in a container filled with ice water;
- measure the resistance between the terminals.
If the arrow on the first type of device goes off scale, and the number 1 is displayed on the digital multimeter, then the thermostat needs to be replaced.
When the engine is running without stopping, you can check the refrigerator thermostat for malfunction in the following way:
- turn off the refrigerator and empty it of food;
- turn the control knob to maximum cold or fast freezing mode;
- place the thermometer on the middle shelf of the refrigerator compartment (choose a device that can also show sub-zero temperatures);
- turn on the empty refrigerator;
- take out the thermometer after 2 hours.
If the temperature value does not correspond to 6-7 0C, then the relay has failed.
You can use a simpler test method that does not require removing and disassembling the thermostat:
- find the plate near the axis on which the temperature control knob is attached;
- try to move it.
If it does not budge and you do not hear clicks, then the thermostat is faulty.
If ice builds up on the inside surface of the unit, also look for the root cause in the thermostat. Turn the control knob to the left and wait until the compressor stops. If this does not happen, the part must be replaced.
Repair
The thermocouple (thermistor) cannot be repaired - it is too miniature and has no replaceable parts. The wiring can be repaired (soldered, twisted, replaced), but not the specified elements. The sensor tube for mechanical thermostats is especially not repairable: no matter how well the hole in it is insulated during repair, including solder, sooner or later it will depressurize, and a bellows with flaws is extremely difficult to bring into proper condition - there will always be miscalibration.
The exceptions are the following cases:
- when the contacts come off, there is a break, a short circuit, an incorrect fit - then the connections are resoldered, the parts are positioned properly;
- installing a new thermocouple on an already installed cable (simply cut and solder in place of the old thermistor, without snapping off the wiring chip from the control unit).
A case of repair from user experience
Let's give an example of how the location of a thermistor affects its performance. The case of the Liebherr CP4003 refrigerator is described. In this model, if the temperature sensor malfunctions, an alarm sound is generated, which was observed by the user. The owner ordered a new sensor, but also decided to simultaneously check the old product and try to revive it.
The refrigerator was turned off, defrosted, and the chambers were dried. Then the protective panel (cover) was removed from the detector. In this case, the device type is no frost, and the part in question is placed on a “crying wall”. The detector was dried with a regular hairdryer without removing it from its seat. In this case, it is necessary to ensure that the directed heat is moderate; high temperatures can damage and melt plastic parts. After these procedures, we launched it and everything worked properly.
Obviously, the cause of the problem is an unsuccessful location for installing the temperature sensor. Over time, due to aggressive conditions, the sensor depressurizes, condensation gets inside, which distorts the readings. Accordingly, the system issues an alarm about a breakdown; incorrect messages are sent to the compressor, forcing it to work constantly.
The further solution was that the protective panel was not mounted, the element was left open, without a cover, and condensation was removed from the walls near the device once a week with an ordinary rag or napkin. The new sensor was not needed and was left as a spare.
Interchangeability of refrigerator thermostats
There are 2 main types of device:
- Mechanical. Produced by the Oryol plant (with the letter marking TAM), the Italian company RANCO (from K-50 to K-59), and the Danish company Danfoss. The cost and quality of the latter are much higher.
- Electronic (installed in units with the No Frost system).
Mechanical thermostats are found in older models of refrigerators; they can be replaced with devices of the second type. If the price is high for you, then if the device breaks down, buy an analogue.
| Refrigeration type | Model of faulty thermostat | Analogue |
| Single chamber | T-110, T-111, T-112 | TAM-112, TAM-113 |
| Double chamber | TAM-125 TAM-133 | K56-L1955 K59, Danfoss 077B6 |
| Freezer | TAM-145 | K56-L1916, K56-P1431, K56-L1954 |
Attention! In Stinol refrigerators you can install not only TAM-133-1M, TAM-145-1M thermostats, but also RANCO K-57, K-59 devices. Their distinctive feature is the covering of the bellows tube with a vinyl sheath.
How to adjust the relay on a refrigerator
I recommend performing this procedure in the following cases:
- the back wall is completely covered with frost. If ice is present only on half the wall, then adjustment will not help;
- The temperature in the refrigerator compartment is too low.
Such adjustment reasons apply to two-chamber units. In single-chamber ones, it is enough to check the distribution of ice in the freezer. If its inner walls are completely covered with frost, then the procedure can bring results. If there is no frost in any area and the engine is constantly running, the cause of the malfunction lies in a freon leak, deformation of the seal, or obstruction of the filter.
It is difficult for someone without experience to adjust the thermostat. Specialists spend at least a day on such a procedure if the unit is two-chamber. Adjusting the thermostats of single-chamber refrigerators takes 2 rubles. less time, since their work and rest schedules are much shorter.
Let's look at how to adjust the device using the example of a Danfoss 25T65 thermostat for a two-chamber refrigerator:
- place the control knob in the middle position;
- If you tighten the central adjusting bolt, the unit will turn off. If you unscrew it a little, the operating time of the refrigerator increases;
- the second bolt is located on the outside. They regulate the time the unit is parked. If you unscrew it, it will last longer; if you tighten it, it will last less.
Attention! The bolts are live, so the screwdriver you use must be well insulated.
DIY thermostat replacement
If you decide to replace a mechanical device with an electronic one or it has failed, then you must perform the following installation steps:
- turn off the refrigerator;
- remove the handle, protective cover:
- disconnect the tube from the evaporator;
- remove the old thermostat and disconnect the wires;
- start installing a new device by attaching the tube to the evaporator;
- connect the wires, secure the thermostat;
- put on the casing;
- install the control knob.
To avoid confusion with connecting the wires, we recommend that you photograph them first. For beginners, it is advisable to perform this action at each stage of removing the thermostat, so that their sequence is not disrupted when installing a new device.
Attention! Do not neglect the relay wiring diagram supplied with the instructions.
How to properly replace a thermostat?
As soon as the evidence of a malfunction of the thermostat becomes undeniable, you need to act in the following sequence:
- The refrigerator body should be partially disassembled. This will allow you to access the thermostat to replace it. Different models of refrigerators do this in different ways. Sometimes you need to remove the top cover, and sometimes you just need to remove the control unit.
- To remove the thermostat, you need to disconnect its contacts. This procedure may vary. It depends on what type of control is used in the refrigerator - electronic or electronic-mechanical.
- A faulty temperature controller should be replaced with a working one. In addition, a thermocouple and a sensor are installed. A new device should be selected in such a way that its characteristics coincide with those that the device had originally installed at the factory. The wires can simply be twisted or soldered together. After that, a heat-shrinkable tube should be installed at the connection point. This will prevent the wires from breaking at the connection point, and will also protect against moisture. The new regulator needs to be checked for functionality; if everything is normal, then it should be set to the required temperature level.
- Reassemble the refrigeration unit in reverse order. After the assembly is completed, it would be a good idea to check the thermostat again.
If all the technology for replacing the thermostat is followed, then even the right to warranty service will not be lost, and the device will continue to operate without failures for a long time.
Why the thermostat breaks and how to repair it
The main reasons for device failure include the following circumstances:
- leakage of coolant into the element;
- violation of the thermostat seal. At the same time, the temperature inside the chambers begins to rise;
- oxidation, rusting or burnt contacts. The circuit does not close and the engine does not start.
In some cases, you can correct the situation at home yourself, but you must take precautions:
- repairs cannot be carried out while the unit is connected to the network;
- When working, periodically check the voltage on all current-conducting surfaces;
- metal tool handles and joints must be well insulated.
If the wires are oxidized, treat them with a cloth soaked in an alcohol solution. If contacts burn, clean their spots. Remove rust with sandpaper.
If the thermostat fails, replace it by following the steps described in the corresponding section. If you do not have experience, you are afraid of worsening the situation, then contact a service center or call a technician.
Recommendations and tips
Often, costly breakdowns occur as a result of improper operation of equipment. Let's look at some tips from experts that will extend the life of the unit.
- If due to negligence the refrigerator was turned off, do not rush to turn it on, you need to wait a while and then start it up.
- After defrosting, you need to give the chambers time to cool and then load the food.
- To ensure careful operation of the engine, you should not set the maximum temperature; it is enough to set the knob to the middle for the unit to operate efficiently.
- Do not block the evaporator with products; disruption of its operation will lead to more global breakdowns.
- It is forbidden to chip off ice during defrosting. For a faster process, it is better to use warm water.
- It is worth storing light foods in the refrigerator door to protect the rubber seal from wear.
- Install the refrigeration unit away from heating appliances.
- If the unit breaks down, contact a specialist.
By following all the recommendations of the technician, you can avoid problems with refrigerator breakdown.
So, you can find out the reason for the malfunction of the thermostat in the refrigerator yourself, while having only basic knowledge and understanding of the refrigerator’s structure. But if a malfunction is detected, it is better to contact a technician who is guaranteed to fix the problem without harm to other parts.
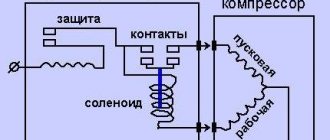
Connection diagram for thermostat Electrolux ER9002
A similar circuit must be used when replacing a device. Its designations are deciphered as follows:
- L – phase;
- TH1 – thermostat;
- RH1 – thermal relay;
- RA1 – start-up protection relay;
- N – neutral;
- TIM – timer;
- TR – evaporator heating element relay;
- TF – fuse;
- SL1 – indicator lamp;
- IL1 – lamp switch;
- CO – compressor;
- R1 – evaporator heating element
- V – fan electric motor;
- IMV – push-button fan.
Results
The thermostat is an important element of the refrigerator, as it maintains the correct temperature conditions inside the chambers. If you suspect it is faulty, you can follow simple steps to check its operation. If it confirms a breakdown, then if you have no experience in repairing refrigerators, call a technician who will install a new or interchangeable part.
Video: How to check the thermostat (thermostat) on the refrigerator
How to check the thermostat (thermostat) on a refrigerator
Watch this video on YouTube
Video: The principle of operation of the thermostat in the refrigerator
The principle of operation of the thermostat in the refrigerator
Watch this video on YouTube
Do you want to understand better than others?
- How to check the thermostat of an Indesit refrigerator? — What is a thermostat and why is it needed? First, let’s figure out what it actually is. A thermostat is a device that controls the temperature in your refrigerator and...
- How to check the performance of a household refrigerator compressor yourself - A refrigerator breakdown can make life very difficult. Of course, the easiest way is to contact a service center or call a technician to your home. But in cases where these options for some reason...
- How to check a refrigerator compressor. How to check a refrigerator compressor - step-by-step instructions - How does a refrigerator work and what place does the compressor occupy in it? The principle of operation itself can be divided into two main stages: At the first stage, freon gas ends up in…
- How to remove the thermostat in the refrigerator and replace it with a new one - Freezers and refrigerators are essential household appliances, but few people know how food is cooled and how this process works...
- Do-it-yourself refrigerator thermostat repair: how to fix the problem - The most common malfunction of household refrigeration devices is a breakdown of the thermostat. This device is a relay that supports user-set...
Signs of a broken temperature relay
There are a number of signs indicating a thermal relay failure:
- violation of cyclicity in the operation of a household appliance (the unit operates for a long time without switching off on its own);
- rapid growth of a layer of frost in the freezer, the appearance of ice in the refrigerator compartment;
- The electrical device does not turn on for a long time.
Such problems may indicate a malfunction in the relay or be a consequence of other refrigerator malfunctions (refrigerant leaks, motor failure, door seal failure, etc.).
Reference
The exact reason for the incorrect operation of household appliances can only be determined after diagnostics.
Snow coat in the freezer
If you find a significant layer of frost on the walls of the freezer, first make sure that the temperature mode is selected correctly and check the tightness of the chamber door. If everything is in order, there is a high probability of a thermal relay malfunction.
After setting the set temperature in the freezer, the failed sensor does not send a signal to the start relay of the refrigerator compressor about the need to complete the cooling cycle. The motor continues to work, the evaporator does not have time to thaw, and a snow crust quickly grows inside the chamber.
If the refrigerator is equipped with two thermostats and independent temperature control in the compartments, ice may form in the freezer and refrigerator compartment.
Disconnected and silent
Reasons for the refrigerator to turn off:
- external factors (for example, loss of power due to a power surge, faulty socket, plug or cable);
- breakdown of the engine start relay, electric motor;
- failure of the thermostat.
A broken relay does not respond to an increase in the temperature level in the refrigerator compartment, a signal is not sent to the start relay, and the motor does not turn on.
A sign of a malfunctioning thermostat is the complete absence of noises, sounds, or clicking sounds in the refrigerator, which indicate attempts to turn on the motor.
Doesn't turn off on its own
The compressor operates cyclically: after a certain period of time (10–20 minutes), it turns off, then again continues to circulate freon in the system (learn about the features of filling a refrigerator with freon with your own hands here). During the hot season, the working period may increase slightly, but the device cannot operate continuously.
The reason for the lack of shutdown of the unit, in addition to violation of the rules for operating household appliances, loose door fit, breakdown of the start-up relay, refrigerant leak, may be a malfunction of the thermostat, which ceases to signal the need to stop operating the compressor. The motor continues to work without stopping, which leads to its overheating and failure.
