If you need to connect a gas stove, it is better to contact the experts in their field. Of course, this work is performed for a fee. Theoretically, you can connect the gas stove yourself. This article contains information about the main stages of connecting equipment, but is not a call to action, since any manipulations with gas are dangerous and should be performed by professional workers.
Connecting a gas stove with your own hands
What do the regulations say?
The current legislation of the Russian Federation clearly defines the circle of persons allowed to perform work.
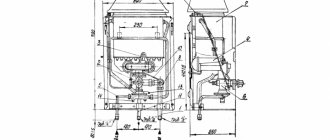
Scheme for connecting equipment and installing meters
The activities of gas services directly extend to connecting equipment, planned and emergency repairs, installation of meters and other manipulations.
Note! If you connect the stove yourself, its operation is possible only after a specialist has inspected the connecting nodes in order to detect leaks and officially approved the equipment for operation.
Each gas appliance must be registered with a specialized organization so that it subsequently undergoes a routine inspection to ensure safe operation of the equipment.
Room ventilation requirements
Safe work with gas equipment - what to consider
Safety precautions when connecting gas-powered equipment include following the following rules:
- before turning on the burner or oven of the stove, it is necessary to carry out a visual inspection of the equipment, make sure that it is in good condition and there are no leaks - this is indicated by the specific smell in the room;
- the kitchen area where the gas stove is installed is equipped with a ventilation hood;
- If the device is not expected to be used for a long time, then turn off the gas valve. When dismantling the stove, the pipe must be sealed and sealed by gas service workers.
The assortment of stores offers many models of hoods of various types and sizes. There are plenty to choose from for a specific kitchen, taking into account the features of its layout and kitchen furniture. And installing this device yourself is within the capabilities of most good owners who know how to use a basic set of household tools. And there will be a special publication to help, which will discuss step by step how to connect a hood in the kitchen with your own hands.
Types of hoods
There are a number of rules that should be followed when operating a gas stove:
- You cannot repair equipment yourself without possessing professional skills and knowledge;
- you cannot change the design of the equipment without permission;
- the operation of the stove must be controlled;
- You cannot use the stove as a heating device by lighting gas on the burners;
- It is necessary to limit access to the stove for small children and incapacitated family members.
Documentation
The process of connecting and registering gas equipment occurs on the basis of a package of documents that the homeowner provides to the gas service specialist. This includes:
- identification card of the owner of the premises (passport);
- certificate of family composition;
- title documents for residential premises;
- registration certificate of the residential premises;
- documentation for equipment and meter;
- subscriber book;
- payment receipts;
- service agreement.
It is necessary to provide a package of documents
Typical connection instructions
Ideally, it is better to invite a specialist to install gas and gas-electric stoves, but if you are still determined to make the connection yourself, then the installation instructions will help with this. By following it in detail and carefully observing the mandatory points, it is quite possible to cope with this task yourself.
USEFUL INFORMATION: Drywall arches for the kitchen (28 photos)
The standard sequence of actions is as follows:
- Free the “object” from packaging materials and all components (baking tray, tray, dividers, etc.), leaving only the protective film, which must be removed after completing all repair work.
- Install the stove in the intended place, maintaining the distance from the wall specified in the attached documentation.
- Using a level and adjustable feet, the working surface is leveled horizontally.
- A flexible hose is connected to the gas pipeline. To do this, the threaded connection is wrapped with a sealant (FUM tape) and tightened with the appropriate wrench.
- Then the gas hose is connected to the device in the same way, using a seal and tightening the locknut with two open-end wrenches. It often happens that the thread at the outlet of the plate has a pitch of 3/8′, then an adapter is installed that comes with the device.
When connecting the hose to the unit, be sure to install a gasket with a diameter of 13 mm, which is sold along with the stove. It contains a metal mesh that acts as a barrier filter for debris and extends the life of the expensive device.
- The last step is to check both connections for leaks, which is carried out using a soap solution. In this case, thick foam is generously applied to the joints (with a brush or hand) and the gas supply valve is opened on the lower side. If bubbles appear at the joint, the tap is turned off and the defective connection is redone. If the surface remains level, then there is no gas leak, which means the new stove is installed correctly.
- At the end, the functionality of the burners and oven is checked.
The video will help you understand more clearly how to properly install a gas stove yourself.
Where to install the stove
The floor under the gas stove must be level so that the hob is positioned strictly horizontally - this will have a positive effect on the safety of the stove and the quality of food preparation.
Rules for leveling the slab height
Most stoves are equipped with legs with height adjustment. This makes it possible to install the equipment on uneven ground. If the floor is crooked and the legs are not adjustable, then you can continue to place a lining under them of the required height from a solid material - chipboard, thick cardboard.
The taps must be in good working order, easy to turn and easily accessible for an adult.
The second thing that should be provided is free access to valves and connecting units. This will allow you to quickly take action to eliminate malfunctions or gas leaks.
Gas hose location
The third rule is to choose the correct location for installing the stove. For each model, the manufacturer recommends a gap between the back wall of the stove and the wall of the room. The size of the gap is specified in the operating instructions for the device.
Video description
The video will show how to properly connect a gas stove and what to choose for this:
Final stage
You can install a gas stove and connect it to the mains yourself. But permission to operate will still be given by a specialist. And for this he will conduct a series of checks.
To be confident in your work, and also not to lose face in front of a technical expert, you can control your actions in advance. To do this, all connecting nodes must be covered with a soap solution. Then open the shut-off valve on the main line. In this case, the burners must be left closed.
If air (gas) bubbles appear on the surface, the tightness must be strengthened. To do this, you will have to disassemble the system and add seals to the components. The work is considered complete if the inspection does not reveal any gas leaks.
Tools
To make your own connection, in addition to a hose and a ball valve specially designed for domestic gas systems, you will need to purchase sealing material.
Set of tools
You will also need to dilute a medium-concentrated soap solution so that, using a brush dipped in it, you can check the connections for tightness and only the likelihood of a gas leak.
Leak check
The main connection element is a hose, the physical characteristics of which must take into account the specifics of its application. This must be a certified product that meets the requirements for gas equipment and related elements. The hose must be durable and flexible.
Bellows hose
The market is not the place where you should purchase a gas hose. For this purpose, there are specialized stores and branded sales points where you can get qualified advice about the product and a receipt guaranteeing exchange if a defect is discovered during installation of the equipment. Considering the specific operating conditions, it is clear that not every hose will be suitable. Those designed for water (with red and blue marks) in the gas system will become unusable in less than a month. Gas hoses are available in three varieties. An important indicator for all types is the flexibility and strength of the product.
The best gas hose is the one that has a certificate. It must clearly state the service life of the product and the conditions under which it is operated.
PVC hose
The most popular type is the rubber hose. It is characterized by high strength, flexibility and affordable cost. Vulcanized rubber is used for its production.
Gas adapter
If the connection thread on the stove is 3/8′, then use a special adapter. If necessary, this part can be purchased at a hardware store.
Rubber hose
A corrugated metal-plastic tube is called a bellows hose. It is characterized by excellent performance properties - it is resistant to intense pressure and its changes, elastic, and equipped with a durable protective shell. The cost of such a hose is higher than that of other analogues, but the recommendations of gas service workers boil down to the use of this particular type of hose to ensure a high-quality and safe connection.
Bellows gas hose
The connecting gas hose has special requirements:
- the hose length is limited and does not exceed 1.5 m;
- the entire length of the hose must have the same diameter;
- the product must be smooth, without twisted areas;
- the product must have a long service life, confirmed by certificates;
- The surface of the product must be free of cracks, cuts, suspension and other defects.
Note! During operation, the hose should be located away from hard and sharp corners, as well as flammable materials. The best option is a free location behind the stove.
A metal pipe is rarely used as a connection element due to the high labor intensity of the process and the need to use specialized professional equipment.
The principle of connection using a pipe
Preparing for work
Before you thoroughly understand how to install a new gas stove, you need to dismantle the old equipment and evaluate the future scope of work. Also, “estimate” the list of required tools and materials, which looks something like this:
- gas, adjustable and wrench (22 x 24) wrenches;
- ball valve 1/2ʹ (if replacement is necessary);
- FUM tape;
- concentrated soap solution;
- suitable hose;
- screwdriver.
Sealing the system
Special seals allow you to eliminate the possibility of leakage in connection nodes and ensure their tightness.
Types of material for joint sealing
Loctite 55 is available in the form of sealing fiber and is a practical, modern material, specially designed for communications of various levels of complexity. The threaded section is wrapped, creating a tight connection and securely fixing it in a given position.
Loctite 55
The second type of sealant is FUM tape. There are three varieties on sale:
- material marked 1 has additional Vaseline lubricant. The seal is designed for operating conditions with an aggressive environment;
- material marked 2 without lubrication is used under conditions of exposure to oxidizing agents;
- material marked 3 is universal. Can be used both in industrial and domestic conditions. Available in the form of thin threads in film.
FUM tape
With the help of FUM tape, the pipe elements are firmly connected to each other and maintain the tightness of the system for many years.
In addition, to seal communication systems, paronite gaskets of the required diameter are used from a flat composite sealing gasket material with a layered structure - paronite. It contains asbestos, rubber and powder fillers. The material provides high-quality sealing of flange joints.
Paronite gasket
Types of seals for gas systems
The main thing is to use certified seals so that the manufacturer confirms the quality. To do this, require a certificate. The combined sealing method using two materials is not used by professionals.
Loctate 55 thread is characterized by practicality, reliability, and elasticity. This material appeared on sale relatively recently. Essentially it is a polymer fiber consisting of a complex of microfibers. Now they sell various containers in which it is stored. The length also varies - from 12 to 160 meters. To connect the tiles, a small amount is enough, since you only need to wrap the external threads of the connecting elements. Once twisted, the material fills the cavities, completely sealing the assembly.
And they differ in the following ways:
- Brand 1. Has a lubricant made on the basis of petroleum jelly components. Excellent for use in aggressive environments.
- Brand 2. The strip is not oiled, which allows the sealant to be used in conditions of high acidity.
- Mark 3. Has edge fragments, as in previous cases. It is used in industry and in everyday life.
In summer, they also wrap the threads, which will remain sealed. And it is stored for 13 years. This means that it makes sense to buy FUM in reserve. Moreover, this seal is used for gas and water supply systems.
Dismantling of old equipment
Before installing a new stove, you must remove the old one.
The sequence of actions is as follows:
- shut off the gas;
- to check the tightness of the tap, open the burners and check that gas does not flow. At the same time, release the remaining gas from the hose;
- remove the connecting hose;
- The stove is disconnected when it is ensured that there is no gas flowing from the pipe.
Dismantling an old gas stove must be carried out in compliance with safety precautions
Note! After the flexible hose is disconnected, it is recommended to place a damp rag in the empty hole of the pipe and secure it with FUM tape. Carry out work in a well-ventilated area.
Basic elements when connecting using a flexible hose
Method of connecting the stove to the system
It is important to use hoses that are designed specifically for delivering gas from a centralized riser to consumers. It is important that they are strong and flexible
At the same time, they cannot be twisted. Check for tightness and availability of a quality certificate.
This document indicates that the product is manufactured taking into account the requirements of current GOSTs and international safety standards. Purchase only certified products from trusted suppliers.
Some still decide to independently install a gas stove with a connection to a metal wiring. However, installing a pipeline is a labor-intensive procedure and has a number of disadvantages. There is no way to move the stove. The slightest misalignment can cause depressurization.
The connections can be welded or threaded, and this will require specialized expensive equipment and skills to work with it. The same FUM tape or Loktail 55 thread are used as seals.
Types of modern gas hoses
Water hoses are highlighted in color:
- Blue for cold.
- Red is for hot.
Gas has a yellow color or markings. Trying to ignore such a classification is not worth it, and it will not work. Water tubes will last a maximum of two weeks and will need to be replaced. It is good if the leak does not lead to dire consequences such as poisoning or explosion.
But here too there is a characteristic classification of hoses based on flexibility and strength. You will have to choose before installing a gas stove, so as not to make unplanned repairs later.
Rubber modifications are preferred due to their low cost. This hose is quite flexible and durable. It is operated at temperatures from -35 to +50 degrees Celsius. Therefore, installing a gas stove in a dacha is done using a rubber tube.
This is convenient when a cylinder located outside the house in a special iron box is connected to it, or if a portable tank is located in the kitchen. It can be moved without the risk of depressurization.
But there is an improved model. This is a rubber tube with armored metal braiding, which provides additional protection against mechanical stress. The metal will not allow the hose to break or bend, and the passability will always be sufficient.
Therefore, leakage during the required service life is practically excluded, and is possible only at the connection points where, through special adapters, the system is connected to the central wiring or gas cylinder. Bellows modification is a new milestone in the industry. In this case, the possibility of stretching is provided, although within acceptable limits.
Basic requirements for hoses
There are a number of conditions that are mandatory in all cases. According to the rules for installing a gas stove in an apartment:
- The length of flexible connectors (routes) does not exceed one and a half meters.
- Joining several segments is unacceptable. A solid tube is used.
- It is strictly prohibited to bend, twist, or press the hose.
- There should be no cuts, corrosion, cracks, or even minor damage.
- After the maximum service life specified by the manufacturer has expired, replacement is required.
To ensure safety, a hose with a metal braid should not be leaned against electrical conductors, hard surfaces, or objects made of flammable materials. Let it hang freely behind the tiles, without touching anything.
Connection using a pipe
Although considered obsolete, rigid riser mounting is often chosen for its reliability and durability. However, labor intensity and the need to use specialized skills and tools are often an insurmountable obstacle for those who decide to do the installation themselves.
Another reason to abandon the idea is the stationary nature of the design. The tiles cannot be moved for cleaning or moved to a new location without laying a new route of solid-rolled steel pipes.
Connection process
Table 1. Gas stove connection process
| Photo | Description |
| Perform a visual inspection of the equipment. | |
| Inspect the installation site - the floor must be level. If it is uneven, then the slab is leveled using adjustable feet. | |
| We install the hose through a paronite gasket. | |
| First, the hose is baited by hand. | |
| Then tighten tightly using a tool. | |
| In a similar way, fix the hose to the stove pipe. | |
| The burners are freed from the fixing stickers. | |
| Open the gas. | |
| Check the operation of the burners. | |
| To prevent gas leakage and check the tightness of the joint, the connection point is washed. | |
| The soap solution is also applied to the connection point to the stove. |
Is it possible to connect a gas stove yourself?
Independent connection of the stove to the gas pipeline is allowed in all cases; it can be done even in the city if special services are available. However, it is not recommended to use the stove after unauthorized connection without checking by specialists - you can get a fine for this.
It is best to call a technician after connecting it yourself, who will check the correct installation and connection of the stove for leaks.
The main procedure for connecting gas stoves to the main line consists of installing a hose of the selected length with standard fittings; its installation may require an adjustable or gas wrench and basic construction skills.
Expert advice
To summarize, we can highlight a number of rules that experienced craftsmen adhere to:
- access to hose connections and valves must be free;
- the hose should be positioned freely behind the stove, without bending or pressing against the wall;
- the hose cannot be painted, as paint can damage the material of the product and cause it to crack;
- all work is carried out with the gas turned off;
- if necessary, plug the pipe, use a damp cloth made of thick fabric;
- upon completion of the work, be sure to wash the docking units to detect possible gas leaks. The appearance of bubbles indicates insufficient tightness of the unit.
Attention! If , after connecting the stove during the inspection process, a hissing sound is heard and a characteristic smell appears, then it is necessary to open the windows to ventilate the room and invite emergency service personnel.
Built-in equipment is very popular in the kitchen.
What requirements must be met?
Although you cannot connect the stove yourself, it is the owner of the apartment who must prepare the place and ensure working conditions The most important stage is preparing the room and choosing a slab.
SNiP and fire safety requirements strictly regulate the installation process itself, the choice of device, and operating conditions.
- Installation of the stove is allowed only in rooms with a ceiling height of at least 2.2 m. So you cannot install the stove in an extension to a summerhouse.
- The room must have a window with an opening window or transom .
- If there is no window, you need to install a hood of the required power . In this case, the hood must be vented only to the roof; the chimney must rise above its level by at least 52 cm. Exit through the wall is prohibited.
- The power of the stove and the volume of the room are related . The minimum volume of a room where a two-burner stove can be installed is 8.2 m³. With 3 burners, the kitchen volume should exceed 12.2 m³, with 4 – 15–12 m³.
- The room in a private house should have natural light .
With rare exceptions, the stove is placed near the wall . The distance from the device to the wall is at least 6.5 cm. The area around the stove must be finished with non-flammable materials: tiles, plaster, steel sheet.- Near the stove you need to provide a place for installing a gas meter .
- A free space of at least 1.2 m must be maintained in front of the unit
If these norms and requirements are violated, the gas installer has the right to refuse installation of the device.
Dismantling the construction slab
Disconnecting old gas equipment will not be a problem for anyone. The order of work will depend on what is installed in your kitchen - a whole gas stove or a hob.
- We start by turning off the gas supply valve. After covering it, make sure it holds well - try lighting the burner on the stove. It didn't work, so everything is fine.
- Next, you need to unscrew the lock nut and fit the coupling at the junction with the plate.
- We move the device away from the wall so that it does not interfere with further work.
- We get to the pipe - clamp it with a gas wrench (you can use a rag so as not to damage the paintwork) and unscrew the nut on the old hose.
Removing the gas hob It will take a little more fiddling if you are removing the hob. To do this you will need:
- Remove the electric oven. It can be simply inserted into a niche, or screwed to the box with self-tapping screws - unscrew them and simply pull the device towards you. Be careful not to drop it and damage the glass parts.
- We get to the electrical cable and unplug it from the outlet, simultaneously removing the plug from the hob. Now we have access to connections.
- We unscrew the gas hose in the same sequence that we described earlier, after first turning off the gas.
- Now you need to remove the panel from the countertop. As usual, they are planted on silicone sealant, so we carefully trim it around the entire perimeter with a utility knife. Most of the time you will have to tinker with the side near the wall.
- We take out the panel and clean the furniture from silicone residues.
Removing the oven Now you can proceed to installing a new gas stove or hob.
Adjusting the flame on the stove burners
It is necessary to debug the normal operation of the burner in cases where the flame loses its efficiency and quality. Setting up a gas stove should also be done by a specialist. But understanding the algorithm of this process will be useful for any user.
First, it’s worth understanding what a properly burning stove flame looks like. The fire should be blue. An intense bright blue glow is a sure sign that the stove is working correctly and does not need debugging. A yellow, orange or red flame indicates an incorrect composition of the combustible mixture. In this case, there is clearly not enough air; its flow must be increased.
Sparks and flame separation are another sign of insufficient air in the fuel mixture for the burner. The composition is corrected by working with a special screw
To change the gas-air mixture entering the burner, it is necessary to adjust the operation of the air dampers, which are usually located near each burner.
Direct setup goes like this:
- after disconnecting the stove from the gas system, it is necessary to gain access to the adjustment mechanisms under a special partition or in the gas control knob;
- the stove is reconnected to the main line, gas is supplied alternately to each burner;
- the volume of air entering the mixer is adjusted by turning a special screw;
- As soon as the flame in each burner acquires the correct color, you can turn off the stove again, reassemble it and connect it to the main line.
When setting up the stove, you may need to work with the gas control valve and its thermocouple. If the flame regularly goes out at a minimum fuel supply level, perhaps the problem lies in the gas control. The operating principle of this option is based on a special sensor that responds to the energy released during the combustion process. If the flame goes out unexpectedly, the thermocouple sensor cools down, signaling the gas supply to stop.
The simple operation of a small sensor can prevent terrible consequences. Therefore, the working surface of the stove and its parts must be kept clean.
However, oxidation processes and a decrease in the sensitivity of the sensor due to the ingress of liquids or the formation of deposits from food deposits can provoke incorrect gas shutoff outside of an emergency situation. Therefore, both the stove and this block should be kept clean, and if necessary, call a professional to clean it.
If you are faced with unusually noisy operation of the burner, we recommend that you find out the cause of the noise of the burner and how to eliminate it.
How to connect using a pipe?
This option is rarely used due to the complexity of installation. Installation using this technology is carried out using a pipe of a certain length, bent at a given angle, with a thread. The latter will be required for screwing on the couplings through which the household appliance is connected to the gas pipeline.
In practice, two connection options are used. The first involves the use of two couplings, with the help of which the pipe is connected at one end to the gas pipeline, and at the other to a household appliance. The second option is more complex in terms of execution technology. In this case, one end of the pipe is welded to the gas pipeline, and the second is connected to the outlet pipe of the stove using couplings.
A third option is also used. In this case, copper pipes are used, to the ends of which fittings with union nuts are soldered. But, regardless of the chosen connection method, this type of connection does not allow the gas stove to be moved to the side if necessary.
How to install officially
As follows from the legislation, owners of apartments and houses have the right to install a gas stove. That is, this procedure is allowed to be carried out without the involvement of third-party specialists, without fear of fines. After completing the installation, you need to contact the gas service or a company with a SRO license. After this, employees of these organizations will come to the apartment or house and check that the stove is installed correctly. Then the gas is started.
At the end, a report is drawn up on the need to eliminate violations or commission the slab.
Household natural gas and rules for handling it
Everyone knows that flammable gas mixed in a certain proportion with air is explosive. But, oddly enough, it comes to an explosion when working with gas for a different reason.
For the sake of safety, a tiny amount of an odorant, mercaptan, is added to household gas. This is an extremely smelly chemical compound and, in theory, if there is a leak long before the concentration reaches a dangerous level, the unbearable stench will spread throughout the entire area and someone will dial 104. But if the gas is coming from an open pipe, a different situation is possible.
Most of natural gas consists of saturated hydrocarbons – propane, butane. However, unsaturated ones are always present in some quantity - ethylene, propylene. They have a psychotropic effect: sensations are dulled, and a person stops paying attention to the hissing of gas and the smell of the fragrance. Mental disorders and inappropriate actions are also possible, for example, trying to light a cigarette in a gas-saturated atmosphere.
To protect yourself and your home when working with gas, you must strictly comply with the following requirements:
- completely de-energize the apartment by unscrewing the plugs or turning off the main circuit breaker;
- remove all self-powered mobile devices from the apartment, completely turn off the computer UPS (uninterruptible power supply);
- open doors and windows throughout the entire room;
- before starting work, close the shut-off valve on the descent from the gas riser to the stove and unplug the stove's power supply from the socket;
- use only special consumables, components and tools for gas fittings;
- prepare a plug in advance from a wet rag, and under the 1/2″ supply pipe - from an old wine cork;
- any open pipe should be plugged immediately, and only after that continue work;
- work quickly, confidently, with full knowledge of the matter;
- After reassembling any connection, supply gas by opening the shut-off valve and check it with a soap solution. The slightest bubble - immediately close the valve and make it completely sealed;
- If a hissing or smell of gas appears for an unknown reason, immediately close the shut-off valve and call 104 an emergency gas service specialist.
The rag must be wet to ensure a gas-tight seal. Household gas is supplied at low pressure - from 100 to 300 mm. water column (for comparison: 1 atm = 10.5 m of water column) - and will not squeeze moisture out of the pores of the rag.
The cork from the narrow end, compressed by the neck of the bottle, is cut into a cone with a sharp knife and processed with sandpaper. Insert tightly into the pipe, turning slightly back and forth. If it gets stuck, remove it with a corkscrew.
There is no need to prepare a soap solution with distilled water. A children's set for blowing soap bubbles is very suitable: with a ring on a stick it is convenient to check the reliability of the shut-off valve. Another way is to add 5-10 drops of any liquid dishwashing detergent to a glass of water.
Advice:
Don’t be lazy to read SNiP 2.04.08-87 “Gas supply”.
Stove and refrigerator
Is it possible to place a refrigerator next to a gas stove? Under no circumstances, both according to the requirements of safety rules and simply out of reason.
The refrigerator is a fairly powerful source of heat. Let us remember: the heat taken from its contents is transferred into the air due to the circulation of the refrigerant, plus the power of the compressor pumping the refrigerant. From being next to kilowatts of heat, the refrigerator will consume an excessive amount of electricity, the compressor will quickly fail due to overload, and the foam insulation from external heating will soon deteriorate.
In general, the refrigerator should be kept away from the stove, and the ideal place for it is a glassed-in balcony. The savings in electricity are such that the cost of glazing is recouped in two or three normal winters.
Power supply for the stove
A gas stove without an electric grill is not a particularly powerful consumer of electricity, but it still needs to be powered through a separate 16 A circuit breaker and always through a grounded socket. The reason is the harsh operating conditions of the electrical equipment of the stove, high electrical conductivity of the flame and, as a result, an increased risk of breakdown.